Table of Contents
Advertisement
Available languages
Available languages
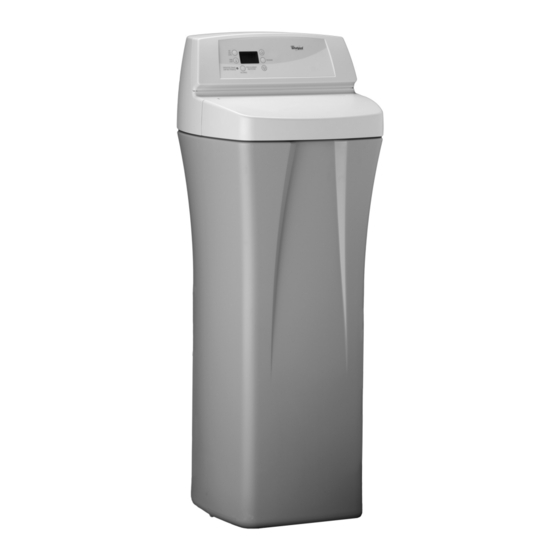
WHES Series
Demand Controlled
Water Softener
Do not return water softener to store
If you have any questions or concerns when
installing, operating or maintaining your water
softener, call our toll free number:
1-866-986-3223
Monday- Friday, 8 AM - 7 PM EST or visit
www.whirlpoolwatersofteners.com
When you call, please be prepared to provide
the model and serial number of your product,
found on the rating decal, typically located on
the rim below the salt lid hinges.
Systems tested and certified by NSF International
against NSF/ANSI Standard 44
for hardness reduction and efficiency,
and certified to NSF/ANSI Standard 372.
Systems tested and certified by the Water Quality
Association against CSA B483.1.
Installation Instructions
Manufactured and warranted by
Ecodyne Water Systems
1890 Woodlane Drive
Woodbury, MN 55125
For a detailed owner's manual,
including specifications,
programming and parts list, go to:
www.whirlpoolwatersofteners.com
or call 1-866-986-3223
1
7345485 (Rev. A 9/30/14)
Advertisement
Table of Contents

Related Manuals for Whirlpool WHES Series


Summary of Contents for Whirlpool WHES Series
- Page 1 For a detailed owner’s manual, including specifications, programming and parts list, go to: www.whirlpoolwatersofteners.com or call 1-866-986-3223 WHES Series Demand Controlled Water Softener Do not return water softener to store If you have any questions or concerns when installing, operating or maintaining your water...
-
Page 2: Water Softener Safety
Water Softener Safety Your safety and the safety of others are very important. We have provided many safety messages in this manual and on your appliance. Always read and obey all safety messages. This is the safety alert symbol. This symbol alerts you to potential hazards that can kill or hurt you and others. All safety messages will follow the safety alert symbol and either the word “DANGER”... -
Page 3: Air Gap Requirements
Before You Start Drain Drain Drain Hose Hose Hose 1-1/2” AIR GAP REQUIREMENTS air gap A drain is needed for regeneration water (See Figure 1-1/2” 1). A floor drain, close to the water softener, is air gap preferred. A laundry tub, standpipe, etc. are other 1-1/2”... -
Page 4: Typical Installation
THE PROPER ORDER TO INSTALL WATER TREATMENT EQUIPMENT Untreated Water to City Water Supply Outside Faucets Cold Water to House Hot Water Pressure to House Optional Tank Sediment Filter Well Water Supply Water Water Softener Heater Well Pump FIG. 6 TYPICAL INSTALLATION Hard Water Conditioned... -
Page 5: Installation Instructions
Installation Instructions TURN OFF WATER SUPPLY Nozzle Top Cover Venturi Brine Tank 1. Close the main water supply valve, located near the Assembly Overflow well pump or water meter. Elbow Nut - 2. Open all faucets to drain all water from house pipes. Ferrule NOTE: Be sure not to drain water from the water Salt... -
Page 6: Grounding Information
Installation Instructions Complete the inlet and outlet plumbing for the type of pipe you will be using. INSTALL VALVE DRAIN HOSE 1. Measure, cut to needed length and connect the 3/8" drain line (provided) to the water softener valve drain fitting. Use a hose clamp to hold the hose in place. - Page 7 Installation Instructions ADD WATER AND SALT TO THE SALT NOTE: You can find complete instructions for program- STORAGE TANK ming the softener and customizing features of the electronic controller in the owner’s manual. Go to www.whirlpoolwatersofteners.com or call 1-866-986-3223. Excessive Weight Hazard SANITIZE THE WATER SOFTENER / Use two or more people to move and lift salt SANITIZE AFTER SERVICE...
- Page 8 ® The factory warranty for your water softener is shown below. The one year full warranty period on parts and labor can be extended to two years from the date of purchase if you use Whirlpool WHE-WSC Water Softener Cleanser ®...
-
Page 9: Instrucciones De Instalación
Instrucciones de instalación Para obtener el manual detallado del propietario, con especificaciones, programación y lista de piezas, visite el sitio: www.whirlpoolwatersofteners.com o llame al 1-866-986-3223 Serie WHES Ablandador de agua controlado por demanda No devuelva el ablandador de agua a la tienda Si tiene cualquier pregunta o inquietud al insta- lar, operar o mantener su ablandador de agua, llame gratis a nuestro número telefónico:... -
Page 10: Antes De Comenzar
Seguridad con el ablandador de agua Es muy importante su seguridad y la seguridad de los demás. En este manual y en el aparato hemos incluido muchos mensajes de seguridad. Siempre lea y cumpla con todos los mensajes de seguridad. Este es el símbolo de alerta de seguridad. - Page 11 Manguera Antes de comenzar Manguera de desagüe Separación de desagüe de aire de 1-1/2 pulg. Separación REQUISITOS DE SEPARACIÓN DE AIRE (3.8 cm) de aire de 1-1/2 pulg. Se necesita un desagüe para el agua de regeneración (3.8 cm) (vea la Fig. 1). Es preferible usar un desagüe de piso, cerca del ablandador de agua.
-
Page 12: Instalación Típica
ORDEN CORRECTO PARA INSTALAR EL EQUIPO DE TRATAMIENTO DE AGUA Agua sin tratar a Suministro municipal de agua los grifos externos Agua fría a la casa Agua caliente Tanque de O BIEN a la casa Filtro presión opcional de sedimentos Suministro de agua de cisterna Ablandador Calentador... - Page 13 Instrucciones de instalación CIERRE EL SUMINISTRO DE AGUA Conjunto del Cubierta superior tubo Venturi de Codo de sobre- 1. Cierre la válvula principal del suministro de agua, situ- la boquilla flujo del tanque ada cerca de la bomba de la cisterna o el medidor de de salmuera Tuerca - agua.
- Page 14 Instrucciones de instalación Finalice la plomería de entrada y salida para el tipo de tubería que usted utilizará. INSTALE LA MANGUERA DE DESAGÜE PARA LA VÁLVULA 1. Mida, corte al largo necesario y conecte el tubo de Riesgo de descarga eléctrica desagüe de 3/8 pulg.
- Page 15 Instrucciones de instalación AGREGUE AGUA Y SAL AL TANQUE DE NOTA: En el manual del propietario podrá hallar instrucciones ALMACENAMIENTO DE SAL completas para programar el ablandador y person- alizar las características del controlador electrónico. Visite el sitio www.whirlpoolwatersofteners.com o llame al 1-866-986-3223. Peligro de Peso Excesivo DESINFECTE EL ABLANDADOR DE AGUA / Para mover y levantar los sacos de sal se...
- Page 16 WHE-WSC para ablandador de agua, según las indicaciones correspondientes, cada cuatro meses a ® partir de la fecha de compra del ablandador de agua. Conserve el comprobante de compra del limpiador Whirlpool ® WHE-WSC para ablandador de agua a fin de validar todo reclamo bajo garantía durante el segundo año. El uso de cualquier aditivo para ablandador de agua que no sea Whirlpool WHE-WSC no prolongará...
-
Page 17: Instructions D'installation
Instructions d’installation Pour obtenir le manuel détaillé de l’utilisateur, incluant les spécifi- cations, les directives de program- mation et la liste des pièces, allez à : www.whirlpoolwatersofteners.com ou appelez au 1-866-986-3223 Séries WHES Adoucisseur d’eau à régénération commandée Veuillez ne pas retourner l’adoucisseur au détaillant. -
Page 18: Avant De Commencer
Sûreté de l’adoucisseur d’eau Votre sécurité et celle des autres sont très importantes. Ce guide contient plusieurs messages importants relatifs à la sécurité. D’autres messages ont été apposés sur votre appareil. Veuillez toujours lire et respecter tous les messages relatifs à la sécurité. Ce symbole incite à... - Page 19 Tuyau de Avant de commencer Tuyau de vidange Espace vidange d’air de 4 cm Espace d’air EXIGENCES RELATIVES À L’ESPACE D’AIR (1 1/2 po) de 4 cm Un drain est nécessaire pour l’eau de régénération (voir la (1 1/2 po) figure 1).
-
Page 20: Installation Type
SÉQUENCE ADÉQUATE D’INSTALLATION DE L’ÉQUIPEMENT DE TRAITEMENT DE L’EAU Eau non traitée vers Alimentation en eau de la municipalité les robinets extérieurs Eau froide vers la maison Eau chaude Réservoir vers la maison Filtre à sous pression sédiments facultatif Alimentation en eau d’un puits Adoucisseur Chauffe- d’eau... - Page 21 Instructions d’installation COUPURE DE L’ALIMENTATION D’EAU Couvercle du dessus Embout et Coude de débor- 1. Fermez le soupape d’alimentation principal qui se trou- venturi dement du réser- ve près de la pompe du puits ou d’un compteur d’eau. voir à saumure Écrou - bague 2.
- Page 22 Instructions d’installation Terminez l’installation de la tuyauterie d’entrée et de sortie selon le type de tuyau employé. AVERTISSEMENT POSE DU TUYAU DE VIDANGE 1. Mesurez, coupez à la longueur désirée et raccordez la canalisation de vidange de 9,5 mm (3/8 po) (fournie) au raccord du tuyau de la soupape de l’adoucisseur d’eau.
- Page 23 Instructions d’installation AJOUT DE L’EAU ET DE SEL DANS LE REMARQUE : Vous trouverez les instructions complètes RÉSERVOIR DE STOCKAGE DU SEL pour programmer l’adoucisseur et person- naliser les fonctions du contrôleur électron- ique dans le manuel de l’utilisateur. Visitez www.whirlpoolwatersofteners.com AVERTISSEMENT ou appelez au 1-866-986-3223.
- Page 24 ® votre preuve d’achat de nettoyant d’adoucisseur d’eau Whirlpool WHE-WSC pour valider votre garantie durant la ® deuxième année. L’utilisation de tout autre additif d’adoucisseur d’eau que le nettoyant Whirlpool WHE-WSC ne ® prolongera pas la couverture de la garantie.
Need help?
Do you have a question about the WHES Series and is the answer not in the manual?
Questions and answers