Table of Contents

Subscribe to Our Youtube Channel
Related Manuals for BIRO 109PCM


Summary of Contents for BIRO 109PCM
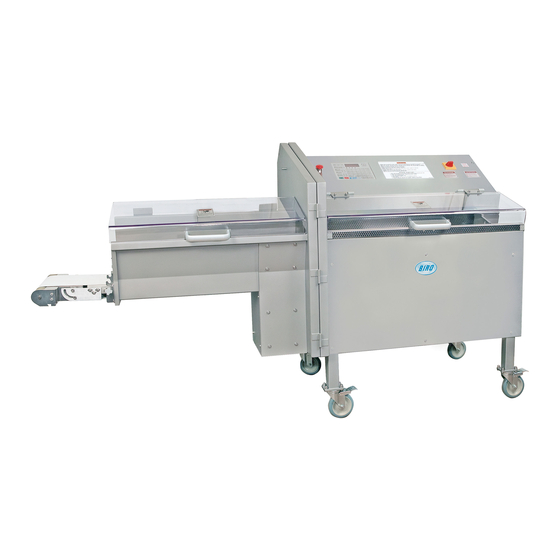
- Page 1 MODEL 109PCM HORIZONTAL SLICER OPERATING and SERVICE MANUAL PARTS LIST & GENERAL INSTRUCTIONS IMPORTANT NOTICE This Manual contains important safety instructions which must be strictly followed when using this equipment. Mod. 109PCM 352-12-16-3 B...
-
Page 3: Table Of Contents
TABLE OF CONTENTS: PAGE NOTICE TO OWNERS AND OPERATORS ..........SAFETY TIPS . -
Page 5: Notice To Owners And Operators
Manual and any requirements of local law. Be sure a BIRO Authorized Representative has reviewed the installation before this machine is initially started up and put into service. Contact BIRO Manufacturing Co. to locate your local Biro Representative. -
Page 6: Safety Tips
Form Meets the Intent of O.S.H.A. Applicable Standards. DO NOT Operate Machine With Missing Parts. ALWAYS Comply with all Regulations for Food Handling, Packaging, and Storing. PROMPTLY REPLACE Any Worn or Illegible Warning and Instruction Labels. ONLY USE BIRO Parts and Accessories Properly Installed. -
Page 7: Installation
4. Electrical supply must be connected correctly, and properly grounded. The voltage must match the unit voltage as labeled. See Electrical Specifications, or contact Biro with the serial number of the machine. 5. Check the Draw Lever by opening the Clutch Door on the right hand side of the unit. Make sure the hex head fastener is tight on the eccentric hub and the linkage arm adjustment handle is tight. -
Page 8: Operation
OPERATION Product should be placed in the Loading Chamber with its straight side against the loading chamber wall, toward the front edge, nearest the operator. Engage the product securely to the Product Pusher Gripper. Product must advance toward the blade. Turn the Main Disconnect Switch (Red Handle) “ON.”... -
Page 9: Machine Operation
” Hex Head Screw Linkage Arm Draw Lever Item No. PCM607 Item No. PCM567 Item No. 31-14 Adjustment Handle Item No. PCM600 Eccentric Hub Item No. PCM588 PCM603 EXAMPLE B: To obtain a ⅞” (22.2mm) Thickness on the “B” scale, loosen the ”... -
Page 10: Operation Sequence
BRIEF OPERATING SEQUENCE Turn the Main Disconnect Switch (Red Handle) “ON.” Close Blade Door, Clutch Door, and Chamber Covers. Twist and Pull out the Emergency Stop Switch. Open the Loading Chamber Cover Slightly, and close again. The Slicer is now operational. Load the product to be cut and engage the product to the Product Pusher Gripper. -
Page 11: Slicer Blade Removal
SLICER BLADE REMOVAL Turn main disconnect switch (Red Handle)”ON.” Open the Blade Door. Press and hold in the Brake Release button with your left hand. The blade may now be moved by hand into the most suitable position for disassembly. Rotate the back flat edge of the blade with your right hand to desired position. -
Page 12: Lubrication
LUBRICATION The Slicer Product Pusher Feed Screw will need to be lubricated periodically using the Haynes Spray U.S.P. Light Duty Sanitary Lubricating Spray. The Spray is Light, Tasteless, and colorless, odorless oil. NSF (National Sanitation Foundation) rated H1. U.S.D.A. rated H-1. All ingredients are FDA approved. It is necessary to lubricate the Feed Screw with the Spray weekly or when excessive drag is felt. - Page 13 ® Haynes Spray is a light duty sanitary oil lubricant for all COMMON APPLICATIONS sanitary machine parts. This lubricant is authorized by the SANITARY VALVE STEMS NSF (rated H1) for use in food processing plants for incidental HOMOGENIZER PISTONS & food contact.
-
Page 14: Wiring Diagram: 200/208/230/460V-60Hz-3Ph
109PCM ELECTRICAL DIAGRAM... - Page 17 PCM632 Label, thickness range scale 31-50-S10 Jog switch PCM517 Front panel PCM622 Name plate, run-jog VTS7181 Biro world decal PC155-1 Emergency stop switch PC175-1 Caster, 5” dia, total lock swivel PC156-1 Legend plate, emergency stop ¾ HHS055S Hex head screw...
- Page 18 INDEXING CLUTCH Fig. Item Number Description ½ PCM572 Shaft, knife drive HHS049S Hex head screw -18 x ⅝ PCM631 PCM571 Feed screw, product pusher Locking collar, 2 pc. 1 ” PCM552 PCM522 Gearmotor w/ brake 2HP Holding plate, rh PCM554 Spacer, feed screw shaft, rh ½...
- Page 19 21 22 Fig. Item Number Description PCM540 Holding plate, LH 360A1 Angle grease fitting PCM571 Feed screw, product pusher PCM565 Angular contact bearing, 25 mm ⅜ HHS010S Hex head screw 10-32 x ½ PCM541 Bearing, 2 bolt flange, 1 bore VTS7130 Cord strain relief ½...
- Page 20 33 34 Fig. Item Number Description PCM595 Locking bolt, Linkage arm 360A1 Angle grease fitting PCM596 Spacer, draw arm ½ 31-14-01 Ball bearing HHS005S Hex head screw 8-32 x 31-14-02 Locking ring PCM614 Housing, backstopping clutch 31-14 Draw lever PCM623 Key, backstopping clutch PCM607 Shoulder bolt, eccentric hub cap...
- Page 21 Fig. Item Number Description PC080 Gripper PCM574-1 Handle casting, product pusher PC005 Slide washer PCM577 Pin, feed screw, product pusher PCM569 PCM619 Product pusher Mounting bracket, product pusher PCM585 Pivot pin, product pusher ½ HHS049S Hex head screw -18 x PCM586 Split ring, pivot pin, product pusher PC003...
- Page 22 22 12 13 23 24 Fig. Item Number Description ¼ LW10S Lock washer, PCM572 Shaft, knife drive ¼ HN15S Hex nut -20 SS PC078 Blade shaft seal ¼ AN15S Acorn Nut -20 SS ¾ PC018 Key, , blade PC035 Chamber cover hinge & hinge pin mounting plate PC038-1 Connecting plate...
- Page 23 Fig. Item Number Description PC144-1 Contactor, 24V PCM514 Control box PC146-1 Aux contact, NO. HHS060S Hex head screw -18 x 1 226EE-OL08.5LOverload B18K-L, 5.5-8.5A HN20S Hex nut -18 SS heavy 226EE-GO Contactor LS05.10-GO, 24V PCM516 Component plate, control box ½ PCM530 Wire raceway, 20 ¼...
-
Page 24: Conveyor Option Diagrams
provide serial NO. provide serial NO. Conveyor Assembly Item NO. PC375 17 18 20 21 19 20 21 22 23... - Page 25 109PCM CONVEYOR OPTIONS Fig. Item Number Description ⅜ HHS010S Hex head screw 10-32 x VTS7131 Wire clamp LW05S Lock washer #10 SS HN10S Hex nut 10-32 SS ¼ ⅜ HHS020S Hex head screw -20 x BES16971 Label, risk of electrical shock...
- Page 27 Fig. Item No. Description Fig. Item No. Description ⅜ PC354 Fixed Idle End, LH SSB40S Shoulder Bolt, -18 x , SS PC353 Fixed Idle End, RH LW15S Lock Washer, PC357 HN20S Spacer, Fixed Idle End Hex Nut, -18 SS PC358 Nose Roller, Idle End ¼...
-
Page 29: Recommended Spare Parts List
RECOMMENDED SPARE PARTS LIST ITEM NO. DESCRIPTION PC005 SLIDE WASHER, PRODUCT PUSHER PC025 FASPIN, PRODUCT PUSHER PC078 BLADE SHAFT SEAL PC124 BLADE, SMOOTH PC125 BLADE, SERRATED PC132 BELLEVILLE DISC SPRING PCM591 LIMIT SWITCH PCM596 SPACER, DRAW ARM VTS7177 FUSE, 2A 31-14-01 BEARING... -
Page 30: Operator's Notes
OPERATOR’S NOTES... -
Page 31: Operator's Signature Page
OPERATOR’S SIGNATURE PAGE WARNING READ AND UNDERSTAND THIS ENTIRE MANUAL BEFORE SIGNING BELOW MY SIGNATURE ATTESTS THAT I HAVE COMPLETELY READ AND UNDERSTAND THIS MANUAL. I REALIZE THAT THIS MACHINE, IF OPERATED CARELESSLY, CAN CAUSE SERIOUS INJURY TO MYSELF AND OTHERS. NAME (PRINT) SIGNATURE SUPERVISOR’S... -
Page 32: Limited Warranty
The warranty card must be returned to The BIRO Manufacturing Company for proper registra- tion. If no warranty card is returned to BIRO, the warranty period will begin from the date the machine was originally shipped from the factory.
Need help?
Do you have a question about the 109PCM and is the answer not in the manual?
Questions and answers