Table of Contents
Advertisement
SIR STEAK
MODEL PRO-9
MODEL PRO-9
with Solid State Relay
with Solid State Relay
Operation and Service Manual
Operation and Service Manual
Tenderizer Parts List
Starting with Serial Number 30,000
Starting with Serial Number 30,000
Biro Designed
Biro Built
+
+
IMPORTANT NOTICE
This Manual contains important
safety instructions which must
be strictly followed when using
this equipment.
Part No.
T3400-091
2-09-37
1-06-38
Advertisement
Table of Contents

Related Manuals for BIRO PRO-9


Summary of Contents for BIRO PRO-9
-
Page 1: Important Notice
SIR STEAK MODEL PRO-9 MODEL PRO-9 with Solid State Relay with Solid State Relay Operation and Service Manual Operation and Service Manual Tenderizer Parts List Starting with Serial Number 30,000 Starting with Serial Number 30,000 Biro Designed Biro Built IMPORTANT NOTICE... -
Page 2: Table Of Contents
ASSEMBLY OF PRO-9 CRADLES........ - Page 3 — NOTES —...
-
Page 4: Notice To Owners And Operators
NOTICE TO OWNERS AND OPERATORS BIRO’s products are designed to process food products safely and efficiently. Unless the oper- ator is properly trained and supervised, however, there is the possibility of a serious injury. It is the responsibility of the owner to assure that this machine is used properly and safely, strictly following the instructions contained in this Manual and any requirements of local law. -
Page 5: Safety Tips
Procedures BEFORE Cleaning, Servicing, or Attempting to Unjam or Unclog. · ALWAYS Wear Wire Mesh Safety Gloves When Touching or Handling Stew Cutter Attachments. · NEVER Leave Machine Unattended While Running. · PROMPTLY REPLACE Any Worn or Illegible Warning Labels. · USE ONLY BIRO Parts and Accessories Properly Installed. -
Page 6: Installation
10. Turn toggle switch to “OFF” position. 11. Check placement of all warning labels. Machine is ready for trained operators to process product. 12. Contact your local distributor or BIRO directly if you have any questions or problems with the installation or operation of the machine. -
Page 7: Operation
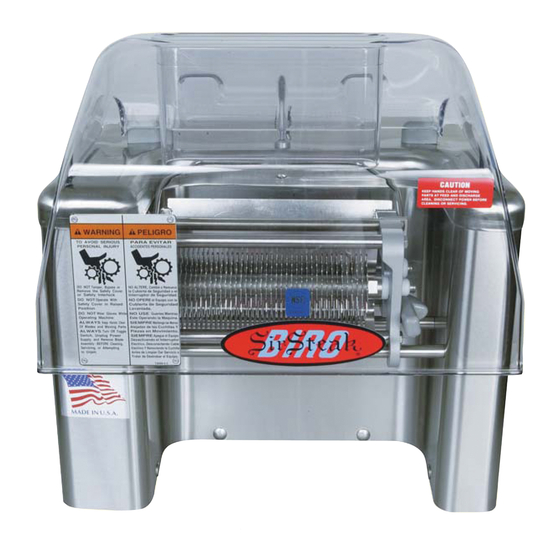
II. OPERATION SHARP ROTATING BLADES TO AVOID SERIOUS PERSONAL INJURY · ONLY Properly Trained Pesonnel Should Use This Equipment. · ALWAYS Keep Hands Clear of Blades and Other Moving Parts. · NEVER Operate With Safety Cover in Raised Position or Removed. Safety Cover MUST Be Down During Operation. -
Page 8: To Unjam Or Unclog
DO NOT WEAR GLOVES WHILE OPERATING. 3. Turn ON/OFF toggle switch to “ON” position. 4. Insert the product through the feed slot in Safety Cover. Observe the processing through the Safety Cover. 5. Product will exit at machine output under Blade Assemblies. NEVER REACH OR GRAB FOR PRODUCT AT MACHINE OUTPUT - ALLOW PRODUCT TO DROP AND FULLY CLEAR ROTATING BLADES BEFORE 6. -
Page 9: Cleaning
III. CLEANING SHARP ROTATING BLADES TO AVOID SERIOUS PERSONAL INJURY · ALWAYS Turn Off and Unplug Machine from Power Source and Perform Lockout/Tagout Procedures Before Cleaning or Servicing. · ALWAYS Wear Wire Mesh Safety Gloves When Touching or Handling Stew Cutter Attachments for Removal and Cleaning Purposes Only. - Page 10 Assemblies in a water bath of 110°-115°F to loosen particles. STEP 2 Immerse all items in soapy bath of 120°-130°F and clean using the BIRO Cleaning Brush, Part #T3091-1 CLEANING TENDERIZER, SCORING, CUTLET AND STAR BLADE ASSEMBLIES ALWAYS WEAR WIRE MESH SAFETY GLOVES WHEN TOUCHING OR HANDLING STEW/STRIP CUTTER BLADE ASSEMBLIES.
- Page 11 CLEANING STEW/STRIP CUTTER BLADE ASSEMBLIES ALWAYS WEAR WIRE MESH SAFETY GLOVES WHEN TOUCHING OR HANDLING STEW/STRIP CUTTER BLADE ASSEMBLIES.
- Page 12 ASSEMBLY OF PRO-9 TENDERIZER, SCORING, CUTLET AND STAR CRADLE ASSEMBLIES NOTE: BIRO RECOMMENDS THE USE OF WIRE SAFETY CLEANING GLOVES WHEN HANDLING CRADLE ASSEMBLIES. STEP 1: Place the empty cradle on table top with plastic handle toward you, left hand cradle end away.
- Page 13 Unplug electrical cord. Holding the cutting group’s support handle, begin to insert the assembled cutting group into PRO-9 Tenderizer. Open safety cover, insert coupling ends first and then rotate the right hand cradle end back counter-clockwise onto the cutting group supports. Make sure coupling ends are locked into the driving shafts and then pull down cradle lock lever to firmly secure the cutting group.
- Page 14 Unplug the power cord then holding the cutting group’s support handle, begin to assemble completed group into PRO-9 Tenderizer. Open safety cover, insert coupling ends first and then rotate the right hand cra- cutting group into PRO-9 Tenderizer. Open hopper cover, then assemble cutting group by inserting coupling dle end back counter-clockwise onto the cutting group supports.
- Page 15 ASSEMBLY OF PRO-9 STEW/STRIP CUTTING CRADLES NOTE: BIRO RECOMMENDS THE USE OF WIRE SAFETY CLEANING GLOVES WHEN HANDLING CRADLE ASSEMBLIES. STEP 1: Place the empty cradle on table top with plastic handle toward you, left hand cradle end away. STEP 2:...
- Page 16 Unplug the power cord then holding the cutting group’s support handle, begin to assemble completed cutting group into PRO-9 Tenderizer. Open hopper cover, then assemble cutting group by inserting coupling ends first and then rotating the right hand cradle end back counter-clockwise onto the cutting group sup- ports.
-
Page 17: Maintenance
Attachments for Removal and Cleaning Purposes Only. · PROMPTLY REPLACE Any Worn or Illegible Warning Labels. · USE ONLY BIRO Parts and Accessories Properly Installed. A. GENERAL 1. Machine should be generally inspected every time it is cleaned (at least daily) to ensure that it is in good operating condition and has not been damaged or tampered with. - Page 18 DO NOT USE THIS MACHINE IF ANY SWITCH FAILS TO FUNCTION PROPERLY. TURN OFF AND UNPLUG MACHINE FROM POWER SOURCE AND PERFORM LOCKOUT/TAGOUT PROCEDURES BEFORE PERFORMING ANY OTHER MAINTENANCE. c. Cradle and Blade Assemblies: The blades and teeth of the Blade Assemblies should be checked for any damage, including broken, bent, or missing teeth, or gouged or bent blades.
-
Page 19: Wiring Diagrams
MODEL PRO-9 TENDERIZER WIRING DIAGRAM 115-220 VOLTS/1 PHASE 50-60 CYCLE MODEL PRO-9 TENDERIZER WIRING DIAGRAM 115-220 VOLTS/1 PHASE/50-60 CYCLE WITH IN LINE CIRCUIT BREAKER... - Page 20 MODEL PRO-9 TENDERIZER WIRING DIAGRAM 220-380-440 VOLTS/3 PHASE 50-60 CYCLE WIRING DIAGRAM 115 or 220 VOLT: 1 PHASE, 50-60 HZ WITH SOLID STATE RELAY...
- Page 21 ITEM NO. TA3168-3 Item STANDARD DUTY TRANSMISSION ASSEMBLY Number Description T3007-3 Gear Box Cover, (#52902 on) STARTING WITH SERIAL No. 52902 T3008-1 Gear Box Cover Screw SERVICE REPLACEMENT T3009-3-4 Gear Box Cover Gasket (#52902 on) * T3012 Knife Drive Gear & Pinion, SD STARTING WITH S/N 40,299 * T3014 Knife Drive Gear, Front, SD...
- Page 22 2V POLY FLEX BELT & PULLEY PARTS STARTING WITH SERIAL NO. 63504 (See Parts List Below for Correct Motor) Item Number Description T3020-8-4 Driven Pulley Woodruff Key T3020-9 Driven Pulley, 2-V, 4 ´ , SD & HD 60HZ-SD 85 & 105 RPM 60HZ-HD 115 &...
- Page 23 Switch Harness with Waterproof Half Boot, 15 Amp (1 PH) 115V (3 PH also available) The Lexan Safety Cover for the Pro-9 has been redesigned to comply with current international standards. It is now 1-3/4 inch (44 mm) taller than the former design and completely interchangeable with the previous safety cover which is no longer available.
- Page 24 PRO-9 SD AND HD BASE FRAME PARTS LIST (REAR VIEW) STARTING WITH S/N 40299 ON Item Item Number Description Number Description T3001/04-4 Base Plate & Gear Housing Bracket CB60S Case Screw (½) Assembly #52884 on CB61S Case Screw(¾) T3022-3A Frame Positioning Lock Screw (#40299 on) HN15S Case Screw Hex Nut ¼-20...
- Page 25 TENDERIZER CRADLE PARTS TA3185M-115-TK SOLID STATE RELAY KIT FOR TRANSPARENT COVER TA3185M-115-SK SOLID STATE RELAY KIT FOR STAINLESS STEEL SAFETY COVER TA3096M-2 TRANSPARENT SAFETY COVER TA3096M-O-1 STAINLESS STEEL SAFETY COVER Item number Description TA3185M-K Harness with solid state switch and reed 110V-220V TA3096M-0-1 SS safety cover w/magnet...
- Page 28 NOTE: All No.’s ending in “A” have #T3031-4 Spacer omitted from their assemblies starting with SR #57696 HD on 1-6-89. STEW CRADLE PARTS LISTING T3031-1 Stew, front spacer for ¾" width T3117-1 Stew, wire back comb, " wide T3031-2 Stew, front spacer for 1" width T3117-2 Stew, wire back comb, 1"...
- Page 29 SCORING CRADLE PARTS SCORING CRADLE PARTS w/BLADES & COMBS (See parts list for other items) SCORING BLADES “A” – DIM TA3130-20 Scoring Cradle Complete 2" 2" 0" TA3130-21 Scoring Cradle Complete 2" " " TA3130-22 Scoring Cradle Complete " " "...
- Page 30 CUTLET PARTS LIST Item Item Number Description Number Description TA3130-50 Cutlet cradle assembly complete T3132 Back knife shaft w/coupling end TA3131-50 Cutlet front blade assembly – 42 blades T3157 Cradle lock lever shaft TA3132-50 Cutlet back blade assembly – 43 blades T3178 Auxiliary spacer ID ´...
- Page 31 PARTS ORDERING Important: Must have Serial Number when ordering parts. Please contact yoru nearest authorized Biro service agency for any repair parts required on your Biro – Sir Steak Model Pro-9 Tenderizer. Additional information or authorized referral assistance may be obtained from:...
- Page 32 Item No. Description Item No. Description T3082 Knife shaft end nut, left hand, front T3181-1 Knife shaft shoulder bearing, front T3083 Knife shaft end nut, right hand, back T3181-2 Knife shaft shoulder bearing, back T3088-1 Gear box vent, 1 psi T3186-1A Toggle switch w/cap nut, 3 phase T3091-1...
- Page 33 ASSEMBLY NUMBERS FOR THE PRO-9 MACHINE Item No. Description ItemNo. Description TA3006-2 Case top assembly without switches, #50420 on TA3130-23 Scoring cradle complete FT 1 " BK 1 " TA3006-2C CSA case top assembly w/o switches TA3130-24 Scoring cradle complete FT 1 "...
-
Page 34: Operator's Signature Page
OPERATOR’S SIGNATURE PAGE WARNING READ AND UNDERSTAND THIS ENTIRE MANUAL BEFORE SIGNING BELOW MY SIGNATURE ATTESTS THAT I HAVE COMPLETELY READ AND UNDERSTAND THIS MANUAL. I REALIZE THAT THIS MACHINE, IF OPERATED CARELESSLY, CAN CAUSE SERIOUS INJURY TO MYSELF AND OTHERS. SUPERVISOR’S NAME (PRINT) SIGNATURE... -
Page 35: Limited Warranty
(Water contaminated electrical systems are not covered under this lim- ited warranty). BIRO is not responsible for service charges or labor required to replace any part covered by this limited warranty or for any damages resulting from misuse, abuse, lack of proper or recommended service, or for electrical connection of equipment, adjustments to switch gear or any other electrical requirements, which must be performed only by a certified electrician.
Need help?
Do you have a question about the PRO-9 and is the answer not in the manual?
Questions and answers