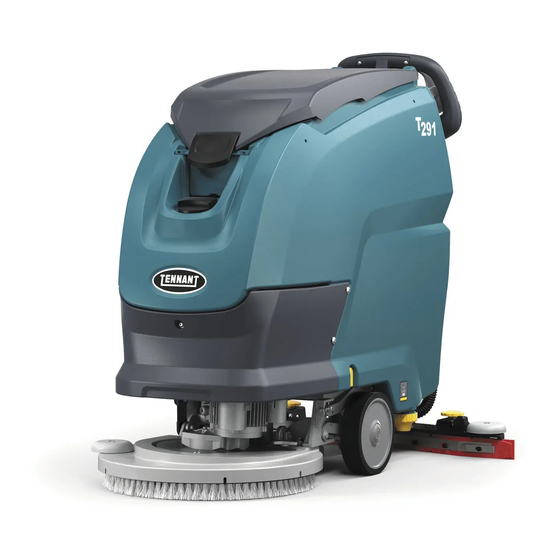
Tennant T291 Operator's Manual
Battery floor scrubber
Hide thumbs
Also See for T291:
- Operator's manual (366 pages) ,
- Technical & service manual (81 pages) ,
- Quick manual (2 pages)
Table of Contents
Advertisement
Quick Links
Model Part No.:
LPTB03238 - SCRUBBER [T291 50CM PD, ANZ]
LPTB03239 - SCRUBBER [T391 70CM PD, ANZ]
ANZ
To view, print or download
the parts manual, visit:
www.tennantco.com/manuals
www.tennantco.com
T291-T391
BATTERY FLOOR SCRUBBER
MANUALE ISTRUZIONI PER L'USO (IT)
OPERATOR'S MANUAL (EN)
PLDC04555
Rev. 02 (10-2021)
Advertisement
Chapters
Table of Contents

Related Manuals for Tennant T291


Summary of Contents for Tennant T291
- Page 1 T291-T391 BATTERY FLOOR SCRUBBER MANUALE ISTRUZIONI PER L’USO (IT) OPERATOR’S MANUAL (EN) Model Part No.: LPTB03238 - SCRUBBER [T291 50CM PD, ANZ] LPTB03239 - SCRUBBER [T391 70CM PD, ANZ] To view, print or download the parts manual, visit: www.tennantco.com/manuals PLDC04555 www.tennantco.com...
-
Page 2: Table Of Contents
Manutenzione - Regole generali ........................................21 ...........................................21 .............................................21 ....................................21 ......................................21 .............................................22 ......................................22 Sostituzione lame squeegee ........................................23 Controllo periodici ............................................23 PERIODI DI INATTIVITÀ ..................................23 INCONVENIENTI , CAUSE E RIMEDI .............................24 ALLARMI SUL DISPLAY .................................25 MENU TECNICO T291 - T391 .................................26 RICAMBI CONSIGLIATI ..................................27 ITALIANO... -
Page 3: Informazioni Sulla Sicurezza
INFORMAZIONI SULLA SICUREZZA Norme di sicurezza ! PERICOLO Leggere attentamente il “Manuale Istruzioni per l’uso” prima di procedere alle operazioni di avviamento, impiego, manutenzione, manuten- zione ordinaria, o qualsiasi altro intervento sulla macchina. ! ATTENZIONE Rispettare rigorosamente tutte le prescrizioni, contenute nel Manuale (ed in particolare modo quelle di pericolo e di attenzione) e le targhet- te, vedere capitolo “Segnaletica di Sicurezza”... - Page 4 Non mettere le mani tra le parti in movimento. ITALIANO...
- Page 5 Batteria: preparazione”. fuoriescono durante il normale utilizzo in particolare durante la ricarica. dati tecnici. ITALIANO...
-
Page 6: Caratteristiche Tecniche T291
CARATTERISTICHE TECNICHE T291 T291 50CM TRAZIONE ELETTRICA Rendimento orario 2723 Numero spazzole n° Diametro spazzola Pressione spazzola massima Potenza motore spazzola Potenza motore trazione Potenza motore aspirazione Diametro ruote anteriori Diametro ruota posteriore n° 12x2 24 dc 100- X=1327 Y=1033 Z=563... - Page 7 1365 x 695 x 1146 60335-2-72: 2012 (dBA) Incertezza della misura (dBA) °C IPX3 Dati soggetti a variazioni senza preavviso ITALIANO...
-
Page 8: Caratteristiche Tecniche T391
CARATTERISTICHE TECNICHE T391 T391 70CM TRAZIONE ELETTRICA Rendimento orario 3142 Numero spazzole n° Diametro spazzola Pressione spazzola massima Potenza motore spazzola 400x2 Potenza motore trazione Potenza motore aspirazione 1008 Diametro ruote anteriori Diametro ruota posteriore n° 12x2 24 dc 100- X=1297 Y=1033 Z=735 360 x 344 x 300 ITALIANO... - Page 9 60335-2-72: 2012 (dBA) Incertezza della misura (dBA) °C IPX3 Dati soggetti a variazioni senza preavviso ITALIANO...
-
Page 10: Dimensione Macchina
DIMENSIONE MACCHINA X-Y-Z: Vedi tabella “CARATTERISTICHE TECNICHE” SEGNALETICA DI SICUREZZA ITALIANO... -
Page 11: Informazioni Generali
INFORMAZIONI GENERALI Scopo del manuale operatori addetti alla manutenzione ! PERICOLO oppure possibili danni alla salute. ! ATTENZIONE all’ambiente in cui si opera od a perdite economiche. ! INFORMAZIONE Indicazioni di particolare importanza viso. formazioni sulla stessa sono garantite. Modello. Numero di serie (numero di matricola). -
Page 12: Informazioni Tecniche
INFORMAZIONI TECNICHE Descrizione generale sporca. Legenda aspirata dal pavimento durante il lavaggio. Pannello comandi (Fig.1-Rif.2). l’acqua sparsa su di esso. Zone di pericolo Pannello comandi: pericolo di cortocircuiti. Accessori ITALIANO... -
Page 13: Movimentazione Ed Installazione
MOVIMENTAZIONE ED INSTALLAZIONE Sollevamento e trasporto della macchina imballata ! ATTENZIONE accidentali. attenzione ad evitare urti e senza capovolgere. Controlli alla consegna domanda per il risarcimento dei danni stessi. Disimballaggio ! ATTENZIONE Durante il disimballaggio della macchina l’operatore deve essere munito degli accessori necessari (guanti, occhiali, ecc.) per limitare i rischi di infortuni. -
Page 14: Batteria: Preparazione
Batteria: preparazione ! INFORMAZIONE ! PERICOLO batterie, non causare scintille e non fumare. solforico; Manutenzione e ricarica delle batterie”. Batterie: installazione e collegamento ! PERICOLO Togliere la chiave elettronica dalla plancia prima di procedere all’installazione e collegamento delle batterie. Fare attenzione a montare sui poli positivi solo morsetti contrassegnati con il simbolo “+”. Non controllate la carica delle batterie mediante scintillamenti. -
Page 15: Installazione E Regolazione Squeegee
Installazione e regolazione squeegee Regolazione squeegee Installazione spazzole Aggancio automatico spazzola, versione “Senza Trazione (Trazione a spinta)” (Fig.21): spazzola sulla lavasciuga. Aggancio automatico spazzola, versione “Con Trazione elettrica” (Fig.21): Aggancio automatico spazzola, versione “Con Trazione elettrica (Spazzola con Attuatore)” : Sgancio automatico spazzola , versione Senza Trazione e con Trazione Elettrica (Fig.21): alzare la testata della Sgancio automatico spazzola, versione con Trazione Elettrica (Spazzola con Attuatore): ITALIANO... - Page 16 ! INFORMAZIONE Seguire le seguenti istruzioni per impostare sul Software della macchina la lingua da utilizzare per la messaggistica visualizzata sul display : Menù Tecnico” Sollevamento e trasporto della macchina ! ATTENZIONE Tutte le fasi devono essere eseguite in ambiente adeguatamente illuminato ed adottando le misure di sicurezza più appropriate alla situa- zione.
-
Page 17: Guida Pratica Per L'operatore
GUIDA PRATICA PER L’OPERATORE ! ATTENZIONE guanti ed ogni altro dispositivo di protezione richiesto dall’ambiente in cui si opera. ! ATTENZIONE Non lasciare mai incustodita o parcheggiata la macchina con la chiave elettronica di accensione inserita. ! INFORMAZIONE acquisire la necessaria dimestichezza. ! ATTENZIONE ! ATTENZIONE Diluire sempre i detergenti secondo le indicazioni del Fornitore. - Page 18 Chiave elettronica (Fig.8-Rif.1): Selettore di funzionamento (Fig.8-Rif.2): OFF (Fig.9-Rif.3): “Menu Tecnico”, si entra nel Aspiratore (Fig.9-Rif.4): 9 10 Spazzola (Fig.9-Rif.5): in questa posizione oltre all’accensione del motore spazzola eseguire i seguenti comandi: modelli provvisti di attuatore. Auto (Fig.9-Rif.6): in questa posizione vengono attivate tutte le funzioni della “Menu Tecnico”...
-
Page 19: Lavoro
Leva trazione (Fig.22) Pulsante sgancio serbatoio (Fig.10-Rif.1): permette di sganciare Pedale sollevamento testata (Fig.10-Rif.2): permette di sollevare Leva sollevamento squeegee (Fig.10-Rif.3): nella versione con trazione elettrica. Manopole regolazione altezza plancia (Fig.10-Rif.4): svitando le Pulsante “SET” (Fig.9-Rif.10): permette di accedere ai sotto menu “Menu Tec- nico”... -
Page 20: Fine Lavoro
Svuotamento serbatoio di recupero “Allarmi sul display” Svuotamento serbatoio acqua/detergente Riempimento serbatoio acqua/detergente “Allarmi sul display”, netto (Fig.12A-Rif.3) e riavvitare il tappo (Fig.12A-Rif.2). Riempimento tanica Chem Dose (accessorio) Fine lavoro ! INFORMAZIONE Vuotare il serbatoio di recupero e ricaricare le batterie Spostamento della macchina non in lavoro Alzare lo squeegee. -
Page 21: Istruzioni Per La Manutenzione
ISTRUZIONI PER LA MANUTENZIONE ! PERICOLO scollegato l’alimentazione. Le operazioni di manutenzione riguardanti l’impianto elettrico e, comunque, tutte quelle non esplicitamente descritte in questo manuale d’uso, devono essere ese- guite da personale tecnico specializzato, in conformità alle norme di sicurezza vigenti ed a quanto previsto dal manuale per la manutenzione. - Page 22 Fusibili: sostituzione ! ATTENZIONE Non installare mai un fusibile di amperaggio superiore a quello previsto. Manutenzione e ricarica delle batterie ! INFORMAZIONE Prima di procedere alla ricarica delle batterie, estrarre la chiave elettronica dalla plancia comandi. ! PERICOLO Non controllate le batterie mediante scintillamenti. ! PERICOLO Eseguire le operazioni descritte di seguito in ambienti aerati.
-
Page 23: Sostituzione Lame Squeegee
Sostituzione lame squeegee Aprire il gancio (Fig.20-Rif.1). Spingere verso l’esterno i due premi-lama (Fig.20-Rif.2) e quindi estrarli. Rimuovere la lama. a consumare tutti e quattro gli spigoli oppure una nuova lama incastrandola nei perni del corpo squeegee. Riposizionare i due premi-lama centrando la parte più larga delle asole sui perni Rimontare lo squeegee sul suo supporto seguendo le indicazioni descritte precedentemente. -
Page 24: Inconvenienti , Cause E Rimedi
INCONVENIENTI , CAUSE E RIMEDI Sostituire Inserire Le spazzole non girano Sostituire Sostituire Motore danneggiato Sostituire Sostituire Sostituire Controllare Riempire Rimuovere l’ostruzione Sostituire Sostituire Controllare Il motore di aspirazione non funziona Sostituire Leva solleamento squeegee sollevata Motore danneggiato Sostituire Sostituire le lame smussato Controllare Controllare... -
Page 25: Allarmi Sul Display
ALLARMI SUL DISPLAY Allarme Possibile Causa Intervento Leva trazione premuta Rilasciare la leva trazione all’accensione. all’accensione della Surriscaldamento motori Potenziometro leva trazione spazzole. spazzola. non regolato. Contatto termico difettoso sui Sostituire il motore spazzola. potenziometro. motori. Controllare la connessione. Connessione difettosa. Surriscaldamento della motoruota. -
Page 26: Menu Tecnico T291 - T391
MENU TECNICO T291 - T391 (Modello senza trazione) Language-lingua Language-lingua Programma auto Programma auto Pressione spazzole 1..5 (2) 0..5 (3) 1..5 (3) Ritardo stop spazzole secondi (3) Ritardo stop spazzole Ritardo stop asp. secondi (3) Ritardo stop asp. ITALIANO... -
Page 27: Ricambi Consigliati
RICAMBI CONSIGLIATI T291 Codice Descrizione T291 50cm 9017699 9017702 9017695 9017694 9017696 9017698 L-1074742 L-17262 L-17261 L-17260 L-63248-6 897346 9017743 9017716 9017687 9017712 9017718 9017788 9018501 9018332 897301 ITALIANO... - Page 28 T391 Codice Descrizione T391 70cm 9017813 9017814 9017801 9017804 9017806 9017811 9017816 9017730 9017820 L-370091 L-222326 L-222327 L-222325 L-222324 897346 9017743 9017716 9017687 9017712 9017718 9017788 9018501 9018332 897301 ITALIANO...
- Page 29 Cleaning the debris container ........................................21 ........................................21 .......................................21 Fuses: replacing ............................................22 Battery maintenance and charging ......................................22 Replacing the squeegee blades ........................................23 Periodic checks ............................................23 PERIODS OF INACTIVITY ................................23 TROUBLESHOOTING ..................................24 DISPLAY ALARMS ..................................25 TECHNICAL MENU T291 - T391 ..............................26 RECOMMENDED SPARE PARTS ..............................27 ENGLISH...
-
Page 30: Safety Information
SAFETY INFORMATION Safety precautions ! DANGER Read the “User Manual” carefully before start-up and use or before performing maintenance or any other work on the machine. ! WARNING Rigorously follow all the instructions in this Manual (in particular those marked “Danger!” and “Warning!”). Also respect the labels applied to the machine (see the “Safety symbols”... - Page 31 The operator must always use personal protection devices: protective apron or overalls, non-slip waterproof shoes, rubber gloves, protective goggles and ear protectors and mask to protect the respiratory tract. Do not use detergents that may produce hazardous reactions, vapours, heat, etc. Keep hands away from moving parts.
- Page 32 It is indispensable to respect the battery manufacturer’s instructions and applicable legislation. The batteries should always be kept clean and dry to avoid surface leakage current. Protect the batteries from impurities such as metal dust. Never rest tools on the batteries as they could cause short circuits leading to explosions. When using battery acid, always follow scrupulously the safety instructions given in the “Batteries: preparation “...
-
Page 33: Technical Characteristics T291
TECHNICAL CHARACTERISTICS T291 T291 50CM PROPEL Cleaning width Squeegee width Cleaning capacity per hour 2723 Number of brushes n° Brush diameter Maximum brush pressure 11,9 Brush rotation speed g/1° Brush motor power Drive motor power Suction motor power Overall power of machine in average operating conditions (P... - Page 34 Battery compartment dimensions (length, width, height) 360 x 344 x 300 Packed size (length, width, height) 1365 x 695 x 1146 Sound pressure - Annex DD (Emission of acoustical noise) EN 60335- 2-72: 2012 (dBA) Measurement uncertainty (dBA) Vibration level (hand) - IEC 60335-2-72 m/sec Measurement uncertainty, k m/sec...
-
Page 35: Technical Characteristics T391
TECHNICAL CHARACTERISTICS T391 T391 70CM PROPEL Cleaning width Squeegee width Cleaning capacity per hour 3142 Number of brushes n° Brush diameter Maximum brush pressure 20,7 Brush rotation speed g/1° Brush motor power 400x2 Drive motor power Suction motor power Overall power of machine in average operating conditions (P 1008 Maximum speed Km/h... - Page 36 Packed size (length, width, height) Sound pressure - Annex DD (Emission of acoustical noise) EN 60335-2-72: 2012 (dBA) Measurement uncertainty (dBA) Vibration level (hand) - IEC 60335-2-72 m/sec Measurement uncertainty, k m/sec Vibration level (body) - IEC 60335-2-72 m/sec Measurement uncertainty, k m/sec Maximum water and detergent temperature °C...
-
Page 37: Safety Symbols
MACHINE DIMENSIONS X-Y-Z: See “TECHNICAL SPECIFICATIONS” table SAFETY SYMBOLS WARNING! RISK OF CUTTING EARTHING POINT. WARNING! RISK OF CRUSHING LIMBS EXTERNAL BATTERY CHARGER CONNECTION POINT. WARNING! RISK OF ABRASION DO NOT WASH THE MACHINE BY SPRAYING DIRECTLY WITH WATER OR USING HIGH PRESSURE WATER JETS. WARNING! RISK OF ENTANGLEMENT WARNING! RISK OF ACID BURNS WARNING! RISK OF BURNS... -
Page 38: General Information
GENERAL INFORMATION Purpose of this manual This manual has been written by the Manufacturer and is an integral part of the machine operators maintenance personnel The terms “right” and “left”, “clockwise” and “anti-clockwise” refer to the forward movement of the machine. Constant compliance with the instructions provided in this manual guarantees the safety of the operator and the machine, ensures low running costs and high quality results and extends the working life of the machine. -
Page 39: Technical Information
TECHNICAL INFORMATION General description trial premises. choosing the detergent and brushes (or abrasive disks) from the wide range of accessories available, the machine can be adapted to a wide range suction motor. The squeegee connected to the tank collects the dirty water. The main parts of the machine are as follows: move the dirt. -
Page 40: Movement And Installation
MOVEMENT AND INSTALLATION Lifting and transporting the packaged machine ! WARNING Always load/unload lorries in adequately illuminated areas. The machine is packaged on a wooden pallet by the Manufacturer. It must be loaded onto the transporting vehicle using suitable equipment (see EC Directive 2006/42 and subsequent amendments and/or additions). -
Page 41: Batteries: Preparation
Batteries: preparation ! INFORMATION Installation and connection / removal of the batteries must be carried out by an IPC-approved technician (referred to hereinafter as skilled technician). ! DANGER During installation of the batteries or any type of battery maintenance, the skilled technician must be provided with the necessary personal battery poles, do not generate sparks and do not smoke. -
Page 42: Squeegee Installation And Adjustment
Squeegee installation and adjustment Squeegee adjustment wear should be checked frequently. For perfect drying, the squeegee must be adjusted in such a way that the edge of the rear blade bends during operation by about 45° with respect Brush installation Automatic brush attachment, version “Without traction”... -
Page 43: Lifting And Transporting The Machine
! INFORMATION See the “Technical menu” section. Lifting and transporting the machine ! WARNING All phases of lifting and moving must be performed in an adequately illuminated environment with the adoption of the safety measures most appropriate to the situation. The operator must always use personal protection devices. -
Page 44: Practical Guide For The Operator
PRACTICAL GUIDE FOR THE OPERATOR ! WARNING Before starting work, wear overalls, ear protectors, non-slip and waterproof shoes, mask to protect the respiratory tract, gloves and all other personal protection devices necessitated by the work environment. ! WARNING Never leave the machine unattended or parked with the electronic ignition key inserted. ! INFORMATION familiarity. - Page 45 inserting the key enables operation of the machine, remove the turn to select the machine operating program: OFF (Fig.9-Ref.3): in this position the electric drive is enabled (where featured), the speed can be adjusted using the “-” and “+” buttons. Press the “SET” button to man- age the following functions: pressing the “SET”...
-
Page 46: Working
: pulling the lever towards the operator engages reverse gear, pushing the lever forwards engages forward gear, to change speed press the “+” and “-” buttons. : releases the tank from the chassis so it can be rotated backwards. : raises and lowers the head on mod- els without actuator. -
Page 47: Emptying The Collection Tank
Emptying the collection tank If the tank is full, the display shows the corresponding alarm, see the chapter “Display alarms”; after a few seconds, the suction motor shuts down, then stop the machine and empty the tank following the instructions shown below. To resume work, turn the operation selector to the OFF position (reset errors): Take the machine to the disposal area. -
Page 48: Maintenance Instructions
MAINTENANCE INSTRUCTIONS ! DANGER teries. scribed in this manual must be performed by specialised personnel only, in compliance with current safety legislation and as described in the maintenance manual. ! DANGER be emptied, then insert the safety bracket in position to prevent the tank from accidentally closing again, see chapter “SAFETY INFORMATION”. -
Page 49: Fuses: Replacing
Fuses: replacing ! WARNING The fuses can only be replaced by an TENNANT service centre or by technical personnel authorised by TENNANT. Lift the tank, disconnect the battery wiring connector from the electrical system or unplug the power cable, remove the cover (Fig. 18-Ref. 1) to access the fuses. -
Page 50: Replacing The Squeegee Blades
CLEAN THE DIRTY WATER TANK AND THE SOLUTION TANK CHECK THE BATTERY ELECTROLYTE LEVEL HAVE THE ELECTRICAL CIRCUIT CHECKED BY QUALIFIED TENNANT PERSONNEL PERIODS OF INACTIVITY If the machine is not used for some time, for example, on display in a showroom or stored in the warehouse for a period or more than one month, the following operations are required: Recharge completely the batteries. -
Page 51: Troubleshooting
TROUBLESHOOTING PROBLEM CAUSE REMEDY The machine does not work The batteries are disconnected Connect the batteries to the machine Recharge the batteries Blown fuse Replace Electronic key not inserted Engage. The brushes do not turn The dirty water tank is full Empty the dirty water tank Blown fuse Replace... -
Page 52: Display Alarms
DISPLAY ALARMS Alarm Possible cause What to do BATTERY FLAT Battery voltage less than Recharge the batteries. 21.4 V - GEL / 20.5 V - ACID. Replace the batteries. BRUSHES THERMAL brush motor Wait for the brush motors to Flat or degraded batteries. PROTECTION overheated. -
Page 53: Technical Menu T291 - T391
TECHNICAL MENU T291 - T391 Access the menu by turning the operation selector to OFF and pressing “SET” twice, then press the “+” and “-” buttons together. The “+” button increases the selected parameter or the variable relating to the selected parameter. -
Page 54: Recommended Spare Parts
MECE00786 BOARD, PCB [TRACTION MODEL] MOCC00465 TRANSAXLE, MOTOR ASSY [TRACTION MODEL] 9017743 BRUSH KIT, MOTOR, TRANSAXLE [2 PC] MOCC00449 MOTOR, BRUSH [T291] MEVR02923 BRUSH KIT, CARBON, BRUSH MOTOR [4 PC] 9017716 FAN, MOTOR 9017687 BRUSH, CARBON, VAC FAN MOTOR GUGO00509... - Page 55 T391 Part Number Description T391 70cm 9017813 BLADE, SQGE, FRONT, 1020L, LINATEX [STANDARD] 9017814 BLADE, SQGE, REAR, 1020L, LINATEX [STANDARD] 9017801 BLADE, SQGE, FRONT, 1020L, LATEX 9017804 BLADE, SQGE, REAR, 1020L, LATEX 9017806 BLADE, SQGE, FRONT, 1020L, PYU 9017811 BLADE, SQGE, REAR, 1020L, PYU 9017816 BRUSH ASSY, DISK, SCB, 35CM, 3-LUG, PYP [STANDARD] 9017730...
- Page 56 Tennant N.V. Industrielaan 6 5405 AB P.O. Box 6 5400 AA, Uden - The Netherlands Europe@tennantco.com http://www.tennantco.com Copyright © 2021 Tennant Company. All rights reserved.
Need help?
Do you have a question about the T291 and is the answer not in the manual?
Questions and answers