
Related Manuals for ARIBEX Nomad Pro Veterinary


Summary of Contents for ARIBEX Nomad Pro Veterinary
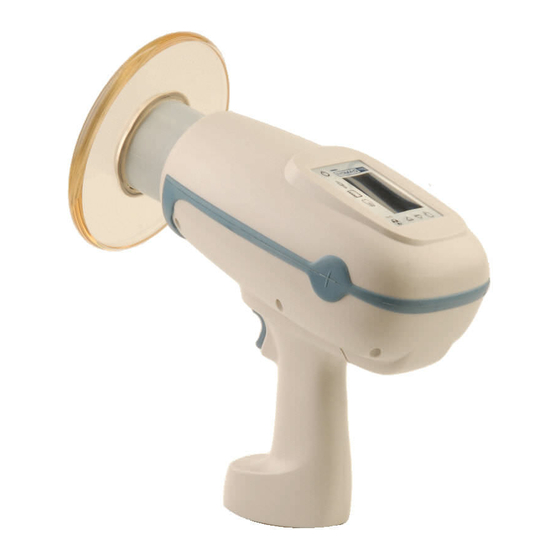
- Page 1 ™ Handheld X-ray System Intraoral Radiographic Imaging PERATOR ANUAL ANUFACTURED BY...
- Page 2 ® Pro Veterinary is sold with the understanding that the user assumes sole responsibility for radiation safety (as well as any state, provincial, or local regulatory compliance) and that Aribex, Inc., its agents or representatives, do not accept responsibility for:...
-
Page 3: Table Of Contents
Operator MANUAL Table of Contents 1.0 Getting Started................1 1.1 Intended Use ........................1 1.2 Unpack, Check, and Register NOMAD Pro System ............1 1.3 Charging the Handsets ....................2 2.0 Safety Precautions ..............3 2.1 Radiation Safety ......................3 2.2 Usage and Duty Cycle ..................... 5 2.3 Cleaning .......................... - Page 4 ® NOMAD Pro Veterinary as your X-ray solution! At Aribex we value your business and we would like to hear from you, because your feedback or suggestions are important to us. If you have comments, please email us: NOMAD@aribex.com ®...
-
Page 5: Getting Started
PERATOR ANUAL 1.0 Getting Started 1.1 Intended Use The NOMAD Pro Veterinary X-ray System is designed to be used for veterinary medicine by trained veterinary professionals for producing diagnostic dental ray images. 1.2 Unpack, Check, and Register NOMAD Pro System Unwrap individual components from the protective plastic and check for any noticeable signs of damage. -
Page 6: Charging The Handsets
NOMAD Pro Complete the product Warranty / Registration card and mail it with proper postage to Aribex today. Completing the card fulfills a condition of warranty coverage (see the inside back cover of this manual). 1.3 Charging the Handsets The handsets (batteries) are partially charged at the factory and normally need not be charged NOTE: up prior to initial use of the NOMAD Pro. -
Page 7: Safety Precautions
PERATOR ANUAL 2.0 Safety Precautions 2.1 Radiation Safety This X-ray unit may be dangerous to patient and operator unless safe exposure factors, operating instructions and maintenance schedules are observed. Operators must follow all applicable regulatory guidelines and in-house radiation protection program in regard to patients and operators who are pregnant or expect to become pregnant. - Page 8 NOMAD Pro As shown in graphic representations, maximum protection (green area) from backscatter radiation (red area) exists when the NOMAD Pro is positioned near the patient, is perpendicular to the operator (with the patient’s head tilted if needed), and the backscatter shield is fully extended toward the patient and parallel to the operator.
-
Page 9: Usage And Duty Cycle
PERATOR ANUAL Comparative Data for Hand and Extremity Exposure (Annual) 500mSv Occupational Dose Limit 50mSv Occupational Dose Limit Requiring Dosimetry 0.43mSv Average Exposure Using NOMAD with D-Speed Film 0.22mSv Average Exposure Using NOMAD with F-Speed Film or Digital Sensor Fixed Beam Limiting X-ray Source Focal 1) Standards for Protection against Radiation, Device... -
Page 10: Cleaning
The optimal storage location is cool, dry, and away from direct sunlight. Aribex recommends that the NOMAD Pro (like all electronic equipment) be allowed to acclimate before use when switching between temperature extremes (i.e, cold storage to a warm area use or hot area storage to a cool area use). -
Page 11: Setup And Power Check
NOMAD Pro should not be operated if it has been dropped or performance degrades; • it should be returned to Aribex for a safety check. When finished for the day with NOMAD Pro, detach the handset. • For long-term storage, it is recommended to fully recharge handsets every 3 months. -
Page 12: Attaching A Charged Handset
There are electric currents present at the handset terminals. Protect the handset from damage; do not probe with fingers or conductive objects. 3.3 Checking for Power NOMAD Pro Veterinary Control Panel Power ( ) After locking a handset in place press the button. -
Page 13: Optional Checks
ANUAL 3.4 Optional Checks The NOMAD Pro Veterinary is factory calibrated and tested prior to release (see your Certificate of Conformance). Each time the device power is turned on, it automatically runs a self diagnostic to ensure proper function. However, the optional checks listed below may be performed periodically as desired. -
Page 14: Operation
4.2 Ensuring Battery Charge Is Adequate At the completion of each day or when the battery indicator reaches one bar, recharge the handset. (Aribex recommends that you keep one handset fully charged at all times to ensure continuous operation.) Charged 4.3 Lock / Unlock the X-ray... -
Page 15: Ensuring The Right Exposure Time Is Set
PERATOR ANUAL 4.4 Ensuring the Right Exposure Time Is Set When power is turned off, the most recent setting for the exposure time 0.12 is stored in memory and redisplays when power is turned back on. sec… However, if the battery is replaced, the display is reset to the default Patient value. -
Page 16: Initiating And Completing An X-Ray Exposure
NOMAD Pro 0.20 60 kV 2.5 mA 4.6 Initiating and Completing an X-ray Exposure X-RAY READY yellow To begin the exposure, press and hold the trigger. The message 0.20 X-RAY ON is replaced with , the green LED is replaced with a yellow LED, and there is an alert tone for the duration of the exposure. - Page 17 PERATOR ANUAL NOMAD Pro should not be operated if it has been dropped or performance degrades; it should be returned to Aribex for a safety check.
-
Page 18: Exposure Techniques
NOMAD Pro 4.8 Exposure Techniques As an intraoral dental X-ray system, the NOMAD Pro can be easily positioned. This high degree of flexibility easily makes possible exposures while the patient is reclined, lying completely on their back, or sitting upright. When taking images, operators may hold the NOMAD Pro by having both hands on the handset grip, or for increased stability and patient safety by placing one on the grip and the other on the... -
Page 19: Settings Menu
PERATOR ANUAL 4.9 Settings Menu NOMAD Pro menus allow the operator to customize settings according to individual preferences. To Main Menu Select Main Menu access the , press and hold down the ( ) button for 3 seconds. When the Increase Decrease appears, the operator can access the desired Menu item(s) by pressing the... - Page 20 NOMAD Pro Menu Item Options OVERALL HISTORY COUNTER The device will display two counters. One is the TRIP which displays the total lifetime X-ray shots for the device. The other, COUNTER , can at any time be reset to 0 by the operator. Reset Select When...
-
Page 21: Technique Factor Settings And Adjustments
PERATOR ANUAL 4.10 Technique Factor Settings and Adjustments The factory settings in this chart are intended as a reference starting point only, and are based upon average preferences and use with the cone perpendicular to the image receptor. Individual results may vary based upon a number of factors including image density preferences, the various imaging sensors or available film speeds and brands, patient size, practitioner techniques and preferences. -
Page 22: Handset Replacement And Care
Risk of fire or explosion exists if batteries inside the handset are replaced by • unauthorized service personnel; do not use batteries from other sources. Properly dispose of spent or damaged handset; return to Aribex or an authorized • distributor for replacement and recycling. Do not place in municipal waste stream. -
Page 23: Nomad Pro Care And Upkeep
PERATOR ANUAL 6.0 NOMAD Pro Care and Upkeep 6.1 Alarms and Alerts The visual/audible alarm signals a programmed action designed to prevent harm to operator, patients, and/or NOMAD Pro. The visual/audible alerts confirm normal conditions or draw the operator’s attention to a required action. - Page 24 NOMAD Pro Visual Audible Function / Condition Indicator Signal Resolution When the trigger is activated while the device is in the X-rays locked mode and operation is Tones will be attempted, various alert messages will be X-ray Lock X-RAYS LOCKED the same as displayed.
- Page 25 5 audible Consult Section 6.2, Troubleshooting (6.2.12) or tones an Aribex authorized service center. FAILURE Alarm NOMAD Pro should not be operated if it has been dropped or performance degrades; it should be returned to Aribex for a safety check.
-
Page 26: Troubleshooting
If you encounter results and/or errors in the operation of NOMAD Pro that are not explained in the previous sections, check the following table on user troubleshooting to determine the need for authorized service. If you have additional questions or require help contact Aribex: support@aribex.com Device Symptom... - Page 27 PERATOR ANUAL Device Symptom Potential Problem Corrective Action This warning message can be cleared by powering off, then on. If device self- Self diagnostics, which diagnostics detects the system failure SYSTEM FAILURE automatically run at startup and 6.2.8 again after clearance, the message will displayed on-screen while the device is on, detects a redisplay and NOMAD Pro will require...
-
Page 28: Repair And Maintenance
NOMAD Pro system, the handsets, the charging cradle, or the AC power supply. At end of life, return these items to Aribex for replacement, and proper disposal or recycling. -
Page 29: Technical Description
PERATOR ANUAL 7.0 Technical Description 7.1 Basic Technical Specifications Maximum deviation from fixed factors ±5% (unless otherwise noted) Total weight 2.5kg (5.5 lbs) Environmental Operation Temperature –5 to +40°C (+23 to +104°F) Relative humidity 10% to 80%, non-condensing Storage and transportation Temperature –20 to +60°C (–4 to +140°F) Relative humidity... -
Page 30: Wiring Diagram
NOMAD Pro Measurement Base of Technique Factors The kV is measured during pre-pot testing using a calibrated high voltage divider with a guaranteed accuracy of ±2%. Final performance measurements are made using a NERO mAx, model 8000 X-ray meter from Victoreen. Tube current is sensed across a series connected resistor with an accuracy of ±1% and measured using a digital multimeter, prior to encapsulation;... -
Page 31: X-Ray Tube Specifications And Characteristics
PERATOR ANUAL 7.3 X-ray Tube Specifications and Characteristics The VDT70/0.4/12CP is designed for intraoral dental imaging by an X-ray unit, and is available for nominal tube voltage with self-rectified or constant potential circuit – manufactured by Kailong; distributed in the U.S.A. by Vista Technology. Nominal tube voltage 60kV Nominal focal spot (IEC 60336:1993) - Page 32 NOMAD Pro NOTE: The X-ray source assembly heating and cooling curves are equivalent to the anode heating curves shown here. Maximum continuous heat dissipation will be made available upon request from Aribex.
- Page 33 PERATOR ANUAL X-ray Source Focal Spot X-ray Beam X-ray Source Focal Spot Reference Axis at 90° to Target/Receptor...
-
Page 34: Emc Data
NOMAD Pro 7.4 EMC Data Independent laboratory testing for electromagnetic compatibility for conformity to the Sub-clause 5.10 requirements of ISO/IEC 17025 "General Criteria for the Competence of Testing and Calibration Laboratories" was conducted by: Nemko USA, Inc. 11696 Sorrento Valley Rd, Suite F San Diego, CA 92121-1024 The NOMAD Pro Dental X-ray System has been tested and found to comply with the limits of electromagnetic compatibility standards for medical devices, which provide reasonable protection... - Page 35 PERATOR ANUAL NOTE: The tests documented in the table above are the only tests required for this product as it is a battery operated device and the AC Adapter (CP-0062) is certified. IEC 61000-3-2, 3-3, 4-4, 4-5, 4-6, 4-11, and EN 55014-1:2006 are not applicable. Emissions Test Summary Specification Frequency Range...
-
Page 36: Optional Calibration Checks
Test Detector and capture the resulting data. Compare the result with the factory release parameters (indicated in the chart below). For results outside these parameters, discontinue use and contact your dealer/distributor or Aribex. Timer Settings and Corresponding Acceptable Ranges... - Page 37 (1) year from the date of purchase. Aribex, Inc. also warrants any accessories purchased from Aribex to be free from any defects in material or workmanship for the period of one (1) year from the date of purchase.
- Page 38 ISO 13485 / ISO 9001 ERTIFIED OMPANY © Aribex, Inc. 2005, 2010 All Rights Reserved English is the original draft language for this manual. Aribex, Inc. Phone: 801-226-5522 11727 Fruehauf Dr Fax: 801-434-7233 Charlotte, NC 28273 Email: NOMAD@aribex.com http://www.aribex.com U.S.A...
Need help?
Do you have a question about the Nomad Pro Veterinary and is the answer not in the manual?
Questions and answers