
Related Manuals for ARIBEX Nomad Pro 2


Summary of Contents for ARIBEX Nomad Pro 2
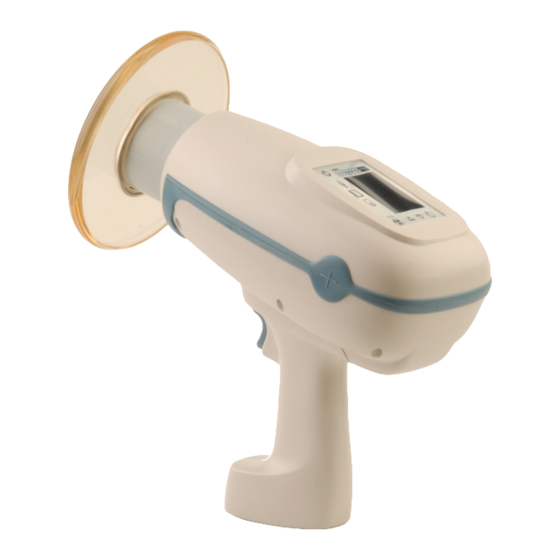
- Page 1 Handheld X-ray System for Intraoral Radiographic Imaging PERATOR ANUAL ANUFACTURED BY RIBEX...
- Page 2 DO NOT OPERATE THIS DEVICE UNTIL YOU HAVE READ THIS MANUAL and reviewed the accompanying materials. Disclaimer: NOMAD Pro 2 is sold with the understanding that the user assumes sole responsibility for radiation safety (as well as any state, provincial, or local regulatory compliance) and that Aribex,...
- Page 3 The symbols used in this publication or used to mark the equipment have the following meanings: Ionizing Radiation Attention, consult instructions for use Recycling/instructions for handling product at end of life Dangerous Voltage, Electrical Shock Hazard Do not spray disinfectant or cleaners directly on the NOMAD Pro 2, handset, charger cradle or AC power supply Manufacturer of the device Date of device manufacture...
-
Page 4: Table Of Contents
Table of Contents 1.0 Getting Started 1.1 Intended Use/Indications for Use 1.2 Unpack, Check, and Register NOMAD Pro 2 System 1.3 Charging the Handsets 2.0 Safety Precautions 2.1 Radiation Safety 2.2 Studies and Data on Leakage and Scatter 2.3 Usage and Duty Cycle 2.4 Cleaning... - Page 5 Thank you for choosing the Aribex NOMAD Pro 2 as your X-ray solution! At Aribex we value your business and we would like to hear from you because your feedback and suggestions are important to us. If you have comments, please email us: support@aribex.com...
-
Page 6: Getting Started
1.0 Getting Started 1.1 Intended Use/Indications for Use The NOMAD Pro 2 X-ray System is designed to be used for both adult and pediatric patients by trained dentists and dental professionals for producing diagnostic dental X-ray images. Caution: U.S. Federal law restricts this device to sale by or on the order of a physician or other licensed practitioner. -
Page 7: Charging The Handsets
If the first bar illuminates green, but then all of the bars illuminate red, the charging cradle and/or handset will need to be sent to an Aribex authorized service center for repairs or replacement. Authorized service will Contact Aribex for service also be required if no illumination occurs upon sliding the handset onto the charging cradle. -
Page 8: Safety Precautions
2.0 Safety Precautions 2.1 Radiation Safety The NOMAD Pro 2 was designed to be used in both clinical settings (e.g., a dental office) and controlled settings where transportation or use of other X-ray devices might be prohibitive due to the device’s size and/or mobility. - Page 9 • Do not enable the NOMAD Pro 2 until patient and operator are positioned and ready for the exposure, preventing interruption and inadvertent exposure of anyone to X-rays. • Do not attempt an exposure if anyone other than the patient is in the direct beam. If others are assisting, then they should wear protective covering as required by local jurisdictions.
-
Page 10: Studies And Data On Leakage And Scatter
IEC regulations stipulate that devices stay below 0.25mGy/hr, an even tighter limit. In response to these regulations, Aribex will only ship product that tests below 0.02mGy/hr for leakage, a self-imposed requirement 44 times more stringent than FDA regulations and 12.5 times more stringent than IEC regulations. - Page 11 As demonstrated by Chart 2, NOMAD Pro 2 whole body annual levels are less than 0.6% of the annual occupational dose limit.
-
Page 12: Usage And Duty Cycle
2.3 Usage and Duty Cycle As a safety feature, the NOMAD Pro 2 will not emit X-rays with insufficient voltage (low battery). The NOMAD Pro 2 is also designed to avoid damage from overheating. The minimum duty cycle rating for maximum exposure (the relationship between duration and frequency of exposures taken during a rolling 60 second period) is 1:60. -
Page 13: Cleaning
For a further level of security, securely store handsets in a separate location. • Take steps to ensure the NOMAD Pro 2 will not be knocked to the ground when not in use. Lay it on its top, side, or in the accessory tabletop stand (08500037). Power will... - Page 14 • Some battery charge may be lost during extended inactivity (leading to fewer exposures between handset charging cycles). • The NOMAD Pro 2 should not be operated if it has been dropped or if performance degrades; it should be returned to Aribex or an authorized service center for an evaluation.
-
Page 15: Setup And Power Check
With the NOMAD Pro 2 placed bottom up on a secure surface, properly orient and carefully slide the charged handset onto the base of the NOMAD Pro 2. (A properly oriented handset should click into place with firm pressure.) The clicking sound ensures the locking mechanism has secured the NOMAD Pro 2 to the handset. -
Page 16: Optional Checks
The NOMAD Pro 2 has an X-ray disable feature that allows the X-rays to be disabled for training purposes. Test firing this X-ray unit may otherwise be dangerous to the testing technician or bystanders. -
Page 17: Operation
NOMAD Pro 2. Press and release the Power button to turn on NOMAD Pro 2. An audible double tone and an active display panel indicate the device has power. Technique factors are redisplayed according to what was displayed when the device was turned off, along with the last saved time setting. -
Page 18: Ready The Device
The illuminated green LED, the message Ready on the display panel, and a double tone alert confirm that NOMAD Pro 2 is prepared to fire X-rays. The Ready state continues until either an exposure is initiated or timeout occurs after 15 seconds of... -
Page 19: Initiating And Completing An X-Ray Exposure
4.6 Powering Off Press and release the Power button to turn NOMAD Pro 2 off. The NOMAD Pro 2 also automatically shuts off after approximately three minutes of inactivity. The NOMAD Pro 2 display darkens, accompanied by a tone to indicate shut-down. -
Page 20: Exposure Techniques
Avoid touching the patient with the cone or backscatter shield; disposable plastic coverings can be used to prevent cross-contamination. Determine what NOMAD Pro 2 exposure time settings deliver optimal results for the type of imaging (digital or film-based) that is used on a regular basis. -
Page 21: Ensuring Image Quality
• DC voltage X-ray generation is efficient in delivering energy at the level optimized for diagnostics, with shorter exposure times required. • The smaller the focal spot, the better the resolution. The NOMAD Pro 2 has a small 0.4mm focal spot. -
Page 22: Technique Factors Settings And Adjustments
Please use caution when configuring the NOMAD Pro 2 by considering the patient’s age, size, body habitus, and clinical indication when verifying exposure time settings. -
Page 23: Settings Menu
Reset Defaults menu item. 4.10 Settings Menu The NOMAD Pro 2 menus allow the operator to customize settings according to individual preferences. To access the Main Menu, press and hold down the Select button for three seconds. - Page 24 Menu Item Function The device will display two counters. One is the Overall History Counter, which displays the total lifetime X-ray shots for the device. The other, Trip Counter, can at any time be reset to zero by the operator. When Reset is selected and the Select button is pressed, the user will be prompted with the message Reset Trip Counter?
-
Page 25: Handset Replacement And Care
• Risk of fire or explosion exists if batteries inside the handset are replaced by unauthorized service personnel; do not use batteries from other sources. • Properly dispose of spent or damaged handsets; return to Aribex or an authorized distributor for replacement and recycling. Do not place in municipal waste stream. -
Page 26: Nomad Pro 2 Care And Upkeep
6.1 Alarms and Alerts The visual and audible alarms signal a programmed action designed to prevent harm to operators, patients, and/or the NOMAD Pro 2. The visual/audible alerts confirm normal conditions or draw the operator’s attention to a required action. - Page 27 & A LERTS LARMS ISUAL AND UDIBLE NDICATORS UNCTION ESOLUTION ISUAL UDIBLE X-ray Exposure Alert At the end of the successful Single tone for exposure the yellow LED turns off, duration of exposure and the panel briefly displays X-ray (X-ray exposure Complete alert and the screen alert) returns to the at-rest state.
- Page 28 System Failure Section 6.2 Troubleshooting Alarm Descending tone (6.2.8) or an Aribex authorized service center. Handset Section 6.2 Troubleshooting Failure Alarm 5 audible tones (6.2.12) or an Aribex authorized...
-
Page 29: Troubleshooting
Aribex for an evaluation. 6.2 Troubleshooting If you encounter results and/or errors in the operation of the NOMAD Pro 2 that are not explained in the previous sections, check the following table on user troubleshooting to determine the need for authorized service. - Page 30 Device Symptom Potential Problem Corrective Action NOMAD Pro 2 times out Manually turn on NOMAD Pro 2 when you after about three minutes are ready to use the device. of inactivity. 6.2.7 NOMAD Pro 2 automatically shuts down. A different problem exists...
-
Page 31: Maintenance And Repair
Sheets. On-going Maintenance: Observe the following steps for on-going maintenance of the NOMAD Pro 2. 1. In order to ensure device functionality, schedule the NOMAD Pro 2 for a maintenance inspection at Aribex every five years. 2. Review Section 1.1 Intended Use/Indications for Use and product labeling periodically in order to verify understanding of indications for use for the NOMAD Pro 2. - Page 32 10. Ensure that the operator of the system has received a copy of the operator manual. • The NOMAD Pro 2 should not be operated if it has been dropped, if performance degrades, or if the backscatter shield has been broken or compromised in any way;...
-
Page 33: Optional Calibration Checks
7.2 Optional Calibration Checks The NOMAD Pro 2 is factory calibrated and tested prior to release (see your Certificate of Conformance) and there are no adjustment options. A self-diagnostic is completed each time an exposure is taken. However, the optional checks listed below may be performed by a qualified technician as desired. -
Page 34: Maintenance Log Sheets
8. Exposure Termination 9. X-Rays On LED and Audible Signal 10. Operator Manual 11. Calibration Checks (Optional) *It is recommended to replace handsets after years 2 and 4. Contact Aribex for more information on covering battery replacement through the NOMAD Care Plan. -
Page 35: Repair
Aribex Please protect the environment, and do not improperly dispose of any part of the NOMAD Pro 2 system, the handsets, the charging cradle, or the AC power supply. At end of life, return these items to Aribex for replacement, and proper disposal or recycling. -
Page 36: Technical Description
(with less than 17% alcohol content) or a cloth to wipe the exterior surfaces of the NOMAD Pro 2 and charger. Do not use cleaners intended for hard surfaces, since certain chemical combinations may deteriorate the NOMAD Pro 2 plastic prematurely. - Page 37 8000 X-ray meter from Victoreen. Tube current (mA) is sensed across a series connected resistor with an accuracy of ±1% and measured using a digital multimeter, prior to encapsulation; the NOMAD Pro 2 has no provision for external measurement of beam current after final manufacture. Exposure time is measured during the entire exposure, references to 75% rise/fall, using the NERO mAx model 8000 X-ray meter.
-
Page 38: X-Ray Tube Specifications And Characteristics
8.2 X-ray Tube Specifications and Characteristics The KL 11-0.4-70 is designed for intra-oral dental imaging by an X-ray unit and is available for nominal tube voltage with self-rectified or constant potential circuit – manufactured by Kailong. Nominal tube voltage 70kV Nominal focal spot (IEC 60336:1993) 0.4mm Maximum anode heat content... - Page 39 Rating Chart Thermal Characteristics Chart NOTE: The X-ray source assembly heating and cooling curves are equivalent to the anode heating curves shown here. anode heating curves Maximum continuous heat dissipation will be made available upon request from Aribex. anode cooling curve...
- Page 40 X-ray Source Focal Spot X-ray Beam X-ray Source Focal Spot Reference Axis at 90° to Target/Receptor...
-
Page 41: Emc Data
The following tables describe the tests performed and the status of the testing. The NOMAD Pro 2 uses RF energy only for its internal function. Its RF emissions are very low and are not likely to cause any interference in nearby electronic equipment. - Page 42 In Accordance with Test Type Document Document Title Electromagnetic Compatibility, Testing Power Frequency Magnetic IEC 61000-4-8:1993, and Measurement Techniques for Power Field Immunity A1:2000 Frequency Magnetic Field, Immunity Test NOTE: The tests documented in the table above are the only tests required for this product as it is a battery operated device and the AC Adapter (CP-0062) is certified.
- Page 43 (1) year from the date of purchase. The liability of Aribex is limited to repair or replacement of any parts that Aribex or its authorized resellers determine to be defective. Contact Aribex for a Return Material Authorization (RMA) number and shipping instructions.
- Page 44 0413 ISO 13485 / ISO 9001 ERTIFIED OMPANY © Aribex 2017 All Rights Reserved English is the original draft language for this manual. Phone: +1-866-340-5522 Aribex Fax: +1-800-659-4299 11727 Fruehauf Dr Email: support@aribex.com Charlotte, NC 28273 http://www.aribex.com U.S.A. MT Promedt Consulting, Altenhofstr. 80, 66386 St. Ingbert, Germany...
Need help?
Do you have a question about the Nomad Pro 2 and is the answer not in the manual?
Questions and answers