
Related Manuals for Philips ColorBlaze TRX


Summary of Contents for Philips ColorBlaze TRX
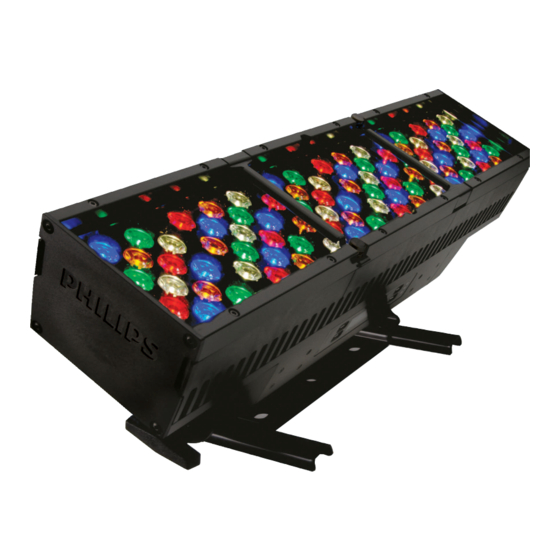
- Page 1 ColorBlaze TRX Advanced theatrical and rental LED batten with intelligent RGBAW light...
- Page 2 Advanced theatrical and rental LED batten with intelligent RGBAW light ColorBlaze TRX is a versatile, feature-packed linear RGBAW LED fixture with industry-leading light output. Available in two-foot and six-foot lengths, these powerful, stage-ready fixtures incorporate channels of red, green, blue, amber, and white LED sources to achieve superior color precision and a dramatically expanded color palette.
- Page 3 Photometrics Photometric data is based on test results from an independent NIST traceable testing lab. IES data is available at www.philipscolorkinetics.com/support/ies. ColorBlaze TRX Polar Candela Distribution Illuminance at Distance Candela Table 2 ft (610 mm), no spread lens Center Beam fc Beam Width 90º...
- Page 4 ColorBlaze TRX Polar Candela Distribution Illuminance at Distance Candela Table 2 ft (610 mm), 32° spread lens Center Beam fc Beam Width 90º 22.5 45.0 67.5 90.0 Cd: 0 0 11208 11208 11208 11208 11208 2.9 ft 2.8 ft 701 fc...
- Page 5 ColorBlaze TRX Polar Candela Distribution Illuminance at Distance Candela Table 2 ft (610 mm), 60° x 32° spread lens Center Beam fc Beam Width 22.5 45.0 67.5 90.0 Cd: 0 90º 0 10197 10197 10197 10197 10197 2.0 ft 4.8 ft...
-
Page 6: Specifications
(1402 mm) 16-bit control, RGBAW, and RGB modes. 9.3 in (236 mm) Control 1.4 in Philips full range of controllers, including Video System Manager Pro (35 mm) Control System and Light System Manager, or third-party controllers 1.4 in Dimensions 9.3 x 24 x 6.7 in 9.3 x 72 x 6.7 in... - Page 7 Fixtures, Lenses, and Replacement Parts Included in the box ColorBlaze TRX fixtures are part of a complete system which includes a full range of ColorBlaze TRX fixture Philips controllers, including Video System Manager Pro, Light System Manager, and Neutrik PowerCon connector...
- Page 8 It is the responsibility of the contractor, installer, purchaser, owner, and user to Refer to the ColorBlaze TRX Installation Instructions for specific warning and caution install, maintain, and operate ColorBlaze TRX fixtures in such a manner as to comply statements. with all applicable codes, state and local laws, ordinances, and regulations. Consult with the appropriate electrical inspector to ensure compliance.
- Page 9 — 2 ft (610 mm) or 6 ft (1.8 m). When installing fixtures end-to-end, you can create virtual segments that span multiple fixtures. • You can mix 2 ft and 6 ft ColorBlaze TRX fixtures in a single run. A mixture of fixture lengths can offer flexibility in architectural applications where you need to install fixtures around corners or in confined areas.
- Page 10 • In Ethernet networks, maximum data cables lengths are 328 ft (100 m) between Ethernet devices without a repeater (for example, controller to switch, switch to ColorBlaze TRX fixture, or fixture to fixture). You can connect up to 15 ColorBlaze TRX fixtures in series.
- Page 11 Connect Fixture to Power ColorBlaze TRX has integrated, auto-switching power supplies that automatically adjust to any 50 / 60 Hz power source from 100 – 240 V. ColorBlaze TRX fixtures connect directly to line power using the included Neutrik PowerCon connector and the appropriate length of power cable.
- Page 12 Address and Configure the Fixtures Make sure the power is ON before addressing and configuring fixtures. When in DMX / Ethernet mode, each ColorBlaze TRX fixture uses a set of sequential DMX addresses. A ColorBlaze TRX fixture uses from 3 to 216 DMX...
- Page 13 Keep the following considerations in mind when setting the number of fixture groups: • You can mix 2 ft and 6 ft ColorBlaze TRX fixtures in the same series while maintaining consistent segment lengths of 4 in, 8 in, 12 in, or 24 in.
- Page 14 Standalone Mode By default, the input source of a ColorBlaze TRX fixture is DMX / Ethernet. When in DMX / Ethernet mode, ColorBlaze TRX listens for and responds to DMX or Ethernet data transmitted to the lighting network by a console or controller.
- Page 15 Master / Slave Mode By default, ColorBlaze TRX fixtures are in Slave mode — that is, they respond to DMX or Ethernet data in the network (unless they are also in Standalone mode). You can configure a ColorBlaze TRX fixture to act as a master controller for ColorBlaze TRX fixtures that follow it in a run by putting the fixture in Master mode.
- Page 16 As shown below, buttons 1 – 8 on the Ethernet Controller Keypad activate triggers 1 – 8 stored on a ColorBlaze TRX fixture's SD card. If the fixture is currently playing a pre-set show, pressing buttons 1 – 8 stops the pre-set show and activates the trigger associated with the pressed button.
- Page 17 You can enable a DMX trigger to implement convenient playback of stored shows from a lighting console. To enable a DMX trigger on a ColorBlaze TRX fixture, you assign an unused DMX address to serve as the trigger channel. Then you assign that DMX address to a channel on your lighting console and control the value —...
- Page 18 Install Spread Lenses (Optional) Spread lenses of 22°, 32°, 60°x 32°, or 32° x 12° rest in the ColorBlaze TRX lens rails, and are held in place by lens clips integrated into the fixture housing. Spread lenses are available in 2 ft sections, and can be laid end-to-end for full coverage in 6 ft fixtures.
- Page 19 Ensure that the installation is suitable and safe and that the hardware is properly Because 6 ft ColorBlaze TRX fixtures rated for the task. When mounting ColorBlaze TRX fixtures on the floor or a base, are bulky and weigh 43 lb (19.5 kg), you also ensure that the fixture sits flush to the surface.
- Page 20 Make sure the power is OFF before connecting ColorBlaze TRX fixtures. 1. Supply power to the first ColorBlaze TRX fixture in a series by plugging a power cable with Neutrik PowerCon connector into the blue Power In port on the input side of the fixture.
- Page 21 We recommend using 22 AWG 5-pin DMX, connect data directly from an Ethernet or DMX controller’s data output XLR shielded cable with all five pins wired. port to a data input port on the first ColorBlaze TRX fixture in a series. XLR-5 RJ45 3.
- Page 22 4. If connecting in series, repeat steps 3 and 4, as needed, for each ColorBlaze TRX fixture in the series. 5. In a DMX network, insert a standard data terminator in a data output port on the last fixture in the series.
- Page 23 Overview of the Onboard Menus The ColorBlaze TRX onboard menus appear in a control panel on the front of the fixture, with the fixture's input side to the left and the output side to the right. The control panel displays menu option names, icons indicating current button behavior, and fixture configuration and status information.
- Page 24 ColorBlaze TRX On-Board Menus DMX Start Address Input Source Configuration RGBAW in / out RGB in / out 1–512 DMX / Ethernet Color Control Mode RGB > RGBAW Standalone 8 Bit 8 / 16 Bit Control 16 Bit Fixed Color 2 ft.
- Page 25 LED Controller 6A LED Controller 9A LED Controller 3B LED Controller 6B LED Controller 9B Fan 2A Fan 1A Fan 3A Fan Speeds Fan 2B Fan 1B Fan 3B Fixture Profiles Reset System Settings Update LED Firmware ColorBlaze TRX Product Guide...
- Page 26 ColorBlaze TRX can work in either DMX / Ethernet mode or Standalone mode. When in DMX / Ethernet mode, ColorBlaze TRX responds to data input from a DMX or Ethernet controller. In Standalone mode, ColorBlaze TRX ignores any data input and displays a pre-set show, such as Fixed Color, Color Wash, or Chasing Rainbow.
- Page 27 Displaying and Setting the DMX Start Address By default, the DMX start address of a ColorBlaze TRX fixture is 1. ColorBlaze TRX uses a set of consecutive DMX addresses, beginning with the DMX start address. A ColorBlaze TRX fixture uses from 3 to 216 DMX channels, depending on color...
- Page 28 If a fixture has more nodes than the effect width, the effect will "tile" or repeat. Select Width, then select the pixel width for the effect, from 1 to 170. Press Enter to confirm your selection. ColorBlaze TRX Product Guide...
- Page 29 Storing and Playing ColorPlay 3 Shows and Triggers ColorBlaze TRX contains an installed SD card to which you can download light shows and triggers from ColorPlay 3, light show authoring and configuration software from For complete details on authoring Philips Color Kinetics. Commands on the Input Source > Standalone > Stored Show ColorPlay 3 light shows, configuring triggers, menu let you trigger shows or play show files directly from the SD card.
- Page 30 Setting Segment Size and Segment Order ColorBlaze TRX fixtures have variable segment sizes, ranging from 4 in to the total fixture length (24 in or 72 in). Each segment functions as a separate, individually controllable node or pixel. Increasing the number of segments increases the number of consecutive DMX addresses that a fixture consumes.
- Page 31 3. Press Enter to confirm your selection. Using Master / Slave Mode When in master mode, a ColorBlaze TRX fixture acts as a master controller for fixtures that follow it in a run. When connected together properly, downstream slave fixtures can be configured to show the same output as the master fixture.
- Page 32 Configuring DMX Triggers You can enable a DMX trigger to implement convenient playback of stored triggers from a lighting console. To enable a DMX trigger on a ColorBlaze TRX fixture, you For guidelines on setting up DMX use the DMX Trigger command on the fixture's Configuration menu to assign an triggers and a table of values, refer to "Using...
- Page 33 When a fixture is in Master mode and is configured to output KiNET data, you can set the KiNET output mode (1 or 2) to add other Philips Color Kinetics devices that Refer to "Master / Slave Mode" on page accept Ethernet input to the end of the run.
- Page 34 Interpreting and Setting the Brightness of the Status LEDs Status LEDs on the right side of the control panel provide feedback about the current functioning of a ColorBlaze TRX fixture Status LED Modes Status LED Mode Meaning Power Status Blue...
- Page 35 Setting Display Timeout The ColorBlaze TRX onboard menus time out and lock after a period of inactivity. To set menu display timeout: ► 1. Select Configuration > User Interface > Display Timeout. 2. To set a timeout, select 15 seconds, 30 seconds, 1 minute, or two minutes.
- Page 36 Resetting System Settings You can load a fixture's default profile at any time to restore the fixture’s initial system settings. To restore a fixture’s initial system settings: ► Select Utilities > Fixture Profiles > Reset System Settings. ▪ ColorBlaze TRX Product Guide...
- Page 37 Switch 1. Connect a computer running QuickPlay Pro to an available port on an Ethernet switch, or to the data input on the first ColorBlaze TRX fixture in a series, using a standard RJ45 patch cable. 2. Run QuickPlay Pro, and click Fixture Configuration.
- Page 38 Configuring Pre-Set Shows with QuickPlay Pro When a ColorBlaze TRX show is in Standalone mode, the fixture can display one of a set of pre-set light shows. By default, ColorBlaze TRX displays Fixed Color with You can program all discovered ColorBlaze all LED channels set to 0 brightness (fixture is black).
- Page 39 (0% – 100%), width (1 – 170 pixels) and brightness (0% – 100%). 4. To apply the selected settings to all discovered ColorBlaze TRX fixtures, click the Program All ColorBlaze TRX checkbox. 5. When you're ready, click Program to apply all changes.
- Page 40 7. Select the ColorBlaze TRX fixture you want to update. 8. Click PROGRAM. 9. Repeat steps 7 and 8 for each ColorBlaze TRX fixture you want to update. Philips Color Kinetics Copyright © 2011 - 2012 Philips Solid-State Lighting Solutions, Inc. All rights reserved.
Need help?
Do you have a question about the ColorBlaze TRX and is the answer not in the manual?
Questions and answers