Table of Contents
Advertisement
Quick Links
Advertisement
Table of Contents

Related Manuals for digicon dTower


Summary of Contents for digicon dTower
- Page 1 Product Manual Tower...
- Page 3 Digicon S.A. Code: 069.31.221 English Version: 0 - This manual was elaborated by: Digicon S.A. Controle Eletrônico para Mecânica Documentation Sector - EDS...
-
Page 4: Table Of Contents
Connecting control signals ................Configuration of controller board ..............Technical characteristics ................Dimensions ....................Other information ..................Cleaning ....................Maintenance and preservation of doors ............Maintenance and preservation of dTower (glasses and stainless steel sheets) ..Warranty and technical assistance .............. -
Page 5: Important Instructions
You can see, below, the symbols that will appear in this manual, signaling important moments. It is essential to pay attention to them. TIP: Indicates something Digicon considers important. CAUTION: Indicates a moment of extreme caution when handling the equipment/product. -
Page 6: Orientations
Keep this manual for future consultations. Ÿ Digicon reserves its right to alter its products at any moment to adapt them to Ÿ more recent technical advancements. Digicon maintains its right to alter the information contained in this manual Ÿ... -
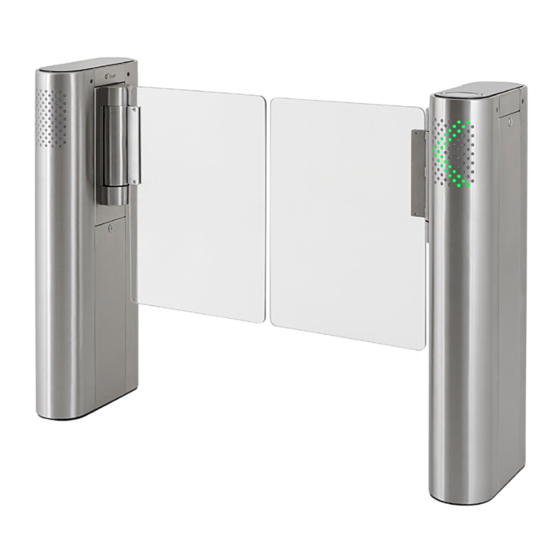
Page 7: Features Of Dtower
Tower 4. Features of dTower -Innovative design, according to the dGate and dFlow lines; -Robust solution, with motorized system and control with proprietary technology; -Reinforced structure for fixing it to the ground; -Available in stainless steel and carbon steel painted in powdered epoxy;... -
Page 8: Dtower Pictograms
The orientation pictogram is installed on the edges of the equipment and is represented by a green arrow > or red x. The red pictogram informs the user that dTower is not operating in the indicated direction or that passage is not allowed, or even that it is busy. -
Page 9: Installing And Assembling
As the items inside the package can vary (since the equipment is customizable), it is important to perform a cautious visual inspection before installing and assembling the turnstile. A checklist that works as a guide during inspection accompanies all Digicon packages. In case of missing pieces, immediately contact the Digicon representative responsible for the sale. -
Page 10: Fixing Dtower To The Ground
Tower 5.2 Fixing dTower to the ground The image below indicates the points for fixing the product to the ground. The surface must be steady and leveled to ensure good performance for the passage-controlling sensor and to maintain the doors aligned. - Page 11 Accessibility to buildings, furniture, space and urban equipment. With the fixing perforations ready, install the fixing threaded bars according to the drawing below. Digicon recommends using the chemical capsule anchor system by Hilti ( www.hilti.com.br INFORMATION: We recommend u s i n g t h e c h e m i c a l a n c h o r a g e ;...
- Page 12 Tower Step-by-Step: Use the 12mm (0,47'') drill to drill the hole with depth of 90mm (Threaded bar M10); Clean the hole with an air blower or a vacuum to remove any debris; Place the threaded bar inside the hole and measure the depth. The bar has a mark that must be leveled with the ground;...
- Page 13 Tower 9. Tightening torque and other information can be seen in the table below: Installation details Data according to the ETA-05/0255/0256/0257, edition 2010-03-01/2006-01-20 Anchorage diameter Nominal diameter of drill [mm] Effective depth of hole and [mm] anchorage Diameter of hole on sheet [mm] Minimum space [mm]...
-
Page 14: Accessing Dtower After Assembly
Tower 5.3 Accessing dTower after assembly After dTower is installed and assembled, access to the interior of the equipment can be done with the key that accompanies the equipment, in 2 ways: 1. Via the upper glass cover: access the readers, pictograms and engine board;... -
Page 15: Connections Among Equipment Pieces
Tower 5.4 Connections among equipment pieces: Interconnection cables can be found in the dTower Receptor and must pass through the ducts as seen below: Interconnection duct for communication cables Interconnection duct for CA cable Conduit with 50mm diameter Exit Cable 4"x4"... -
Page 16: Connection To Power And Data Networks
1º With inner source: Power supply to the equipment must be 100 to 240Vca. 2º With outer source: Power supply must be 24Vcc (+/- 5%) by module. Digicon recommends using the norm NBR 5410 as reference for electrical installations of equipment pieces. -
Page 17: Connecting Control Signals
Tower 5.6 Connecting control signals Enabling dry contact with 2 relays: Dry Contact Clockwise Enab. Anti- clockwise Enab. 7654321 Enabling both directions with only 1 relay: Dry contact (simultaneous) Relay Integrator controller 7654321... - Page 18 Tower Enabling by solid state (positive, positive voltage): Anti- clockwise Vcc = 5~24V Clockwise Integrator controller 654321 Enabling solid state (negative) Vcc = 5~24V Anti- clockwise Clockwise 54321 Integrator controller...
- Page 19 Tower Confirming passage Vcc - True logical level, configured in “disk emulation” DIP Ds2 n°7 in ON. Positive digital input Integrator controller 4321 Clockwise turn Anti- clockwise turn...
- Page 20 Tower Confirming passage by disk emulation Firmware version 2.0.0 or superior Ÿ Confirming passage by pulse Confirmation of passage by pulse or “disk emulation” can be configured through the dipswitch Ds2 n°7; if it is on, it will emulate the disk; if it is off, pulse will be generated when passing.
- Page 21 Tower Connecting electromechanical counter Depends on counter voltage Protection diode If using inductive counter, protection diode is necessary Counter Inductive counter...
-
Page 22: Configuration Of Controller Board
5.7 Configuration of controller board Tower The switch (or dipswitch) DS1 allows programming the following actions: - passage direction; - Maximum time for turns; - NO inputs (relay or pushbutton contact normally open and without input voltage), enabling passage in face of these signals; or NC inputs (relay or pushbutton contact usually closed and with input voltage), enabling passage in the absence of these signals;... - Page 23 Tower To program DS2, put each pin in the desired position, according to the table below: DIP SWITCH DS2 SWITCH RESERVED RESERVED RESERVED RESERVED RESERVED RESERVED RESERVED RESERVED RESERVED RESERVED Retention time of card in the box for reading 1s Retention time of card in the box for reading 2s Disk emulation for MCA Version FW >= 2.0.0.0 Disables Disk Emulation Version FW >= 2.0.0.0...
-
Page 24: Technical Characteristics
Tower 6. Technical characteristics 6.1 Dimensions (36,220") /520 (20,472") (8,976") 48(1,889") 404(15,905") INFORMATION: Measures are provided in millimeters and (inches). -
Page 25: Other Information
Tower 6.2 Other information Characteristics Technical Data 100 - 240 Vca Power supply (inner source) (Automatic selection) Power supply (outer source) 24 Vcc/5A (+/-5%) (one source per module) 50 - 60 Hz Frequency Average time for 1 second opening/closing door 0°C and 50°C Operational temperature 40 kg per packed... -
Page 26: Cleaning
Every six months, check the attachment of the doors to their supports. Ÿ 7.2 Maintenance and preservation of dTower (glasses and stainless steel sheets) Clean the equipment monthly, at least. Adjust the frequency of cleaning according Ÿ... -
Page 27: Warranty And Technical Assistance
Tower 8. Warranty and Technical Assistance Digicon is responsible for the project, skilled labor, and quality of the materials used in the manufacturing of our products, ensuring that the equipment and all parts are free of manufacturing defects or problems. Digicon commits itself to replace or repair, as we choose, any part or equipment presenting manufacturing defects without any costs to the buyer, in our factory in Gravataí... - Page 28 RS CEP 94045 -420 Vendas: (0xx51) 3489.8700 / 3489.8745 Assistência técnica: (0xx51) 3489.8903 E-mail: vendas.acesso@digicon.com.br Filial/ SP Desenvolvimento, Assistência Técnica e Vendas Rua São Paulo, 82 - Alphaville. Barueri/ SP CEP 06465 -130 Fone: (0xx11) 3738.3500 E-mail: vendas.acesso@digicon.com.br Home page: www.digicon.com.br...
Need help?
Do you have a question about the dTower and is the answer not in the manual?
Questions and answers