Thor Kitchen HRG4801U Manual
Hrg professional gas range
Hide thumbs
Also See for HRG4801U:
- Manual (58 pages) ,
- User manual (56 pages) ,
- Operating instructions manual (11 pages)
Table of Contents
Advertisement
Advertisement
Table of Contents

Related Manuals for Thor Kitchen HRG4801U


Summary of Contents for Thor Kitchen HRG4801U
- Page 1 All Models HRG PROFESSIONAL GAS RANGE...
-
Page 2: Table Of Contents
Contents Table of Contents WARNINGS ................................3 WELCOME ................................. 4 BEFORE YOU START ..............................5 SAFETY AND WARNINGS ............................6 .................................. 6 AFETY YMBOLS ..............................7 LECTRICAL HOCK AZARD ................................... 7 IPPING AZARD ................................8 XPLOSION AZARD ..................................8 AZARD ................................ - Page 3 Contents OVEN FUNCTION..............................36 ..............................36 ATURAL IRFLOW .................................. 36 NFRARED ROIL ................................36 ONVECTION ................................37 ONVECTION OAST ................................. 37 ONVECTION EFROST ..................................37 EFROSTING ..............................37 ONVECTION EHYDRATION BROILER OPERATION .............................. 38 ..................................38 REHEATING ................................... 38 ROIL ..................................
-
Page 4: Warnings
Contents 1. Warnings These are the most critical warnings summarized below. • If the instructions in this manual are not followed exactly, a fire or explosion may result, causing property damage, personal injury or death. • Do not store or use gasoline or other flammable substances and liquids near this or other appliance, •... -
Page 5: Welcome
Please keep this manual for future reference, as it contains answers to questions that you might have as you begin to cook. Thank you, Thor Group This manual applies to the following models’ series: HRG48” HRG4801U HRG4802U HRG4803U HRG4804U HRG4805U HRG4808U HRG4805U-1... -
Page 6: Before You Start
Safety and Warnings 3. Before you start Make sure that the anti-tip of the range has been properly installed. Find the model and serial numbers on the CSA label in the bottom right-hand corner of the backboard. Note these numbers down for future reference in the space provided in section ‘Warranty and service’. -
Page 7: Safety And Warnings
Safety and Warnings 4. Safety and Warnings Safety Symbols Symbol Definition This will alert you to potential personal or property safety hazards. Obey all safety rules to avoid any property damage, personal injury or death WARNING indicates a potentially hazardous situation, which, if not avoided, could result in serious injury or death CAUTION indicates a moderate hazardous situation, which, if not avoided, could result in minor or moderate injury... -
Page 8: Electrical Shock Hazard
Safety and warnings Electrical Shock Hazard ✓ Before removing a faulty oven light bulb, make sure you turn OFF the power to the range at the main fuse or circuit breaker panel. If you don’t know how to do this, contact an electrician. ✓... -
Page 9: Explosion Hazard
Safety and warnings Explosion Hazard ✓ If you smell gas, do not use the appliance. Open a window or door to let the gas escape, then follow the instructions on the inside front cover of this manual. ✓ Do not use water on grease fires. A violent steam explosion may result. ✓... -
Page 10: Poisoning Hazard
Safety and warnings Poisoning Hazard ✓ Never cover any slots, holes or passages in the oven bottom or cover an entire rack or the oven floor with materials such as aluminum foil. Doing so blocks airflow through the oven and may cause carbon monoxide poisoning. - Page 11 Safety and warnings Do not install or operate stove if damaged. which ensures that the oven operates efficiently. Do not operate the appliance if it is damaged or not Care should be taken not to rub, damage or move it. working properly.
- Page 12 Safety and warnings Always disconnect power to appliance before any Always turn pot handles to the side or back of the type of servicing. range. Do not turn handles towards the area where they are easily burned. Handles should not extend over the adjacent burners.
-
Page 13: Stove Models
Stove Models 5. Stove Models HRG 36” Freestanding gas range Features: • 36 Inch Freestanding Gas Range • Convection • Infrared Broil Burner • Dual Burners • Continuous Grates • 6 Sealed Burners • Automatic Re-Ignition • Porcelain Drip Pan •... -
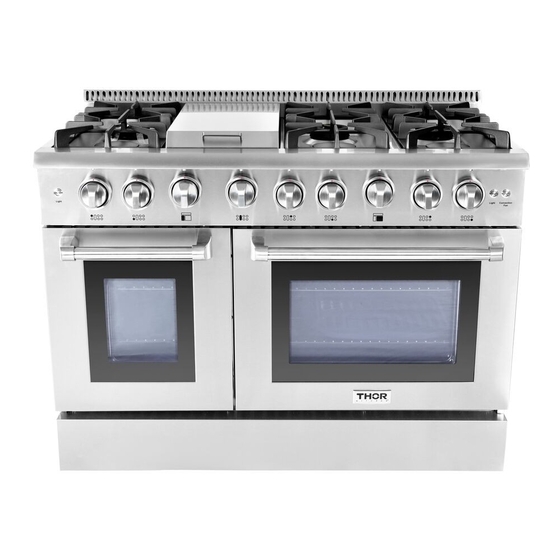
Page 14: Hrg 48" Freestanding Gas Range
Stove Models HRG 48” Freestanding Gas Range Features: • Convection • Griddle • Infrared Broil Burner • 6 Sealed Burners • Dual Burners • Automatic Re-Ignition • Continuous Grates • 2 Ovens • Total cu. ft. Capacity • Blue Porcelain Interior... -
Page 15: Hrg 30" Freestanding Gas Range
Stove Models HRG 30” Freestanding gas range Features: • Convection • Dual Burner • Continuous Grates • 4 Sealed Burners • 4.2 cu. ft. Capacity • Blue Porcelain Oven Porcelain Drip Pan •... -
Page 16: List Of Components Legend
Stove Models List of Components Legend... -
Page 17: Gas Supply Requirements
Dimension and Clearance 6. Gas Supply Requirements Installation of this range must conform with local codes, or in the absence of local codes, with national Fuel Gas Code,ANSIZ223.1 / NFPA 54. In Canada, installation must conform to the current natural Gas Installation /code, CAN 1-1.1-M81 and with local codes where applicable. -
Page 18: Dimensions And Clearances
Dimension and Clearance The appliance shall not be used for space heating. This information is based on safety considerations. All openings in the wall behind the appliance and in the floor under the appliance shall be sealed. Dimensions and Clearances The range may be installed flush to the rear wall. - Page 19 Dimension and Clearance The maximum depth of cabinets installed above cooking tops be 13 in (330mm). The maximum depth of cabinets installed above cooking tops be 13 in (330mm). The maximum depth of cabinets installed above cooking tops be 13 in (330mm).
- Page 20 Dimension and Clearance 30” Gas Range Clearance...
- Page 21 Dimension and Clearance 36” Gas Range Clearance...
- Page 22 Dimension and Clearance 48” Gas Range Clearance...
-
Page 23: Top Hood And Cabinet Specifications
Dimension and Clearance Top Hood and cabinet specifications Minimum Condition clearance allowed Clearance between the top of the cooking surface and the bottom of an 36” unprotected wood or metal cabinet for any model other than HRG4808U,HRG4808U-1 (or any coming 48-inch model) dual field ranges. - Page 24 Dimension and Clearance...
-
Page 25: Electric Power Supply Requirements
Dimension and Clearance Electric Power Supply Requirements Your range must be electrically grounded in accordance with local codes or, in the absence of local codes, in accordance with the National Electrical Code (ANSI/NFPA 70, latest edition). In Canada, electrical grounding must be in accordance with the current CSA C22.1 Canadian Electrical Code Part 1 and/or local codes. - Page 26 Dimension and Clearance HRG3618U / HRG3617U Back Panel Layout...
- Page 27 Dimension and Clearance HRG4808U Back Panel Layout...
-
Page 28: Electrical Grounding Instructions
Gas Supply Requirements Electrical Grounding Instructions This indoor gas cooking appliance is equipped with a three-prong (grounding) plug for your protection against shock hazard and should be plugged directly into a properly grounded three- pronged receptacle. Where a standard two-prong wall receptacle is encountered, it is the responsibility and obligation of the customer to have it replaced with a properly grounded three-prong wall receptacle. -
Page 29: After Installation
Gas Supply Requirements Install male ” or ” ( ” refers to 48-inch gas range) flare union adapter to the NPT internal thread of the manual shut-off valve, taking care to secure the shut-off valve to keep it from turning. The gas supply pressure for checking the regulator setting is 6 in.w.c. -
Page 30: First Use
First Use 10. First Use Conditioning the oven Conditioning will burn off any manufacturing residues and ensure that you get the best results right from the start. Follow these steps to condition your new stove’s oven: Insert all the shelves. See ‘Positioning the shelves’ for instructions. Turn on the ventilation hood above your range on high. - Page 31 First Use Hold the front of both sides of the shelf firmly to keep it in horizontal. Put the shelf on the slot horizontally.
-
Page 32: Cooktop Safety Guidelines
Cook Top Safety Guidelines Lift the front about 15°upward till the tag of the shelf clear the safety stop of the side rack. Then lower the shelf horizontally and slide all the way into the oven. Other shelves can be installed this way. -
Page 33: Surface Burner Ignition
Cook Top Safety Guidelines Surface Burner Ignition To light the top burners, push and turn the appropriate control knob counter clockwise to the “HI” position. You will hear a clicking noise – the sound of the electric spark igniting the burner. Once burner ignition has been achieved, then turn the burner control knob to adjust the desired heat setting. -
Page 34: Power Failure
Cook Top Safety Guidelines Power Failure If the gas does not ignite within four seconds, turn off the valve and allow at least five minutes for any gas to dissipate. Repeat the lighting procedure. If the power fails, it is not capable of being safely placed in operation and user that no attempt should be made to operate during power failure. -
Page 35: Oven Burner Use
Cook Top Safety Guidelines Oven burner use To light the oven burner, push and turn the appropriate control knob counter clockwise to the (150℉~500℉) position. You will hear a clicking noise – the sound of the electric spark igniting the burner. -
Page 36: Oven Cooking Guidelines
Cook Top Safety Guidelines Oven cooking guidelines Do not block the ducts on the rear of the range when cooking in the oven. It is important that the flow of warm air from the oven and fresh air into the oven burner never be interrupted. Avoid touching the vent opening or nearby surfaces during oven or broiler operation because they are hot. -
Page 37: Oven Function
Oven Function 12. Oven Function Natural Airflow Bake Occurs when heat is transferred into the oven from the bake burners in the bottom of the oven cavity. Heat is then circulated by natural airflow. This is a traditional bake setting. Infrared Broil The broil burner is located at the top of the oven. -
Page 38: Convection Roast
Oven Function Convection Roast For best results use the broiler pan. The pan is used to catch grease spills and has a cover to prevent grease splatter. The convection fan circulates heated air over the around the food being roasted, sealing juices quickly for a moist and tender product while, at the same time, creating a rich golden-brown exterior. -
Page 39: Broiler Operation
Broiler Operation 13. Broiler Operation Note: Door must be closed during broiler operation. Broiling is a method of cooking tender cuts of meat directly under the infrared broiler in the oven. Broiling in the oven is accomplished with the oven door closed. It is normal and necessary for some smoke to be present to give the food a broiled flavor. -
Page 40: Broiling Guidelines
Broiler Operation To set the oven to Broil: Place the broiler pan insert on the broiler pan. Then place the food on the broiler pan insert. Arrange the interior oven rack and place the broiler pan on the rack. Be sure to center the broiler pan and position directly under the broil burner. - Page 41 Broiler Operation For the models with Griddle Before Using the Griddle 1. Clean the griddle thoroughly with warm, soapy water to remove dust or any protective coating. 2. Rinse with clean water and wipe off to dry with soft, clean, lint-free cloth. 3.
-
Page 42: Cleaning Instructions
Cleaning Instructions 14. Cleaning Instructions Do’s Read these cleaning instructions and the ‘Safety and warnings’ section before you start cleaning your range. Before cleaning or removing any part, make sure that everything on the range has been turned off. Unless suggested otherwise in the following chart, allow any part to cool to a safe temperature before cleaning. -
Page 43: Cleaning Side Racks
Cleaning Instructions Before cleaning the cooktop, ensure that all burners are turned off and that all components are cool enough to safely touch To avoid electrical shock or burns, turn off controls and ensure the cooktop is cool before cleaning. Do not use harsh or abrasive cleaning detergents, waxes, polishes, or commercial cooktop cleaners to clean the cooktop. -
Page 44: Cleaning Bake And Broil Burners
Cleaning Instructions Cleaning bake and broil burners Do not clean these parts. They self-clean during normal use. Cleaning porcelain surfaces Clean oven interior and inner door liners with a solution of mild detergents and hot water. Rinse and dry with a soft, lint-free cloth. Do not use abrasives or commercial oven cleaners. Cleaning the oven glass window Clean all glass surfaces with a solution of mild detergent and hot water. -
Page 45: Replacing The Burner Parts
Replacing the Burner Parts 15. Replacing the burner parts This diagram shows how to replace the burner parts. When replacing the burners, make sure that the two locating pins on the bottom of the brass flame spreader are properly aligned with the locating pin holes on the top of the simmer ring. -
Page 46: Removing And Replacing The Oven Door
Removing the Oven Door Removing and replacing the oven door Do not lift the oven door by its handle. Doing so may damage the door. Make sure the oven and the door are cool before you begin to remove the door. Before removing the door, make sure there is a large enough clear, protected surface in the kitchen to rest the door on. -
Page 47: Replacing The Oven Door
Removing the Oven Door Replacing the oven door Hold the door firmly in an approximately Open the door fully as shown, open position Insert the hinge tongues into the slots making sure that the notches on both sides drop into place as shown. 4. -
Page 48: Replacing The Oven Light Bulb
Removing the Oven Light Bulb Replacing the oven light bulb When replace bulbs, release the glass cover on the lamp holder first, and then remove the bulb to replace new light bulb. -
Page 49: Troubleshooting Guide
Troubleshooting Guide 16. Troubleshooting Guide If you can’t find an answer to your problem in the chart below, or if the problem cannot be fixed, you will need technical help. Contact your Authorized Service Center or Customer Care. Problem Probable causes What to do Cooktop Some burners will not... - Page 50 Troubleshooting Guide The flames have A draft or a spill has extinguished No action required. The burner will detect this and automatically the flame. suddenly gone out. relight. However, if there has been a large spill, we recommend turning the burners off and cleaning the burners and sump area.
-
Page 51: Oven
Trouble Shooting Guide Problem Possible causes What to do Oven The oven doesn’t work No power supply (oven light and Check that the circuit breaker hasn’t (no heating). tripped and there is no power outage halos do not come on either). in your area. - Page 52 Trouble Shooting Guide The convection fan Contact your Authorized Service does not come on in a Center or Customer Care. Technical fault. CONVECTION mode. Oven will not heat Oven settings are not corrected Follow mode selection and clock settings as specified in Oven Operation section of the manual.
-
Page 53: Warranty & Service
Warranty and Service 17. Warranty & Service This product has been manufactured by Thor Group, 13831 Oaks Avenue Chino, CA 91710. Thor Group disclaims all express warranties except for the following: This warranty applies to products purchased and located in the United States. Products purchased or located outside this area are excluded. -
Page 54: Thor Group Will Not Pay For
Warranty and Service Thor Group will not pay for: This limited warranty does not cover: Service to instruct you on how to use your range to correct house wiring, replace or repair house fuses. Service to correct the installation of your range. Repairs when your range is used for other than normal, single-family household use or when it is used in a manner that is contrary to published user or operator instructions and/or installation instructions. -
Page 55: Warranty And Product Registration
This warranty gives you specific legal rights, and you may also have other rights that vary from state to state. Whenever you call our customer service at 877-288-8099 (Thor Kitchen RANGE) for technical information and parts sales in the United States or to request service for your appliance, please have your complete model number and serial number ready. - Page 56 Warranty and Service Exhibit A Correct Position for Dual Burner Here’s the procedure to check the condition for our current burner design. The procedure helps the electrode to sense the flame correctly. Step 1 Make sure the Burner Design is correct. Our current design for the burner is has the electrode on the left side (10 o’clock) and cross-over on the right side (2 o’clock).
- Page 57 Warranty and Service Step 3 For the flame ring base part. make sure that the electrode will go through the hole on the 10 o’clock position. Make sure the electrode is not going through the hole next to the cross-over. Step 4 Make sure the electrode is vertical to the surface of the burner base.
- Page 58 Warranty and Service Exhibit B Oven Door Handle Installation Your HRG range might have a KD handle that needs to be installed. Please Follow up the following procedures for the oven door handle installation 1. Check your Installation Kits for Door Handles 2 * Handle Holders, 1 * Installation Wrench, 1 * Handle (18”.
- Page 59 Warranty and Service 4. Lay the door handle against to the oven door and fit it on the connection part; 5. Use the wrench to get the door handle holder tight; 5. Check if the oven door is level and stable.
- Page 60 Warranty and Service ______________________________________________________________ Customer Service # 877-288-8099 service@thorgroup.us...
Need help?
Do you have a question about the HRG4801U and is the answer not in the manual?
Questions and answers
\]how do i adjust the oven temp to meet proper temp mine is off by atleast 35 to 50 degrees
To adjust the oven temperature on a Thor Kitchen HRG4801U, follow these steps:
1. Preheat the oven to the temperature stated in your recipe. Preheating usually takes 15–20 minutes.
2. If using convection, either:
- Reduce the recipe temperature and keep the baking time the same, or
- Reduce the baking time slightly and keep the temperature the same.
3. For baking times over an hour, slightly reduce both the temperature and time for best results.
Note: Specific instructions for adjusting the oven temperature setting itself (e.g., calibration) are not provided in the context.
This answer is automatically generated
WHAT IGNITO DO I NEED
The Thor Kitchen HRG4801U uses an automatic re-ignition system.
This answer is automatically generated