Advertisement
Table of Contents
- 1 Table of Contents
- 2 Caution
- 3 Care and Maintenance
- 4 Components Illustration
- 5 Installation
- 6 Operation
- 7 Specifications
- 8 Optional Parts
- 9 Troubleshooting Guide
- 10 Darkfield Condenser Installation and Operation Instructions
- 11 Phase Contrast Kit Installation and Operation Instructions
- 12 Eyepiece
- Download this manual
Advertisement
Table of Contents

Subscribe to Our Youtube Channel
Related Manuals for Omax M8333S


Summary of Contents for Omax M8333S
- Page 1 User Manual Trinocular Infinity Compound LED Microscope Model M8333S series MicroscopeNet.com...
-
Page 2: Table Of Contents
Table of Contents Caution ....................1 ii. Care and Maintenance................2 1. Components Illustration ................3 2. Installation ....................5 3. Operation ....................7 4. Specifications ..................10 5. Optional Parts ..................11 6. Troubleshooting Guide ................13 7. Darkfield Condenser Installation and Operation Instructions ....15 8. -
Page 3: Caution
www.microscopenet.com Caution 1. Open the carton carefully with a knife or paper cutter. Find the “UP” sign and place the Styrofoam container on the side that makes the arrow upward. If the “UP” sign is missing, please open the Styrofoam container gently to prevent any accessory items (i.e. -
Page 4: Care And Maintenance
www.microscopenet.com ii. Care and Maintenance 1. Do not attempt to disassemble any component including eyepieces, objectives or focusing assembly. 2. Keep the instrument clean; remove dirt and debris regularly. Accumulated dirt on metal surfaces should be cleaned with a damp cloth. More persistent dirt should be removed using a mild soap solution. -
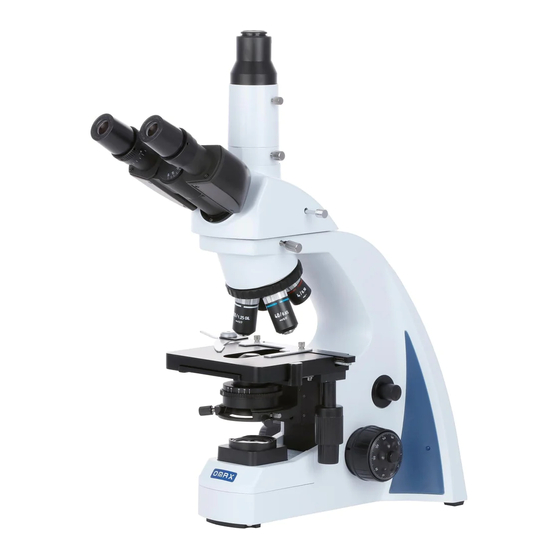
Page 5: Components Illustration
www.microscopenet.com 1. Components Illustration... - Page 6 www.microscopenet.com Eyepiece Trinocular Viewing Head Condenser Focus Knob Diopter Ring Swapping Lever Top Lens Knob Eyepiece Tube Head Lock Thumb Screw Stage Upward Stopper Nosepiece Objectives Condenser Slide Holder Microscope Body Aperture Diaphragm Ring Mechanical Stage Brightness Intensity Dial Condenser Centering Screws Light Collector Focus Tension Ring Filter...
-
Page 7: Installation
www.microscopenet.com 2. Installation 2.1 Installation of the trinocular viewing head 1) Loosen the head lock thumb screw on the top of the microscope body and remove the plastic cover on the top. 2) Remove the cap on the dovetail of the trinocular viewing head. 3) Seat the dovetail of the viewing head (Fig. - Page 8 www.microscopenet.com counter-clockwise direction, rotate the nosepiece and install each succeeding higher magnification objective as shown in Fig. 2. Fig.2 Note: Inspect the objectives frequently for dirt or oil; clean if necessary. Use the 10X objective to initially focus the image of your specimen. ...
-
Page 9: Operation
www.microscopenet.com 2.8 Switching the power voltage The power voltage can be switched between 115V and 230V. 1) Turn off the power switch and disconnect the power cord. 2) Find the voltage switch on the back board. See Fig 4 3) Push the switch down, the microscope will use 115V. - Page 10 www.microscopenet.com Tips: a) The condenser is raised when using high power objectives and lowered when using low power objectives. b) The top lens is flipped up by turning the top lens knob when using high power objectives. c) To prevent your specimen slide from making contact with an objective, raise the stage to its highest position without contacting the 100X objective;...
- Page 11 www.microscopenet.com Caution (important): When you use the 100X objective to observe the specimen, you have to finish observing the specimen with the 4X, 10X, 40X objectives. When you use the 100X objective to observe the specimen, you have to apply the immersion oil on the top of the slide cover.
-
Page 12: Specifications
4. Specifications Model M8333S Total Magnification 40X, 80X, 100X, 200X, 400X, 800X, 1000X, 2000X 1 pair of WF10X/18 Eyepieces 1 pair of WF20X PLAN Infinity objectives achromatic 4X/0.10 ∞/- 10X/0.25 ∞/0.17 Objectives 40X/0.65 ∞/0.17 (spring) 100X/1.25 ∞/0.17 (spring, oil) 30º... -
Page 13: Optional Parts
www.microscopenet.com 5. Optional Parts (The optional parts may be included in some models or sold separately.) 1) Cameras Model Sensor Resolution Operating System Software A35100U 3584 x 2748 (10.MP) CMOS USB2.0 A35140U 4096 x 3288 (14.0MP) A3550U3 2560 x 1922 (5.0MP) MS Windows A3580U3 3328 x 2548 (8.0MP) - Page 14 www.microscopenet.com 2) Darkfield Condensers Darkfield Numerical Mounting Model Objective Condenser Aperture Size(diameter) A191-INF 0.7-0.9 37mm A191BD- 1.36-1.25 37mm 3) Phase Contrast Kits Centering Model Phase Contrast Objective Condenser Annular Ring Plates Telescope Plan achromatic 10X with Five positions: built-in phase plate 10 for 10X phase contrast objective Plan achromatic 20X with...
-
Page 15: Troubleshooting Guide
www.microscopenet.com 6. Troubleshooting Guide Problem Cause Solution No electrical power Check power cord connection Lamp does not light when LED or power unit dead Replace LED light switched on Fuse blown out Replace fuse Revolve the nosepiece to click-stop Revolving nosepiece not in click stop position by swinging the objective position correctly into the optical path... - Page 16 www.microscopenet.com The aperture and field iris diaphragm Open and adjust the aperture and field are not opened enough diaphragm Specimen rises from stage surface Secure the specimen in the slide holder Revolving nosepiece is not in the Revolve the nosepiece to the click-stop click-stop position position Adjust the light intensity by rotating the...
-
Page 17: Darkfield Condenser Installation And Operation Instructions
www.microscopenet.com 7. Darkfield Condenser Installation and Operation Instructions 7.1 Dry darkfield condenser of A191-INF 1) Mounting the dry darkfield condenser Loosen the condenser lock thumb screw on the condenser holder and remove the brightfield condenser as shown in Fig. 11 (a). ... - Page 18 www.microscopenet.com 7.2 Oil darkfield condenser of A191BD-INF 1) Mounting the oil darkfield condenser Loosen the condenser lock thumb screw on the condenser holder and remove the brightfield condenser as shown in Fig. 13 (a). Install the oil darkfield condenser and tighten the condenser lock thumb screw on the condenser holder as shown in Fig.
-
Page 19: Phase Contrast Kit Installation And Operation Instructions
www.microscopenet.com Note: When using the 40X objective, you won’t need to apply oil drop on the oil condenser. When using the 100X objective, the condenser won’t work well if no oil drop applied on the condenser. When you apply the immersion oil with the 100X objective, do not let the immersion oil to contact with the dry objective lenses (especially the 40X). -
Page 20: Eyepiece
www.microscopenet.com Note: When raising the mechanical stage, do not make contact with the objective. 3) Turn the desired objective into light path. 4) Turn the annular ring disk to put the corresponding ring into light path, i.e. if you are using the 40X phase contrast objective, you should turn the disk at 40 as shown in Fig.
Need help?
Do you have a question about the M8333S and is the answer not in the manual?
Questions and answers