Advertisement
Quick Links
Advertisement

Related Manuals for Angler CI-LR20


Summary of Contents for Angler CI-LR20
- Page 1 19 " led ring light CI-LR20 INSTRUCTIONS...
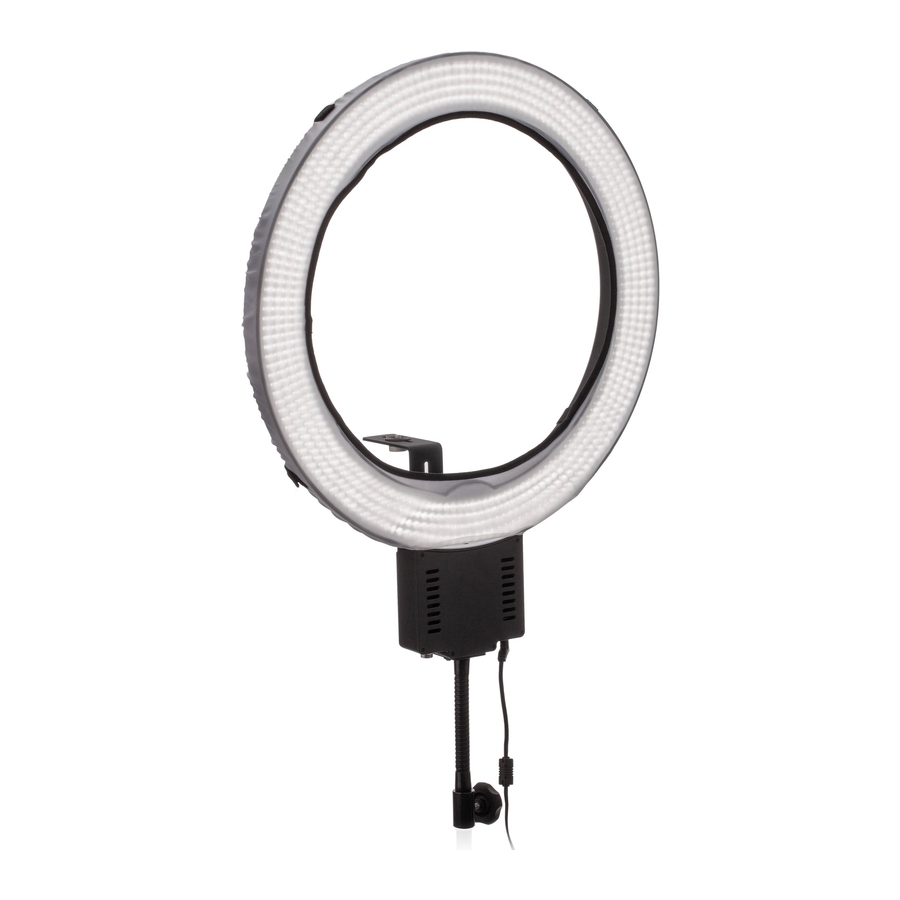
- Page 2 Introduction Congratulations on purchasing the Angler Circo 19" LED ring light. The Angler Circo CI-LR20 is a compact, lightweight, and portable way to light your subject. It provides 360 degrees of even illumination, ideal for enhancing facial features. It’s a great fit for fashion and beauty photography and when used in combination with its diffuser sock, which provides softer lighting.
- Page 3 To prolong the life of the unit, turn the power off and unplug the light when it is not in use. Do not attempt to disassemble or repair this product. There are components inside that can produce a hazardous electric shock. Keep this product away from water and any flammable gases or liquids.
- Page 4 LED Array Front Back Dimming knob Power switch DC input Phillips-head screws Also included: Carrying case User manual...
- Page 5 Diffuser Sock Touch-fastener straps Elastic band AC Power Supply 1/4"-20 AC power cord Camera set screw DC barrel connector Height adjustment Flexible thumb screws Stand Adapter Camera Bracket Locking 5/8" knob receiver...
- Page 6 Attaching the Diffuser Sock It is recommended that the diffuser sock is placed on the LED array before adding any other accessories. Lay the LED array faceup on a flat, clean surface. Look for the elastic band on the bottom of the sock, and wrap it around the base of the array.
- Page 7 Attaching the Camera Bracket The adjustable camera bracket attaches your camera to the ring light for tripod-mounted shooting. It connects to the bottom of the LED array via two Phillips-head screws. Use a Phillips screwdriver (not included) to remove the screws from the bottom of the LED array.
- Page 8 5. If necessary, use the two thumbscrews on the back of the camera bracket to adjust the bracket’s height. 6. For tripod-mounted shooting, use the socket in the 1/4"-20 set screw to mount the assembly to your tripod. Make sure the assembly is securely mounted to the tripod.
- Page 9 Attaching the Flexible Stand Adapter The flexible stand adapter incorporates a gooseneck and 5/8" receiver to mount the ring light on a light stand for easy off-camera positioning. Like the camera bracket, it connects to the bottom of the LED array via two Phillips-head screws. Use a Phillips screwdriver (not included) to remove the screws from the bottom of the LED array.
- Page 10 Powering and Dimming the LED The power supply is rated for multivoltage use at a range of 100–240 V and 50/60 Hz. Before connecting, make sure the array’s power switch is set to Off. Connect the AC cord to the AC input on the DC barrel connector.
-
Page 11: Specifications
SPECIFICATIONS number of LED count's Color temperature 5500 K 0%–100% Dimming range Camera weight rating 2 lb. (0.9 kg) 100–240 V AC at 50/60 AC power supply Hz; conversion to DC 14.8–15 V, 1.5 A (H × W × D): 23" × 19" × Dimensions 1.75"... -
Page 12: One-Year Limited Warranty
One-Year Limited Warranty This Angler product is warranted to the original purchaser to be free from defects in materials and workmanship under normal consumer use for a period of one (1) year from the original purchase date or thirty (30) days after replacement, whichever occurs later.
Need help?
Do you have a question about the CI-LR20 and is the answer not in the manual?
Questions and answers