Advertisement
Quick Links
4.6
Verifique se o combustor está convenientemente
DK
apertado. O fogão está agora pronto para ser usado.
5. UTILIZAÇÃO DO APARELHO DE GÁS
5.1
Quando está a ser utilizado, o fogão a gás deve estar
sempre sobre uma superfície estável. Certifique-se
VIGTIGT: Gennemlæs nøje denne vejledning og bliv
que a tampa está na posição correcta.
fortrolig med produktet, inden du sætter apparatet
5.2
Abrir a válvula de gás na extremidade da mangueira
på gaspatronen. Gennemse jævnligt instruktionerne
(7). Rodar o botão de ajustamento para a esquerda (1)
for at holde oplysningerne vedlige. Behold denne
e ligar imediatamente a boca de gás. Se o fogão está
vejledning til senere brug.
equipado com um guarda-chamas, será necessário
manter o botão premido cerca de três (3) segundos
332001 & 332003, BRUG KUN UDENDØRS!
após a chama se acender.
5.3
Ajuste a chama rodando o botão de regulação (2).
Tildæk ALDRIG gasbrænderen med vindafskærm-
5.4
O aparelho só deve ser utilizado quando estiver
ning, sten eller lignende, som kan forårsage
perfeitamente na vertical. Nunca mude de posição um
overophedning og dermed beskadige brænder og
aparelho aceso. A chama pode apresentar aspecto
gaspatron. En sådan overophedning af gaspatroner
tremulante antes do aparelho estar quente, ou quando
kan medføre livsfare.
este é movido de forma demasiado violenta.
5.5
Fechar a válvula do botijão de gás após utilização.
Quando a chama se apagar, fechar a válvula(s) do
1. INDLEDNING
fogão a gás.
1.1
Dette gasapparat er kun beregnet til LP (Liquified
5.6
Deverá ser guardada uma distância conveniente de
Petroleum) Gas. Propanapparater må kun tilsluttes
materiais passíveis de
gasflasker, der er mærket til propan.
combustão. A distância do tecto deverá ser de pelo
1.2
Det kan være farligt at forsøge at montere andre
menos 500 mm e da parede de pelo menos 200 mm,
typer gaspatroner.
em CASO CONTRÁRIO há risco de incêndio.
1.3
Gasforbrug: (2x) 115 g/h / 1,6 kW propan.
1.4
Dyse: 0.59 mm (50 mbar) og 0.65 mm (30 mbar).
6. MUDANÇA DO BOTIJÃO DE GÁS
1.5
Dette gasapparat opfylder kravene i EN521.
6.1
Feche a válvula completamente. Assegure-se de que
1.6
Undgå at udsætte slangen for slitage. Pas på, at
a chama está extinta e que não se encontra próximo
SLANGEN IKKE BLIVER SNOET.
de qualquer outra chama. O botijão de gás deve
ser mudado no exterior, longe de outras pessoas.
2. SIKKERHEDS-INFORMATION
Desenrosque o reservatório da válvula e mude o a
2.1
Sørg for, at apparatets tætninger sidder på plads
anilha (anel-O), que veda o fogão, se estiver danificado
og er i god stand, inden gaspatronen monteres.
ou gasto. Evite enroscar enviesadamente, ajustando
O-ringen skal monteres løst på ventilhuset.
a válvula com precisão à rosca do botijão de gás,
2.2
Apparatet bør kun anvendes udendørs.
utilizando apenas força manual, de acordo com a
2.3
Apparatet skal anvendes på en plan overflade.
descrição no ponto 4.
2.4
Sørg for, at der ikke er brændbare materialer i
7. MANUTENÇÃO (Figura 4)
nærheden af gasapparatet,
7.1
Se a pressão do gás baixar por qualquer razão, ou
2.5
Skift altid gaspatron på et sikkert sted, altid
não for possível acendê-lo, verifique se existe gás no
udendørs, på afstand af antændingskilder, såsom
botijão (3). Se de facto houver, assegure-se de que a
åben ild, vågeblus eller varmelamper og på afstand
embocadora (9) não está entupida.
af andre mennesker.
7.2
Limpeza da embocadura. Feche o botão de regulação
2.6
Hvis apparatets tæthed skal kontrolleres, skal det
completamente (2) e desenrosque o reservatório de
foregå udendørs. Søg ikke efter lækager med åben
gás (3).
ild. Brug kun sæbevand for eksempel.
7.3
Retirar a grade de suporte. Desaparafusar a parte
2.7
Brug aldrig et apparat med beskadigede eller
superior da boca de gás (3). A parte inferior da boca
ødelagte tætninger, og brug aldrig et apparat, der
de gás solta-se para baixo do fogão.
lækker, er beskadiget eller fungerer dårligt.
7.4
Virar o fogão ao contrário.
2.8
Efterlad aldrig et tændt apparat uden overvågning.
7.5
Soltar a parte inferior da boca de gás.
2.9
Lad ikke kogegrej koge tørt.
7.6
Desaparafusar o bocal ligado à válvula com uma
chave de 7mm.
3. HÅNDTERING AF APPARATET
7.7
Soprar através do pequeno orifício no exterior para
limpar o bocal (pode utilizar ar pressurizado).
3.1
Pas på ikke at berøre varme dele på apparatet
7.8
Montar novamente o bocal e aparafusar bem até a
under eller efter brug.
conexão estar bem vedada.
3.2
Opbevaring: Skru altid patronen fra apparatet, når
7.9
Montar e fixar as partes inferior e superior da boca de
det ikke er i brug. Opbevar dem på et sikkert sted,
gás.
hvor der ikke er varmekilder i nærheden.
7.10 Colocar novamente a grade na posição correcta.
3.3
Undgå at bruge apparatet forkert eller til noget, det
7.11 Voltar a ligar a garrafa de gás seguindo o descrito no
ikke er beregnet til.
ponto 4. Como segurança extra, verificar a união com
3.4
Apparatet skal behandles med forsigtighed. Pas på
água morna com sabão. Caso surjam bolhas de ar, a
ikke at tabe det.
união não está suficientemente vedada.
4. SAMLING AF APPARATET (Fig. 1 & 2)
8. CONTROLE E MANUTENÇÃO
(a. gælder for et kogeapparat, som bruger 50 mbar
8.1
Verifique sempre se a anilha vedante está bem colo-
og b. gælder for kogeapparat, som bruger 30 mbar
cada e em boas condições. Faça isto sempre antes
tryk, se på kartonen for informationerne)
de montar o parelho de gás. Substitua a anilha se
4.1
Sørg for, at reguleringsknapperne (1) er helt lukket
estiver deteriorada ou gasta.
(ved at dreje helt om med uret). Slå lukkemekanis-
8.2
Há anilhas novas à venda no revendedor mais
men op (2).
próximo.
4.2
Sæt gasflasken (8) i opret stilling, når apparatet
tilsluttes.
9. ASSISTÊNCIA TÉCNICA E REPARAÇÃO
4.3a Er slangen udstyret med et gveind på enden (4),
9.1
Se não conseguir rectificar qualquer avaria através das
presentes instruções deve
skrues gasslangen fast i kogeapparatet ved hjælp
entregar o aparelho ao seu revendedor.
af en tang (se fig. 2).
9.2
Não tente fazer operações de manutenção ou de
4.3b Er slangen ikke udstyret med noget gevind på
reparação que não venham prescritas nas instruções.
enden (5), skrues slangeniplen fast på bagsiden af
9.3
Não introduza modificações no aparelho, a fim de não
kogeapparatet ved hjælp af en tang. Træk slangen
tornar perigosa a sua utilização.
hen over hele vejen ind og fastgør dernæst slangen
ved hjælp af en slangeklemme.
10. PEÇAS SOBRESSALENTES E ACESSÓRIAS
4.4
Montér regulatoren på gaspatronen og tilslut den
10.1 Use apenas as peças sobressalentes e acessórias
dernæst til kogeapparatet ved hjælp af slangen.
originais da marca Primus. Proceda com cuidado ao
(Fig. 3)
montar peças sobressalentes e acessórias, evitando
4.5
Kontrollér, at der er helt tætnet til gassen. Hvis
pegar em peças quentes.
gastætheden skal kontrolleres, skal det ske
10.2 Substituição da Garrafa: Ao substituir a garrafa de gás,
udendørs. Kontrollér ikke for gaslækager med
utilizar apenas garrafas para gás LP.
åben ild. Brug kun varmt sæbevand, som påføres
10.3 Se tiver dificuldade em encontrar peças sobressalen-
samlinger og forbindelser på apparatet. Eventu-
tes ou acessórios
comunique com o distribuidor no seu país, veja em:
elle lækager vil da vise sig som bobler omkring
www.primus.se
lækagestedet. I tvivlstilfælde, eller hvis man kan
høre eller lugte gas, må man ikke søge at tænde for
apparatet. Skru i stedet patronen af og kontakt den
lokale forhandler.
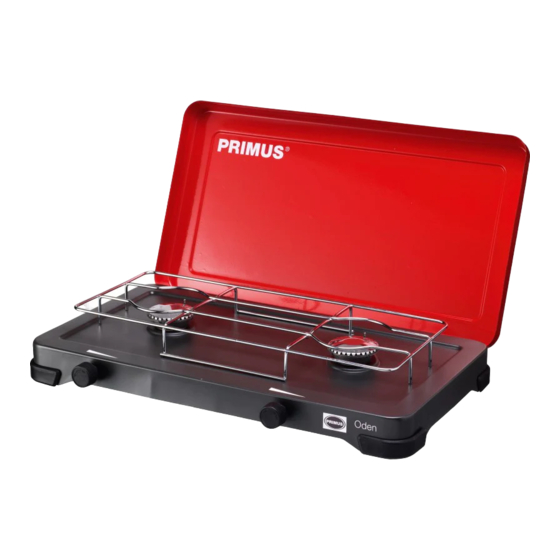
3320/3321 PRIMUS Oden
, kogeapparat
BRUGSVEJLEDNING
5. BETJENING AF APPARATET
5.1
Gasapparatet skal altid stå på en stabil flade, når
det anvendes. Sørg for, at lukkemekanismen er i
den rette position.
5.2
Åbn for gasventilen i enden af slangen (7). Drej
reguleringsknappen mod uret (1) og tænd straks
brænderen (3). Er kogeapparatet udstyret med
flammeovervågning, kræver det, at regulerings-
knappen holdes trykket ind i ca. 3 sekunder, efter
flammen er antændt.
5.3
Justér flammens størrelse ved at dreje på skrueven-
tilen (2).
5.4
Når apparatet er tændt, skal det blive stående opret
og må ikke flyttes omkring. Flammen kan blive
ustabil, hvis apparatet ikke er varmet helt op eller
det flyttes for pludseligt.
5.5
Efter anvendelsen lukkes ventilen på gasflasken.
Når flammen er slukket, lukkes ventilen (ventilerne)
på gasapparatet.
5.6
Sørg for sikker afstand til brændbart materiale.
Afstand til loft skal være mindst 500 mm, og til væg
mindst 200 mm for at være sikker på at forebygge
brand!
6. UDSKIFTNING AF PATRON
6.1
Luk helt for ventilen. Kontrollér, at flammen er
slukket, og der ikke er nogen anden åben ild i
nærheden. Tag apparatet med udendørs på afstand
af andre mennesker. Skru patronen fra ventilen
og udskift den O-ringstætning, der sidder på
apparatet, hvis den er slidt eller krakeleret. Undgå
at skrue skævt på gevindet ved at anbringe ventilen
lige på patronens gevind og skrue manuelt til som
beskrevet i afsnit 4.
7. VEDLIGEHOLDELSE (Fig 4)
se afsnit 5.6.
7.1
Hvis gastrykket falder eller gassen ikke kan antæn-
des, skal det
kontrolleres, om der er mere gas i patronen (3). Er
dette tilfældet, kan dysen (9) være tilstoppet.
Rensning af gasdysen
7.2
Drej skrueventilen (2) helt til og skru patronen (3) fra.
7.3
Løft grydestøtten op. Skru brænderoverdelen af (3).
Derved løsnes brænderens underdel på kogeappa-
ratets underside.
7.4
Vend kogeapparatet om.
7.5
Løsn brænderens underdel.
7.6
Skru mundstykket af, som sidder på ventilen, med
en 7 mm skruenøgle.
7.7
Pust igennem det lille hul, der sidder længst ude, så
mundstykket renses (anvend gerne trykluft).
7.8
Sæt igen mundstykket i og skru det godt fast, så
samlingen bliver tæt.
7.9
Fastmontér bænderens under- og overdel.
7.10 Placér grydestøtten på sin rette plads.
7.11 Tilslut igen til gasflasken ved at følge beskrivelsen
under punkt 4. For at være helt sikker, kontrolleres
samlingerne med varmt sæbevand. Er samlingen
ikke tæt nok, opstår der bobler.
8. REGELMÆSSIG SERVICE OG VEDLIGEHOL-
DELSE
8.1
Kontrollér altid, at O-ringen sidder rigtigt og er i
god stand. Dette skal kontrolleres hver gang. inden
apparatet monteres. Udskift O-ringen, hvis den er
beskadiget eller slidt.
8.2
Nye O-ringstætninger kan fås hos den lokale for-
handler.
9. SERVICE OG REPARATION
9.1
Hvis eventuelle fejl ikke kan rettes ved at følge disse
instruktioner, leveres apparatet til reparation hos
den lokale forhandler.
9.2
Forsøg aldrig selv at foretage anden reparation eller
vedligeholdelse.
9.3
Foretag ingen ændringer på apparatet. Det kan
gøre apparatet farligt at bruge.
10. RESERVEDELE OG TILBEHØR
10.1 Brug kun ægte Primus reservedele og tilbehør. Vær
forsigtig ved montering af reservedele og tilbehør.
Undgå at berøre varme dele.
10.2 Udskiftningsflasker: Der må kun anvendes gaspa-
troner med LP Gas, når gasflaskerne udskiftes.
10.3 Hvis der opstår problemer med at få reservedele
eller tilbehør, så kontakt distributøren i dit land. Se
www.primus.se
3320
ENG
3321
IMPORTANT: Read these instructions carefully and
familiarize yourself with the product before fitting the
Oden Stove
appliance to the gas cartridge. Review the instruc-
tions periodically to maintain awareness. Retain
these instructions for future reference.
Design and Quality Primus AB Sweden
332001 & 332003, USE OUTDOORS ONLY!
Tel: +46 8 564 842 30
www.primus.se
NEVER cover the stove (gas cartridge) with wind shields,
rocks or similar which may cause "over heating" and
damage the stove and cartridge. Overheating a gas
cartridge by this means is highly dangerous.
-0845-10
1. INTRODUCTION
ID: 845BR-0041
1.1
This gas-powered device is intended for use with LP
(Liquified Petroleum) Gas cylinders only. Propane-
powered devices may only be connected to gas
cylinders marked "propane".
Fig 1
1.2
It may be hazardous to attempt to fit other types of
2
gas cartridges.
1.3
Gas consumption: (2x) 115 g/h / 1.6 kW on pro-
pane.
1.4
Jet nipple: 0,59 mm (50 mbar) 0,65 mm (30 mbar),
propane.
1.5
This gas appliance conforms to the provisions of
EN521.
1.6
Avoid subjecting the fuel line to wear and tear. Make
sure that the
FUEL LINE DOES NOT BECOME TWISTED.
2. SAFETY INFORMATION
3
2.1
Ensure that the appliance seals are in place and in
1
good condition before fitting the gas cartridge. O-ring
shall be loosely fitted in the valve body.
2.2
The appliance should be used outdoors only.
2.3
The appliance must be operated on a level surface.
2.4
Make sure that no inflammable materials are near the
gas appliance, see section 5.6.
Fig 2
2.5
Always change or fit the gas cartridge in a safe
place, only outside, away
tion such as naked flames, pilot lights, electric fires
and away from other people.
2.6
If you have to check the gas soundness of the appli-
ance, do this outdoors. Do not check for leaks with a
naked flame. Use soapy water
4
example.
2.7
Never use an appliance with damaged or worn seals
and never use a leaking, damaged or malfunctioning
appliance.
2.8
Never leave the appliance unattended when lit.
5
2.9
Do not allow pans to boil dry.
3. HANDLING THE APPLIANCE
3.1
Be careful not to touch hot parts of the appliance
during, or after use.
3.2
Storage: Always unscrew the cartridge from the
Fig 3
appliance when not in use. Store them in a safe dry
place away from heat.
3.3
Do not misuse the appliance, or use it for anything
for which it has not been designed.
7
3.4
Handle the appliance with care. Do not drop it.
4. ASSEMBLING THE APPLIANCE (Fig. 1 & 2)
(a applies to stoves that use 50 mbar and b applies
to stoves that use 30 mbar of pressure; see the
8
package for more information)
4.1
Make sure that the adjustable burner valves (1) are
firmly closed (by turning the valves fully clockwise).
Open the lid (2).
4.2
Place the gas cylinder (8) in the upright position
when connecting it to the apparatus.
Fig 4
4.3a. If the fuel line is equipped with a screw thread on
the end (4), screw the fuel line securely to the stove
using pliers (see figure 2).
4.3b If the fuel line is not equipped with a screw thread
on the end (5), screw the fuel nipple securely to the
back of the stove using pliers. Thread the fuel line
the entire way in and secure it with the fuel line clip.
4.4
Mount the regulator onto the gas cylinder and then
connect it to the stove using the fuel line. (Fig. 3)
4.5
Ensure that a complete gas seal has been made. If
you have to check the gas soundness of the appli-
9
ance, do this outdoors. Do not check for leaks with
a naked flame. Use warm soapy water only, applied
to the joints and connections of the appliance. Any
leakage will show up as bubbles around the leakage
52291 / 2
area. If you are in doubt or you can hear or smell gas,
3320/3321 PRIMUS Oden Stove
do not attempt to light the appliance. Unscrew the
cartridge and contact your local dealer.
INSTRUCTIONS FOR USE
4.6
Make sure that the burner is securely screwed in.
The stove is now ready for use.
5. OPERATING THE APPLIANCE
5.1
The gas-powered device should always be on a
stable surface when in use. Make sure the lid is in
the correct position.
5.2
Open the gas valve at the end of the fuel line (7).
Turn the burner valve counterclockwise (1) and
ignite the burner (3) immediately. If your stove
comes equipped with a flame detector, you must
hold the contrl knob pressed in for approx. three
(3) seconds after the flame has been lit.
5.3
Adjust the size of the flame by turning the control
knob (1).
5.4
After lighting, operate the appliance upright and
do not move it around. Flaring may occur if the
appliance has not fully warmed, or if it is moved
carelessly.
5.5
After use, close the valve on the gas cylinder.
Once the flame has gone out, close the valve
(valves) on the gas-powered device
5.6
Distance to inflammable materials must be
ensured. Minimum distance to combustibles at
least 500 mm (20 inches) from sides and 200 mm
(8 inches) from top. To avoid a fire hazard these
minimum distances must be complied with.
6. CHANGING THE CARTRIDGE
6.1
Shut the valve fully. Be sure the flame is exting-
uished and no other flame is nearby. Take the unit
outdoors away from other people. Unscrew the
cartridge from the valve and replace the appliance
sealing O-ring if it is cracked or worn. Avoid cross
threading by puting the valve onto the cartridge
screw thread squarely and screw on hand tight
only, as described in section 4.
7. MAINTENANCE (Fig. 4)
7.1
If gas pressure drops or the gas will not light,
check if there is gas left in the cylinder (8). If so,
the jet nipple (9) might be blocked.
Cleaning the Jet Nipple
from any source of igni-
7.2
Fully turn off the control knob (1) and unscrew the
cartridge (8).
7.3
Lift up the pot support. Unscrew the top of the
burner (3). The base of the burner will then come
loose on the bottom of the stove.
only, for
7.4
Turn the stove over.
7.5
Undo the base of the burner.
7.6
Unscrew the nozzle attached to the valve with a 7
mm wrench.
7.7
Blow through the tiny hole at the very end to clean
the nozzle (using compressed air if available).
7.8
Reattach the nozzle and screw it securely to form
a tight seal.
7.9
Assemble the burner base and top securely
together.
7.10 Place the pot support in the correct position.
7.11 Reconnect the gas cylinder by following the
instructions in point 4. To be extra safe, check
the connecting joint with warm, soapy water. The
seal on the connecting joint is not tight enough if
bubbles appear.
8. ROUTINE SERVICE AND MAINTENANCE
8.1
Always ensure that the O-ring sealing is in place
and in good condition. Always check this each
time prior to fitting the appliance. Replace the
O-ring if it is damaged or worn.
8.2
New sealing O-rings are available from your local
dealer.
9. SERVICE AND REPAIR
9.1
If you cannot rectify any fault by following these
instructions, return the appliance to your local
retailer.
9.2
Never attempt any other maintenance or repair.
9.3
Never modify the appliance. This may cause the
appliance to become unsafe.
10. SPARES AND ACCESSORIES
10.1 Use only Primus brand spares and accessories.
Be careful when fitting spares and accessories.
Avoid touching hot parts.
10.2 Changing gas cylinders: When changing gas
cylinders, only use LP Gas cylinders.
10.3 In the event of difficulties in obtaining spare parts
or accessories, consult the distributor in your
country. Visit www.primus.se
Advertisement

Related Manuals for Primus 3320


Summary of Contents for Primus 3320
- Page 1 10.1 Use apenas as peças sobressalentes e acessórias on the end (5), screw the fuel nipple securely to the dernæst til kogeapparatet ved hjælp af slangen. 10.1 Brug kun ægte Primus reservedele og tilbehør. Vær appliance to become unsafe. originais da marca Primus. Proceda com cuidado ao back of the stove using pliers.
- Page 2 Primus. Obrar con cuidado al montar los repuestos Verifique se o gás ficou totalmente vedado. O controlo Monter le détenteur sur la cartouche de gaz et connec- verticalement du réchaud.
- Page 3 Den Regler an der Gaskartusche anbringen und ansch- -Zubehör von Primus. Seien Sie beim Anbringen von voorzichtig bij het monteren van reserveonderdelen en filettata nella parte finale (5), avvitare bene il raccordo 10.
- Page 4 återlämna den till din Primus ilmassa on kaasun hajua, älä sytytä kaasulaitetta. hvis det lukter gass, skal gassapparatet ikke tennes. 3320/3321 PRIMUS Oden, keitin 3320/3321 PRIMUS Oden , kokeapparat 3320/3321 PRIMUS Oden , kooktoestel återförsäljare. Irrota kaasusäiliö ja palauta kaasulaite Primus- Skru av gassbeholderen og lever gassapparatet inn KÄYTTÖOHJE...