Table of Contents
Advertisement
Quick Links
Advertisement
Table of Contents

Subscribe to Our Youtube Channel
Summary of Contents for Stardom SA2TB3
- Page 1 Docking SA2TB3 User Manual...
-
Page 2: Table Of Contents
SOHORAID SA2TB3 User Manual » SA2TB3 User Manual ........1 1. Operating Information .............1 2. Package Contents and Product Views ......1 3. The System Connections ..........3 4. Hardware Requirements and Precautions ......4 5. System Fan Failure Management ........4 6. The MSU, and easy RAID configurator ......4 7. -
Page 3: Sa2Tb3 User Manual
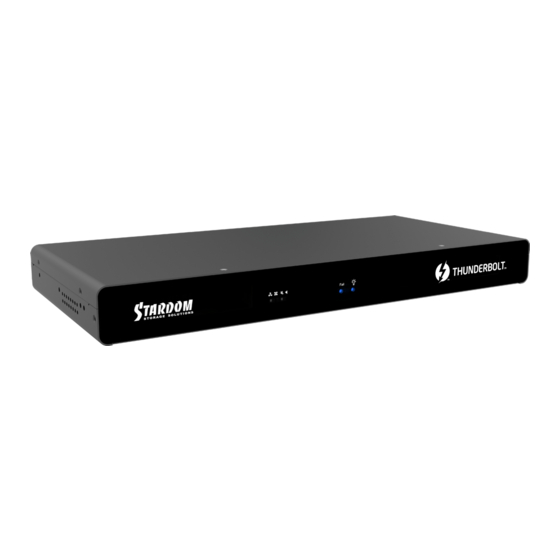
Docking SA2TB3 User Manual The Introduction Thanks for purchasing Stardom product. This User Manual will introduce you the SA2TB3 Thunderbolt™ storage product. Before using your SA2TB3, please read it thoroughly. Although all information contented in this User manual had already been carefully verified before publishing, however, the actual product and its specification will be based upon the time of delivery from Stardom. - Page 4 Docking SA2TB3 User Manual Front and Rear Views Front View Rear View Power socket ™ Thunderbolt Mini Mnin-SAS Power switch port DisplayPort 12G port...
-
Page 5: The System Connections
Docking SA2TB3 User Manual 3. The System Connections SA2TB3 connects to Host (PC/Workstation/Server) SA2TB3 connects to other Devices (TB, SAS) Thunderbolt™ daisy chain SAS 12G External Storage Enclosure up to 6 Thunderbolt devices EX: STARDOM ST4-U6/ST8-U6... -
Page 6: Hardware Requirements And Precautions
STARDOM tech support for further assistance. 6. The MSU, and easy RAID configurator Thru connecting your miniSAS device to SA2TB3, you could use this MSU (Marvell Storage Utility) to configure a RAID mode. A. Set up RAID Mode: 1. - Page 7 Docking SA2TB3 User Manual 2. Click 【Operation】 and 【Create Array】. 3. Click at the selected HDDs. 4. Select【RAID 5】(or other RAID). • The more Stripe Sizes helps a better data transfer for large data files which is good for video and audio editing works.
- Page 8 Docking SA2TB3 User Manual 5. Setup Stripe Size. 6. Type Storage Name and Submit RAID setting. 7. After submitting RAID setting:...
- Page 9 Docking SA2TB3 User Manual 8. Click 【Create VD】, 【Initialize】 option is set to 【Fast Initialization】; 【Gigabyte Rounding】 options set to 【10G】, then click 【Submit】. No Initialization Fast Initialization Foreground Initialization Background Initialization 9. After submit, you get a New_VD. P.S. VD is the abbreviation of Virture Disk.
- Page 10 Docking SA2TB3 User Manual 11. After completing the format, you couyld start using your SA2TB3. B. Delete a RAID for a new RAID setting 1. Click 【Operation】 and 【Delete VD】. 2. Click 【OK】 at first warning message.
- Page 11 Docking SA2TB3 User Manual 3. Click 【OK】 at the second warning message. 4. Click 【Operation】, 【Delete Array】 and 【Submit】. 5. Click 【OK】 at warning message.
-
Page 12: Description Of Hdd Indicators
6. It returns to JBOD mode, you just have to format every individual HDD or just to set up another RAID. Please refer to “STARDOM All TB2&TB3 RAID 5 Storage MSU User Manual.pdf” for the RAID setting. 7. Description of HDD Indicators... -
Page 13: Frequently Asked Questions
The fan and power status light will not come on until the computer is awake. 3. If the SA2TB3 is installed on the Windows OS but can not be connected, refer to the following steps: A. Open the Windows Taskbar. - Page 14 Docking SA2TB3 User Manual 4. The new macOS 10.13 (High Sierra) requires user approval before loading new, third-party kernel extensions. A. Execute MarvellMvumi.pkg. B. Appear from an unidentified developer warning, click on the lower right corner of the "OK." C. Open System Preferences, and go to Security & Privacy.
-
Page 15: Sa2Tb3 產品使用說明
Docking SA2TB3 User Manual » SA2TB3 產品使用說明 關於這份手冊 感謝您使用 STARDOM 的產品。本手冊將介紹 STARDOM SA2TB3 產品。在您開始使用 STARDOM SA2TB3 產品前,建議您先閱讀過本手冊。手冊裡的資訊在出版前雖已被詳細確認,實際產品規格仍 將以出貨時為準;任何產品規格或相關資訊更新請您直接到 www.stardom.com.tw 網站查詢,本公司 將不另行通知。若您想獲得 STARDOM 最新產品訊息、使用手冊、韌體 , 或對 STARDOM 產品有任何 疑問,請您聯絡當地供應商或到 www.stardom.com.tw 取得相關訊息。 本手冊相關產品內容歸銳銨科技股份有限公司版權所有 1. 環境需求 工作溫度 : 5 ~ 35 ℃ (41 ~ 95 ℉ ) 儲存溫度... - Page 16 Docking SA2TB3 User Manual 正面與背面示意圖 前視圖 背視圖 風扇 電源插座 Thunderbolt ™ Mini Mnin-SAS 電源開關 連接埠 DisplayPort 12G 連接埠...
-
Page 17: 硬體連結示意圖
Docking SA2TB3 User Manual 3. 硬體連結示意圖 SA2TB3 連結電腦示意圖 SA2TB3 連結外接設備示意圖 Thunderbolt ™ daisy chain SAS 12G 硬碟外接盒 最多可串接6台裝置 例如 STARDOM ST4-U6/ST8-U6... -
Page 18: 注意事項
SA2TB3 內建風扇故障警示功能,若 SA2TB3 風扇發生故障時,內建的蜂鳴器會發出警告聲響,前面 板的故障指示燈也會亮起;此時你可選按系統前面的靜音按鈕,先將警示聲關閉,並在允許的狀況下 關閉 SA2TB3 電源讓機器降溫;同時,請先確認機體擺放環境是否通風良好,沒有任何物體擋住風扇 孔,一併檢查 SA2TB3 的風扇是否停止運轉;待上述檢查確認後,再將電源開啟繼續使用本系統。若 問題還是無法獲得解決,請與此產品供應商或 STARDOM 連絡,以便取得進一步的支援。 6. MSU 簡易設定 Mini-SAS 外接設備藉由 SA2TB3 連結後,可透過 Marvell Storage Utility(MSU)建立多種 RAID 模式。 ㄧ、建立 RAID 模式: 1. 開啟 MSU 程式進入登錄頁面, 使用 Windows 或 Mac 帳戶及密碼登錄進入 MSU。 若有帳戶卻無密碼, 請將 MSU 登錄密碼處維持空白。... - Page 19 Docking SA2TB3 User Manual 2. 點擊【Operation】與【Create Array】。 3. 點擊選擇硬碟。 4. 選擇【RAID 5】(或其他 RAID)...
- Page 20 Docking SA2TB3 User Manual 5. 設定 Stripe Size 數值越大,大量傳輸資料的效能越好(如圖像編修、影音編輯等); 數值越小,隨機讀寫越快(如程式啟動、文書處理、系統頻繁讀寫等)。 6. 輸入存儲名稱,再點擊【Submit】,提交 RAID 設置。 7. 提交 RAID 設置後的回饋如下:...
- Page 21 Docking SA2TB3 User Manual 8. 點 擊【Create VD】, 將【Initialize】 的 選 項 設 定 為【Fast Initialization】; 將【Gigabyte Rounding】的選項設定為【10G】,再點擊【Submit】。 No Initialization Fast Initialization Foreground Initialization Background Initialization 9. 提交後,您將獲得一個 New_VD。 P.S. VD 為虛擬磁碟 virtual disk 的簡稱 10. 於作業系統進行初始化硬碟的設定。...
- Page 22 Docking SA2TB3 User Manual 11. 格式化之後,即可開始使用。 二、移除 RAID 模式: 1. 點擊【Operation】與【Delete VD】。 2. 在第一條警告消息中點擊【OK】。...
- Page 23 Docking SA2TB3 User Manual 3. 在第二條警告信息中點擊【OK】。 4. 點擊【Operation】、【Delete Array】與【Submit】 5. 在警告信息中點擊【OK】。...
-
Page 24: 燈號說明
Docking SA2TB3 User Manual 6. 磁碟系統轉為 JBOD 模式,之後只需要個別格式化硬碟,或設置新的 RAID 模式。 更詳細的 RAID 設定方式請參閱 STARDOM All TB2&TB3 RAID 5 Storage MSU User Manual.pdf 7. 燈號說明 系統指示燈 故障指示燈 狀態 蜂鳴器 藍燈 紅燈 電源開啟 恆亮 — — 開機一短音 風扇故障 恆亮 閃爍... -
Page 25: 常見問題
Docking SA2TB3 User Manual 8. 常見問題 1. SA2TB3 在開機情況下,未連接 Thunderbolt™ cable 時,風扇與電源指示燈皆為停止及休眠狀態, 直至連接 Thunderbolt™ cable 至電腦才會啟動風扇及電源指示燈。 2. 電腦進入睡眠模式時,SA2TB3 的風扇與電源指示燈皆為停止及休眠狀態,直至喚醒時才會啟動風 扇及電源指示燈。 3. 若 SA2TB3 裝設在 Windows 作業系統上卻無法連線,請參考下方步驟: A. 開啟右下角工作列圖示 B. 在 Thunderbolt™ software 圖示上擊點滑鼠右鍵 C. 選擇「批准已接上的裝置」 D. 選擇連接埠 E. 等候對話框「批准 Thunderbolt™ 裝置」出現... - Page 26 Docking SA2TB3 User Manual 4. 礙於 macOS 10.13 (High Sierra) 的權限設定,如果程式來自於未識別開發者,是無法直接安裝的。 請依照下列步驟進行安裝。 A. 執行 MarvellMvumi.pkg,出現來自未識別開發者的警訊,先點選右下角的「好」。 B. 進入「系統偏好設定」後,點選「安全性與隱私」功能。 C. 接著下方就會看到被阻擋的訊息,按旁邊的「允許」。 注意:如果無法擊點允許按鈕,請先擊點左下角的鎖頭圖示,並輸入管理員密碼。...
- Page 27 Docking SA2TB3 User Manual http://www.stardom.com.tw/...


Need help?
Do you have a question about the SA2TB3 and is the answer not in the manual?
Questions and answers