
Related Manuals for 3M Dynatel 965AMS-BT


Summary of Contents for 3M Dynatel 965AMS-BT
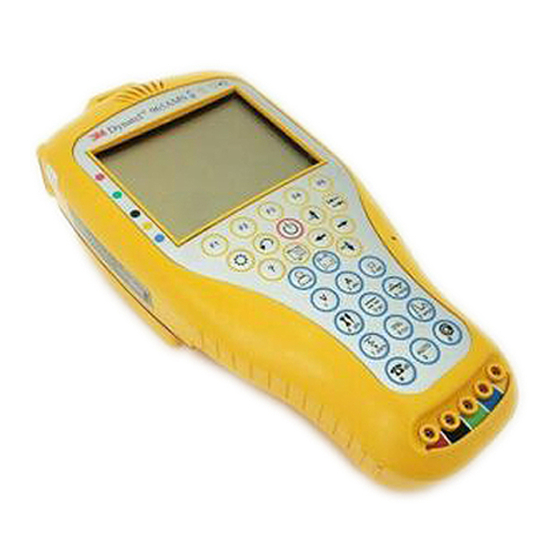
- Page 1 ™ Dynatel Advanced Modular System 965AMS-BT User’s Guide Future-Proof Testing Platform June 2006 Dynatel 965AMS-BT.indd 1 6/21/06 10:47:55 AM...
- Page 2 Dynatel 965AMS-BT.indd 2 6/21/06 10:47:55 AM...
-
Page 3: Table Of Contents
Voltage Termination ................22 Measurement Functions ..............24 Volts-DC or AC ..................25 Loop Current...................27 Ohms Measurements................30 Toolbox ....................36 Opens ......................45 Tone......................50 RFL (Resistance Fault Locate) ...............55 DSL (Digital Subscriber Line)..............91 TDR.......................102 POTS.....................121 Auto Test ....................140 Talk Set ....................161 Dynatel 965AMS-BT.indd 3 6/21/06 10:47:55 AM... - Page 4 Care & Maintenance ..............168 Charging....................168 AC Charger ...................168 DC Charger ...................169 Level of Charge..................169 Battery Pack ..................169 Battery Holder..................172 System Reset..................172 Test Leads .....................173 Specifications ................174 Electrical Specifications................174 General Specifications ................177 Replacement Items ..............178 Troubleshooting ................179 Dynatel 965AMS-BT.indd 4 6/21/06 10:47:55 AM...
-
Page 5: Introduction
Introduction 3M™ Dynatel™ Advanced Modular System 965AMS Introduction Getting Started 1. Press the red key to power up the unit or to power down the unit. 2. Press the key to change the contrast. Use the keys to adjust the contrast on the screen. - Page 6 Introduction 3M™ Dynatel™ Advanced Modular System 965AMS Getting Started 5. Some screens require you to choose from a list of possible choices. Use the up and down arrow keys to make your choice. 6. Other screens may allow you to enter information such as telephone numbers.
-
Page 7: Welcome Screen
Introduction 3M™ Dynatel™ Advanced Modular System 965AMS Getting Started 8. Use the (escape) key to quit the current screen without making any changes. Use multiple escapes to return to the Welcome screen. 9. The battery symbol in the upper right-hand corner of the display gives an indication of the approximate battery capacity. -
Page 8: High Voltage
Introduction 3M™ Dynatel™ Advanced Modular System 965AMS High Voltage This screen indicates a high voltage (120 VAC/VDC or greater) has been detected between the test leads when not in the Voltage Mode. The tester has opened an internal relay to protect itself from damage. -
Page 9: System Setup
System Setup 3M™ Dynatel™ Advanced Modular System 965AMS System Setup Start with the Welcome Screen. Press to review the Setup global settings or to make changes. Press RS-232 Control upload results with a serial port, or press Bluetooth upload results with a wireless connection. -
Page 10: Language
System Setup 3M™ Dynatel™ Advanced Modular System 965AMS Country 2. Use the up and down arrow keys to highlight a country. You will be warned about changing country-specific default values and asked to confirm or cancel your selection. Press continue or press to quit without making changes. -
Page 11: Units
System Setup 3M™ Dynatel™ Advanced Modular System 965AMS Units 1. Use the Units menu to change the Units of Measure. Use the up and down arrow keys to highlight Units. Press to continue or Change press to quit without making changes. - Page 12 System Setup 3M™ Dynatel™ Advanced Modular System 965AMS Units 2. Use the up and down arrow keys to select the units you want to change. Press to change Change Selection the units of measure. An “X” in a box indicates your choice.
-
Page 13: Clock Settings
System Setup 3M™ Dynatel™ Advanced Modular System 965AMS Clock Settings 1. Use the Clock Settings menu to select the clock format and to set the correct time. Use the up and down arrow keys to highlight Units. Press continue or press to quit without making changes. - Page 14 System Setup 3M™ Dynatel™ Advanced Modular System 965AMS Clock Settings 3. Press , then enter the Select correct time using the blue keys. 4. Press to enter the Select date format. Choose month, day, year or day, month, year. Dynatel 965AMS-BT.indd 14...
- Page 15 System Setup 3M™ Dynatel™ Advanced Modular System 965AMS Clock Settings 5. Press to choose the Select 12 hour or 24 hour format. Use the up and down arrow keys to select the format. If you choose the 12 hour format, press a.m.
-
Page 16: Set Beep Volume
System Setup 3M™ Dynatel™ Advanced Modular System 965AMS Set Beep Volume 1. Use this menu to change the Set Beep Volume. Use the up and down arrow keys to highlight Set Beep Volume. Press Change continue or press to quit without making changes. -
Page 17: Power Down Timeout
System Setup 3M™ Dynatel™ Advanced Modular System 965AMS Power Down Timeout 1. Use this menu to change the Power Down Timeout. Use the up and down arrow keys to highlight Power Down Timeout. Press Change continue or press to quit without making changes. -
Page 18: Custom Cable
System Setup 3M™ Dynatel™ Advanced Modular System 965AMS Custom Cable Use Custom Cable 1 or Custom Cable 2 to create a special cable you are using on a regular basis that has capacitance values that are different from existing cables. - Page 19 System Setup 3M™ Dynatel™ Advanced Modular System 965AMS Custom Cable 4. Use the blue keys to enter the capacitance to ground. Press Select Mutual 5. Use the blue keys to enter the mutual capacitance. Press Select Ohms Dynatel 965AMS-BT.indd 19...
- Page 20 System Setup 3M™ Dynatel™ Advanced Modular System 965AMS Custom Cable 6. Use the blue keys to enter ohms per thousand feet. Press Select Velocity 7. Use the blue keys to enter the velocity propagation. If you do not know this value, use 0.68.
- Page 21 System Setup 3M™ Dynatel™ Advanced Modular System 965AMS Custom Cable 8. Use the up and down arrow keys to select Custom 1 or Custom 2. Press to save the custom cable. Dynatel 965AMS-BT.indd 21 6/21/06 10:48:03 AM...
-
Page 22: Voltage Termination
System Setup 3M™ Dynatel™ Advanced Modular System 965AMS Voltage Termination 1. The Voltage Termination option allows you to select the input impedance of the 965AMS digital voltmeter (in supported countries only). The input impedance of the internal 965AMS voltmeter is normally 1Mohm. - Page 23 System Setup 3M™ Dynatel™ Advanced Modular System 965AMS Voltage Termination 2. Use the up and down arrow keys to select the Voltage Termination you want to use. Press to save your choice. Dynatel 965AMS-BT.indd 23 6/21/06 10:48:03 AM...
-
Page 24: Measurement Functions
Measurement Functions 3M™ Dynatel™ Advanced Modular System 965AMS Measurement Functions The 12 measurement functions include: DC and AC voltage measurements milliAmps and ground resistance measurements Ohms measurement and Soak Test Self-Calibrate, Stored Results and Ohms-to-Distance Calculator Opens distance measurement Send Tones... -
Page 25: Volts-Dc Or Ac
Measurement Functions 3M™ Dynatel™ Advanced Modular System 965AMS Volts-DC or AC The Volts function measures the DC voltage or AC voltage between Tip, Ring and Gnd. Volts-DC or AC>Hook-Up Volts-DC or AC>Operation 1. Press the blue to start the voltage measurement function. - Page 26 Measurement Functions 3M™ Dynatel™ Advanced Modular System 965AMS Volts-DC or AC>Operation 4. Press to display Ring Gnd the R-G voltage. The T-G measurement will be saved on the screen in a smaller box until a new measurement updates the screen.
-
Page 27: Loop Current
Measurement Functions 3M™ Dynatel™ Advanced Modular System 965AMS Loop Current Loop Current measures the loop current in an active line. Loop Current>Hook-Up Loop Current>Operation 1. Press the blue key to start this test. 2. This is a continuous measurement until you disconnect the test leads or choose another function. - Page 28 Measurement Functions 3M™ Dynatel™ Advanced Modular System 965AMS Loop Current>Operation 3. Over Current Warning The tester has detected current higher then 110 mA. High current can damage the test set. Use standard safety practices for disconnecting the test leads and eliminating the source of the high current.
- Page 29 Measurement Functions 3M™ Dynatel™ Advanced Modular System 965AMS Loop Current>Ground Resistance>Operation 1. Press Ground Resistance to access the Ground Resistance function. 2. Press to start the Test test. The results will be displayed in the box in the center of the screen.
-
Page 30: Ohms Measurements
Measurement Functions 3M™ Dynatel™ Advanced Modular System 965AMS Ohms Measurements The Ohms Measurement function measures the insulation resistance between the Tip, Ring and ground. This function can also measure the resistance of the Tip and Ring loop or individual wires. - Page 31 Measurement Functions 3M™ Dynatel™ Advanced Modular System 965AMS Ohms Measurements>Operation 3. Press to display Tip Gnd the Tip-Ground resistance. The T-R measurement will be saved on the screen in a smaller box until a new measurement updates the screen. 3. Press...
- Page 32 Measurement Functions 3M™ Dynatel™ Advanced Modular System 965AMS Ohms Measurements>Voltage Compensation The Voltage Compensation feature compensates for crossed battery on the line. Use “compensated” for most measurements. Press to turn off Turn Off V Comp voltage compensation. Ohms Measurements>Soak Test...
- Page 33 Measurement Functions 3M™ Dynatel™ Advanced Modular System 965AMS Ohms Measurements>Soak Test 1. Take an initial resistance measurement by pressing key. Snap Shot 2. You will compare this to other active measurements to determine the source of the fault. 3. One of the properties of...
- Page 34 Measurement Functions 3M™ Dynatel™ Advanced Modular System 965AMS Ohms Measurements>Soak Test 4. A property of corrosion is that a current flowing through the corrosion will cause the corrosion to become a better conductor. The ohmmeter will show a lower resistance reading if corrosion is the cause.
- Page 35 Measurement Functions 3M™ Dynatel™ Advanced Modular System 965AMS Ohms Measurements>Soak Test 6. Use Go To Positive Voltage Go To Negative Voltage reverse the voltage polarity. Use the lowest resistance reading of the two numbers for your measurements. Dynatel 965AMS-BT.indd 35...
-
Page 36: Toolbox
Measurement Functions 3M™ Dynatel™ Advanced Modular System 965AMS Toolbox Use the Toolbox to: (1) view saved test results, (2) perform a self calibrate, (3) use the Ohms to Distance calculator, and (4) Upload results to PC Link. Toolbox>Stored Results The Stored Results function allows you to review the results of previously saved tests. - Page 37 Measurement Functions 3M™ Dynatel™ Advanced Modular System 965AMS Toolbox>Stored Results>Operation 2. If one or more test results have been stored, the ID number for each will be displayed. The ID number is like a file folder and each test result is like a file.
- Page 38 Measurement Functions 3M™ Dynatel™ Advanced Modular System 965AMS Toolbox>Self-Calibrate The Self-Calibrate function will verify that all of the internal circuits and test leads are operating properly. Use self-calibrate: • After the first full battery charge before you put the tester in service for the first time.
- Page 39 Measurement Functions 3M™ Dynatel™ Advanced Modular System 965AMS Toolbox>Self-Calibrate>Operation 1. Press the blue key to enter the Toolbox function. 2. Use the up and down arrow keys to select the Self- Calibrate function. Press to save your choice. 3. The calibration may take up to 1 minute to complete.
- Page 40 Measurement Functions 3M™ Dynatel™ Advanced Modular System 965AMS Toolbox>Ohms-to-Distance Calculator Use this function to convert from Ohms to Distance or Distance to Ohms based on temperature and wire gauge. Toolbox>Ohms-to-Distance Calculator>Operation 1. Press the blue key to enter the Toolbox function.
- Page 41 Measurement Functions 3M™ Dynatel™ Advanced Modular System 965AMS Toolbox>Ohms-to-Distance Calculator>Operation 4. Use the up and down arrow keys to select the wire gauge. Press Select to save and highlight the temperature field. 5. Use the blue keys to enter the temperature.
- Page 42 965AMS tester to your PC or laptop. PC Link can be ™ ™ used either with the 3M Dynatel Advanced Modular System 965AMS Serial Cable 1190 or via a Bluetooth® connection. Download the PC Link software from www.3m.com/dynatel. Dynatel 965AMS-BT.indd 42 6/21/06 10:48:13 AM...
- Page 43 Measurement Functions 3M™ Dynatel™ Advanced Modular System 965AMS Toolbox>PC Link>Serial Cable Hookup Note: You must have a COM port on your laptop or PC to use PC Link with a serial cable. ™ ™ Connect the 3M Dynatel Advanced Modular System 965AMS Serial Cable 1190 to the 965AMS tester and the PC or laptop if you will be uploading stored test results.
- Page 44 Measurement Functions 3M™ Dynatel™ Advanced Modular System 965AMS Toolbox>PC Link>Operation 1. Start with the Welcome Screen. Press RS-232 Control to upload results with a serial port, or press to upload results Bluetooth with a wireless connection. 2. Press the blue key to enter the Toolbox function.
-
Page 45: Opens
Measurement Functions 3M™ Dynatel™ Advanced Modular System 965AMS Toolbox>PC Link>Operation 4. Use the up and down arrow keys to select the file to upload. Press Upload transfer the file. Opens Opens measures the distance to an “open” circuit. This could be a broken wire, a cut pair or the end of the circuit. - Page 46 Measurement Functions 3M™ Dynatel™ Advanced Modular System 965AMS Opens>Operation 1. Press the blue to enter the Opens measurement function. 2. Press to enter the Setup Setup menu. 3. Use the up and down arrow keys to choose the type of cable that best describes your cable.
- Page 47 Measurement Functions 3M™ Dynatel™ Advanced Modular System 965AMS Opens>Operation 5. The T-R measurement will be saved on the screen in a smaller box until a new measurement updates the screen. Press to display Ring Gnd the R-G distance. 6. The T-G measurement will...
- Page 48 Measurement Functions 3M™ Dynatel™ Advanced Modular System 965AMS Opens>Calibrate Cable Use this function to measure the capacitance of a known good pair within a cable of known length. This value can be used as a ‘Calibrated Cable’(or ‘reference’) to find the distance to an ‘open’...
- Page 49 Measurement Functions 3M™ Dynatel™ Advanced Modular System 965AMS Opens>Calibrate Cable 3. Use the blue keys to enter the known distance. Press Measure 4. The screen will display the measured capacitance per distance for the reference pair. Note: A Yield sign indicates...
-
Page 50: Tone
Measurement Functions 3M™ Dynatel™ Advanced Modular System 965AMS Tone Use Tone to send a tone on a pair. Tone>Set-Up Tone>Operation 1. Press the blue key to enter the Tone function. 2. Use the up and down arrow keys to highlight the frequency that you want to use. - Page 51 Measurement Functions 3M™ Dynatel™ Advanced Modular System 965AMS Tone>Operation 3. Press to send the Send Tone tone. 4. Press to stop the Stop Tone tone. Dynatel 965AMS-BT.indd 51 6/21/06 10:48:17 AM...
- Page 52 Measurement Functions 3M™ Dynatel™ Advanced Modular System 965AMS Tone>Edit The Frequency Of A Tone There are 10 frequencies that can be stored in memory. If you need a different frequency you can edit any of the 10 frequencies and change to a new frequency.
- Page 53 Measurement Functions 3M™ Dynatel™ Advanced Modular System 965AMS Tone>Edit The Frequency Of A Tone 4. Use the blue keys to enter the frequency in kHz. 5. Press Tone>Applications The Tone function can be used for three applications: ID Tone, Precision Tone and Wideband Tone.
- Page 54 Measurement Functions 3M™ Dynatel™ Advanced Modular System 965AMS Tone>Applications>Precision Tone 1. Use the Precision Tone to send a tone. 2. Use another 965AMS tester to receive the tone. Press the blue key, then select Loss 3. The output frequency of the Precision tone is adjustable between 200Hz and 19,999Hz.
-
Page 55: Rfl (Resistance Fault Locate)
Measurement Functions 3M™ Dynatel™ Advanced Modular System 965AMS RFL (Resistance Fault Locate) Use RFL to find the distance to a short or ground. Important Note: You must first use the Auto test , or the Ohmmeter , to determine the type of fault. - Page 56 Measurement Functions 3M™ Dynatel™ Advanced Modular System 965AMS RFL>Hook-Up Tip-Cross Separate Pair Short Separate Pair Ring-Ground Separate Pair Dynatel 965AMS-BT.indd 56 6/21/06 10:48:19 AM...
- Page 57 Measurement Functions 3M™ Dynatel™ Advanced Modular System 965AMS RFL>Hook-Up Tip-Ground Separate Pair Ring-Cross Single Pair Tip-Cross Single Pair Short Single Pair Dynatel 965AMS-BT.indd 57 6/21/06 10:48:21 AM...
-
Page 58: Auto Test
Measurement Functions 3M™ Dynatel™ Advanced Modular System 965AMS RFL>Hook-Up Tip-Ground Single Pair Ring-Ground Single Pair RFL>Separate-Pair, Single-Section Operation 1. Use the Auto test , or the Ohmmeter , to determine the type of fault. Dynatel 965AMS-BT.indd 58 6/21/06 10:48:22 AM... - Page 59 Measurement Functions 3M™ Dynatel™ Advanced Modular System 965AMS RFL>Separate-Pair, Single-Section Operation 2. Press the blue key to enter the RFL function. Press until the up Select and down arrow keys are in the Fault section. Use the up and down arrow keys to select the type of fault that you have.
- Page 60 Measurement Functions 3M™ Dynatel™ Advanced Modular System 965AMS RFL>Separate-Pair, Single-Section Operation 4. Press to move to Select the Multiple-Single section. Use the up and down arrow keys to select Single Section. 5. Press to choose the Setup measurement parameters. Dynatel 965AMS-BT.indd 60...
Need help?
Do you have a question about the Dynatel 965AMS-BT and is the answer not in the manual?
Questions and answers