Table of Contents
Advertisement
Quick Links
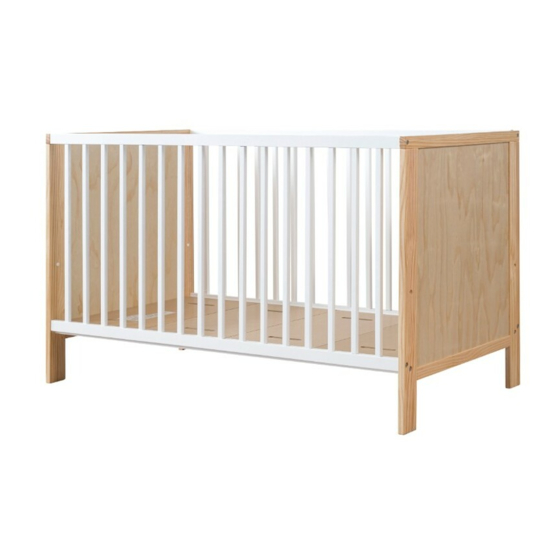
Thank you for purchasing a Mocka Aspiring Cot.
Please follow the manufacturer's assembly instructions in detail
to ensure the safety features of the cot are not compromised.
A
screw
x12
Ensure the cot is placed at a reasonable distance from curtains, blinds, heaters
and power points. Keep all medications, string, elastic, small toys or small items,
such as money, out of reach from any position in the cot.
Assembly
Care must be taken when attaching sides. Do not over-tighten screws as this can
cause damage to the cot.
Care and Maintenance
Regularly check all screws for tightness or damage that could render the cot
unsafe. To clean - use a damp cloth, avoiding the use of detergents or abrasives.
Recommended mattress size
This cot has been manufactured for use with a mattress which measures 1300mm
long x 690mm wide x 100mm in thickness. The width and length are specified
because it is important that gaps between the mattress and the sides and ends
of the cot will not exceed 40mm. This is to minimize the risk of a child's limb
becoming caught in the gap. The thickness of the mattress has been specified to
ensure that the depth of the cot is greater than 500mm with the mattress base in
the lower position to minimize the risk of a child climbing or falling out of the cot.
mocka.co.nz | mocka.com.au
B
Allen key
x1
Side Panel
Cot Mattress Base
WARNING: TO PREVENT FALLS, THE MATTRESS BASE
OF THIS COT SHOULD BE ADJUSTED TO THE LOWEST
POSITION BEFORE THE CHILD CAN SIT UP
End Panel
1
Advertisement
Table of Contents

Subscribe to Our Youtube Channel
Related Manuals for Mocka Aspiring Cot


Summary of Contents for Mocka Aspiring Cot
- Page 1 Mocka Aspiring Cot Assembly Instructions Thank you for purchasing a Mocka Aspiring Cot. Please follow the manufacturer’s assembly instructions in detail to ensure the safety features of the cot are not compromised. screw Allen key Side Panel Ensure the cot is placed at a reasonable distance from curtains, blinds, heaters and power points.
- Page 2 Mocka Aspiring Cot Assembly Instructions Find one of the side panels and attach to both end panels of the cot using 4x screws (A) in the holes as shown. mocka.co.nz | mocka.com.au...
- Page 3 Mocka Aspiring Cot Assembly Instructions Attach the cot mattress base at the required level using 4x screws (A) as shown, and tighten all screws using the allen key (B). mocka.co.nz | mocka.com.au...
- Page 4 Mocka Aspiring Cot Assembly Instructions Slide the remaining side panel into place and attach using 4x screws (A) in the holes as shown. Tighten all screws using the allen key. mocka.co.nz | mocka.com.au...
- Page 5 Mocka Aspiring Cot Jolt Wardrobe Assembly Instructions ASSEMBLY INSTRUCTIONS All done! Regularly check all screws are suitably tightened. Place the OPTIONAL: To adjust mattress base setting, push the small plastis correct size mattress into the cot before use. To clean use a damp screws out from the alternative holes with a screwdriver and repeat cloth, avoiding the use of detergents or abrasives.
Need help?
Do you have a question about the Aspiring Cot and is the answer not in the manual?
Questions and answers