Table of Contents
Advertisement
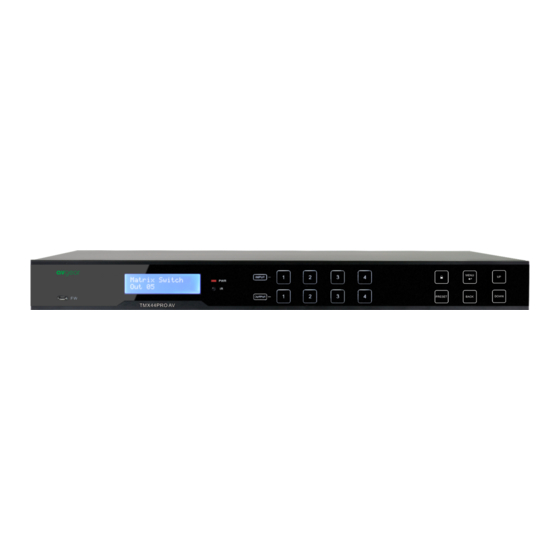
AVG-TMX44PRO
The TMX44PRO is a professional 4K 4x4
HDBaseT Matrix Switcher that accommodates 4
HDMI IN, 4 HDBT with 2 mirrored HDMI outputs, 4
Digital Audio outputs and 4 Analogue audio
outputs. HDMI inputs are selected by the front
touch panel, IR, RS232 and IP.
Features:
Supports 4Kx2K@60Hz & 1080p 3D
signals.
Transmit 4Kx2K signal for 26ft (8m) via
HDMI port, 131ft (40m) via HDBaseT
port
Transmit 1080p signal for 230ft (70m)
via HDBaseT port
Features PoH technology, providing
power for HDBaseT Receivers
HDCP2.2 compatible, supports manual
HDCP management and auto-detecting
LCD screen shows real-time I/O
connection status, switching status,
HDCP status, and output resolution
Controllable via the front touch panel,
RS232, IR and TCP/IP
Supports bi-directional IR & RS232
control
Built-in GUI for TCP/IP control
Input and output mapping is
automatically stored and recalled when
the unit is powered on and off and in the
event of a power outage.
Supports firmware upgrades through
the Micro USB port
Easy installation with rack-mounting
design
Advertisement
Table of Contents

Related Manuals for AVGear AVG-TMX44PRO


Summary of Contents for AVGear AVG-TMX44PRO
- Page 1 AVG-TMX44PRO Features: Supports 4Kx2K@60Hz & 1080p 3D signals. Transmit 4Kx2K signal for 26ft (8m) via HDMI port, 131ft (40m) via HDBaseT port Transmit 1080p signal for 230ft (70m) via HDBaseT port Features PoH technology, providing power for HDBaseT Receivers ...
- Page 2 AVG-TMX44PRO PLEASE READ THIS PRODUCT MANUAL CAREFULLY BEFORE USING THIS PRODUCT. This manual is only for operational instruction only, and not to be used in a maintenance capacity. The functions described in this version are current as at February 2017. Any changes of functions and operational parameters will be updated in future manual versions.
- Page 3 AVG-TMX44PRO SAFETY OPERATION GUIDE In order to guarantee the reliable operation of the equipment and safety of the user, please abide by the following procedures in installation, use and maintenance: 1. The system must be earthed properly. Please do not use two blade plugs and ensure the AC power supply ranges from 100v to 240v and from 50Hz to 60Hz.
-
Page 4: Table Of Contents
TABLE OF CONTENTS Introduction ......................Introduction to the AVG-TMX44PRO ............Features ...................... What’s in the Box ..……………………………………………………………………2 Product Appearance of the AVG-TMX44PRO ............Front Panel....................Rear Panel ....................System Connection ....................System Applications ..................Usage Precautions ..................Connection Diagram .................. -
Page 5: Introduction
AVG-TMX44PRO 1. Introduction 1.1. Introduction to the AVG-TMX44PRO The TMX44PRO 4K HDBaseT 4x4 Matrix Switcher is a professional 4x4 HDBaseT Matrix Switcher that accommodates 4 HDMI IN, 4 HDBT Outputs with 2 mirrored HDMI outputs, 4 Digital Audio outputs and 4 Analogue Audio outputs. Each zone has... -
Page 6: What's In The Box
AVG-TMX44PRO 2. What’s in the Box 1 x TMX44PRO - 4K HDBaseT 4x4 Matrix Switcher 2 x Mounting ears (6 x Screws) 4 x Rubber feet (4 x Black Screws) 1 x RS232 cable 1 x IR Receiver (12V) ... -
Page 7: Product Appearance Of The Avg-Tmx44Pro
AVG-TMX44PRO 3. Product Appearance of the AVG-TMX44PRO 3.1. Front Panel INPUT EDID EDID CLEAR ENTER ENTER TMX44PRO Name Description Touching any button will wake up the touch panel, and then all buttons will be lit white. If there is no operation of the touch panel within 8 seconds, the white backlight of the buttons will gos out and the matrix enters into sleep mode. - Page 8 AVG-TMX44PRO ALL: Select all inputs or outputs. EDID: EDID management button: Enable input port to manually capture and learn the EDID data of output devices. Function ⑦ CLEAR: Withdraw an operation like switching an output buttons channel or learning EDID data before it comes into effect.
-
Page 9: Rear Panel
AVG-TMX44PRO 3.2. Rear Panel HDCP2 2 COAX COAX COAX COAX CONTROL COMMON IR COAX Name Description Input port for IR control signal, connect an IR receiver here. COMMON IR Delivers IR signal to all the HDBaseT ports to control the ①... - Page 10 AVG-TMX44PRO Serial port for control of the TMX44PRO. 9-pin female DB9 ⑥ RS232 connector, connect a control device such as a PC or Automation system. ⑦ TCP/IP TCP/IP port for unit control. Power port Connect with the supplied DC 24V power adaptor. It will ⑧...
-
Page 11: System Connection
AVG-TMX44PRO 4. System Connection 4.1. System Applications Reliable performance for control and transmission makes the AVG-TMX44PRO ideal in the IT computer space, signal monitoring, big screen displays, conference systems, television broadcast, education, banking and security institutions etc. 4.2. Usage Precautions 1. -
Page 12: Connection Procedure
4.5. Connection with a HDBT Receiver The AVG-TMX44PRO features 4 HDBaseT output ports which support PoH. Connect the HDBT output ports of the AVG-TMX44PRO to the HDBaseT Receivers supporting PoH via twisted pair cable. Plug a power supply to the power port of the... -
Page 13: System Operations
AVG-TMX44PRO 5. System Operation 5.1 Front Panel Button Control The AVG-TMX44PRO features an easy to operate touch panel that can be used for control. Below is an introduction to how the system operates. 5.1.1 Switching I/O Connection 1. To switch one input to an output: Operation: “input”... -
Page 14: Edid Programming
AVG-TMX44PRO OUTPUT: OUTPUT: All input ports learn EDID data from one output port Operation: Press “EDID”, “ALL” + “OUTPUTS” + “ENTER” Example: All input ports learn EDID data from output 4 OUTPUT: Note: Indicators of the pressed buttons will blink blue for three times if the process is successful, then they will turn off. -
Page 15: Query
AVG-TMX44PRO 5.1.4 Query Check status: Press and hold the button “ENTER” for 3 seconds, it will enter into the system query menu. Use Left and Right direction button to navigate checking the previous/next items. Function Items Example Description Check the... -
Page 16: Ir Control
ENTER: Confirm operation. Note: With this IR remote, the AVG-TMX44PRO can be controlled by the built-in IR, the extended IR receiver connected to the “IR CONTROL” or ”COMMON IR” and the IR receiver on the far-end receiver. - Page 17 IR Remote of the far-end device to control the device locally. 1 to 1: (through IR IN) Connect an IR receiver with to the IR IN port of the AVG-TMX44PRO, users can control a far-end output display via its IR remote from the Matrix location.
-
Page 18: Controlling A Local Device Remotely
AVG-TMX44PRO 1 to All: (through IR ALL IN) Connect an IR receiver to the COMMON IR port of the AVG-TMX44PRO, the IR signal received from the COMMON IR port will be transmitted to all the 4 connected far-end HDBT receivers. See as below:... - Page 19 AVG-TMX44PRO Multiple to Multiple: (IR Matrix) The 4 “IR OUT” ports and the 4 “IR IN” ports on the far-end receivers make up an 4 x 4 IR matrix. See as below: IR Emitter HDTV HDTV Receiver 1 Receiver 2...
-
Page 20: Rs232 Control
5.3 RS232 Control 5.3.1 Connection with the RS232 Communication Port As well as the front control panel, the AVG-TMX44PRO can be controlled by a far- end control system through the RS232 communication port. This RS232 communication port is a female 9-pin D connector. The definition of its pins are listed in the table below. -
Page 21: Control Through The 3-Pin Rs232 Port
AVG-TMX44PRO 5.3.3 Control through the 3-pin RS232 port Control 3rd party device from local Connect the RS232 (3-pin phoenix plug) port in any zone to PC, and connect the controlled RS232 device (3rd party device) to the corresponding (same zone as PC) -
Page 22: Installation/Removal Of Rs232 Control Software
AVG-TMX44PRO 5.3.4 Installation / Removal of RS232 Control Software Installation Copy the control software file to the computer connected with the switcher. Removal Delete all the control software files in corresponding file path. 5.3.5 Basic Settings Firstly, connect the switcher with an input device and an output device. Then, connect it with a computer which is installed with the RS232 control software. -
Page 23: Rs232 Communication Commands
AVG-TMX44PRO 5.3.6 RS232 Communication Commands Note: Please disconnect all the cat cables before sending command EDIDUpgrade[X]. In the below commands, “[” and “]” are symbols for easy reading and do not need to be typed in the actual string. - Page 24 AVG-TMX44PRO Feedback Command Function Example Transfer the AV signal from the input channel [x1] to one or several output AV: X1-> X2 [x1]V[x2]. channels ([x2], separate output (X1/X2=01~04) channels with comma). Transfer the AV and IR signal from input channel [x1] to one or several AV: X1->...
- Page 25 AVG-TMX44PRO Feedback Command Function Example Set communication between PC and HDBaseT receiver. ① Y is for RS232 port (connect with RS232 port of HDBaseT receiver) Y= 1~5 or A~H, The value of Y is defined into the following meanings (in a given baud rate depended by the value of X): a.
- Page 26 AVG-TMX44PRO Feedback Command Function Example Restore the factory default EDID data EDIDMInit. EDIDMInit. of every input. Manual EDID switching. Enable input[Y] to learn the EDID data of output[X]. If the EDID data is not EDIDM[X]B[Y]. EDIDM[X]B[Y] available, then set it to initial EDID data.
-
Page 27: Tcp/Ip Control
HDCPEN Y Y Y Y 5.4 TCP/IP Control The AVG-TMX44PRO features a TCP/IP port for IP control. Default settings: IP: 192.168.0.178; Subnet Mast: 255.255.255.0; Gateway: 192.168.0.1; Port: 23. IP & gateway settings can be changed as needed, the Port cannot be changed. -
Page 28: Control Modes
The AVG-TMX44PRO can be controlled by a PC without Ethernet access or PC(s) within a LAN. Controlled by PC Connect a computer to the TCP/IP port of the AVG-TMX44PRO and set its network address in the same address range as the default IP address of the matrix (Default: 192.168.0.178). -
Page 29: Gui For Tcp/Ip Control
TCP IP Port Follow these steps to connect the devices: Step1. Connect the TCP/IP port of AVG-TMX44PRO to Ethernet port of PC with a cat cable. Step2. Set the PC’s IP address in the same range as the matrix’s default IP. Log into the matrix via its GUI. - Page 30 AVG-TMX44PRO There are 2 usernames – admin (default password: admin) and user (default password: user). Logging in as admin allows access to more configuration interfaces than the user login. Enter username and the password. Here is a brief introduction to the interfaces.
- Page 31 AVG-TMX44PRO The button matrix displays every possible connection between every input and output, users can select the connections by clicking the corresponding buttons. Buttons 1~9 at the right-bottom corner enables quick saving and recall for overall connection status. Users: Display or modify credential settings, front panel lock, and GUI version.
- Page 32 AVG-TMX44PRO Configuration: Set the HDCP Compliance status for every input, and manage EDID. See the screenshot below: Network: Query and configure network settings including MAC address, IP address, subnet mask, and Gateway...
-
Page 33: Gui Update
AVG-TMX44PRO Note: Logging in as a user accesses the main interface only. 5.4.3 GUI Update The GUI for the AVG-TMX44PRO supports online updates at http://192.168.0.178:100. Type the username and password (the same as the GUI log-in settings, the modified password will be available only after rebooting) to log into the configuration interface. -
Page 34: Firmware Update Via Usb
To meet the needs of different users or further additional functions, the firmware of the AVG-TMX44PRO can be upgraded via USB. When you need to upgrade it, please download the latest upgrade file and then you are able to upgrade it through the update .exe file. -
Page 35: Specifications
AVG-TMX44PRO 6. Specifications Video Input 4 HDMI Input Female HDMI Input Connector T.M.D.S. 2.9V~3.3V Input Level 100Ω (Differential) Input Impedance Video Output Output 2 HDMI; 4 HDBaseT Output Connector Female HDMI; Female RJ45(with LED indicators) Output Level T.M.D.S. 2.9V~3.3V Output Impedance 100Ω... -
Page 36: Panel Drawing
AVG-TMX44PRO 7. Panel Drawing 436.4 mm INPUT EDID EDID CLEAR ENTER ENTER TMX44PRO HDCP2 2 COAX COAX COAX COAX CONTROL COMMON IR... -
Page 37: Troubleshooting & Maintenance
AVG-TMX44PRO 8. Troubleshooting & Maintenance Problems Causes Solutions Check whether the cables The connecting cables may are connected correctly and not be connected correctly or are in good working Colour loss or no video faulty. condition. signal output Make sure the connection is Failed or loose connection. - Page 38 AVG-TMX44PRO resolution of the video source automatically compliant with the output resolution. Check to ensure the connection between the Wrong connection control device and the unit is wired correctly. Cannot control the device with the control device (e.g. Type in correct RS232...
Need help?
Do you have a question about the AVG-TMX44PRO and is the answer not in the manual?
Questions and answers