Table of Contents
Advertisement
Quick Links
Advertisement
Table of Contents

Related Manuals for Liesegang Mayfair


Summary of Contents for Liesegang Mayfair
- Page 1 Bedienungsanleitung User Manual Mayfair Mayfair pro Liesegang Unternehmensgruppe...
-
Page 2: Table Of Contents
Table of contents 1. Before use 2. Scope of delivery / accessories / disposal of packing material 2.1 Scope of delivery 2.2 Accessories 2.3 Disposal of packing material 3. Views and parts of the projector 3.1 Top, front and side view of the unit 3.2.Rear view 3.3 Bottom view Installation... -
Page 3: Before Use
Before use Before use The following notes are intended to be a help for handling the product in accordance with its designated purpose. Caution: A person could be killed or injured if the wrong operation is done by ignoring this indication. - Page 4 Before use Do not apply any shock. If you drop this unit or if the casing is broken, turn off the power switch, disconnect the power plug and contact your dealer. If you use it as it is, it may cause a fire, an electric shock, etc. If any abnormality occurs.
- Page 5 Before use Never leave the projector switched on unsupervised. Never leave the projector switched on unsupervised or let children play with it as unusual conditions may occur which can cause a fire, an electric shock, etc. User Manual Multimedia Projector...
- Page 6 Before use Attention ! Non-observance can lead to injury or damage. _______________________________________________________________ Caution when carrying the unit. When the unit is to be moved, be sure to disconnect the power plug and check that all external connection cords are removed before moving it. If not, the cord may be damaged and it may cause a fire, an electric shock, etc.
- Page 7 Before use Never block the ventilation slots. Never block the openings for the ventilation or place objects in the projector. Heat may accumulate inside the projector and it may catch fire. Set the caster stoppers. When this unit is installed on a table with casters, set the caster stoppers. If the table moves, it may fall over, causing an injury.
- Page 8 Before use Use of batteries. Do not use batteries not specified for this unit. Do not use new batteries mixed with old ones. This may cause a fire, injury due to burst of battery, liquid leakage. When inserting batteries in this unit, pay attention to the direction of the + and - polarities and insert the batteries correctly.
-
Page 9: Scope Of Delivery / Accessories / Disposal Of Packing Material
PS/2 mouse cable (1.8m / 6.0ft) Audio-Kabel (1.8m) Ein/Aus Quelle Menü LASER ENTER Remote control and batteries Stumm Trapezkorrektur Standbild Lautstärke ZOOM AAA battery x 2 User Manual Bedienungsanleitung Mayfair Mayfair pro Liesegang Unternehmensgruppe Air Filter User Manual Multimedia Projector... -
Page 10: Accessories
Scope of delivery / Accessories / Disposal of packing material Accessories The following accessories are available: Monitor splitterbox, Boosterbox, booster extension cables, HDTV Cable, Ceiling mount, replacement bulb In case of extreme operating conditions: In case of extreme operating conditions – examples: >8-hour-operation, severe vibrations, great temperature fluctuations, heavy nicotine or other aggressive smoke, heights exceeding 3000 m –... -
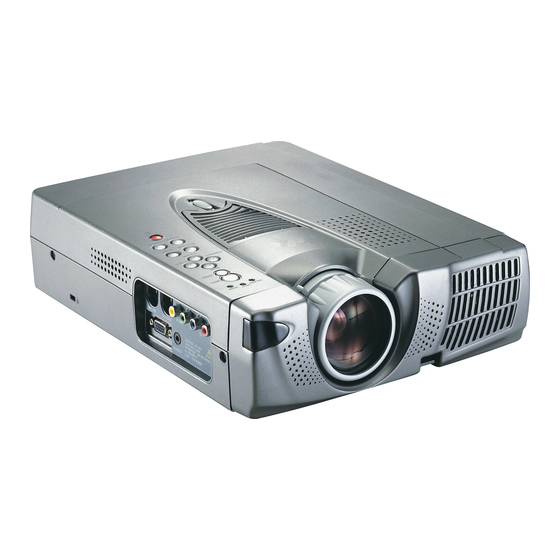
Page 11: Views And Parts Of The Projector
Views and parts of the projector Views and parts of the projector Top, front, and side view of the unit (with control buttons, indicators and input sources) Keypad and indicators Air filter Lampe (p 26) Strom Temperatur Speaker MENÜ Lens (6-7, p 18) ENTER Exhaust vents... -
Page 12: Installation
Installation Installation Please read the important safety information (p2) carefully before installation. Positioning Please place the unit on a solid plat level surface. Projection distance and image size The distance from projector lens to the screen will determine the size of the projected image. The maximum image size is about 290 ~ 378 inches (about 7.3 ~9.6 meter) diagonally at a distance of 15 meter. -
Page 13: Ventilation
Do not operate the projector upside down or at an inclined level. This may damage the projector. Ceiling installation Mayfair / Mayfair pro can be installed on the ceiling for education, conference and home entertainment applications. The ceiling mount is an optional accessory. Please contact qualified service personnel or agent for further information or service. -
Page 14: Connections
Connections Connections Connecting a computer or a notebook PC VIDEO MAUS S-VIDEO AUDIO VGA cable Audio cable (accessory) (not supplied) Desktop-PC or Notebook Using the remote control as the PC mouse VIDEO MAUS S-VIDEO AUDIO VGA cable (accessory) Audio cable PS/2 mouse cable (not supplied) (accessory) -
Page 15: Connecting Video Equipments
Connections Connecting video equipments Composite video images Connecting a VCR/VCD/DVD player, digital camcorder by using a composite video cable Composite video cable (Accessory) VIDEO Audio VIDEO MAUS S-VIDEO VCD / DVD-Player, digitaler Camcorder AUDIO Audio cable (not supplied, optional) S-Video images Connecting a VCD/DVD player, digital camcorder by using a S-Video cable S-Video cable (accessory) S-VIDEO... - Page 16 Connections Component images: HDTV Connecting a DVD player or set-top-box by using a YPbPr to VGA converting cable VIDEO MAUS S-VIDEO AUDIO HDTV cable Audio cable (not supplied, optinal) not supplied, optinal Pr L R Audio DVD-Player, Set-Top-Box * If your DVD player does not support Macrovision (video copy protection) -encoded function, please use YCbCr video input as your component video source.
-
Page 17: Starting Operation
Starting operation Starting operation Remove the lens cap before starting operation. Lens Cap 1. Connect a PC or video equipment to the projector (Connection see p 13 - 15) 2. Connect the power cable The three indicators will flash RED and the cooling fan will operate at slow speed. - Page 18 (or the remote control) and use keys for further adjustment until the image is square. The adjustable angle of keystone correction of Mayfair / Mayfair pro is +/-15 degree. When pressing keys, it will proceed vertical keystone correction and when pressing keys, it will proceed horizontally.
- Page 19 When the "Power" indicator turns RED, user can disconnect the power cable. Mayfair / Mayfair pro is designed not able to restart when the projector just shuts off and the cooling procedure is still going on. User must wait until the cooling procedure completely finishes before restarting the unit.
-
Page 20: Using The Remote Control
Using the remote control Using the remote control Buttons on the the remote control 7.2 Inserting batteries before operating Power Mayfair / Mayfair pro attaches two AAA batteries as Source Menü LASER accessories. If the electricity is used up, please purchase ENTER and replace new ones of the same type. -
Page 21: Using The "Mouse Keys" As Wireless Pc Mouse
Using the remote control Using the "Mouse Keys" as wireless PC mouse User can use the remote control of Mayfair / Mayfair pro as a wireless PC mouse while connecting the projector to a computer. : the same as "Left button" of PC mouse. -
Page 22: Menu Operation
Menu operation Menu Operation MENU is designed for user to adjust the image components or select other function operation. User can press the "MENU" button on the keypad or on the remote control to enter the adjustable elements. VGA and HDTV (YPbPr) Input Menu When the projector is connected to a computer, a DVD player with progressive scan function, or a set-top-box for HDTV applications, user can press the "SOURCE"... -
Page 23: Factory Reset
Menu operation There are 4 elements in this component. H Position : moving the image horizontally. V Position : moving the image vertically. H Projection: Normal normal front projection mode Flip: turning the image over for rear projection. V Projection: Normal normal front projection mode Flip:... - Page 24 Menu operation Status There are 2 elements in the "Status" component. Lamp hour meter: the time of lamp used. S/W version : the version of the software. Video Input Menu When the projector is connected to a video equipment, user can press the "SOURCE"...
- Page 25 Menu operation Display There are 5 elements in the "Display" component. V Keystone: allowing +/- 15 degree adjustment of vertical keystone correction. H Keystone: allowing +/- 15 degree adjustment of horizontal keystone correction. Sharpness: adjusting the outlines of objects to be soft or hard. H Projection: Normal normal front projection mode...
- Page 26 Menu operation Status There are 2 elements in the "Status" component. Lamp hour meter: the time of lamp used. S/W version: the version of the software. Multimedia Projector User Manual...
-
Page 27: Indicators Lighting Or Flashing
Periodically check air filter for excess dust or dirt. Replace or clean as needed. Every Mayfair / Mayfair pro attaches one spare air filter for replacement. If more is required, please contact the agent for purchasing or consultation. User can clean or replace the air filter by following the procedure below. -
Page 28: Replacing The Lamp Cartridge
Replacing the Lamp Cartridge Replacing the lamp cartridge Under normal usage, the lamp life time of the projector is about 2000 hours. The output luminance will drop as lamp life diminishes. User can check the used lamp life status in the MENU (see p 23). Important Note: In case of extreme operating conditions - examples: >8-hour- operation, severe vibrations, great temperature fluctuations, heavy nicotine or... -
Page 29: Specifications Of Lcd Projector
Specifications of LCD Projector Specifications of LCD Projector Optical Native resolution : XGA (1024 x 768 pixels) : Mayfair: VGA - XGA Resolution supported Mayfair pro: VGA - SXGA : Mayfair: 1300 ANSI Lumens Brightness Mayfair pro: 1600 ANSI Lumens : 3-panel 0.9"... - Page 30 Liesegang products please do not hesitate to call Liesegang at +49 1805 390145. In case of technical problems please feel free to call Liesegang at +49 1805 390144 or +49 01805 390146. Fax Hotline +49 211 39 01 226...
-
Page 31: User Manual Multimedia Projector
Glossar Glossary of Terms Hz, KHz, MHz (Hertz, Kilohertz, Megahertz) Hertz is a unit of measurement used to express the frequency, in cycles per second, of an electrical signal or event. (Megahertz = 1 million cycles per second) Lumens A measure of light output on a screen or other surface. One lumen is the light of one candle power on each square foot of a surface of a sphere at a radius of one foot from the light soruce. - Page 32 Warranty terms Warranty terms for the Liesegang Mayfair and Mayfair pro What to do in case of a defect? Take the product to your dealer or carefully pack it and send it to us unfranked (address below). Please make sure that you enclose a copy of your receipt and briefly describe the defect.
Need help?
Do you have a question about the Mayfair and is the answer not in the manual?
Questions and answers