Table of Contents
Advertisement
Quick Links
Liesegang Optoelectronics GmbH
Kaistraße 5
D-40221 Duesseldorf
Germany
Telefon +49 (0) 211 / 3901-1
Telefax +49 (0) 211 / 3901-227
info@liesegang.de
www.liesegang.de
Technische Änderungen vorbehalten, Subject to modification
Liesegang Corp.
1001 W. Cypress Creek Rd. 103
Ft. Lauderdale, FL 33309
USA
phone (954) 489 23 01
fax (954) 489 23 18
info@liesegangcorp.com
www.liesegangcorp.com
Luxor / Luxor plus
Bedienungsanleitung
User manual
Advertisement
Table of Contents

Subscribe to Our Youtube Channel
Related Manuals for Liesegang Luxor plus


Summary of Contents for Liesegang Luxor plus
- Page 1 Luxor / Luxor plus Bedienungsanleitung User manual Liesegang Optoelectronics GmbH Liesegang Corp. Kaistraße 5 1001 W. Cypress Creek Rd. 103 D-40221 Duesseldorf Ft. Lauderdale, FL 33309 Germany Telefon +49 (0) 211 / 3901-1 phone (954) 489 23 01 Telefax +49 (0) 211 / 3901-227 fax (954) 489 23 18 info@liesegang.de...
-
Page 2: User Manual
Kanada Dieses Digitalgerät der Klasse B stimmt mit ICES-003 von Kanada überein. Sicherheitszertifikate Luxor / Luxor plus UL, cUL, CB, TÜV-GS, CE Garantie und Kundendienst Tritt ein Problem mit dem Projektor auf, versuchen Sie, es anhand der »Fehlerbehebung« auf Seite 28 zu beheben. - Page 3 — — — Copyright This publication, including all photographs, illustrations and software, is protected under international copy- Important Safety Information right laws, with all rights reserved. Neither this manual, nor any of the material contained herein, may be reproduced without written consent of the author. Congratulations on purchasing the DLP projector! ©...
-
Page 4: Table Of Contents
— — — Table of contents General Safety Information GETTING STARTED..............................1 Do not open the unit case. Aside from the projection lamp, there are no user-serviceable parts in .............................1 ACKING HECKLIST the unit. For servicing, contact qualified service personnel..........................2 IEWS OF ROJECTOR ARTS... -
Page 5: Getting Started
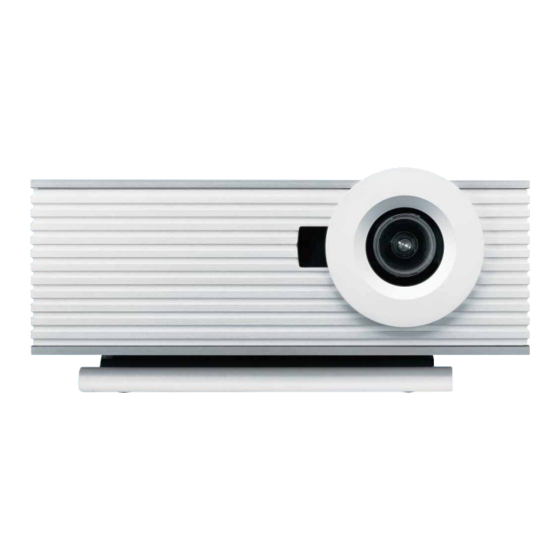
— — — Views of Projector Parts ETTING TARTED Front-right view Packing Checklist Carefully unpack the projector and check that besides this user manual the following items are in- cluded: POWER LIGHT SHARPN BRIGHTN RIGHT LEFT ENTER EXIT DOWN PROJECTOR WITH ENS CAP EMOTE CONTROL WITH... -
Page 6: Rear View-Connectors
— — — — — — Remote Control Parts Rear view—connectors POWER LIGHT SHARPN BRIGHTN ABEL ESCRIPTION S-video Connect an S-video enabled device. RIGHT LEFT Video (composite) Connect a composite video enabled device. ENTER RGBHV (5-cable) RGSB (sync on green) Connect a component video enabled device. -
Page 7: R Emote C Ontrol O Perating R Ange
— — — — — — the projector, the remote will function well within a radius of about 10 meters (33 feet) and 30 degrees ABEL ESCRIPTION EE PAGE above or below the projector level. If the projector does not respond to the remote control, try bounc- ing the IR signal off the screen or move a little closer to the projector. -
Page 8: Setup And Operation
— — — ETUP AND PERATION Connecting Input Devices A PC or notebook computer as well as video devices can be connected to the projector at the same time. Inserting the Remote Control Batteries Video devices include DVD, VCD, and VHS players, as well as movie camcorders and digital still cam- eras. - Page 9 — — — — — — ABEL ESCRIPTION Starting and Shutting down the Projector Aspect ratio 12-Volt DC out. Connect the power cord to the pro- Power Connect the female connector of the supplied power cable to this con- jector. Connect the other end to a nector.
-
Page 10: Adjusting The Image
— — — — — — Adjust the Zoom, Focus and Keystone Adjusting the Image There are hot keys on the remote control that let you adjust contrast, sharpness, tint, color, bright- Use the ZOOM ring (on ness, aspect ratio, and color temperature. When you press one of these hot keys, a slide bar is the projector) to resize overlayed on the source image. -
Page 11: Tint Control
— — — — — — Tint Control Brightness Control Use the tint control to adjust color hue to obtain true color reproduction. The tint control is not avail- Use the brightness control to adjust the overall light output. able in PC mode. Press the BRIGHTN+/- but- Press the TINT+/- button. -
Page 12: Color Temperature Control
— — — Color Temperature Control CREEN ISPLAY ETTINGS Select the color temperature according to the source. The calibrated 9300K/6500K/5300K setting provides optimum color tracking. The White setting provides maximum projector light output. On-Screen Display Menu Controls The projector has an On-Screen Display (OSD) that lets you make image adjustments and change Press the COLOR TEMP but- various settings. -
Page 13: Setting The Osd Language
— — — — — — Setting the OSD Language Image Menu (PC) You may want to reference the OSD on your projector while reading this section. Set the OSD lan- Press MENU to open the OSD. If necessary, press to move to the Image menu and press guage to your preference before continuing. -
Page 14: Image Menu (Video)
— — — — — — Image Menu (Video) Advanced Menu (PC and Video) Press MENU to open the OSD. If necessary, press to move to the Image menu and press Press MENU to open the OSD menu. Press to move to the Advanced menu and press ENTER. ENTER. -
Page 15: Install Menu (Pc)
— — — — — — Install Menu (PC) Install Menu (Video) Press MENU to open the OSD menu. Press to move to the Install menu and press ENTER. Press MENU to open the OSD menu. Press to move to the Install menu and press ENTER. Press to move up and down in the Install menu. -
Page 16: Setup Menu (Pc And Video)
— — — — — — PIP Setting Menu Setup Menu (PC and Video) Press MENU to open the OSD menu. Press to move to the Setup menu. Press in the Setup Press MENU to open the OSD menu. Press to move to the Setup menu and press ENTER. -
Page 17: Service Menu
— — — AINTENANCE Service Menu Press MENU to open the OSD menu. Press to move to the Service menu and press ENTER. Cleaning the Projector Press to move up and down in the Service menu. The Service menu items are displayed only. Cleaning the projector to remove dust and grime will help ensure trouble-free operation. -
Page 18: Troubleshooting
2. Ensure the projector-to-screen distance is within the 10-meter (33-feet) specified range. 3. Check that the projector lens is clean. 4. Make sure the output native resolution from the PC is 1024 x 720 for the Luxor Plus model and 800 x 576 for the Luxor model. -
Page 19: Lamp Problems
— — — Lamp Problems EGULATORY OMPLIANCE Problem: There is no light from the projector 1. Check that the power cable is securely connected. FCC Warning 2. Ensure the power source is good by testing with another electrical device. This equipment has been tested and found to comply with the limits for a Class B digital device pur- 3. - Page 20 Notizen...
Need help?
Do you have a question about the Luxor plus and is the answer not in the manual?
Questions and answers