
Subscribe to Our Youtube Channel
Related Manuals for Uni-Line Smart Sense SMART 3000


Summary of Contents for Uni-Line Smart Sense SMART 3000
- Page 1 Uni-Line® SMART 3000 Touchscreen Thermostat Quick Start Guide www.robertshaw.com 7/15 – 352-00198-001 RevB ©2015 Robertshaw...
-
Page 2: Important Safety Information
IMPORTANT SAFETY INFORMATION WARNING: ELECTRICAL SHOCK HAZARD – Turn off power at the main power source by unscrewing fuse or switching circuit breaker to the OFF position before installing, removing, or cleaning this thermostat. WARNING: FIRE AND ELECTRIC SHOCK HAZARD – This device should be installed by a qualified service technician wit ue regard for safety as improper installation could result in a fire and... - Page 3 Thank you for purchasing a SmartSense thermostat by Uni-Line . The SmART 3000 ® is a multi-function thermostat. Several configurations may be programmed through the button interface or remotely, using Modbus communications. This is a quick start guide on how to perform the basic installation, programming and testing of the SMART 3000 so it functions as a single-stage, manual thermostat. Only the steps needed to provide a functioning thermostat with minimal features and programming will be discussed. When finished, the thermostat will be operational for the following: • manual thermostat • 1 Speed Fan • 1 Heat/1 Cool • 2 pipe mode • Thermostat controlled fan • Short cycle timer at five minutes...
-
Page 4: Mounting The Smart 3000 Thermostat
Mounting the SMART 3000 Thermostat IMPORTANT: The SmART 3000 can only be as accurate as the onboard temperature sensor, or its optional remote temperature sensor(s) permit. The SmART 3000 should be mounted in a location that is typical of the ambient room temperature. Do not install near the floor, in a draft, behind a door, or on a non-insulated, exterior wall. - Page 5 • Continue to swing the top half upward. This will release the tabs holding the top half in place. • Pull the control wires through the large opening in the base plate. • Position the base plate on the wall and attach it with appropriate fasteners (two screws with drywall anchors are supplied).
-
Page 6: Switch Setup
Switch Set-Up Locate the row of eight function DIP switches. Figure 3 Switch Position NOTE: This will configure the SMART 3000 as a manual heat/cool, single stage, single setpoint thermostat. - Page 7 Wiring Terminal Function 24V Common or Neutral 24V AC - This voltage is switched back through the relays Indoor Fan High Speed (NOT Used in Single fan speed mode - Sw 1 = OFF) Indoor Fan medium Speed (NOT Used in Single fan speed mode - Sw 1 = OFF) Indoor Fan Low Speed (Used in single and three fan speed mode) Compressor or Cool - (Based on Sw 2 setting)
- Page 8 Terminal Function Window Contact - Forces SmART 3000 OFF if window open > five min (Adjustable) Door Switch – monitors room door status for occupancy detection PIR (movement sensor) input for occupancy detection The SMART 3000 is powered by 24V AC and requires the 24V AC active and neutral to be connected to the R (active) and C (Neutral) terminals to function. The 24V AC applied to the SmART 3000 R terminal is switched back through the 2A relays to the equipment.
-
Page 9: Close The Cover
Cool Heat 24 V AC 24 C Neutral Figure 5 Close the Cover • Hold the cover up and connect the top hinge points between the two halves. • Position the top cover with the pins in the base plate openings. • Swing the top half downward until it snaps in place. -
Page 10: Apply Power
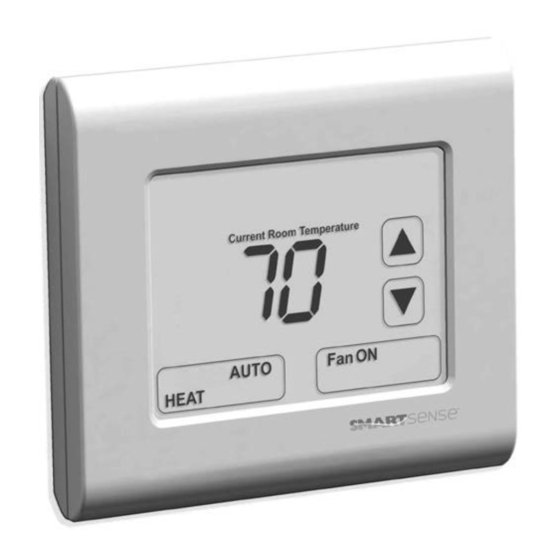
Apply Power • Apply the 24V AC power to the SmART 3000. The screen should display the current temperature. Test Each press of a button should produce an audible beep. Figure 6 • Press the Fan button to test the fan operation. • Use the Up and Down arrow buttons to adjust the setpoint. • Adjust the setpoint five degrees above the room temperature. - Page 11 moments the heat system will stop. The cooling system should come ON. NOTE: There may be a delay of up to four minutes performing this test due to anticycle delay timer. The SMART 3000 system is now operational. It will function as a single setpoint, manual thermostat with a single speed fan.
- Page 12 Robertshaw®, Uni-Line® and SmartSense are trademarks of Robertshaw, its subsidiaries and/or affiliated companies. All other brands mentioned may be the trademarks of their respective owners. Customer Service Telephone 1.800.304.6563 Customer Service Facsimile 1.800.426.0804 HVACCustomerService@robertshaw.com For Technical Service www.uni-line.com www.robertshaw.com Telephone 1.800.445.8299 ©2015 Robertshaw Facsimile 1.630.260.7294 TechnicalService@robertshaw.com 07/15 – 352-00198-001 RevB...
Need help?
Do you have a question about the Smart Sense SMART 3000 and is the answer not in the manual?
Questions and answers