Table of Contents
Advertisement
Quick Links
Download this manual
See also:
User Manual
Advertisement
Table of Contents

Related Manuals for GW Instek GSP-9300


Summary of Contents for GW Instek GSP-9300
- Page 1 Spectrum Analyzer GSP-9300 QUICK START GUIDE GW INSTEK PART NO. 82SP-930A0MC1 ISO-9001 CERTIFIED MANUFACTURER...
- Page 2 This manual contains proprietary information, which is protected by copyright. All rights are reserved. No part of this manual may be photocopied, reproduced or translated to another language without prior written consent of Good Will company. The information in this manual was correct at the time of printing. However, Good Will continues to improve products and reserves the rights to change specification, equipment, and maintenance procedures at any time without notice.
-
Page 3: Table Of Contents
Table of Contents Table of Contents SAFETY INSTRUCTIONS ..........2 GETTING STARTED ............7 GSP-9300 Introduction ......8 Accessories .......... 11 Appearance .......... 13 First Use Instructions ......25 BASIC OPERATION ............37 Viewing a Signal ........37 Using the Marker Function ....39 Interface Configuration ...... -
Page 4: Safety Instructions
GSP-9300 Quick Start Guide AFETY INSTRUCTIONS This chapter contains important safety instructions that you must follow during operation and storage. Read the following before any operation to ensure your safety and to keep the instrument in the best possible condition. - Page 5 SAFETY INSTRUCTIONS Safety Guidelines Do not place any heavy object on the General Guideline instrument. Avoid severe impact or rough handling that CAUTION leads to damaging the instrument. Do not discharge static electricity to the instrument. Use only mating connectors, not bare wires, for ...
- Page 6 GSP-9300 Quick Start Guide Rating: 10.8V, 6 cell Li-ion battery Battery Turn off the power and remove the power cord CAUTION before installing or removing the battery. Disconnect the power cord before cleaning. Cleaning Use a soft cloth dampened in a solution of mild ...
- Page 7 SAFETY INSTRUCTIONS Do not dispose this instrument as unsorted Disposal municipal waste. Please use a separate collection facility or contact the supplier from which this instrument was purchased. Please make sure discarded electrical waste is properly recycled to reduce environmental impact.
- Page 8 GSP-9300 Quick Start Guide Power cord for the United Kingdom When using the instrument in the United Kingdom, make sure the power cord meets the following safety instructions. NOTE: This lead/appliance must only be wired by competent persons WARNING: THIS APPLIANCE MUST BE EARTHED...
-
Page 9: Getting Started
GETTING STARTED ETTING STARTED This chapter provides a brief overview of the GSP-9300, the package contents, instructions for first time use and an introduction to the front panel, rear panel and GUI. GSP-9300 Introduction ............. 8 Main Features......................... 8 Accessories ..............11 Appearance .............. -
Page 10: Gsp-9300 Introduction
GSP-9300 Quick Start Guide GSP-9300 Introduction The GSP-9300 builds on the strong feature set of the GSP-930 and significantly increases performance in almost every aspect; making this the most comprehensive and feature-rich spectrum analyzer GW Instek has released. Like the GSP-930, the GSP-9300 features a split window display to view data in spectrum, topographic or spectrographic views. - Page 11 GETTING STARTED Gate sweep Marker Frequency counter Two operating modes: Spectrum and Power Meter mode EMI Pretest functions SEM measurement ACPR measurement OCBW measurement 2FSK measurement Phase jitter measurement Harmonics measurement ...
- Page 12 GSP-9300 Quick Start Guide 8.4 color LCD (800600) Interface On-screen menu icons DVI-I video output RS-232 with RTS/CTS hardware flow control USB 2.0 with support for USB TMC LAN TCP/IP with LXI support Optional GPIB/IEEE488 interface ...
-
Page 13: Accessories
GETTING STARTED Accessories Standard Part number Description Accessories Region dependant Power cord User manual CD: Includes: User manual, Programming manual, SpectrumShot quick start guide, SpectrumShot software, IVI driver Quick start guide Certificate of calibration Region dependant Power cord Options Option number Description Opt1. - Page 14 GSP-9300 Quick Start Guide Software Downloads PC Software for Windows System (SpectrumShot quick start guide, SpectrumShot software) IVI Driver Supports LabView & LabWindows/CVI Programming Android System (“GSP-9300 Remote Control”, available on Google play.)
-
Page 15: Appearance
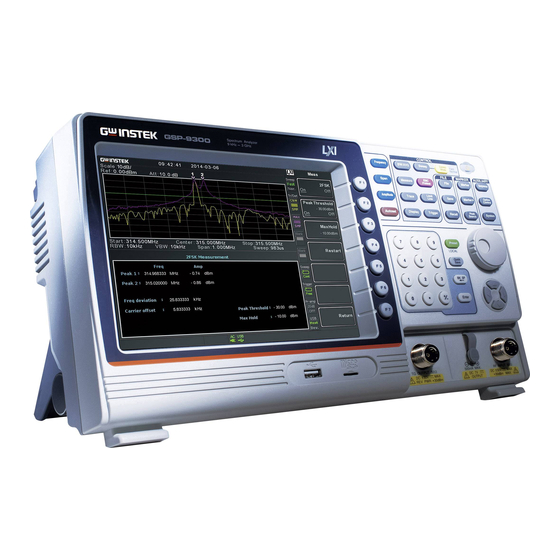
GETTING STARTED Appearance GSP-9300 Front Panel Function Main Control File keys display keys keys keys Power key Marker keys G S P - 9 3 0 0 Spectrum Analyzer CONTROL 9 kHz 3 GHz Sweep Fast/ Frequency BW / AVG... - Page 16 GSP-9300 Quick Start Guide Sets the span, with options for full Span span, zero span and last span. Sets the amplitude reference level, Amplitude attenuation, pre-amplifier controls, scale and other options for attenuation and scale. Automatically searches the peak Autoset...
- Page 17 GETTING STARTED The Display key configures the Display windowing mode and basic display properties. Sets the triggering modes. Trigger File utilities options File File Save the trace, state etc., and save Save options. Recall the trace, state etc., and Recall recall options.
- Page 18 GSP-9300 Quick Start Guide The Preset key will restore the Preset / Local key Preset spectrum analyzer to the Factory LOCAL or User Preset settings. The Preset key will also return the instrument back to local control after it has been in remote control mode.
- Page 19 GETTING STARTED SMB port supplies power for DC power supply optional accessories. 500mA MAX. DC +7V DC 7V OUTPUT 500mA Max. The numeric Numeric keypad keypad is used to enter values and parameters. It is often used in conjunction with BK SP the arrow keys and...
-
Page 20: Rear Panel
GSP-9300 Quick Start Guide Rear Panel IF OUT DVI-I USB-B, Power port LAN port socket RS232 port TRIG IN/GATE AC 100 AC 100 240V 240V 60 Hz 60 Hz 82W MAX. 82W MAX. IN port ALARM OUT/ OPEN COLLECTOR REF OUT... - Page 21 GETTING STARTED Voltage: 10.8V Battery pack Capacity: 5200mAH BNC female reference input. REF IN BNC female reference output: REF OUT 10MHz, 50Ω impedance Security Lock BNC female open collector Alarm ALARM OUT output. BNC female 3.3V CMOS trigger TRIG IN/GATE IN input/gated sweep input.
-
Page 22: Display
GSP-9300 Quick Start Guide Display Attenuation Date Marker Function level and time information LXI icon menu Sweep Scale and settings Reference level Trace/ Detection settings Traces and waveforms Unassigned setting Sweep icons progress Sweep, Trigger, Entry / Pre-amp Frequency/Bandwidth Status icons... - Page 23 GETTING STARTED This icon displays the sweep mode, Sweep Mode as set by the Sweep Mode key. Sweep icon that shows the sweep Sweep settings status. Trace icon that shows the trace type Trace and and the detection mode used for detection settings each trace.
- Page 24 GSP-9300 Quick Start Guide The sweep progress bar shows the progress of Sweep progress slow sweeps (greater than 2 seconds).
-
Page 25: Status Icon Overview
GETTING STARTED Status Icon Overview Indicates that the 3G adapter is 3G Adapter installed and turned on. Indicates that the demo kit is Demo Kit installed and turned on. Indicates that the pre amplifier is PreAmp Shown when running on AC power. - Page 26 GSP-9300 Quick Start Guide Indicates that the Average function Average is active. Indicates that the system is now External Lock locked and refers to the external reference input signal External trigger signal is being External Trigger used. Trace math is being used.
-
Page 27: First Use Instructions
GETTING STARTED First Use Instructions Use the procedures below when first using the GSP-9300 to tilt the stand, insert the battery pack, power up the instrument, set the internal clock, set the wake-up clock, update the firmware and to restore the default settings. Lastly, the Conventions sections will introduce you to the basic operating conventions used throughout the user manual. -
Page 28: Inserting The Battery Pack
GSP-9300 Quick Start Guide Inserting the Battery Pack The GSP-9300 has an optional battery pack. Description The battery should be inserted before power is connected to the AC power socket and before the unit is turned on. 1. Ensure the power is off and the AC power is Steps disconnected. -
Page 29: Power Up
3. Press the power button for a few seconds to turn the GSP-9300 on. 4. The power button will turn orange and the GSP-9300 will start to boot up. It takes a little less than 1 minute for the GSP-9300 Note to fully startup. -
Page 30: Power Down
Press and hold the power button for ~4 Forced Power seconds until the system turns off and the Down power button turns blue. The forced power down mode might cause the Note GSP-9300 to perform a longer system check the next time it is powered up. -
Page 31: Setting The Date, Time And Wake-Up Clock
GETTING STARTED Setting the Date, Time and Wake-Up Clock The GSP-9300 can be setup to power-up Description automatically using the Wakeup Clock function. This feature is useful to wake-up the instrument early and eliminate settling time. Example: Set the System Date to July 1, 2014 System Date 1. - Page 32 GSP-9300 Quick Start Guide The System Time will be shown at the top of the Note display. Example: Set the GSP-9300 to wake up at 9.00 System Wake-Up Clock 1. Press >Date/Time[F4]>Wake-Up System Clock[F3]>Select Clock[F1]. 2. Press Clock 1[F1] ~ Clock 7[F7] to choose a clock (1 ~ 7).
-
Page 33: Firmware Update
GETTING STARTED Firmware Update The GSP-9300 allows the firmware to be Description updated by end-users. Before using the GSP- 9300, please check the GW Instek website or ask your local distributor for the latest firmware. Before updating the firmware, please check the System version firmware version. -
Page 34: Restoring Default Settings
GSP-9300 Quick Start Guide 5. Press >More 1/2[F7]>Upgrade[F2]. System 6. The spectrum analyzer will automatically find the firmware on the USB flash drive and start to update the firmware. When finished, the message “Upgrade is finished” will be shown at the bottom of the screen followed by “Rebooting”. -
Page 35: Conventions
The following conventions are used throughout the user manual. Read the conventions below for a basic grasp of how to operate the GSP-9300 menu system and front panel keys. The F1 to F7 function keys on the right side of... - Page 36 GSP-9300 Quick Start Guide Toggle State & Input Parameter Pressing this menu key will allow you to toggle the state of the function between Auto and Man(ual) state. When in the Man state, the parameter value can be manually edited. Use...
- Page 37 GETTING STARTED Parameter input Numerical keypad Scroll wheel Preset LOCAL Quick Save BK SP Enter Directional arrow keys Backspace, Enter keys Parameter values can be entered using the numeric keypad, the scroll wheel and occasionally with the arrow keys. When prompted to enter a parameter, use the Using the numeric number keys (0~9), the decimal key (.) and the keypad...
- Page 38 GSP-9300 Quick Start Guide Use the scroll wheel to alter the current value. Using the scroll Clockwise increases the value, anti-clockwise wheel decreases the value. Use the directional arrows to select discrete Directional arrows parameters or to alter values by a coarser resolution than the scroll wheel.
-
Page 39: Basic Operation
BASIC OPERATION ASIC OPERATION The Basic Operation chapter in this Quick Start Guide only covers a few basic operations: how to view a signal, how to use a marker to make a measurement and how to setup the LXI interface. For comprehensive operating instructions, please see the user manual on the accompanying User Manual CD. - Page 40 GSP-9300 Quick Start Guide 3. Press >Center[F1] and enter 10MHz. This Frequency is the output frequency of the REF out signal. 4. Press >Ref Level[F1] and set the reference Amplitude level to 17dBm. 5. Press and enter a span of 10MHz. This...
-
Page 41: Using The Marker Function
BASIC OPERATION Using the Marker Function This section will describe how to activate and Description move a normal marker. The noise marker function will also be used to show how to make a basic marker measurement. 1. Use the procedure described in the previous Operation section to display a signal from the REF out terminal. - Page 42 GSP-9300 Quick Start Guide Display Marker frequency Measurement Marker position...
-
Page 43: Interface Configuration
User Manual CD for further details. Configure the LAN and LXI Interface The GSP-9300 is a class C LXI compliant instrument. The LXI specification allows instrumentation to be configured for basic remote control or monitoring over a LAN or WLAN. The GSP-9300 also supports HiSlip. - Page 44 GSP-9300 Quick Start Guide 1. Press >More[F7]>RmtInterface[F1]> System LAN[F2]>LAN Config[F1] to set the LAN settings: Sets the IP address. IP Address[F1] Sets the subnet mask. Subnet Mask[F2] Default Gateway[F3] Sets the default gateway. Sets the DNS server address DNS Server[F4]...
- Page 45 BASIC OPERATION ABCDE FGHIJ KLMNO Lowercase PQRST Return Rename> UVWXY Return Return Cancel password Menu tree to enter the password 5. The password appears on the bottom of the screen as it is created. Password 6. Press to confirm setting the password. Enter Hi SLIP Port 7.
- Page 46 The Welcome Page lists all the LXI and LAN Welcome Page configuration settings as well as the instrument identification. The instrument identification can be turned on/off from this page. The LXI icon in the GSP-9300 display will Note flash when the Identification setting is turned on.
- Page 47 BASIC OPERATION The View & Modify Configuration allows you View & Modify to modify the LAN settings from the browser. Configuration Press the Modify Configuration button to modify any of the configuration files. A password must be entered to alter the settings.
- Page 48 [Note: password is case sensitive.] The Get Image page allows the browser to Get Image remotely capture a screenshot of the GSP-9300 display. For further details, please see the programming Note manual, available on the GW Instek web site @ www.gwinstek.com.
-
Page 49: Appendix
The system clock and wake-up clock keep time Background using a button battery. Battery type: CR2032, 3V, 210mAh 1. Turn off the GSP-9300 and Connection remove the battery cover and battery (if connected). 2. Replace the battery with the same type and... -
Page 50: Gsp-9300 Specifications
GSP-9300 Quick Start Guide GSP-9300 Specifications The specifications apply when the GSP is powered on for 45 minutes (typical) to warm-up to a temperature of 20˚C to 30˚C, unless specified otherwise. Frequency Frequency Range 9 kHz to 3.0 GHz Resolution... - Page 51 APPENDIX Phase Noise Offset from Fc =1 GHz; RBW = 1 Carrier kHz, VBW = 10 Hz; Average ≥ 40 Typical 10 kHz <-88 dBc/Hz Typical 100 kHz <-95 dBc/Hz Typical 1 MHz <-113 dBc/Hz Resolution Bandwidth (RBW) Filter Filter Bandwidth 1 Hz to 1 MHz in 1-3- -3dB bandwidth 10 sequence...
- Page 52 GSP-9300 Quick Start Guide 1 dB Gain Compression Typical ;Fc ≥ 50 MHz; Total Power at 1st > 0 dBm Mixer preamp. off ;Fc ≥ 50 MHz; Typical Total Power at the > -22 dBm Preamp preamp. on mixer power level (dBm)= input power (dBm)-...
- Page 53 APPENDIX Absolute Amplitude Accuracy Absolute Point Center=160 MHz ; RBW 10 kHz; VBW 1 kHz; span 100 kHz; log scale; 1 dB/div; peak detector; 23±1°C; Signal at Reference Level Preamp off ± 0.3 dB Ref level 0 dBm; 10 dB RF attenuation Preamp on ±...
- Page 54 GSP-9300 Quick Start Guide Spurious Response Second Harmonic Preamp off; signal input -30dBm; Intercept 0 dB attenuation Typical +35 dBm ; 10 MHz < fc < 775 MHz Typical ; 775 MHz ≤ fc < 1.5 GHz +60 dBm Third-order Preamp off;...
- Page 55 APPENDIX USB Host Connector Type A plug Protocol Version 2.0 Supports Full/High/Low speed MicroSD Socket Protocol SD 1.1 Supported Cards microSD, microSDHC Up to 32GB capacity Rear Panel Input/Output Reference Output Connector Type BNC female Output Frequency 10 MHz Nominal Output 3.3V CMOS Amplitude...
- Page 56 GSP-9300 Quick Start Guide Earphone Output Connector Type 3.5mm stereo jack, wired for mono operation Video Output Connector Type DVI-I ( integrated analog and digital) , Single Link. Compatible with VGA or HDMI standard through adapter RS232 Interface Connector Type...
- Page 57 APPENDIX Tracking Generator (Optional) Frequency Range 100 kHz to 3 GHz Output Power -50 dBm to 0 dBm in 0.5 dB steps Absolute Accuracy ± 0.5 dB @160 MHz, -10 dBm, Source attenuation 10 dB, 20 to 30°C Output Flatness Referenced to 160 MHz, -10 dBm 100 kHz to 2 GHz ±...
- Page 58 GSP-9300 Quick Start Guide Power -30 dBm to +5 dBm: Measurement 1 MHz to 3GHz: ±0.1 dB typical; ±0.3 dB max. Uncertainty 3 GHz to 6 GHz: ±0.15 dB typical; ±0.3 dB max. @ 25 °C +5 dBm to +12 dBm: 1 MHz to 3GHz: ±0.15 dB typical;...
-
Page 59: Gsp-9300 Dimensions
APPENDIX GSP-9300 Dimensions G S P -9 3 0 0 Spectrum Analyzer CONTROL 9 kHz 3 GHz Sweep Fast/ Frequency BW/AVG Sweep Mode Normal FILE MARKER AUXILIARY Span Measure File Marker Sequence Pretest Limit Option Amplitude Trace Save Marker Line... -
Page 60: Declaration Of Conformity
GSP-9300 Quick Start Guide Declaration of Conformity GOOD WILL INSTRUMENT CO., LTD. declare that the below mentioned product Type of Product: Spectrum Analyzer Model Number: GSP-9300 is herewith confirmed to comply with the requirements set out in the Council Directive on the Approximation of the Laws of the Member States relating to the EMC: 2014/30/EU, LVD: 2014/35/EU, WEEE: 2012/19/EU and RoHS: 2011/65/EU.
Need help?
Do you have a question about the GSP-9300 and is the answer not in the manual?
Questions and answers