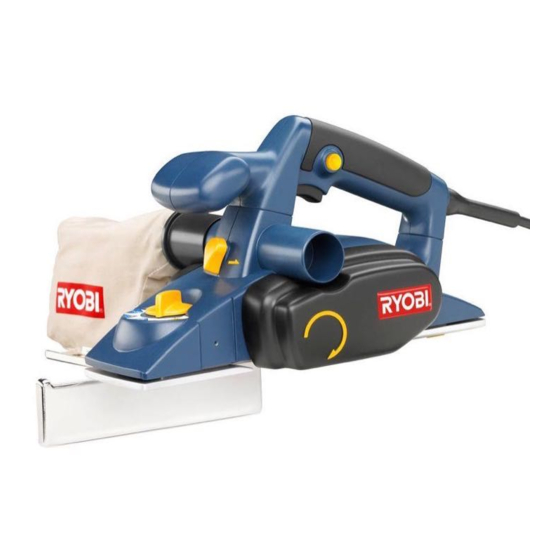
Ryobi HPL51 Operator's Manual
Double insulated
Hide thumbs
Also See for HPL51:
- Operator's manual (32 pages) ,
- Manuel d'utilisation (18 pages) ,
- Repair sheet (4 pages)
Table of Contents
Advertisement
Your new Power Planer has been engineered and manufactured to Ryobi's high standard for dependability, ease of operation,
and operator safety. Properly cared for, it will give you years of rugged, trouble-free performance.
WARNING:
To reduce the risk of injury, the user must read and understand the operator's manual before
using this product.
Thank you for buying Ryobi tools.
SAVE THIS MANUAL FOR FUTURE REFERENCE
OPERATOR'S MANUAL
Power Planer
Model No. HPL51
DOUBLE INSULATED
Advertisement
Table of Contents

Summary of Contents for Ryobi HPL51
- Page 1 Your new Power Planer has been engineered and manufactured to Ryobi’s high standard for dependability, ease of operation, and operator safety. Properly cared for, it will give you years of rugged, trouble-free performance. WARNING: To reduce the risk of injury, the user must read and understand the operator’s manual before using this product.
-
Page 2: Table Of Contents
Operation ... 10- 12 Maintenance ... 13 - 15 Parts Ordering / Service ... 16 Your power planer has many features for making the use of this product more pleasant and enjoyable. Safety, performance, and dependability have been given top priority in the design of this tool making it easy to main- tain and operate. -
Page 3: General Safety Rules
GENERAL SAFETY RULES WARNING: Read and understand all instructions. Failure to follow all instructions listed below, may result in electric shock, fire and/or serious personal injury. SAVE THESE INSTRUCTIONS Work Area Keep your work area clean and well lit. Cluttered benches and dark areas invite accidents. -
Page 4: General Safety Rules
GENERAL SAFETY RULES Service Tool service must be performed only by qualified repair personnel. Service or maintenance performed by unqualified personnel could result in a risk of injury. SPECIFIC SAFETY RULES Hold tool by insulated gripping surfaces when performing an operation where the cutting tool may contact hidden wiring or its cord. -
Page 5: Symbols
SPECIFIC SAFETY RULES WARNING: Some dust created by power sanding, sawing, grinding, drilling, and other construction activities contains chemicals known to cause cancer, birth defects or other reproductive harm. Some examples of these chemicals are: lead from lead-based paints, crystalline silica from bricks and cement and other masonry products, and arsenic and chromium from chemically-treated lumber. -
Page 6: Double Insulation
For service, we suggest you return the tool to your nearest authorized service center for repair. When servicing, use only identical Ryobi replacement parts. WARNING: The double insulated system is intended to protect the user from shock resulting from a break in the tool's internal wiring. -
Page 7: Product Specifications
If any parts are damaged or missing, please call 1-800-525-2579 for assistance. You may use the power planer for the purposes listed below: Planing the surface of a piece of lumber. Planing the edge of a piece of lumber. -
Page 8: Know Your Planer
The edge guide included allows you to plane edges and make rabbet cuts. DUST BAG The dust bag attaches to the planer and helps keep the work area free of dust and debris. KICKSTAND The kickstand allows you to set the planer down on a workpiece or clear table area without damaging the workpiece or the blades. -
Page 9: Attaching The Dust Bag
For finish planing use a setting of approximately 1/64 (0.4 mm). Make test cuts in scrap wood after each adjustment to make sure that the planer is removing the desired amount of wood. Follow these steps to adjust planing depth. -
Page 10: Operating The Planer
STARTING/STOPPING THE PLANER See Figure 5. Follow these steps to start/stop the planer. To start the planer —Push the lock-off button, and then depress the trigger switch. To stop the planer —Release the trigger switch. OPERATING THE PLANER Follow these guidelines when operating the planer. - Page 11 NOTE: We suggest that you always keep an extra set of blades on hand. As soon as the blades in your planer show signs of becoming dull, replace them. The blades in your planer are reversible and can be reversed until both sides become dull.
-
Page 12: Operation
Follow these steps to attach the edge guide for making rabbet cuts. 1. Unplug the planer. 2. Attach the bracket to the left side of the planer using the knob bolt. 3. Attach the edge guide loosely to the bracket using the knob nut and the carriage head bolt. -
Page 13: Maintenance
WARNING: When servicing, use only identical Ryobi replacement parts. Use of any other part may create a hazard or cause product damage. GENERAL All parts represent an important part of the double insulation system and should be serviced only at an authorized service center. -
Page 14: Replacing Blades
If the blades become dull, replace them. When replacing the blades, use recommended replace- ment blade only, Ryobi part number 6986101. WARNING: Blades are sharp, use extreme caution when replacing the blades. Failure to heed this warning can result in serious personal injury. -
Page 15: Maintenance
REPLACING THE BELT See Figures 16 and 17. When replacing the belt, use the recommended replace- ment belt only, Ryobi part number 5695001. 1. Unplug the planer. WARNING: Failure to unplug the planer could result in accidental starting causing serious injury. -
Page 16: Parts Ordering / Service
Ryobi Authorized Service Center. Be sure to provide all pertinent facts when you call or visit. Please call 1-800-525-2579 for your nearest Ryobi Authorized Service Center. You can also check our web site at www.ryobitools.com for a complete list of Authorized Service Centers.


Need help?
Do you have a question about the HPL51 and is the answer not in the manual?
Questions and answers