Table of Contents
Advertisement
Quick Links
START HERE
Installation Guide
for R-Tronic Wireless
Thermostat
and
Actuator
3
Steps:
1) Year
2) Month
3) Day
4) Hour
5) Minute
Follow the prompts on the
screen to set the DATE and
TIME by pushing the select
and scroll knob.
6
Within 30 seconds
push the actuator
button. The signal
Signal
symbol will display
Symbol
when the pairing is
successful.
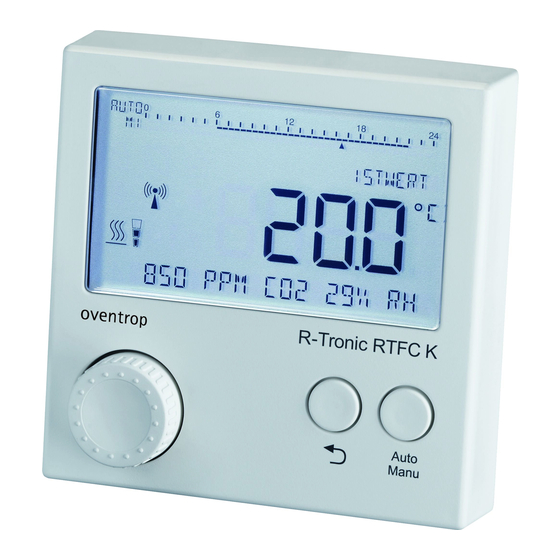
Front
1
Select and Scroll knob
Back button
Setting mode toggle button
4
Insert two LR6 AA batteries into
the actuator. Take note of the
polarity markings on the device.
7
Actuator
Button
Thread the actuator on the
valve. Do not use tools to
mount the valve.
Back
2
+
-
Insert two LR6 AA batteries into
the thermostat. Take note of the
polarity markings on the device.
Push then turn the Select
5
and Scroll knob to the
MAIN MENUE, then push
to select.
Turn the knob to SETTINGS,
then push to select.
Push again to select
INSTALLATION.
Holding the actuator within
two feet of the thermostat,
push to select TEACH IN.
8
Actuator
Button
Once the actuator is mounted,
push and hold the actuator button
to calibrate it. The green LED will
blink three times once calibrated.
Select and Scroll knob
-
Used to navigate
through the thermostat's
+
menus and change
settings.
Back button
Used to undo an action
or exit a menu item.
Setting mode toggle button
Used to switch between
program modes.
Actuator Button
Used to pair and
calibrate actuator.
FINISH
Thermostat default
program is set to
maintain 68 °F.
See operators manual
on back for programming
instructions.
Advertisement
Table of Contents

Subscribe to Our Youtube Channel
Related Manuals for oventrop R-Tronic


Summary of Contents for oventrop R-Tronic
-
Page 1: Installation Guide
START HERE Select and Scroll knob Used to navigate through the thermostat’s menus and change Installation Guide settings. for R-Tronic Wireless Back button Thermostat Used to undo an action or exit a menu item. Actuator Select and Scroll knob Insert two LR6 AA batteries into the thermostat. -
Page 2: Menu Map
PROGRAMME SELECTION Manu: Profile ON - Set to maintain the comfort First Heating Period PROGRAMMING temperature for R-Tronic Wireless Comfort temperature start time Profile OFF - Set to maintain the (Example: This would be the time you would TEMPERATURES setback temperature Thermostat wake up in the morning.)
Need help?
Do you have a question about the R-Tronic and is the answer not in the manual?
Questions and answers