Medion Akoya Instruction Manual
29.5 cm/ 11.6 inch tablet/ notebook
Hide thumbs
Also See for Akoya:
- Instruction manual (72 pages) ,
- Instruciton manual (65 pages) ,
- Instruction manual (54 pages)
Table of Contents
Advertisement
Quick Links
Advertisement
Table of Contents

Subscribe to Our Youtube Channel
Related Manuals for Medion Akoya


Summary of Contents for Medion Akoya
- Page 1 29.5 cm / 11.6“ Tablet / Notebook ® ® MEDION AKOYA Instruction Manual...
-
Page 3: Table Of Contents
Table of Contents About these Instructions ................4 1.1. Symbols and Key words used in these Instructions ........4 1.2. Proper Use ......................... 5 1.3. Declaration of Conformity ................... 5 Safety Instructions ..................6 2.1. Dangers for children and people with reduced ability to operate electronics ......................... - Page 4 The Universal Serial Bus Port ..............27 Securing Your Device ................. 27 12.1. Password Setting (Power-on) ................27 Software ..................... 28 ® 13.1. Getting to Know Windows 8 ................28 13.2. Windows Activation .....................28 Windows ® 8 – What’s New .................29 13.3. 13.4.
- Page 5 Personal Information Please append the following to your proof of ownership: Serial number ..........Date of purchase ..........Place of purchase ..........You will find the serial number on the underside of the device. Where applicable, also copy the number on your warranty documents. Our Target Group This operating manual is intended to be read by both first-time and experienced users.
-
Page 6: About These Instructions
1. About these Instructions Before using the device for the first time, please read these operating instructions carefully, paying special attention to the safety notices. This device should only be used as designated and as described in these instructions. Please keep these instructions in a safe place for future reference. Always include these instructions if passing the device on. -
Page 7: Proper Use
Bluetooth (optional) Use is only permitted inside buildings in all EU countries due to the 5 GHz frequency band of the inbuilt Wireless LAN solution. Medion AG hereby declares that this product conforms to the following European requirements: • R&TTE Directive 1999/5/EC •... -
Page 8: Safety Instructions
2. Safety Instructions 2.1. Dangers for children and people with reduced ability to operate electronics • This device is not intended for use by people (including children) with reduced physical, sensory or mental abilities or for those without experience and/or knowledge, unless they are supervised by a person responsible for their safety or they have been instructed in its use. - Page 9 • The Device is not intended for use by companies in the heavy industry sector. • To avoid damage from lightning strikes, do not operate the Device during thunderstorms. • Do not place any objects on top of the Device and do not exert pressure on the display.
-
Page 10: Never Carry Out Repairs Yourself
2.3. Never Carry Out Repairs Yourself WARNING! Never try to open or repair the device yourself. There is a risk of electric shock. • If there is a fault, contact the Medion Service Center or other suitable specialist workshop. 2.4. Data Backup CAUTION! Back up your data on external storage media before each update. -
Page 11: Connecting
• During a thunderstorm, disconnect the mains plug and the antenna plug. For extra safety, we recommend using an overvoltage protection device to prevent the device from sustaining damage as a result of power surges or lightning strikes. • After transporting the device, wait until the device has reached room temperature before switching it on. -
Page 12: Cabling
CAUTION! Use only the supplied mains adapter to charge your device. WARNING! Listening to a device at high volumes for an extended period via headphones/earphones can damage your hearing. Excessive volume when using headphones or earphones can damage your hearing. Before pressing play, set the volume to the lowest setting. -
Page 13: Notes On The Integrated Battery
• Do not exchange the supplied cable for another one. Use only the supplied cable as this cable has been extensively tested in our laboratory. • In addition, when connecting your peripherals only use the connecting cables supplied with those devices. •... -
Page 14: Measures For Protecting The Display
2.10. Measures for protecting the display • The display is the most sensitive component part of the device as it consists of thin glass. It can break if subjected to too much stress. Do not scratch the cover of the device, because it will not be possible to remove any scratches. -
Page 15: Views
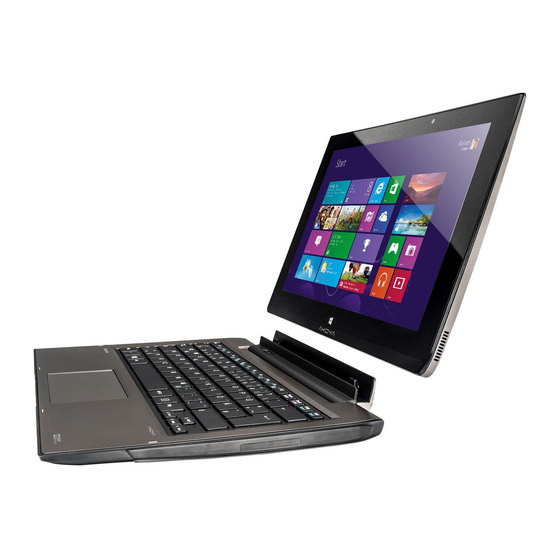
4. Views 4.1. Front Side Microphone Webcam Webcam LED LCD Display Battery LED Light Sensor 13 of 48... -
Page 16: Left Side
4.2. Left Side Reset opening for the tablet unit USB 3.0 Port USB 2.0 Port microHDMI Connector microSD Card Slot Audio Out / Microphone Volume Buttons +/- Power ON/OFF 4.3. Bottom View of the Tablet Unit Power Socket Connection plug to the base unit 14 of 48... -
Page 17: First Use
5. First Use To operate your device safety and ensure a long service life, you should read the “Operational safety” chapter at the beginning of this manual. All operating software is already fully preinstalled on the device so there is no need for you to install any more drivers and you can get started right away. - Page 18 The adapter supplies the device with power and also charges the battery. Your battery will also be charged while you work on your device with the mains adapter connected. The mains adapter also consumes power when the device is not connected to it.
-
Page 19: Battery Mode
6.3. Battery Mode PLEASE NOTE! Please charge and discharge the new batteries completely two or three times consecutively to ensure that it reaches their optimum performance! Batteries store electrical energy in their cells and then release it again as required. The service life and performance of your batteries depend on careful handling. -
Page 20: Power Management (Power Options)
6.3.4. Checking the Battery Charge To check the current battery charge status, move the cursor over the power icon in the task bar. In battery mode, the icon is displayed as a battery. You can obtain more information about settings by double-clicking the icon. PLEASE NOTE! If you ignore the low battery warning, your device will shut down. -
Page 21: Sleep Mode
6.5. Sleep Mode With this setting the content of your device’s RAM is preserved while practically all other components of your device are disabled or their power consumption reduced to a minimum. If the device is flipped shut it will enter sleep mode. The device will automatically come out of sleep mode upon reopening. - Page 22 7.5.1. Touch screen gestures These are the main gestures which allow you to run programs and access settings on your device: Diagram Command Swipe from the left edge towards Swipe from the left edge the centre of the screen to display towards the centre the last app Swipe from the left edge of the...
-
Page 23: Screen Resolution
7.1. Screen Resolution The integrated monitor can display up to 1920 x 1080 pixels. If you change to a display with different settings in the Windows® 8 Control Panel, Appearence and Personalisation wizard, the display may not, in certain circumstances, fill the entire screen area. -
Page 24: Appearance And Customisation
7.2. Appearance and Customisation This program gives you the option of customising your desktop. This includes the background image, the screensaver and other settings for your monitor and your graphics card. The program can be started as follows: • Right-click on the Windows desktop and left-click on Personalise. •... -
Page 25: The Sound System
8. The Sound System 8.1. External Audio Connections Your device has an integrated stereo speaker so you can always reproduce sound without additional devices. Using the external connections provides you with an ideal opportunity to connect your device to external devices. The Fn + F5 and Fn + F6 keyboard shortcut enables you to adjust the volume. -
Page 26: Network Operation
9. Network Operation 9.1. What is a Network? We talk about a network when multiple computers are directly connected to one another. This allows users to transfer information and data with one another and to share their resources (printers and drives). Here are a few concrete examples: •... -
Page 27: Bluetooth
If encryption is used for the transfer, the same procedure must be used for all devices. Encryption is a procedure to protect the network from unauthorised access. The transfer speed can vary depending on the distance and the number of users accessing the remote station. -
Page 28: The Card Reader
10. The Card Reader Memory cards are media that are used, e.g. in the field of digital photography, and are gradually replacing the diskette. The shape and capacity of a memory card can vary depending on the manufacturer. Your Device supports the following formats: •... -
Page 29: The Universal Serial Bus Port
11. The Universal Serial Bus Port The universal serial bus (USB 1.1 and USB 2.0) is a standard for connecting input devices, scanners and other peripherals. Your device has 1 USB 2.0 and 1 USB 3.0 port. PLEASE NOTE! Where possible, always connect your USB devices to the same port that they were originally installed on. -
Page 30: Software
13. Software This section deals with the subject of software. We distinguish here between the operating system, the software (the applications), the Windows activation and the UEFI firmware configuration. PLEASE NOTE! The current Windows family currently includes Windows 8 and Windows 8.1. -
Page 31: Windows ® 8 - What's New
® 13.3. Windows 8 – What’s New 13.3.1. Microsoft Account ® A Microsoft account is an e-mail address and password for logging in to Windows 8. You can use any e-mail address. We recommend using the address you use to communicate with friends and log into your favourite web sites, however. - Page 32 ® The jump lists for certain programs such as Windows 8 Media Player can be populated in advance with frequently used commands. Thus, for example, you will see options to play all music or to reopen the last playlist in the jump list for ®...
-
Page 33: Overview
13.3.6. Home Group ® With home network groups, a Windows 8 function, connecting home computers becomes child’s play. A home network group is set up automatically when you ® connect the first PC running Windows 8 to the home network. Adding additional ®... -
Page 34: Linking A User Account To A Liveid
13.4.4. Setting Up an ImageCode for Windows Move the mouse pointer into the top right or bottom corner of the display and click Settings. Next, click Change PC settings. Select the User item. Click Create a Picture password and follow the instructions. 13.5. -
Page 35: Windows® 8 Desktop
Information such as the following may be displayed here, for example: Windows 8 App Windows 8 apps are executable programs. ® ® The “Desktop” tile opens the traditional Windows display. The Internet Explorer tile launches Internet Explorer PLEASE NOTE! Apps are applications that are displayed on a desktop with a program thumbnail. - Page 36 Information such as the following may be displayed here, for example: Classic Desktop apps are applications that are displayed on a desktop with desktop a program thumbnail. The app thumbnails are bigger than the apps standard tiles. The classic “Power Recover” desktop app launches the system recovery program.
- Page 37 Swipe from the bottom to the top on the Linking apps to the Start screen Start screen to display all apps. Press and hold your finger down on the desired app until the context menu appears on the lower edge. ...
-
Page 38: Using The Search Function
Open the Charms Bar by swiping from the Searching for apps right edge of the screen. Tap on the Search symbol. Enter the name of the app. Press and hold down the desired app and Arranging apps drag it to the desired position. -
Page 39: Control Panel Settings
13.10. Control Panel Settings ® You can change Windows 8 settings using the control panel. These settings control ® virtually everything about how Windows 8 appears and functions and enable you ® to customise Windows 8 to meet your requirements. When the control panel is run for the first time, some of the most frequently used control panel elements are displayed grouped together by category. -
Page 40: Windows
13.11.2. To reset your device Swipe in from the right edge of the screen, tap Settings, then tap Change PC settings. Tap Update/recovery, and then tap Recovery. Under Remove everything and reinstall Windows, tap Get started. Follow the instructions on screen. PLEASE NOTE! Always perform any type of recovery using mains power. -
Page 41: Faq - Frequently Asked Questions
14. FAQ – Frequently Asked Questions ® What is Windows 8 activation? − You will find a relevant section in these operating instructions containing detailed information on this topic. ® How do I activate Windows ® − Windows 8 is activated automatically as soon as an Internet connection is established. -
Page 42: Customer Service
15. Customer Service 15.1. What To Do In Case of Hardware Problems Malfunctions can sometimes have quite trivial causes, but they may also be the result of defective components. We have included a brief troubleshooting guide below which may help to solve any problems. If these tips don’t do the trick, then we’ll be more than pleased to assist you. -
Page 43: Do You Need More Help
You’ve checked through the suggestions in the previous section and you’re still having problems with your device? Then call our hotline or contact us at www.medion.com. We’ll be glad to help you. Before contacting your technology centre, however, prepare the following information: •... -
Page 44: Maintenance
Over time, dust can collect inside the device which then blocks the vents. This can lead to an increase in the fan speed and, therefore, also increase the operating volume of your device. It can also lead to overheating and malfunctions. -
Page 45: Recycling And Disposal
However, these approaches were mostly very complicated and varied from one manufacturer to the next. When handling warranty issues for all of its display products, MEDION therefore adheres to the strict and transparent requirements of the standard ISO 9241-307, Class II; which has been briefly summarised below. - Page 46 Pixel structure 5 Pixel Rows Pixel blue green Sub-Pixel Pixel defect types: • Type 1: permanently illuminated pixel (bright, white dot) even when not activated. A white pixel occurs due to the illumination of all three sub-pixels. • Type 2: non-illuminated pixel (dark, black dot) even when activated.
-
Page 47: Legal Notice
Subject to technical and optical changes as well as printing errors. The operating manual can be reordered via the service hotline and is available for download via the service portal at www.medion.com/gb/service/start/. You can also scan the QR code above and download the operating manual onto your mobile device via the service portal. -
Page 48: Index
Setting Up an Image Code for 19. Index Windows ..........32 Setting Up a Password for Windows 31 Battery Mode ..........17 Battery Performance ......17 Mains Power ..........15 Charging the Batteries ......17 Maintenance ..........42 Charging the Battery ......17 Checking the Battery Charge ...18 Network ............24 Discharging the Battery .....17 Inserting the Battery ......17... - Page 49 Windows activation ......28 Sound System ..........23 Starting ............16 The Multi-Card Reader Inserting a Memory Card ....26 Universal Serial Bus Port ......27 Upgrades/Modifications Notes for service technicians ...42 Views Bottom View of the Tablet Unit ..14 Left Side ...........14 Windows® 8 Desktop ........33 Desktop apps .........34 Windows®...
- Page 50 48 of 48...
Need help?
Do you have a question about the Akoya and is the answer not in the manual?
Questions and answers