Table of Contents
Advertisement
Advertisement
Table of Contents

Subscribe to Our Youtube Channel
Related Manuals for Medion MEDION


Summary of Contents for Medion MEDION
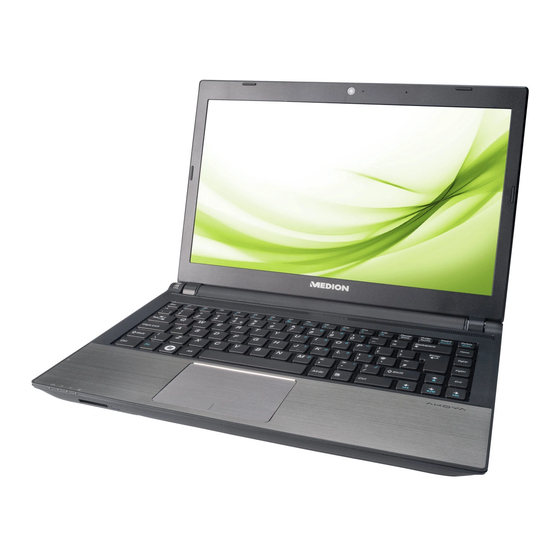
- Page 1 35.6 cm / 14“ Notebook ® ® MEDION AKOYA S42xx S46xx Instruction Manual...
-
Page 2: Table Of Contents
Table of Contents 1. About these Instructions .................. 5 1.1. Symbols and Key words used in these Instructions ..........5 1.2. Proper Use ..........................6 1.3. Declaration of Conformity ....................6 2. Safety Instructions .................... 7 2.1. Dangers for children and people with reduced ability to operate machinery. - Page 3 10. The Hard Drive ....................31 10.1. Important Directories ......................32 10.2. mSATA Hard Drive (optional) ..................33 11. The Optical Drive ..................... 34 11.1. Inserting a disc ........................34 11.2. Playing/Reading Discs .....................35 11.3. Regional playback information for DVDs ..............35 11.4. Issues Relevant to the Burner ..................36 12.
- Page 4 ® 20.6. Windows 8 – Help and Support .................62 21. FAQ – Frequently Asked Questions ..............63 22. Customer Service .................... 64 22.1. What To Do In Case of Hardware Problems ............64 22.2. Find The Cause ........................64 22.3. Do You Need More Help? ....................66 22.4.
- Page 5 This document contains legally protected information. All rights reserved. Mechani- cal, electronic and any other form of reproduction is prohibited without the written permission of the manufacturer. Copyright © 2012 ® All rights reserved. This manual is protected by copyright. MEDION is the owner of the copyright. ® ®...
-
Page 6: About These Instructions
About these Instructions Before using the device for the first time, please read these operating in- structions carefully, paying special attention to the safety notices. This device should only be used as designated and as described in these instructions. Please keep these instructions in a safe place for future reference. Al- ways include these instructions if passing the device on. -
Page 7: Proper Use
Wireless LAN (optional) • Bluetooth (optional) Medion AG hereby declares that this device conforms to the fundamental require- ments and the remaining relevant regulations of the 1999/5/EC R&TTE Directive. This product satisfies the basic requirements and relevant regulations of the Ecode- sign Directive 2009/125/EC. -
Page 8: Safety Instructions
Safety Instructions 2.1. Dangers for children and people with reduced ability to operate machinery • This device is not intended for use by people (including children) with reduced physical, sensory or mental abilities or for those without experience and/or knowledge, unless they are supervised by a person responsible for their safety or they have been instructed in its use. -
Page 9: Never Carry Out Repairs Yourself
Never Carry Out Repairs Yourself WARNING! Never try to open or repair the device yourself. There is a risk of elec- tric shock. • If there is a fault, contact the Medion Service Center or other suitable specialist workshop. 8 of 73... -
Page 10: Data Backup
2.4. Data Backup ATTENTION! Back up your data on external storage media before each update. We do not accept any liability for claims for compensation arising from loss of data or any consequential loss or damage. 2.5. Setup Location • Keep your Notebook and all connected devices away from moisture and avoid dust, heat and direct sunlight. -
Page 11: Ergonomics
2.7. Ergonomics PLEASE NOTE! Avoid dazzle, reflections and strong bright-dark contrast in order to protect your eyes. The Notebook should never be placed next to a window because this is the bright- est part of the room in daylight. This brightness can make it more difficult for the eyes to adjust to the darker display. -
Page 12: Connecting
2.8. Connecting Follow the instructions below to connect your Notebook correctly and safely: 2.8.1. Power Supply DANGER! Do not open the housing of the mains adapter. There is a risk of elec- tric shock when the housing is open. It does not contain any parts re- quiring maintenance. -
Page 13: Information About The Touchpad
• In addition, when connecting your peripherals only use the connecting cables supplied with those devices. • Ensure that all connection cables are connected to their corresponding periph- eral device to avoid any interference radiation. Disconnect any cables that are not required. -
Page 14: Included With Your Notebook
Included with your Notebook Please check that the contents are complete and notify us within 7 days of purchase if any of the following components are missing: • Notebook • Li-Ion Battery • AC Adapter with Power Cord • OEM version of operating system •... -
Page 15: Views
Views 4.1. Open Notebook Webcam Webcam LED Microphone Display Stereo Speaker Keyboard Touchpad Device Indicators Power ON/OFF 14 of 73... -
Page 16: Front View
4.2. Front View Multimedia Card Reader 4.3. Left Side Kensington® Lock LAN Port (RJ-45) External monitor port VGA HDMI Connector USB 3.0 Port with charging function for mobile phones (optional) ATTENTION! The charging function („Symbols and Key words used in these Instructions“ is available in sleep mode and when the Notebook is switched off providing it is activated beforehand in the BIOS. -
Page 17: Right Side
4.4. Right Side 16 17 Audio Out* / Digital Audio Out (S/P-DIF, optical) Microphone* USB 2.0 Port Optical Drive Power Socket *Ports with dual function. Configuration is set with the included software 16 of 73... -
Page 18: Operating And Status Leds
4.5. Operating and Status LEDs The system displays power supply status and operating modes via LEDs. The oper- ating lights also light up during Notebook activity. Battery LED This LED lights when the battery is charging. Access Indicator This LED lights or flashes when the Notebook is accessing the hard disk or the optical drive. -
Page 19: First Use
First Use To operate your Notebook safety and ensure a long service life, you should read the “Operational safety” chapter at the beginning of this manual. All operating software is already fully preinstalled on the Notebook so there is no need for you to install any more drivers and you can get started right away. -
Page 20: Power Supply
Power Supply 6.1. On/Off Switch Open the Notebook and hold the on/off switch down briefly to switch the Note- book on or off. The operating light indicates the current operating mode. Regardless of the operat- ing system, the Notebook will switch off if the switch is held down for longer than 4 seconds continuously. - Page 21 6.2.1. Starting the Notebook Open up the display as described above and press the on/off switch. Follow the instructions on the screen. Step-by-step instructions will guide you through the process to be followed. The welcome procedure takes you through several screens and dialogues. ...
-
Page 22: Battery Mode
6.3. Battery Mode PLEASE NOTE! Please charge and discharge the new battery completely two or three times consecutively to ensure that it reaches its optimum performance! Batteries store electrical energy in their cells and then release it again as required. The service life and performance of your battery depends on careful handling. -
Page 23: Removing The Battery
6.3.2. Removing the Battery To remove the battery pack, slide the battery lock and to the ‘lock open’ position and remove the battery pack from the compartment. ATTENTION! Do not remove the battery while the Notebook is switched on or data may be lost. -
Page 24: Discharging The Battery
6.3.4. Discharging the Battery Operate the Notebook on battery power until it turns itself off due to low battery charge. PLEASE NOTE! Be sure to save your open files promptly to prevent any data loss. 6.3.5. Battery Performance The actual operating time varies depending on the configuration of the power-sav- ing functions. -
Page 25: Power Management (Power Options)
6.4. Power Management (Power Options) Your Notebook offers automatic and customisable power-saving and energy func- tions that can be used to optimise battery life and reduce the overall operating costs. 6.4.1. Sleep With this setting the content of your Notebook’s RAM is preserved while practical- ly all other components of your Notebook are disabled or their power consumption reduced to a minimum. -
Page 26: Appearance And Customisation
7.3. Appearance and Customisation This program gives you the option of customising your desktop. This includes the background image, the screensaver and other settings for your monitor and your graphics card. The program can be started as follows: • Right-click on the Windows desktop and left-click on Personalise. -
Page 27: Connecting An External Monitor
7.4. Connecting an External Monitor The Notebook has a VGA connection socket (13) as well as an HDMI port (14) for an external monitor. Shut down your Notebook correctly. Plug the external monitor’s signal cable into the VGA socket on the Notebook (13). -
Page 28: Data Input
7.4.1. Duplicate This mode duplicates the Notebook display on the external monitor. PLEASE NOTE! In this mode the same screen resolution must be configured for both devic- 7.4.2. Extend In this mode, a blank desktop is displayed on the second (external) monitor. Win- dows on the first screen can be moved onto the second screen and vice versa. - Page 29 8.1.1. Notebook-Specific Keyboard Shortcuts Description Sleep Fn + F1 To configure these keys to suit your requirements, please go to Power Options Smart Power Fn + F4 You will be able to select between two different Energy Saving Modes with this key combination. Darker Fn + F5 Reduces the brightness of the display.
-
Page 30: The Touchpad
The Touchpad In normal mode, the cursor follows the direction specified by moving your fingers in the corresponding direction on the touchpad. ATTENTION! Do not use pens or other objects as this can damage your touchpad. The left and right mouse buttons are found in the lower section of the touchpad and can be used in the same way as those on a conventional mouse. - Page 31 9.1.1. Two-Finger Touchpad Operation Your touchpad supports two-finger operation which enables certain commands to be executed in some applications. You can perform the following commands using your touchpad: Image Command Function zoom out Drag two fingers togeth- from an object/ er or apart zoom in on an object Place one finger in the...
-
Page 32: The Hard Drive
The Hard Drive The hard drive is your main memory medium and combines high storage capacity with rapid data access. You Notebook is supplied with an OEM version * of the Mi- ® crosoft Windows 8 operating system which supports all of the Notebook’s perfor- mance features. -
Page 33: Important Directories
10.1. Important Directories We have listed the most important directories below and described their contents. ATTENTION! Do not delete or modify these directories or their content otherwise data may be lost or system functionality may be impaired. The C: drive root directory contains important files required for Windows® 8 startup. On delivery these files are hidden for security reasons. -
Page 34: Msata Hard Drive (Optional)
10.2. mSATA Hard Drive (optional) Your notebook is supplied with an mSATA hard drive installed. This mSATA hard drive will speed up your entire system. It optimises access speed to the standard hard drive. This has the benefit of making your notebook boot up and programs start more quickly. -
Page 35: The Optical Drive
The Optical Drive 11.1. Inserting a disc Unlike optical drives on a desktop PC, the Notebook uses a mount to hold the disc. When inserting the disc ensure that it is pressed into the mount correctly and that it clicks into position there. PLEASE NOTE! Do not stick protective film or other adhesive labels to the disc. -
Page 36: Playing/Reading Discs
11.1.1. Emergency Release of a Blocked Disc In the event of the drawer no longer opening automatically, it can be opened man- ually providing your device has an emergency eject hole. Exit Windows ® 8 and switch off the Notebook. ... -
Page 37: Issues Relevant To The Burner
11.4. Issues Relevant to the Burner This section only concerns devices supplied with a CD-RW, a combination CD/DVD read drive or a DVD-RW drive. First some information about blank discs 11.4.1. Blank CDs and DVDs Normal CDs are pressed by a glass master and then sealed. With blank discs, digi- tal information is burned onto them using the drive’s laser. -
Page 38: The Sound System
The Sound System 12.1. External Audio Connections Your Notebook has an integrated stereo speaker so you can always reproduce sound without additional devices. Using the external connections provides you with an ideal opportunity to connect your Notebook to external devices. The Fn + 11 and Fn + 12 keyboard shortcut enables you to adjust the volume. -
Page 39: Network Operation
Network Operation 13.1. What is a Network? We talk about a network when multiple computers are directly connected to one another. This allows users to transfer information and data with one another and to share their resources (printers and drives). Here are a few concrete examples: •... - Page 40 13.2.1. Requirements A so-called WLAN access point may be used as a remote station. A WLAN access point is a radio transmitting device that communicates with your Notebook and controls access to the connected network. WLAN access points are frequently found in large offices, airports, train stations, universities or Internet cafés.
-
Page 41: Bluetooth (Optional)
Bluetooth (optional) Bluetooth technology is used to wirelessly bridge short distances. Bluetooth de- vices transfer data via radio so that computers, mobile phones, printers, keyboards, mice and other devices can communicate with one another wirelessly. Bluetooth wireless technology has numerous possible applications. A few of them are listed below: •... -
Page 42: The Multi-Card Reader
The Multi-Card Reader Memory cards are media that are used, e.g. in the field of digital photography, and are gradually replacing the diskette. The shape and capacity of a memory card can vary depending on the manufacturer. Your Notebook supports the following formats: •... -
Page 43: The Webcam
The Webcam The integrated webcam enables the use of various communication services. The Universal Serial Bus Port The universal serial bus (USB 1.1 and USB 2.0) is a standard for connecting input de- vices, scanners and other peripherals. Up to 127 devices can be connected to the USB ports via a single cable. -
Page 44: Charging Function For Compatible Mobile Phones (Optional)
17.1. Charging function for Compatible Mobile Phones (optional) You can use the USB 3.0 port on the left side of the Notebook (15) to charge a com- patible mobile phone (5 volts max. 1.5A) The charging function is available in sleep mode and when the Notebook is switched off. -
Page 45: Securing Your Notebook
Securing your Notebook Your new Notebook has software and hardware solutions for preventing unauthor- ised access. 18.1. Power-on Password You can protect your Notebook against unauthorised use with a power-on pass- word. On switching on the Notebook, a password prompt will appear on the screen. The password is set up in the BIOS . -
Page 46: Software
Software This section deals with the subject of software. We distinguish here between the operating system, the software (the applications), the Windows activation and the BIOS. ® 19.1. Getting to know Windows ® Windows 8, the new operating system from Microsoft, contains a series of innova- tive functions and new technologies that your Notebook uses to work quickly and reliably. -
Page 47: Windows ® 8 - What's New
® 19.3. Windows 8 – What’s New Microsoft Account ® A Microsoft account is an e-mail address and password for logging in to Windows 8. You can use any e-mail address. We recommend using the address you use to communicate with friends and log into your favourite web sites, however. The Microsoft account also allows you to purchase or download apps from the Store and install them on up to five devices. -
Page 48: Jump Lists
Taskbar (Desktop Mode) You can start programs from the taskbar at the bottom of the screen and switch be- tween programs already running. In Windows® 8 you can place any program onto the taskbar, so that you can always open it with a single click. You can also rear- range the icons on the taskbar by simply clicking on them and dragging them to the desired position. -
Page 49: Overview
Improved Device Management ® Windows 8 allows you to connect, manage and use all devices via the central “De- vices” function. All devices are shown in a central location. With the new “Device Stage” technology, however, Windows® 8 goes one step fur- ther with device management. -
Page 50: Logging In To Windows
19.5. Logging in to Windows ® ® To be able to work with Windows 8, you must set up a Windows 8 user account. Move the mouse pointer into the top right or bottom corner of the display, move the mouse down and click Settings. -
Page 51: Linking A User Account To A Liveid
19.6. Linking a User Account to a LiveID You can link your user account to a LiveID. This enables you to log in to any comput- er or mobile device connected to the Internet using your LiveID. Move the mouse pointer into the top right or bottom corner of the display, move the mouse down and click Settings. -
Page 52: Windows® 8 Start Screen
19.7. Windows® 8 Start Screen Once the operating system is running, you will see the new Windows® 8 Start screen. (image similar) Information such as the following may be displayed here, for example: Windows Windows 8 apps are executable programs. ®... -
Page 53: Windows® 8 Desktop
19.8. Windows® 8 Desktop This image shows a symbolic representation of additional programs. (image similar) Information such as the following may be displayed here, for example: Classic Desktop apps are applications that are displayed on a desktop desktop with a program thumbnail. The app thumbnails apps are bigger than the standard tiles. -
Page 54: Working With Windows
19.8.1. Working with Windows ® 8 and Cassic Apps Menu Instructions Click the desired app with the left mouse but- Opening an app ton. Closing an app PLEASE NOTE! Not all apps need to be closed! Win- dows® 8 closes unused apps automati- cally. - Page 55 Right-click on the Start screen. Uninstalling an app Click All Apps in the bottom right hand cor- ner of the display. Right-click the desired app. Click Uninstall at the bottom edge of the display. PLEASE NOTE! Not all apps can be uninstalled.
-
Page 56: Using The Search Function
19.9. Using the Search Function Use the search function to find individual tasks, settings or apps quickly. Move the mouse pointer into the top right or bottom corner of the display and click Search. Enter the name of the app or file and select an entry from the results list on the left-hand side of the display. - Page 57 Configure the general settings for time zone, spell General checking, language and memory here. Reinstall the operating system without losing personal user data or key basic settings. Restore your Notebook to its factory settings. Perform a reboot with a CD inserted. ...
-
Page 58: Windows ® 8 Power On/Off Functions
20.1. Windows 8 Power On/Off Functions ® ® The new Windows 8 allows you to restart your Notebook, put it into sleep mode or shut it down. Changes can be made to the sleep settings at any time in the power options. In sleep mode the content of your Notebook’s RAM is preserved while practically all other components of your Notebook are disabled or their power consumption reduced to a minimum. -
Page 59: Control Panel Settings
20.2. Control Panel Settings ® You can change Windows 8 settings using the control panel. These settings control ® virtually everything about how Windows 8 appears and functions and enable you ® to customise Windows 8 to meet your requirements. When the control panel is run for the first time, some of the most frequently used control panel elements are displayed grouped together by category. -
Page 60: Resetting The Notebook To Its Factory Settings
20.3. Resetting the Notebook to its Factory Settings In the event of problems with the installation or other software problems which ® make it necessary to reinstall the software, Windows 8 offers three options for rein- ® stalling Windows 8 on your Notebook. First ensure that you have backed up all important data and programs. -
Page 61: Bios Setup Program
20.4. BIOS Setup Program BIOS setup (the basic hardware configuration of your system) offers you numerous configuration options for operating your Notebook. For example, you can modify the operating mode for interfaces, security features or power supply management. The Notebook has already been configured by the manufacturer to ensure opti- mum operation. -
Page 62: Kaspersky Internet Security
20.5. Kaspersky Internet Security Kaspersky Internet Security is a comprehensive tool to protect your data. The use of it not only offers you full protection against viruses, but also against spam and at- tacks against your network. Further components of the software will protect your computer against threats and phishing attacks unknown up to now and allows the access to the Internet to be restricted sensibly. -
Page 63: Windows
The Kaspersky Internet Security Package will be updated with the most up-to-date virus information for a test period after the free registration. Read the activation in- formation about this on the internet at: http://www.Kaspersky.com. PLEASE NOTE! The operating system and anti-virus software are automatically updated when the first online connection is made. -
Page 64: Faq - Frequently Asked Questions
FAQ – Frequently Asked Questions Do I need to install the discs supplied? − No All programs are preinstalled. The discs are provided as backup copies only. Where can I find the necessary drivers for my Notebook? − The drivers can be found in the second hard drive partition in the Drivers and Tools folders. -
Page 65: Customer Service
Customer Service 22.1. What To Do In Case of Hardware Problems Malfunctions can sometimes have quite trivial causes, but they may also be the re- sult of defective components. We have included a brief troubleshooting guide be- low which may help to solve any problems. If these tips don’t do the trick, then we’ll be more than pleased to help you out. - Page 66 22.2.1. Faults and Possible Causes The screen is black. • This fault can have various causes: − The operating light (on/off switch) does not light up and the Notebook is in hibernation. Solution: Press the on/off switch. − The sleep light is flashing. The Notebook is in sleep mode. Solution: Press the on/off switch.
-
Page 67: Do You Need More Help
Do You Need More Help? You’ve checked through the suggestions in the previous section and you’re still hav- ing problems with your device? Then call our hotline or contact us at www.medion. de/service. We’ll be glad to help you. Before contacting your technology centre, however, prepare the following informa- tion: •... -
Page 68: Transport
22.5. Transport Please note the following information if you wish to transport the Notebook: • Switch the Notebook off. This ensures that the hard drive heads are automatical- ly moved to a safe area to avoid damage. Remove any inserted DVDs/CDs. •... -
Page 69: Maintenance
22.6. Maintenance ATTENTION! None of the parts inside the Notebook housing require cleaning or mainte- nance. You can increase the lifespan of your Notebook with the following measures: • Always unplug the device, disconnect all cables and remove the battery before cleaning. -
Page 70: Upgrading/Modifying And Repair
Upgrading/Modifying and Repair • Upgrades and modifications to your Notebook should only be carried out by qualified specialists. If you do not have the necessary qualifications, have the work carried out by a qualified service technician. Please contact your custom- er service department if you have technical problems with your Notebook. -
Page 71: Recycling And Disposal
Recycling and Disposal Should you have any questions concerning the disposal please contact your dealer or customer service. Packaging Your device has been packaged to protect it against transportation damage. Packaging is raw material and can be re-used or added to the recycling system. -
Page 72: European En 9241-307 Class Ii Standard
However, these approaches were mostly very complicated and var- ied from one manufacturer to the next. When handling warranty issues for all of its display products, MEDION therefore adheres to the strict and transparent require- ments of the standard ISO 9241-307, Class II; which has been briefly summarised below. - Page 73 Pixel defect types: • Type 1: permanently illuminated pixel (bright, white dot) even when not activated. A white pixel occurs due to the illumination of all three sub-pixels. • Type 2: non-illuminated pixel (dark, black dot) even when activated. • Type 3: abnormal or faulty red, green or blue sub-pixel (e.g.
-
Page 74: Fcc Compliance Statement
25.1. FCC Compliance Statement This equipment has been tested and found to comply with the limits for a Class B digital device, pursuant to Part 15 of FCC Rules. These limits are designed to provide reasonable protection against harmful interference in a residential installation. This equipment generates, uses, and can radiate radio frequency energy and, if not ins- talled and used in accordance with the instructions, may cause harmful interference to radio communications.
Need help?
Do you have a question about the MEDION and is the answer not in the manual?
Questions and answers