Medion Lifetab Instrucion Manual
17.8 cm / 7“ tablet
Hide thumbs
Also See for Lifetab:
- Instruction manual (75 pages) ,
- Manual manual (48 pages) ,
- Instruction manual (49 pages)
Table of Contents
Advertisement
Quick Links
Advertisement
Table of Contents

Related Manuals for Medion Lifetab


Summary of Contents for Medion Lifetab
- Page 1 17.8 cm / 7“ Tablet ® ® MEDION LIFETAB Instruction manual...
-
Page 2: Table Of Contents
Contents About these Instructions ........5 1.1. Symbols and Key words used in these In- structions ............... 6 1.2. Proper Use ............. 8 1.3. Declaration of Conformity ....... 9 Safety Instructions ..........10 2.1. Dangers for children and people with re- duced ability to operate electronics ..10 2.2. - Page 3 6.1. Power Adapter ...........33 6.2. Battery Operation ..........34 Power Button ............35 7.1. Powering On Your Tablet ........35 7.2. Powering Off your Tablet .......35 7.3. Turn the Tablet PC into sleep mode ...36 7.4. Waking up from Standby Mode ....37 Operating the Tablet ........38 8.1.
- Page 4 LIFETAB Media – Entertainment ......56 16.1. Camera ..............56 16.2. Video ..............57 16.3. Music ..............57 Physical keyboard ..........58 FAQ ..............59 Customer Service ..........60 19.1. Additional Support...........60 19.2. Maintenance ............61 19.3. Measures for Protecting the Display ..62 Recycling and Disposal........63 European Norm EN 9241-307 Class II .....64 21.1.
- Page 5 Google marks are trademarks of Google Inc. Other trademarks are the property of their respective owners. D - MEDION AG, Am Zehnthof 77, 45307 Essen Subject to technical and optical changes as well as print- ing errors. 4 of 79...
-
Page 6: About These Instructions
1. About these Instructions Before using the device for the first time, please read these operating instructions care- fully, paying special attention to the safety no- tices. This device should only be used as designated and as described in these instructions. Please keep these instructions in a safe place for future reference. -
Page 7: Symbols And Key Words Used In These Instructions
1.1. Symbols and Key words used in these Instructions DANGER! Warning of immediate risk of fatal injury! WARNING! Warning: possible mortal danger and/or serious irre- versible injuries! CAUTION! Warning: possible light or moderate injuries! CAUTION! Please follow the guidelines to avoid injuries and/or property damage. - Page 8 WARNING! Warning: danger of electric shock! WARNING! Warning: danger due to exces- sive volume! Bullet point/information on operat- • ing steps and results Tasks to be performed 7 of 79...
-
Page 9: Proper Use
1.2. Proper Use You can use your tablet PC in various ways. For example, you can surf the internet whenever and wherever you want, read books and news articles, play games, watch films and communicate with the whole world. An internet connection is required to access the internet and this service may be subject to a charge. -
Page 10: Declaration Of Conformity
• Wireless LAN • Bluetooth Medion AG hereby declares that this device conforms to the fundamental requirements and the remaining rele- vant regulations of the 1999/5/EC R&TTE Directive. This product satisfies the basic requirements and relevant regulations of the Ecodesign Directive 2009/125/EC. Full declarations of conformity are available at http://www.medion.com/conformity. -
Page 11: Safety Instructions
2. Safety Instructions 2.1. Dangers for children and people with reduced ability to operate electronics • This device is not intended for use by people (including children) with reduced physical, sensory or mental abilities or for those with- out experience and/or knowledge, unless they are supervised by a person responsible for their safety or they have been instructed in its use. -
Page 12: Operational Safety
2.2. Operational Safety Please follow the instructions in this section for the safe operation of your tablet. • Do not open the case of the tablet, or the power adapter. When the case is open there is a danger of severe electric shock. •... - Page 13 • Do not expose the tablet PC to heat for any extended period. This applies in particular to leaving it in your car, as excessive heat could deform the various components. • Update the software regularly to make sure the tablet PC is always compatible and stable. •...
-
Page 14: Notes On Lithium-Ion Batteries
If the tablet PC gets wet: • Do not switch it on. • Disconnect the power cable and switch off the tablet PC. • Do not switch it back on until it has dried off completely. 2.3. Notes on lithium-ion batteries This device contains a lithium-ion battery. -
Page 15: Never Carry Out Repairs Yourself
your eyes or skin. If this happens, rinse the af- fected areas immediately with plenty of clean water and contact your doctor immediately. 2.4. Never Carry out Repairs Yourself WARNING! Never try to open or repair the de- vice yourself. There is a risk of elec- trical shock! •... -
Page 16: Ambient Temperature
2.5. Ambient Temperature • The tablet is most reliably operated at an am- bient temperature between 5°C (41°F) and 30°C (86°F)and at a relative humidity be- tween 20% and 80% (without condensation). • When powered off, the tablet can be stored at temperatures between 0°C (32°F) and 60°... - Page 17 2.6. Connecting Pay attention to the following information in or- der to connect your tablet correctly. 2.6.1. Power Adapter • Do not open the power adapter housing. When the housing is open there is a danger of severe electric shock. It contains no us- er-serviceable parts.
-
Page 18: Cabling
power supply remove the plug from the power source first and then remove the con- nector from the tablet. A reverse sequence could damage the power adapter or the tab- let. Always hold the connector firmly when removing it. Never pull on the power cord. CAUTION! Use only the supplied mains adapter to charge your tablet PC. -
Page 19: Included With Your Tablet
3. Included with Your Tablet Please check that the contents are complete and notify us within 14 days of purchase if any of the following compo- nents are missing: • Tablet PC • AC Adapter • microUSB cable (optional) • microUSB host cable (optional) AC/DC adapter Manufacturer... -
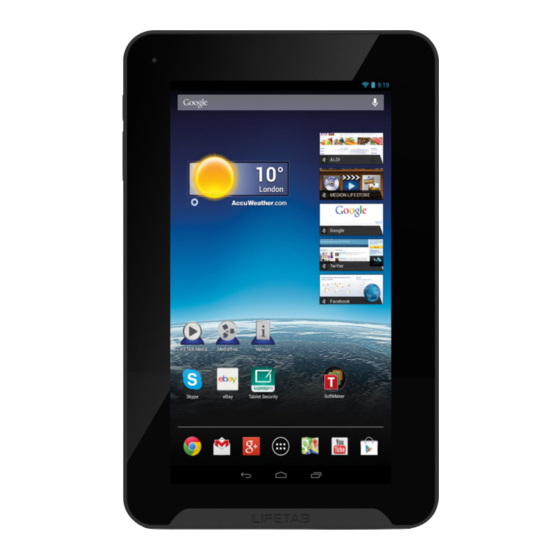
Page 20: Views
4. Views 4.1. Front Side Display Camera 19 of 79... -
Page 21: Rear Side
4.2. Rear Side Reset Button Speaker Camera 20 of 79... -
Page 22: Side View, Short Side
4.3. Side View, Short Side Microphone microSD card slot USB connection Stereo headphone socket On/Off Switch Volume Control + Volume Control - 21 of 79... - Page 23 CAUTION! The microSD card must be inserted in the correct direction. Ensure that the contacts on the microSD card are fac- ing towards the rear. Do not apply force when inserting cards otherwise they may be damaged. PLEASE NOTE! Please only use stereo earphones / head- phones with this tablet PC.
- Page 24 WARNING! The use of headphones/earphones with a high volume can lead to last- ing damage to your hearing. Set the volume to the lowest level before reproducing any sound. Start the sound reproduction and increase the volume to the level that is comforta- ble for you.
- Page 25 PLEASE NOTE! The device’s warnings are given in English. Tap on the symbol and follow the instructions given. Mark the field underneath the instructions to con- firm that you have read and understood them. Now tap on OK. PLEASE NOTE! After the device has been restarted, it will be necessary to reset the volume.
-
Page 26: Getting Started
5. Getting started Before you get started using your tablet, first take a few moments to read the important section on safety. 5.1. First Steps Connect one end of the USB cable to the mains adapt- er supplied and connect the other end of the USB ca- ble in the micro USB port on your tablet PC. -
Page 27: Configuring Your Google™ Account
5.2. Confi guring Your Google™ Account Your tablet provides you with access to a variety of appli- cations from Google™. You need a Google™ account to use these applications. This account allows you to use a large number of different services, e.g. Google Mail™. The following will take you through the set-up process for your tablet PC. -
Page 28: Setting Up A User Account
5.3. Setting up a user account After you have set up your Google™ account or skipped this step, you can now enter your forename and surname as the owner of this tablet PC. A user account with addi- tional rights will be set up automatically for the first user (owner). - Page 29 Among other things, you will find the Search bar, the Fa- vourites bar and the Navigation bar here to provide eas- ier and more convenient operation. Tap on the corresponding element to start the respec- tive application or to receive further information. ...
- Page 30 On the Search bar of the home screen located at the top edge you will find the following icons: Icon Description This icon starts a Google search. The search includes the content of your tablet PC (e.g. your contacts and in- stalled applications) as well as the In- ternet.
- Page 31 Icon Description This icon will return you to the home screen. Please note that the applica- tion you were using has not closed, but is only paused and shifted to the background. It therefore continues to use memory and possibly also proces- sor performance.
- Page 32 On the Favourites bar, which is located above the Status bar, you will find the following symbol: Icon Description This icon displays a list of all applica- tions on your tablet PC. Tap on an ap- plication to start it. Keep your finger on an application to create a shortcut to the application on the home screen (drag the application to the corre-...
-
Page 33: Status Icons
5.5. Status icons At the upper left edge of the display, the status icons are shown that indicate the following: • SD card is inserted • The tablet is connected as a media device • Download is finished Press on the status icons and pull your finger down- wards. -
Page 34: Power Supply
6. Power Supply Connect the tablet PC to the mains adapter when first switching on or after the tablet has been powered off for a long period. The tablet is provided with a rechargeable integrated high-performance lithium battery which you can charge using the mains adapter supplied. -
Page 35: Battery Operation
6.2. Battery Operation Batteries store electrical energy in their cells and then de- liver it when needed. The useful life and performance of your battery will de- pend on careful handling. The battery should be completely discharged before a charging process and completely charged again in order to optimise its useful life and its performance. -
Page 36: Power Button
7. Power Button 7.1. Powering On Your Tablet Press and hold the on/off button on the right side of the tablet PC for several seconds. The tablet PC will switch on. 7.2. Powering Off your Tablet Press and hold the power button until the following message appears on the screen: ... -
Page 37: Turn The Tablet Pc Into Sleep Mode
7.3. Turn the Tablet PC into sleep mode To optimise the battery life, the tablet switches to ener- gy-saving mode whenever it isn’t being used. In energy-saving mode, the tablet PC uses less energy as the display is switched off. If no activity takes place within a certain time period, the background lighting switches it- self off automatically and the device is locked. -
Page 38: Waking Up From Standby Mode
7.4. Waking up from Standby Mode While the screen display is off, press the power button quickly to re-illuminate the screen. To do this, drag the lock icon onto the sign, to return the main page. 37 of 79... -
Page 39: Operating The Tablet
7.4.1. Adjusting Screen Lock Pattern Settings You can adjust the screen lock pattern settings under Settings > Security > Screen lock. 8. Operating the Tablet You operate your tablet with your fingertips. Do not use any pointed or sharp-edged objects. ... -
Page 40: Customising The Home Screen
8.1. Customising the Home Screen Your tablet has several workspaces. You can move the screen with your fingers, adjust the dis- play or move icons between the workspaces. 39 of 79... -
Page 41: Making/Checking Settings
9. Making/Checking Settings To change or display your tablet settings, tap on > Settings. All available settings appear on the left. Touching the dis- play allows you to select the menu items for the settings. 9.1.1. WIRELESS & NETWORK Icon Menu Name Description Configure and administer... - Page 42 Icon Menu Name Description Check the available memo- ry on an inserted microSD Storage card and the internal device memory. Displays the charging sta- Battery tus and the remaining bat- tery life. Manage your applications Apps and install new applica- tions.
- Page 43 9.1.3. USER Icon Menu Name Description Here you can set the sourc- Location es that are to be used to services determine your location. Create your unlock pattern, define the memory man- Security agement for the registra- tion information on your mobile device.
- Page 44 9.1.5. SYSTEM Menu Icon Description Name Set the date, time, time zone Date & and date/time format time After installing the applica- Accessibil- tions for input support, you can set various options here. Display the mobile network About tab- status, battery level and le- gal information.
-
Page 45: Software Updates
9.1. Software Updates When a software update is available, you can download this update from the Internet. To check the availability of new updates, go to Settings > About tablet > Updater. 9.2. Google Play As your tablet is based on the Android platform, you can expand its functions by installing additional applications. -
Page 46: Widgets - Little Helpers On The Desktop
10. Widgets – Little helpers on the Desktop Widgets – mini programs that are executed on the desk- top – are used to display and manage many things. How to run widgets: Tap on > Widgets. All available widgets will be shown: ... -
Page 47: Setting Wallpapers
11. Setting Wallpapers Browse through the many available wallpapers and give your tablet PC a fresh design. Press with a finger on the Home screen until the fol- lowing window appears: Browse wallpapers and background images. Tap on the desired picture and select Set wallpaper. -
Page 48: Connecting To The Internet
12. Connecting to the Internet 12.1. Main Settings Press and drag down the Main Settings window in the upper right corner of the display as shown to open the Main Settings. Note! Some settings can only be activated or deac- tivated by pressing and holding. -
Page 49: Airplane Mode
12.2. Airplane Mode The airplane mode allows you to deactivate all wireless connections (e.g. WLAN, Bluetooth). Tap on Aeroplane Mode to activate or deactivate the mobile network. 12.3. Wi-Fi 12.3.1. Activating Wi-Fi CAUTION! Make sure the Wireless LAN option is switched OFF in any environment where it might interfere with critical and sensi- tive devices, e.g. -
Page 50: Bluetooth
You can also manually add a WLAN network using the Add Network option by entering the network SSID with the respective security types. 12.3.2. Connecting to a WLAN Network Tap on Apps > Settings and then on Wireless & Net- works >... - Page 51 10 m. 12.4.2. Pairing Devices Tap on Bluetooth > ON. On the right in the window, tap on LIFETAB, thus ac- tivating the option Visible to all Bluetooth devices nearby. Tap at the top right on Search for devices and search the network for accessible devices.
-
Page 52: Connecting The Tablet Pc To A Computer
13. Connecting the Tablet PC to a Computer The micro USB connection lets you connect the tablet PC to a computer via the USB cable supplied. The computer recognises the tablet as a USB device. 14. External Storage Media Your tablet PC permits the use of external storage media. These allow you to increase the memory capacity of the device and exchange data with your desktop computer or other devices/people. -
Page 53: Inserting Microsd Cards
14.1.1. Accessing the microSD Card Contents To access the SD card you either can use the application the ES file explorer or another application of your choice (i.e. LIFETAB Media) to play music or watch photos from the SD card. 52 of 79... -
Page 54: Removing Microsd Cards
14.1.2. Accessing the microSD via the ES File Explorer Open the ES file Explorer. The SD card is detected automatically. 14.1.3. Accessing the microSD via LIFETAB Media (optional) Start LIFETAB Media. Select Music, Video, Photo or Camera. -
Page 55: Connecting Usb Stick
14.3.1. Accessing the USB Memory With ES File Explorer or another application of your choice (e.g. LIFETAB MEDIA) you can access the content of the USB memory and play back music or display photos. 14.3.2. Accessing the USB Memory using the ES File Explorer ... -
Page 56: Communication
14.3.3. Accessing the USB Memory using LIFETAB Media (optional) Start LIFETAB Media. Select Music, Video, Photo or Camera. The data from the corresponding category can now be played back. 14.4. Removing the USB Memory Tap on Settings > Storage. -
Page 57: Lifetab Media - Entertainment
16. LIFETAB Media – Entertainment Using the LIFETAB Media application you can watch vid- eos, listen to music, view photos or use the integrated camera. 16.1. Camera With this application you can use the integrated camera to shoot photos and/or to record films. -
Page 58: Video
16.2. Video From here you can call up videos that are available in the internal memory or on the external memory card. Select the desired film to play it back. 16.3. Music With this application you can visualise and play back mu- sic albums. -
Page 59: Physical Keyboard
17. Physical keyboard If you use your tablet to write long e-mails or texts, it may be helpful to use an external keyboard. You can connect keyboards via USB (with the USB host adapter) or Blue- tooth. The first time an unknown keyboard is connected, it will only offer the US layout, i.e. -
Page 60: Faq
18. FAQ How do I switch off the tablet when the system is blocked? Press the On/Off switch for several seconds. The device switches off and can then be restarted. How can I reset the tablet PC to the factory settings? ... -
Page 61: Customer Service
How can I automatically regulate the illumination? Activate the automatic brightness function. To do this, select Settings > Display > Brightness and activate the selection option Automatic brightness. Why are Bluetooth and WiFi deactivated? Check whether the Airplane mode is active. In this case, the Bluetooth and WLAN functions cannot be ac- tivated. -
Page 62: Maintenance
19.2. Maintenance CAUTION! There are no user-serviceable or us- er-cleanable parts inside the tablet housing. Never open the tablet hous- ings. Following these measures can extend the lifetime of your tablet. Before cleaning the tablet and its accessories, pro- ceed as follows: ... -
Page 63: Measures For Protecting The Display
19.3. Measures for Protecting the Display • The display is the most sensitive component part of the tablet as it consists of thin glass. It can break if stressed too strongly. Do not scratch the cover of the tablet, because it will not be possible to remove any scratches. -
Page 64: Recycling And Disposal
20. Recycling and Disposal Should you have any questions concerning the disposal please contact your dealer or our customer service. Packaging To avoid damage during transport, the tablet is stored in packaging. Packaging is produced mostly from materials which can be disposed of in an environmentally friendly manner and be professionally recycled. -
Page 65: European Norm En 9241-307 Class Ii
21. European Norm EN 9241-307 Class II There have been several attempts in the past to define the acceptable number of defective pixels. But this can be difficult and varies widely between different manufactur- ers. We, therefore, adhere to the clear and strict requirements of EN 9241-307, class II, for the warranty handling of all LCD display prod- ucts. - Page 66 Pixel structure 5 Pixel Rows Pixel blue green Sub-Pixel Types of Pixel Failures: • Type 1: A constantly lit pixel (a bright, white spot), even though it is not addressed. A white pixel is caused when all three sub-pixels are lit. •...
-
Page 67: Fcc Compliance Statement
EN 9241-307, Class II Clus- Cluster Type Type Type Resolution Type 1, Type Type 2 1024 x 768 1280 x 800 1280 x 854 1280 x 1024 1366 x 768 1400 x 1050 21.1. FCC Compliance Statement This equipment has been tested and found to comply with the limits for a Class B digital device, pursuant to Part 15 of FCC Rules. - Page 68 • Increase the separation between the equipment and receiver. • Connect the equipment into an outlet on a circuit dif- ferent from that to which the receiver is connected. • Consult the dealer or an experienced technician for help. Changes or modifications not expressly approved by the party responsible for compliance could void the user’s au- thority to operate the equipment.
-
Page 69: Technical Data
22. Technical Data Description E731X Dimensions approx. 191,9 x 121,8 x 10,8 (w x h x d) Weight approx. 310 g Ktec Co., Ltd., China Model: KSAPK0110500200HU AC adapter USA Input: 100-240V ~ , 50-60 Hz 0,5A/ Output: 5 V 2000 mA Ktec Co., Ltd., China Model: KSAPK0110500200HK AC adapter UK... - Page 70 Description E731X WLAN: IEEE 802.11b/g/n Wireless properties Bluetooth 2.1 Front camera 0,3 MP / rear Cameras camera 2,0 MP Speaker 8Ω/1W *1 Microphone integrated Operating system Android™ 4.2 (Jelly Bean) * Depending on the device settings and usage 69 of 79...
-
Page 71: Licence Information
You can acquire the source code for this product in the following manner: Visit MEDION Service at http://www.medion.com/ de/service/start and enter the MD number or the MSN number of your device in the search field. You will find these numbers on the rear side of your de- vice. - Page 72 GNU General Public Licence Version 2, June 1991 Copyright (C) 1989, 1991 Free Software Foundation, Inc. 51 Franklin Street, Fifth Floor, Boston, MA 02110-1301, USA Everyone is permitted to copy and distribute verbatim copies of this license document, but changing it is not allowed. Preamble The licenses for most software are designed to take away your freedom to share and change it.
- Page 73 If the software is modified by someone else and passed on, we want its recipients to know that what they have is not the original, so that any problems introduced by others will not reflect on the original authors‘ reputations. Finally, any free program is threatened constantly by software patents.
- Page 74 it, thus forming a work based on the Program, and copy and distribute such modifications or work under the terms of Section 1 above, provid- ed that you also meet all of these conditions: a) You must cause the modified files to carry prominent notices stating that you changed the files and the date of any change.
- Page 75 tions 1 and 2 above provided that you also do one of the following: a) Accompany it with the complete corresponding machine-readable source code, which must be distributed under the terms of Sections 1 and 2 above on a medium customarily used for software interchange; or, b) Accompany it with a written offer, valid for at least three years, to give any third party, for a charge no more than your cost of physically per- forming source distribution, a complete machine-readable copy of the...
- Page 76 it. However, nothing else grants you permission to modify or distribute the Program or its derivative works. These actions are prohibited by law if you do not accept this License. Therefore, by modifying or distribut- ing the Program (or any work based on the Program), you indicate your acceptance of this License to do so, and all its terms and conditions for copying, distributing or modifying the Program or works based on it.
- Page 77 a consequence of the rest of this License. 8. If the distribution and/or use of the Program is restricted in certain countries either by patents or by copyrighted interfaces, the original copyright holder who places the Program under this License may add an explicit geographical distribution limitation excluding those countries, so that distribution is permitted only in or among countries not thus ex- cluded.
- Page 78 12. IN NO EVENT UNLESS REQUIRED BY APPLICABLE LAW OR AGREED TO IN WRITING WILL ANY COPYRIGHT HOLDER, OR ANY OTHER PARTY WHO MAY MODIFY AND/OR REDISTRIBUTE THE PROGRAM AS PERMIT- TED ABOVE, BE LIABLE TO YOU FOR DAMAGES, INCLUDING ANY GENER- AL, SPECIAL, INCIDENTAL OR CONSEQUENTIAL DAMAGES ARISING OUT OF THE USE OR INABILITY TO USE THE PROGRAM (INCLUDING BUT NOT LIMITED TO LOSS OF DATA OR DATA BEING RENDERED INACCURATE OR...
-
Page 79: Index
24. Index LIFETAB Media ....56 Airplane Mode ....48 Maintenance ...... 61 Ambient temperature ..15 Making/Checking Settings ......40 Battery Operation ..... 34 microSD Cards ....52 Bluetooth ......49 Browser ........ 55 Non-Market Applications 44 Charging the Battery ..34 Operating the Tablet .. - Page 80 Power Adapter .....16 Repair ......14 Selecting/checking the settings ......40 Settings ........ 40 Software updates ..... 44 Standby Mode ....37 Technical Data ....68 Views Front Side ......19 Rear Side ......20 Side View, Short Side .21 Wallpapers ......46 Widgets ........
Need help?
Do you have a question about the Lifetab and is the answer not in the manual?
Questions and answers