Medion Lifetab Instruction Manual
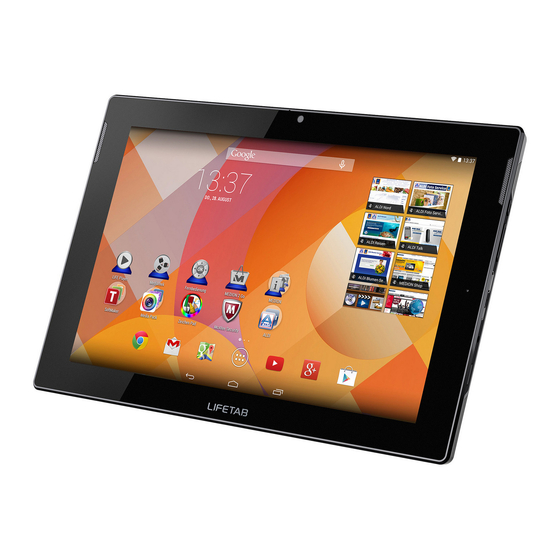
19,9 cm / 7,85“ tablet-pc
Hide thumbs
Also See for Lifetab:
- Instrucion manual (80 pages) ,
- Instruction manual (49 pages) ,
- Manual manual (48 pages)
Table of Contents
Advertisement
Advertisement
Table of Contents

Related Manuals for Medion Lifetab


Summary of Contents for Medion Lifetab
- Page 1 19,9 cm / 7,85“ Tablet-PC ® ® MEDION LIFETAB Instruction manual...
-
Page 2: Table Of Contents
Contents About these Instructions ........5 1.1. Symbols and Key words used in these Instructions ............5 1.2. Proper Use ............. 7 1.3. Declaration of Conformity ....... 8 Safety Instructions ..........9 2.1. Dangers for children and people with reduced ability to operate electronics ..9 2.2. - Page 3 6.1. Power Adapter ...........32 6.2. Battery Operation ..........33 Power Button ............34 7.1. Powering On Your Tablet ........34 7.2. Powering Off your Tablet .......34 7.3. Turn the Tablet PC into sleep mode ...35 7.4. Waking up from Standby Mode ....36 Operating the Tablet ........37 8.1.
- Page 4 FAQ ..............55 Customer Service ..........56 18.1. Additional Support...........56 18.2. Maintenance ............57 18.3. Measures for Protecting the Display ..57 Recycling and Disposal........58 European Norm EN 9241-307 Class II .....59 20.1. FCC Compliance Statement ......61 Technical Data ...........62 Legal notice ............64 Licence information .........65 Index ..............73 3 of 74...
- Page 5 Trademarks: Google, Android, Google Play and other Google marks are trademarks of Google Inc. Other trademarks are the property of their respective owners. Subject to technical and optical changes as well as printing errors. 4 of 74...
-
Page 6: About These Instructions
1. About these Instructions Before using the device for the first time, please read these operating instructions carefully, paying special attention to the safety notices. This device should only be used as designated and as described in these instructions. Please keep these instructions in a safe place for future reference. - Page 7 CAUTION! Please follow the guidelines to avoid injuries and/or property damage. PLEASE NOTE! Additional information on using the device PLEASE NOTE! Please follow the guidelines in the operating instructions. WARNING! Warning: danger of electric shock! WARNING! Warning: danger due to excessive volume! Bullet point/information on operating •...
-
Page 8: Proper Use
1.2. Proper Use You can use your tablet PC in various ways. For example, you can surf the internet whenever and wherever you want, read books and news articles, play games, watch films and communicate with the whole world. An internet connection is required to access the internet and this service may be subject to a charge. -
Page 9: Declaration Of Conformity
1.3. Declaration of Conformity This device is supplied with the following wireless features: • Wireless LAN • Bluetooth Medion AG hereby declares that product conforms to the following European requirements: • R&TTE Directive 1999/5/EC • EMC Directive 2004/108/EC • RoHS Directive 2011/65/EU. -
Page 10: Safety Instructions
2. Safety Instructions 2.1. Dangers for children and people with reduced ability to operate electronics • This device is not intended for use by people (including children) with reduced physical, sensory or mental abilities or for those without experience and/or knowledge, unless they are supervised by a person responsible for their safety or they have been instructed in its use. -
Page 11: Operational Safety
2.2. Operational Safety Please follow the instructions in this section for the safe operation of your tablet. • The tablet PC has a class 1 infrared diode. Never use optical devices to look at the LED. • Do not open the case of the tablet, or the power adapter. - Page 12 leaving it in your car, as excessive heat could deform the various components. • Update the software regularly to make sure the tablet PC is always compatible and stable. Switch off your tablet immediately or do not switch it on at all and contact the contact customer service if: •...
-
Page 13: Notes On Lithium-Ion Batteries
If the tablet PC gets wet: • Do not switch it on. • Disconnect the power cable and switch off the tablet PC. • Do not switch it back on until it has dried off completely. 2.3. Notes on lithium-ion batteries WARNING! Risk of explosion if the batteries are replaced incorrectly. - Page 14 This device contains a lithium-ion battery. Please note the following when using lithium-ion batteries: • Charge the battery regularly and as fully as possible. Do not leave the battery discharged for long periods. • Keep the battery away from heat sources such as radiators or open flames, e.g.
-
Page 15: Never Carry Out Repairs Yourself
2.4. Never Carry out Repairs Yourself WARNING! Never try to open or repair the device yourself. There is a risk of electrical shock! • If there is a fault, contact the Service Centre or other suitable specialist workshop. 2.5. Ambient Temperature •... -
Page 16: Connecting
• Make sure you do not expose the tablet to high temperatures and direct sunlight in the car. • Keep the original packaging in the event the device needs to be sent for repair. • Your tablet PC is not suitable for use with workstations in accordance with the workstation regulation. -
Page 17: Cabling
• Only use the tablet with a power adapter operating at AC 100-240V 50/60 Hz. For details on power consumption, please refer to the rating plate on the rear of your tablet. If you are unsure of the type of power supply available at the point of use, ask your local power company. -
Page 18: Included With Your Tablet
3. Included with Your Tablet Please check that the contents are complete and notify us within 14 days of purchase if any of the following components are missing: • Tablet PC • AC Adapter • microUSB cable • microUSB host cable (optional) •... -
Page 19: Views
DANGER! Keep plastic packaging out of reach of children. There is a risk of suffocation. 4. Views 4.1. Front Side Display Camera On/Off Switch Volume Control +/- Microphone 18 of 74... -
Page 20: Rear Side
4.2. Rear Side Reset Button Camera 19 of 74... -
Page 21: Side View, Short Side
4.3. Side View, Short Side Speaker Infrared diode microSD card slot USB connection Stereo headphone socket 20 of 74... - Page 22 CAUTION! The microSD card must be inserted in the correct direction. Ensure that the contacts on the microSD card are facing towards the front. Do not apply force when inserting cards otherwise they may be damaged. 21 of 74...
- Page 23 WARNING! The use of headphones/earphones with a high volume can lead to lasting damage to your hearing. Set the volume to the lowest level before reproducing any sound. Start the sound reproduction and increase the volume to the level that is comfortable for you.
- Page 24 If the selected volume exceeds a level that is damaging for your ears, the device will block any subsequent increase in the volume and the relevant symbol will be shown on the display Tap on the symbol and follow the instructions given.
-
Page 25: Getting Started
5. Getting started Before you get started using your tablet, first take a few moments to read the important section on safety. 5.1. First Steps Connect one end of the USB cable to the mains adapter supplied and connect the other end of the USB cable in the micro USB port on your tablet PC. -
Page 26: Configuring Your Google™ Account
5.2. Confi guring Your Google™ Account Your tablet provides you with access to a variety of applications from Google™. You need a Google™ account to use these applications. This account allows you to use a large number of different services, e.g. Google Mail™. The following will take you through the set-up process for your tablet PC. -
Page 27: Short Description Of The Home Screen
Enter the first name and tap on the field for the surname. Enter the required surname, tap on and then follow the on-screen instructions. If you want to share the tablet with other people, you can set up additional user accounts at a later point in time. - Page 28 Tap on the corresponding element to start the respective application or to receive further information. You can also customise this content as you like and set your own background image (see below). 27 of 74...
- Page 29 On the Search bar of the home screen located at the top edge you will find the following icons: Icon Description This icon starts a Google search. The search includes the content of your tablet PC (e.g. your contacts and installed applications) as well as the Internet.
- Page 30 Icon Description This icon will return you to the home screen. Please note that the application you were using has not closed, but is only paused and shifted to the background. It therefore continues to use memory and possibly also processor performance. However, you can also bring an application back to the foreground.
- Page 31 On the Favourites bar, which is located above the Status bar, you will find the following symbol: Icon Description This icon displays a list of all applications on your tablet PC. Tap on an application to start it. Keep your finger on an application to create a shortcut to the application on the home screen (drag the application to the corresponding page) or to...
-
Page 32: Status Icons
5.5. Status icons At the upper left edge of the display, the status icons are shown that indicate the following: • SD card is inserted • The tablet is connected as a media device • Download is finished Press on the status icons and pull your finger downwards. -
Page 33: Power Supply
6. Power Supply Connect the tablet PC to the mains adapter when first switching on or after the tablet has been powered off for a long period. The tablet is provided with a rechargeable integrated high-performance lithium-ion battery which you can charge using the mains adapter supplied. 6.1. -
Page 34: Battery Operation
6.2. Battery Operation Batteries store electrical energy in their cells and then deliver it when needed. The useful life and performance of your battery will depend on careful handling. The battery should be completely discharged before a charging process and completely charged again in order to optimise its useful life and its performance. -
Page 35: Power Button
7. Power Button 7.1. Powering On Your Tablet Press and hold the on/off button for several seconds. The tablet PC will switch on. 7.2. Powering Off your Tablet Press and hold the power button until the following message appears on the screen: ... -
Page 36: Turn The Tablet Pc Into Sleep Mode
7.3. Turn the Tablet PC into sleep mode To optimise the battery life, the tablet switches to energy-saving mode whenever it isn’t being used. In energy-saving mode, the tablet PC uses less energy as the display is switched off. If no activity takes place within a certain time period, the background lighting switches itself off automatically and the device is locked. -
Page 37: Waking Up From Standby Mode
7.4. Waking up from Standby Mode While the screen display is off, press the power button quickly to re-illuminate the screen. To do this, drag the lock icon onto the sign, to return the main page. 36 of 74... -
Page 38: Operating The Tablet
7.4.1. Adjusting Screen Lock Pattern Settings You can adjust the screen lock pattern settings under Settings > Security > Screen lock. 8. Operating the Tablet You operate your tablet with your fingertips. Do not use any pointed or sharp-edged objects. ... -
Page 39: Customising The Home Screen
8.1. Customising the Home Screen Your tablet has several workspaces. You can move the screen with your fingers, adjust the display or move icons between the workspaces. 9. Making/Checking Settings To change or display your tablet settings, tap on > Settings. - Page 40 9.1.2. Device Icon Menu Name Description Configure the sound Sound settings, e.g. ring tones and notifications. Configure display settings, e.g. Display brightness, Sleep. Check the available memory on an inserted microSD Storage card and the internal device memory. Displays the charging status Battery and the remaining battery life.
- Page 41 9.1.3. User Icon Menu Name Description Here you can set the sources Location that are to be used to determine your location. Create your unlock pattern, define the memory Security management for the registration information on your mobile device. Set the operating system Language &...
- Page 42 9.1.5. System Icon Menu Name Description Set the date, time, time zone Date & time and date/time format After installing the applications for input support, Accessibility you can set various options here. It is possible to search for and configure printers here (this may require Printing additional software from the...
- Page 43 Example • Select the desired menu on the left hand side. • A sub-menu will appear. • To return to the previous menu, tap on in the upper left hand corner of the screen. 42 of 74...
-
Page 44: Software Updates
9.1. Software Updates When a software update is available, you can download this update from the Internet. To check the availability of new updates, go to Settings > About tablet > System updates. 9.2. Google Play As your tablet is based on the Android platform, you can expand its functions by installing additional applications. -
Page 45: Widgets - Little Helpers On The Desktop
10. Widgets – Little helpers on the Desktop Widgets – mini programs that are executed on the desktop – are used to display and manage many things. How to run widgets: Tap on > Widgets. All available widgets will be shown: ... -
Page 46: Setting Background Images / Wallpaper
11. Setting background images / wallpaper Browse through the many available wallpapers and give your tablet PC a fresh design. Press with a finger on the Home screen until the following window appears: Tap on wallpapers. Browse wallpapers and background images. ... -
Page 47: Important Settings
12. Important Settings Press and drag down the Main Settings window in the upper right corner of the display as shown to open the Main Settings. NOTE! Some settings can only be activated or deactivated by pressing and holding. Tap the desired setting to call up the settings menu. -
Page 48: Airplane Mode
12.1. Airplane Mode The airplane mode allows you to deactivate all wireless connections (e.g. WLAN, Bluetooth). Tap on Aeroplane Mode to activate or deactivate the mobile network. 12.2. Wi-Fi 12.2.1. Activating Wi-Fi CAUTION! Make sure the Wireless LAN option is switched OFF in any environment where it might interfere with critical and sensitive devices, e.g. -
Page 49: Bluetooth
You can also manually add a WLAN network using the Add Network option by entering the network SSID with the respective security types. 12.2.2. Connecting to a WLAN Network Tap on Apps > Settings and then on Wireless & Networks > Wi-Fi > ON. The descriptions for the WLAN network and the relevant security settings (open or secure) that have been detected by your tablet are displayed under Wi-Fi networkst. -
Page 50: Connecting The Tablet Pc To A Computer
10 m. 12.3.2. Pairing Devices Tap on Bluetooth > ON. On the right in the window, tap on LIFETAB, thus activating the option Visible to all Bluetooth devices nearby. Tap at the top right on Search for devices and search the network for accessible devices. -
Page 51: External Storage Media
14. External Storage Media Your tablet PC permits the use of external storage media. These allow you to increase the memory capacity of the device and exchange data with your desktop computer or other devices/people. You can use the following types of storage media: −... -
Page 52: Removing Microsd Cards
CAUTION! Never remove the SD card without disconnecting it beforehand. This can result in data loss! 14.1.1. Accessing the microSD Card Contents To access the SD card you either can use the application the ES file explorer or another application of your choice (i.e. -
Page 53: Connecting Usb Stick
Now press lightly on the microSD card. The microSD card disengages and pops out of the card slot slightly. Remove the memory card by carefully pulling it out. 14.3. Connecting USB Stick Connect the USB host cable supplied to the tablet PC. ... -
Page 54: Removing The Usb Memory
14.3.3. Accessing the USB Memory using LIFEPLAYER (optional) Start LIFEPLAYER. Select Music, Video or Photo. The data from the corresponding category can now be played back. 14.4. Removing the USB Memory Tap on Settings > Storage. ... -
Page 55: Physical Keyboard
16. Physical keyboard The use of a physical keyboard can be helpful if you use the tablet PC to write long e-mails or text messages. You can connect keyboards via USB (with the USB Host adapter) or Bluetooth (see “12.3. Bluetooth” on page 51) After an unknown keyboard has been connected for the first time, it will only offer a US American layout –... -
Page 56: Faq
17. FAQ How do I switch off the tablet when the system is blocked? Press the On/Off switch for several seconds. The device switches off and can then be restarted. How can I reset the tablet PC to the factory settings? ... -
Page 57: Customer Service
Why are Bluetooth and WiFi deactivated? Check whether the Airplane mode is active. In this case, the Bluetooth and WLAN functions cannot be activated. Deactivate the airplane mode. 18. Customer Service 18.1. Additional Support Please contact the customer service and we will attempt to help you solve the problem. -
Page 58: Maintenance
18.2. Maintenance CAUTION! There are no user-serviceable or user-cleanable parts inside the tablet housing. Never open the tablet housings. Following these measures can extend the lifetime of your tablet. Before cleaning the tablet and its accessories, proceed as follows: Switch off the tablet. ... -
Page 59: Recycling And Disposal
• Do not pour any fluids into the tablet, as this could damage it. • Do not scratch the display with your fingernails or hard objects. • Do not clean the display with chemical cleaning products. • Clean the display with a soft, dry and lint-free cloth. 19. -
Page 60: European Norm En 9241-307 Class Ii
20. European Norm EN 9241-307 Class II There have been several attempts in the past to define the acceptable number of defective pixels. But this can be difficult and varies widely between different manufacturers. We, therefore, adhere to the clear and strict requirements of EN 9241-307, class II, for the warranty handling of all LCD display products. - Page 61 Types of Pixel Failures: • Type 1: A constantly lit pixel (a bright, white spot), even though it is not addressed. A white pixel is caused when all three sub-pixels are lit. • Type 2: A pixel that does not light up (dark, black spot), although it is addressed •...
-
Page 62: Fcc Compliance Statement
20.1. FCC Compliance Statement This equipment has been tested and found to comply with the limits for a Class B digital device, pursuant to Part 15 of FCC Rules. These limits are designed to provide reasonable protection against harmful interference in a residential installation. -
Page 63: Technical Data
21. Technical Data Description Dimensions approx. 200 x 137 x 9 mm (w x h x d) Weight approx. 370 g Ktec Co.Ltd., China Modell: KSA29B0500200HE (Europe) KSA29B0500200HK (UK) AC adapter KSA29B0500200HU (USA) KSAPK0110500200HA (AU) Input: 100-240V ~ 0,5A max. / max. - Page 64 Description Speaker 8Ω/1W *1 Microphone integrated Operating system Android™ 4.4 (KitKat) * Depending on the device settings and usage. 63 of 74...
-
Page 65: Legal Notice
Mechanical, electronic and any other form of reproduction is prohibited without the written permission of the manufacturer. Copyright is owned by the company: Medion AG Am Zehnthof 77 45307 Essen Germany The operating manual can be downloaded via the service portal at www.medion.com/gb/service/start/. 64 of 74... -
Page 66: Licence Information
You can acquire the source code for this product in the following manner: Visit MEDION Service at http://www.medion.com/ de/service/start and enter the MD number or the MSN number of your device in the search field. You will find these numbers on the rear side of your device. - Page 67 GNU General Public Licence Version 2, June 1991 Copyright (C) 1989, 1991 Free Software Foundation, Inc. 51 Franklin Street, Fifth Floor, Boston, MA 02110-1301, USA Everyone is permitted to copy and distribute verbatim copies of this license document, but changing it is not allowed. Preamble The licenses for most software are designed to take away your freedom to share and change it.
- Page 68 everyone understands that there is no warranty for this free software. If the software is modified by someone else and passed on, we want its recipients to know that what they have is not the original, so that any problems introduced by others will not reflect on the original authors‘ reputations.
- Page 69 2. You may modify your copy or copies of the Program or any portion of it, thus forming a work based on the Program, and copy and distribute such modifications or work under the terms of Section 1 above, provided that you also meet all of these conditions: a) You must cause the modified files to carry prominent notices stating that you changed the files and the date of any change.
- Page 70 under Section 2) in object code or executable form under the terms of Sections 1 and 2 above provided that you also do one of the following: a) Accompany it with the complete corresponding machine-readable source code, which must be distributed under the terms of Sections 1 and 2 above on a medium customarily used for software interchange;...
- Page 71 compliance. 5. You are not required to accept this License, since you have not signed it. However, nothing else grants you permission to modify or distribute the Program or its derivative works. These actions are prohibited by law if you do not accept this License. Therefore, by modifying or distributing the Program (or any work based on the Program), you indicate your acceptance of this License to do so, and all its terms and conditions for copying, distributing or modifying the Program or works...
- Page 72 decide if he or she is willing to distribute software through any other system and a licensee cannot impose that choice. This section is intended to make thoroughly clear what is believed to be a consequence of the rest of this License. 8.
- Page 73 ENTIRE RISK AS TO THE QUALITY AND PERFORMANCE OF THE PROGRAM IS WITH YOU. SHOULD THE PROGRAM PROVE DEFECTIVE, YOU ASSUME THE COST OF ALL NECESSARY SERVICING, REPAIR OR CORRECTION. 12. IN NO EVENT UNLESS REQUIRED BY APPLICABLE LAW OR AGREED TO IN WRITING WILL ANY COPYRIGHT HOLDER, OR ANY OTHER PARTY WHO MAY MODIFY AND/OR REDISTRIBUTE THE PROGRAM AS PERMITTED ABOVE, BE LIABLE TO YOU FOR DAMAGES, INCLUDING ANY...
-
Page 74: Index
24. Index Maintenance ...... 57 Making/Checking Airplane Mode ....47 Settings ......38 Ambient temperature ..14 microSD Cards ....50 Battery Operation ..... 33 Non-Market Applications 43 Bluetooth ......48 Browser ........ 53 Operating the Tablet ..37 Operational Safety ... 10 Charging the Battery .. - Page 75 Selecting/checking the settings ......38 Settings ........ 38 Software updates ..... 43 Standby Mode ....36 Technical Data ....62 Views Front Side ......18 Rear Side ......19 Side View, Short Side .20 Widgets ........ 44 Wi-Fi ........47 74 of 74...
Need help?
Do you have a question about the Lifetab and is the answer not in the manual?
Questions and answers