
Subscribe to Our Youtube Channel
Related Manuals for Serta Laguna Sofa & Table Set


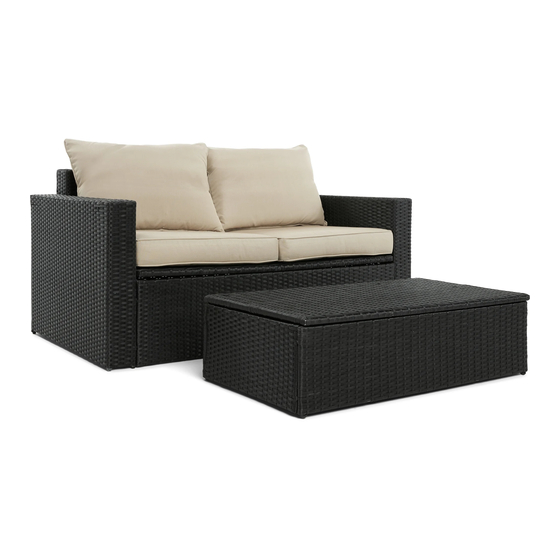
Summary of Contents for Serta Laguna Sofa & Table Set
- Page 1 ASSEMBLY INSTRUCTIONS Laguna Sofa & Table Set Part 1 So Comfortable, You’ll feel the difference the moment you sit down.
- Page 3 Should you prefer to speak with a customer service representative, you may call toll free : 1-855-372-2315.
-
Page 4: Limited Warranty
t he exceptions or exclusions to this warranty are: Limited Warranty Upholstery material and foam cushion material is • warranted against defects in material and workmanship for a period of one year, beginning on the date of Millwork Holdings seating products are warranted purchase as shown on the original sales receipt. - Page 5 Guidelines FAILURE TO FOLLOW THESE WARNINGS Thank you for selecting a Serta furniture piece! WHEN IN USE COULD RESULT IN INJURY Our primary objective is to provide fast, friendly customer service to all of our customers. We are here to help if you have any questions, comments, Do not stand on the item or use as a step ladder •...
- Page 6 WARNING: DO NOT lET CHilDrEN PlAy iN Or ArOUND THE UNiT DUE TO THE POSSiBlE riSK OF INJURY. Pre-Assembly Preparation: Cleaning & Maintenance: Please read through this instruction before beginning • Wash frame parts with mild soap and water, rinse assembly of this item.
- Page 7 Parts & Assembly - Sofa Left right Fixing Panel Panel Panel Front Washer Seat Cushion Panel Back Panel Base Panel Seat Panel Back cushion Allen Key...
- Page 8 Assembly: Please note, the box is well engineered to fit all the pieces of the sofa in it. Check that all layers have been unpacked to locate all the pieces. Front Panel Base Panel...
- Page 9 NOTE: DO NOT FULLY TIGHTEN BOLTS UNTIL ALL PARTS ARE ASSEMBLED. Step One: Attach Left Side panel (1) to Back Panel (2) by using M6*35 bolt (A) and Washer (B). Fasten with Allen Key (D). step2...
- Page 10 Step Two: Attach Seat panel (3) to assembled panels (1) and (2).
- Page 11 NOTE: DO NOT FULLY TIGHTEN BOLTS UNTIL ALL PARTS ARE ASSEMBLED. Step Three: Attach Right Side Panel (4) to assembled Panels (1), (2) & (3) by using M6*35 bolt (A) and Washer (B). Fasten with Allen Key (D). step4...
- Page 12 NOTE: DO NOT FULLY TIGHTEN BOLTS UNTIL ALL PARTS ARE ASSEMBLED. Step Four: Attach Front Panel (5) to panels (1) & (4), by using M6*35 bolt (A) with Washer (B). Fasten with Allen Key (D).
- Page 13 step5 Step Five: Lift up Seat Panel (3) then Attach Base Panel (6) to Back Panel (2) and Front Panel (5) by clicking into place. Hold Seat Panel (3) by the hook of Base Panel (6) when putting stuffs in the storage.
- Page 14 Step Six: step7 Attach Fixing Plates (E) by using M6*15 bolt (C) with Washer (B). Fasten with Allen Key (D).
- Page 15 ASSEMBLY INSTRUCTIONS Laguna Sofa & Table Set Part 2 So Comfortable, You’ll feel the difference the moment you sit down.
- Page 16 Parts & Assembly - Table Back Panel Front Panel Left Side Panel Base Panel right Side Panel Allen Key...
- Page 17 Assembly: Please note, the box is well engineered to fit all the pieces of the table in it. Check that all layers have been unpacked to locate all the pieces.
- Page 18 NOTE: DO NOT FULLY TIGHTEN BOLTS UNTIL ALL PARTS ARE ASSEMBLED. Step One: Attach Front Panel (7) to Left Side Panel (8) by using M6*35 bolt (A) step2 and washer (B) with Allen Key (D). repeat with right Side Panel (9).
- Page 19 NOTE: DO NOT FULLY TIGHTEN BOLTS UNTIL ALL PARTS ARE ASSEMBLED. Step Two: Attach Side Panels (8) and (9) to Back Panel (10) by using M6*35 bolt (A) and Washer (B) and fasten with Allen Key (D).
- Page 20 NOTE: DO NOT FULLY TIGHTEN BOLTS UNTIL ALL PARTS ARE ASSEMBLED. Step Three: Attach Base Panel (11) to Panels (7), (8), (9), and (10) by using M6*35 bolt (A) and Washer (B). Fasten with Allen Key (D). step4...
- Page 21 NOTE: DO NOT FULLY TIGHTEN BOLTS UNTIL ALL PARTS ARE ASSEMBLED. Step Four: Attach Lid (12) to Back Panel (10) by using M4*25 bolt (F) and Nut (G). Fully tighten using Wrench (H) and Allen Key (D).
- Page 23 NOW YOU’RE FINISHED! THANK YOU FOR YOUR PURCHASE.
Need help?
Do you have a question about the Laguna Sofa & Table Set and is the answer not in the manual?
Questions and answers