Table of Contents
Advertisement
Quick Links
Download this manual
See also:
User Manual
Setup Guide
Read this first
This guide describes the setup tasks and important
conditions about the installation location that must
be met in order to enable use of this machine.
Roland DG Corporation has developed a special website introducing dental
solutions. For the latest information regarding this machine (including manu-
als), see our special Easy Shape website (http://www.rolandeasyshape.com).
Advertisement
Table of Contents

Related Manuals for Roland DWX-51D


Summary of Contents for Roland DWX-51D
- Page 1 Roland DG Corporation has developed a special website introducing dental solutions. For the latest information regarding this machine (including manu- als), see our special Easy Shape website (http://www.rolandeasyshape.com).
- Page 2 Roland DG Corp. assumes no responsibility for any direct or indirect loss or damage which may occur through use of this product, regardless of any failure to perform on the part of this product.
- Page 3 ROLAND DG CORPORATION 1-6-4 Shinmiyakoda, Kita-ku, Hamamatsu-shi, Shizuoka-ken, 431-2103 JAPAN The importer in the EU: Roland DG Europe Holdings B.V. Prof. J.H. Bavincklaan 2, 1183 AT, Amstelveen, The Netherlands Roland DG Corp. has licensed the MMP technology from the TPL Group.
-
Page 4: Operating Instructions
REDUCE THE RISK OF UNINTENTIONAL Operating Instructions STARTING. Make sure switch is in off position be- fore plugging in. KEEP GUARDS IN PLACE and in working order. USE RECOMMENDED ACCESSORIES. Consult REMOVE ADJUSTING KEYS AND WRENCHES. the owner's manual for recommended accessories. Form habit of checking to see that keys and adjusting The use of improper accessories may cause risk of wrenches are removed from tool before turning it on. -
Page 5: Table Of Contents
Power Rating and Serial Number Locations .................46 Expansion Connector Specification ..................46 Coordinates ............................47 Dimensional Drawings ........................47 Specifications ...........................49 System Requirements for USB Connection ................49 Company names and product names are trademarks or registered trademarks of their respective holders. http://www.rolanddg.com/ Copyright © 2015-2017 Roland DG Corporation... -
Page 6: Machine Highlights
• Machine installation procedure • Software installation procedure Setup Guide (this manual) You can find the manual on the included Roland Software Package CD. P. 37"How to View the Electronic-Format Manual" • Software operation procedure • Milling procedure using the machine User's Manual •... -
Page 7: To Ensure Safe Use
To Ensure Safe Use Improper handling or operation of this machine may result in injury or damage to property. Points which must be observed to prevent such injury or damage are described as follows. About WARNING and CAUTION Notices Used for instructions intended to alert the user to the risk of death or WARNING severe injury should the unit be used improperly. - Page 8 Doing so may result in injury. If the cover is technician. cracked or broken, contact your authorized Roland DG Corporation dealer. Be sure to follow the operation proce- dures described in the user's manual. Never allow anyone unfamiliar with the us- CAUTION age or handling of the machine to touch it.
- Page 9 To Ensure Safe Use This is a heavy machine. CAUTION CAUTION Unloading and placement are operations Install the machine in a location that is that must be performed by 4 persons or level, stable, and able to bear the weight more.
- Page 10 In- electrical shock, or injury. stall the machine next to an electrical outlet. Contact your authorized Roland DG Corp. dealer. Also, provide enough empty space to allow immediate access to the electrical outlet.
- Page 11 To Ensure Safe Use Important notes about the power cord, plug, and electrical outlet Never place any Never bend or twist Never pull with un- Never bundle, bind, object on top or with undue force. due force. or roll up. subject to damage.
- Page 12 To Ensure Safe Use Danger of components flying off or becoming damaged WARNING WARNING Keep the supply of compressed air within Before removing or attaching the regulator the specified pressure range. and before performing maintenance, make sure that the bowl is securely attached. Exceeding the specified pressure may result in a rupture or other major accident.
- Page 13 To Ensure Safe Use Warning Labels Warning labels are affixed to make areas of danger immediately clear. The meanings of these labels are as follows. Be sure to heed their warnings. Also, never remove the labels or allow them to become obscured. Never use a pneumatic blower.
-
Page 14: Pour Utiliser En Toute Sécurité
Pour utiliser en toute sécurité La manipulation ou l'utilisation inadéquates de cet appareil peuvent causer des blessures ou des dommages matériels. Les précautions à prendre pour prévenir les blessures ou les dom- mages sont décrites ci-dessous. Avis sur les avertissements Utilisé... - Page 15 Vous risqueriez de vous blesser. Si le cou- vercle est fissuré ou brisé, communiquer Ne jamais faire fonctionner l'appareil avec le représentant Roland DG autorisé. après avoir consommé de l'alcool ou des médicaments, ou dans un état de fatigue. L'utilisation de l'appareil exige un jugement PRUDENCE sansfaille.
- Page 16 Pour utiliser en toute sécurité Cet appareil est lourd. PRUDENCE PRUDENCE Le déchargement et la mise en place doivent Installer l’appareil à un endroit de niveau, être faits par au moins quatre personnes. stable et pouvant prendre en charge le Les tâches qui exigent un effort trop grand si poids l’appareil.
- Page 17 Ainsi, l'appareil pourra être débranché rap- représentant Roland DG Corp. Autorisé. idement en cas d'urgence. Installer l'appareil près d'une prise électrique. En outre, prévoir Ne jamais utiliser à l'extérieur ni à un endroit suffisamment d'espace pour que la prise où...
- Page 18 Pour utiliser en toute sécurité Risque de décharge ou de choc électrique, d’électrocution ou d’incendie Mise à la terre. Ne jamais utiliser d'air sous pression. La mise à la terre peut prévenir un incendie Cet appareil n'est pas conçu pour être net- ou un choc électrique dus à...
- Page 19 Pour utiliser en toute sécurité Composants risquant d'être éjectés ou endommagés ATTENTION ATTENTION Garder la température de l'endroit où Ne jamais frapper ni soumettre l'objet à l'appareil est installé dans les limites un impact. spécifiées. Ne jamais placer un four ou Les composants pourraient être endommagés un appareil de chauffage à...
- Page 20 Pour utiliser en toute sécurité Vignettes d'avertissement Des vignettes d'avertissement sont apposées pour qu'il soit facile de repérer immédiatement les zones dangereuses. La signification des vignettes est donnée ci-dessous. Respecter les avertissements. Ne jamais retirer les vignettes et ne pas les laisser s'encrasser. Attention : outil coupant Ne jamais utiliser d’air sous pression.
-
Page 21: Important Notes On Handling And Use
Important Notes on Handling and Use This machine is a precision device. To ensure the full performance of this machine, be sure to ob- serve the following important points. Failure to observe these points may not only result in loss of performance but may also cause malfunction or breakdown. -
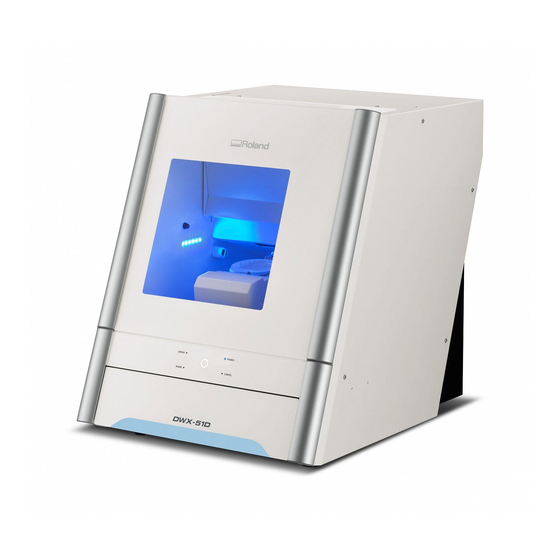
Page 22: Part Names And Functions
Part Names and Functions Front and Interior Rotary axis unit ATC magazine Name Name Name Front cover Ionizer Clamp Milling bur Maintenance cover Built-in panel sensor Status light Bottom cover Stocker *1 To ensure safety, opening the cover during spindle rotation causes an emergency stop. *2 The ionizer works to eliminate static electricity from cutting waste when cutting PMMA. - Page 23 Part Names and Functions Inside the maintenance cover Open the cover to replace the spindle or perform other work. Spindle Unit Spindle Belt Handle Maintenance cover Pull the handle forward to open the cover. Collet Inside the bottom cover ( Storage ) Included items and milling burs can be stored here.
- Page 24 Part Names and Functions Back Dust collection hose attachment port Side USB connector This is for connecting a USB cable. P. 33"STEP 7: Connecting the Cable" Expansion connector This terminal is for connecting a dust collector with a built-in linking function. ...
-
Page 25: Preparing The Machine For Use
Hexagonal screwdriver T-shaped hexagonal Dust collection hoses and dust collection screwdriver (1) (long, short)(2) hose adapter) (4) Dust collection hose Roland Software Spanner (1) Cloth for care (1) adapter (1) Package CD (1) Torque screwdriver (1) Assembly Instructions Check the attachment orientation. -
Page 26: Step 2: Preparing Separate Items
Preparing the Machine for Use STEP 2: Preparing Separate Items Dust Collector This machine requires a dust collector for sucking up cutting waste generated from milling. Milling cannot be performed without a dust collector. WARNING Be sure to turn on the dust collector. Milling waste and workpieces are flammable and toxic. - Page 27 Preparing the Machine for Use Compressor (Source of Compressed Air) This machine requires compressed air. You will need to prepare a compressor separately. WARNING The pressure of the compressed air must be 1.0 MPa or less. Anything higher may result in a serious accident such as a rupture. WARNING Ensure that the supplied compressed air is not contaminated by water, oil, chemicals, or foreign objects.
-
Page 28: Step 3: Deciding On An Installation Site
Preparing the Machine for Use STEP 3: Deciding on an Installation Site Placement and Installation The weight of the machine alone is 67 kg (148 lbs.) Perform unloading and emplacement with care. WARNING Unloading and placement are operations that must be performed by 4 persons or more. -
Page 29: Step 4: Removing The Retainers
Preparing the Machine for Use STEP 4: Removing the Retainers Retaining materials are attached to protect the machine from vibration during shipment. When installation is completed, remove and store these . Remove all retaining materials. Any that remain may cause faulty operation or breakdown when the power is switched on. - Page 30 Preparing the Machine for Use Installation Space Ensure that at least the following amount of space is available. Work space Installation space 0.6m 1.1 m Ensure that a height is available to enable the opening of the front cover. Ensure that space is available in front of and behind the machine to enable the opening of the bottom cover. Installation Location Height The installation location should be above the work floor by 0.6 m (23.7 in.) or more.
-
Page 31: Step 5: Attaching The Dust Collector Hose
Preparing the Machine for Use STEP 5: Attaching the Dust Collector Hose Connecting the Dust Collector Directly to the Machine Attach the dust collector hose as in the figure. Dust collection hose (short or long) Dust collector Using the Dust Collection Hose Adapter Locations where the dust collection hose adapter can be attached. - Page 32 Preparing the Machine for Use Attach the dust collector hose as in the figure. Dust collector Dust Collector with Built-in Linking Function Procedure Attach the Ferrite Core to the Linking cable included with the dust collector. Linking cable Ferrite Core (included with the dust collector)
-
Page 33: Step 6: Attaching The Regulator
Preparing the Machine for Use STEP 6: Attaching the Regulator WARNING Do not supply the compressed air until the air hose is connected securely. Failure to do so may cause an accident. Procedure Loosely tighten the screws on the back of the machine (for the regulator and the dust collection hose adapter). - Page 34 Preparing the Machine for Use Attach the air hose to the regulator. WARNING Securely insert the air hose as far as it will go. Lightly tug the hose to make sure it does not come loose. If it is not inserted securely, it may come loose. Included air hose To source of com-...
-
Page 35: Step 7: Connecting The Cable
Preparing the Machine for Use STEP 7: Connecting the Cable Connecting the Power Cord WARNING Connect to an electrical outlet that complies with this machine’s ratings (for voltage, frequency, and current). Incorrect voltage or insufficient current may cause fire or electrical shock. WARNING Handle the power cord, plug, and electrical outlet correctly and with care. -
Page 36: Step 8: Installing The Software
This software is a 32-bit application and therefore runs in WOW64 (Windows-On-Windows 64) when run- ning on 64-bit versions of Windows operating systems. For the latest information, see the Roland DG Corp. website (http://www.rolandeasyshape.com). Installable Software VPanel for DWX-51D This is the dedicated software for controlling this machine. - Page 37 Log on to Windows as an “Administrator”. Insert the Roland Software Package CD into the CD-ROM drive of the computer. When the automatic playback window appears, click [Run menu.exe]. If a [User Account Control] win- dow appears, click [Allow] or [Yes], and continue with the installation. The setup menu screen appears automatically.
- Page 38 Windows 7 Click [Install this driver software anyway]. Click [OK]. Proceed with the installation by following the dis- played information. Click [OK]. Click on the setup menu. Remove the Roland Software Package CD from the computer.
- Page 39 The driver will be installed automatically. How to View the Electronic-Format Manual Windows 10,7 From the [Start] menu, click [All Apps] (or [All Programs]), then [Roland DWX-51D]. Then click [User's Manual]. Windows 8.1 On the [Start] screen, click . On the [Apps] screen, click [User's Manual] icon under...
-
Page 40: Step 9: Running In The Spindle
Windows [Start] screen (or the [Start] menu). "How to start VPanel from the Windows [Start] screen (or [Start] menu) of Windows" Windows 10,7 From the [Start] menu, click [All Apps] (or [All Programs]), then [Roland DWX- 51D]. Then click [VPanel for DWX-51D]. Windows 8.1 On the [Start] screen, click . -
Page 41: Step 10: Correcting The Milling Machine
Preparing the Machine for Use STEP 10: Correcting the Milling Machine Required Items Automatic correc- Detection pin Torque screwdriver Cloth for care tion jig Install the detection pin. Use the supplied cloth for care to clean the detection pin, automatic correction jig, and central protrusion on the ATC magazine. - Page 42 Preparing the Machine for Use Attach the automatic correction jig. Loosen the screws about 3 turns using a torque driver. (2 locations) Push down on the screw heads to open the workpiece installation section. Open this section. If force is applied in the direction of the back of the machine when you push down on the screw heads, the rotary axis may move.Forcefully moving the rotary axis by hand is forbidden, but there is no problem if you have to move it slightly in this manner.
- Page 43 Preparing the Machine for Use Attach the automatic correction jig. With the screw heads pushed down, push in until the protrusions come into contact with the clamp.The jig can be attached with either surface facing up. Use a torque driver to alternately tighten the screws in the two locations little by little.
- Page 44 Preparing the Machine for Use Click the [Maintenance] tab. Click [Automatic correction]. Make sure that the work displayed on the screen is complete. Click [OK]. Automatic correction starts. Automatic correction is complete once the screen in the figure is displayed. Click [OK].
-
Page 45: Connecting Multiple Units
Connecting Multiple Units Connection Method Up to four machines can be concurrently connected to a computer. When more than one machine is connected, each machine needs to be identified on VPanel. An ID (A, B, C, and D) must be assigned to each machine to configure the settings for each machine. - Page 46 Connecting Multiple Units Click the [Settings] tab. Click [Set ID]. The [Set ID] selection screen opens. Select any unused ID, and click [OK]. "A" is assigned as the ID of the machine by default. Since A is assigned to the first machine, be sure to select B, C, or D for subsequent machines.
- Page 47 The selected ID is now enabled. Verify that the selected ID is displayed on the top window. If the name of the machine has not been changed, "DWX-51D (Copy 1)" is displayed. ("DWX-51D (Copy 2)" is displayed for the third machine.) You can connect all the machines with configured settings to the computer using the USB cables.
-
Page 48: Specifications
Specifications Power Rating and Serial Number Locations Serial number The serial number is required for maintenance, servicing, and support. Never peel off the label or let it get dirty. Power rating Use an electrical outlet that meets the ratings for voltage, frequency, and current given here. -
Page 49: Coordinates
Specifications Coordinates Y direction Z direction B axis Origiin A axis X direction Dimensional Drawings External Dimensions Unit: mm 69.7 355.6 (195) (567) (855) - Page 50 Specifications Detection Pin Dimensions Unit: mm Clamp Dimensions Unit: mm...
-
Page 51: Specifications
* Even when made from the described materials, some workpieces cannot be milled due to specifications or physical properties. For more information, contact your authorized Roland DG Corporation dealer. System Requirements for USB Connection Computer Model preinstalled with the 32- or 64-bit edition of Windows10, 8.1, or 7 or an... - Page 52 For China 产品中有毒有害物质或元素的名称及含量 有毒有害物质或元素 部件名称 六价铬 多溴联苯 多溴二苯醚 铅(Pb) 汞(Hg) 镉(Cd) (Cr(Ⅵ)) (PBB) (PBDE) 印刷电路板 × ○ × ○ ○ ○ 头部 × ○ ○ ○ ○ ○ 壳体、底架 × ○ ○ ○ ○ ○ 电源 × ○ × ○ ○...
- Page 56 R3-170804...
Need help?
Do you have a question about the DWX-51D and is the answer not in the manual?
Questions and answers