Table of Contents
Advertisement
Quick Links
Installation
DCAM100
Instructions
System Overview
CHIME BOX
DOORBELL TRANSFORMER
4
Mounting Doorbell Camera Plate
• Use mounting plate as guide to mark holes.
• Use leveling tool to align mounting plate.
SCREWS ONLY
SCREWS & ANCHORS
OR
USE 1/4" (6.35mm) DRILL FOR
ANCHOR HOLES
System Description
CHIME BOX
SMART
DOORBELL
CAMERA
CLOUD
SMARTPHONE
DOORBELL
TRANSFORMER
WiFi COMMUNICATIONS
1
Prepare for Installation
VERIFY WiFi STRENGTH
• Go to existing doorbell location.
• Use a Smartphone connected to the installations WiFi
router to confirm adequate signal strength (2 - 3 bars).
EXISTING
SMARTPHONE
DOORBELL
5
Wiring Doorbell Camera
• Connect doorbell wires using weather-resistant wire connectors (included).
• Ensure there is enough room behind the mounting plate for excess wires.
1. TWIST THEN
2
CRIMP WIRES
.
FEED WIRES INTO
WITH PLIERS ON
SHORT END OF
SHORT END OF
CONNECTOR
CONNECTOR
CONNECTORS IN PLACE
Doorbell Camera Components
SMART
SMART DOORBELL
DOORBELL
CAMERA MOUNTING
CAMERA
PLATE
ANCHORS
(3)
PHILLIPS SCREWS
(3)
WIRE
TORX SCREW
CONNECTORS (4)
TORX
WRENCH
2
Installing Diode in Chime Box
NOTE: It is recommended to TURN POWER OFF
before performing any wiring.
2
INSTALL DIODE AS SHOWN
1
OPEN CHIME BOX
NOTE: Not
compatible
with
electronic
chimes
IMPORTANT STEP
NOTE: When (2)
DCAM100's are used,
connect a second diode
between REAR and
TRANS terminals.
REAR
TRANS
FRONT
6
Flashing Blue once
Flashing Blue (Slow)
Solid Blue 5 seconds
Flashing Blue
5 seconds (fast)
NOTE: Ensure there is
Solid Blue
enough room behind the
Solid Red
mounting plate for excess
Flashing Green/Red
wires.
Flashing Green (Fast) Connecting to Cloud Server
Solid Green
Flashing Green (Slow)
Flashing Red (Slow)
Flashing Red (Fast)
Tools For Installation
WIRE STRIPPERS / CUTTER
PLIERS
OPTIONAL
DIODES FOR
CHIME BOX (2)
POWER DRILL WITH 1/4" BIT
3
Existing Doorbell Removal
• Remove existing doorbell pushbutton from location.
• Disconnect wires from back of pushbutton.
REAR TRANS FRONT
DISCONNECT WIRES
CHIME BOX
FROM PUSHBUTTON
FRONT VIEW
WITHOUT COVER
LED Indicators Status
Color
Status
Power ON
Cold start at low temperature
Connect to 16V transformer without diode
The voltage of transformer is low
The voltage of transformer is too high
Powering up
Discovery Mode
Connected to Cloud Server
Session in Progress
Not connected to network
Firmware update
PHILLIPS SCREWDRIVER
FLAT SCREWDRIVER
LEVEL
DOORBELL
Note
1. Occurs after power on, or push the button
2. Can't ring the chime box
1. Occurs after power on, or push the button
2. Proceed to Step 7.
Doorbell can't work
Skip Step 7 and proceed to Step 8.
Skip Step 7 and proceed to Step 8.
Advertisement
Table of Contents

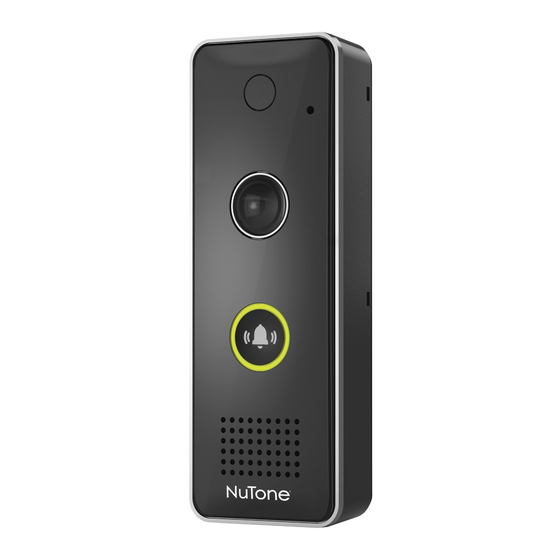
Summary of Contents for NuTone KNOCK DCAM100
-
Page 1: System Description
System Description Doorbell Camera Components Tools For Installation PHILLIPS SCREWDRIVER CHIME BOX SMART SMART DOORBELL SMART DOORBELL CAMERA MOUNTING DOORBELL CAMERA PLATE FLAT SCREWDRIVER CAMERA ANCHORS WIRE STRIPPERS / CUTTER CLOUD PHILLIPS SCREWS PLIERS LEVEL Installation SMARTPHONE OPTIONAL DCAM100 DIODES FOR Instructions DOORBELL WIRE... - Page 2 (2) l’utilisateur de l’appareil doit accepter tout www.broan.com . brouillage radioélectrique subi, même si le brouillage est susceptible d’en compromettre le Broan 926 West State Street, Hartford, WI 53027 www.nutone.com 888-336-3948 www.nutone.ca 877-896-1119 ©2017 Broan 99045707A...


Need help?
Do you have a question about the KNOCK DCAM100 and is the answer not in the manual?
Questions and answers