Table of Contents
Advertisement
Quick Links
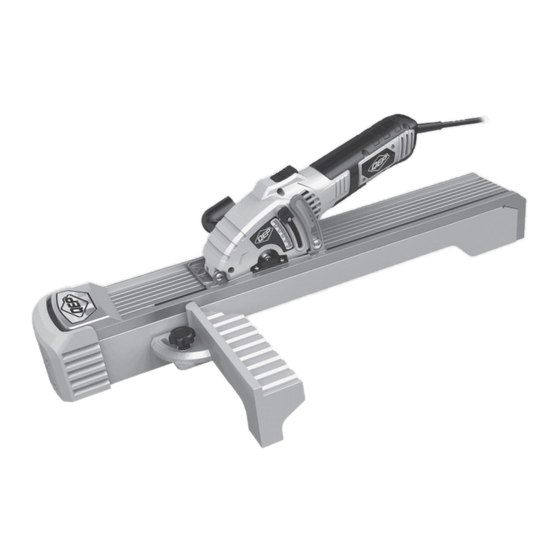
MTCT600
Multi Saw Instructions
Safety and Operating Manual
Environmental Protection
Safety First
Always wear Vitrex Protective Equipment when using
Waste electrical products should not be disposed of
hand or power tools.
with household waste.
Please recycle where facilities exist. Check with your
Local Authority or retailer for recycling advice.
Advertisement
Table of Contents

Related Manuals for QEP MTCT600


Summary of Contents for QEP MTCT600
- Page 1 MTCT600 Multi Saw Instructions Safety and Operating Manual Environmental Protection Safety First Always wear Vitrex Protective Equipment when using Waste electrical products should not be disposed of hand or power tools. with household waste. Please recycle where facilities exist. Check with your...
-
Page 2: Product Description
This operating manual must accompany the equipment if it is transferred to somebody else. We do not accept any liability for accidents or damage arising from ignoring this manual and the safety instructions. SPECIFICATIONS Model No. MTCT600 Power 600W Voltage 230-240V 50Hz Speed... -
Page 3: Safety Instructions
SAFETY INSTRUCTIONS The following pictograms appear throughout these operating instructions: Indicates danger of injury and possible damage to the appliance if these instructions are not followed. Read through these operating instructions carefully before using the Multi Saw. Become familiar with the functions and method of operation. To ensure proper operation, always maintain the Multi Saw according to the instructions. -
Page 4: Electrical Safety
2) ELECTRICAL SAFETY a) Power tool plugs must match the outlet. Never modify the plug in any way. Do not use any adapter plugs with earthed (grounded) power tools. Unmodified plugs and matching outlets will reduce risk of electric shock. b) Avoid body contact with earthed or grounded surfaces, such as pipes, radiators, ranges and refrigerators. -
Page 5: Additional Safety Warning
c) Disconnect the plug from the power source before making any adjustments, changing accessories, or storing power tools. Such preventive safety measures reduce the risk of starting the power tool accidentally. d) Store idle power tools out of the reach of children and do not allow persons unfamiliar with the power tool or these instructions to operate the power tool. - Page 6 * Accessory speed rating must be equal to or greater than the tool’s speed rating. Do not exceed the recommended wheel diameter. NOTE: For tool specifications refer to the nameplate on your tool. This tool is double insulated; therefore no earth wire is required. Always check that the power supply corresponds to the voltage on the rating plate.
-
Page 7: Operation
7) OPERATION WARNING! Only use the 85mm TCT blade to cut wood, plywood, woodbase composites, plastics, vinyl and fiberglass. An 85mm diamond blade to cut ceramic tile. An 85mm HSS blade to cut aluminum, copper. 8) INSTALLING THE BLADE (Fig 2, Fig 3) WARNING! BE SURE to wear protective work gloves while handling blade. - Page 8 9) SETTING THE CUTTING DEPTH (Fig 4) NOTE: It is recommended to set the cutting depth approximately 2mm deeper than the material thickness. 1) Unlock the cutting depth indicator lever. 2) Slide the cutting depth indicator to the desired depth of cut. 3) Lock down the cutting depth indicator lever.
-
Page 9: Starting A Cut
11) STARTING A CUT WARNING: ALWAYS clamp and support workpiece securely, ALWAYS maintain proper control of the Multi Saw. Failure to clamp and support workpiece and loss of control of the Multi Saw could result in serious injury. 1) Unplug the Multi Saw. 2) Set-up and clamp your workpiece and mark your cut line. - Page 10 12) MAKING CROSS CUTS AND RIP CUTS WARNING: ALWAYS clamp and support workpiece securely, ALWAYS maintain proper control of Multi Saw. Failure to clamp and support workpiece and loss of control of Multi Saw could result in serious injury. ALWAYS hold the Multi Saw firmly before starting. WARNING: ALWAYS maintain proper control of the Multi Saw to make swing safer and easier.
- Page 11 Fig 7 Edge Guide Edge Guide 14) PLUNGE CUTTING (Fig 8) WARNING: ALWAYS clamp and support workpiece securely, ALWAYS make sure the workpiece is securely positioned so it will not move. 1) Unplug the Multi Saw. 2) Mark the cut line on the surface to be cut. 3) Set the cutting depth to the thickness of the material to be cut.
-
Page 12: Dust Extraction
Fig 8 Plunge Cutting 15) DUST EXTRACTION WARNING: ALWAYS unplug Multi Saw before making any adjustments or attaching accessories. 1) Your Multi Saw includes a vac hose adapter tube that attaches to the built-in dust extraction port on the Multi Saw. 2) This adapter tube can be attached to a wet/dry vac hose. - Page 13 Fig 9 Mitre Base A1 Locking lever A6 Fixed block A2 Guide rail A7 Locking knob A3 Steel base A8 Head A4 Angle ruler level A9 Working piece A5 Angle ruler block Tel: 01335 347300...
- Page 14 17) HOW TO USE MITRE BASE (Fig 9) 1) Loosen the guide rail with locking lever (A1). 2) Fold the guide rail upward (A2). 3) Make the desired cutting line on the workpiece. 4) Place down the workpiece (A9). 5) Fold the guide rail (A2) downward and align the workpiece to the cutting line of mark. 6) Lock the guide rail with locking lever (A1).
-
Page 15: Troubleshooting
19) TROUBLESHOOTING Suspected malfunctions are often due to causes that the users can fix themselves. Therefore check the product using this section. In most cases the problem can be solved quickly. WARNING! Only perform the steps described within these instructions! All further inspection, maintenance and repair work must be performed by an authorised service centre or qualified electrician. - Page 16 Airfield Industrial Estate, Ashbourne, Derbyshire, DE6 1HA, UK Tel: +44 (0) 1335 347300 www.vitrex.co.uk...
Need help?
Do you have a question about the MTCT600 and is the answer not in the manual?
Questions and answers