Table of Contents
Advertisement
Quick Links
Advertisement
Table of Contents

Related Manuals for QEP 83240


Summary of Contents for QEP 83240
-
Page 2: Table Of Contents
QEP's obligations under this warranty shall be limited to the repair and/or replacement of the product. QEP shall not be liable for consequential damages. This warranty is void if the product or any of its components are modified, altered, or in any way changed, or if the product is used in a manner or with a blade that is not recommended by QEP. -
Page 3: General Safety Instructions
GENERAL SAFETY INSTRUCTIONS READ THIS OWNER’S MANUAL COMPLETELY AND MAKE SURE YOU UNDERSTAND ALL OF IT’S SAFETY GUIDELINES. 1. KEEP GUARDS IN PLACE and in working order. 2. REMOVE ADJUSTING KEYS AND WRENCHES. Form habit of checking to see that keys and adjusting wrenches are removed from tool before turning it on. -
Page 5: Diamond Blades
GROUNDING INSTRUCTIONS A. All grounded, cord-connected tools: In the event of a malfunction or breakdown, grounding provides a path of least resistance for electric current to reduce the risk of electric shock. This tool is equipped with an electric cord having an equipment-grounding conductor and grounding plug. -
Page 6: Use
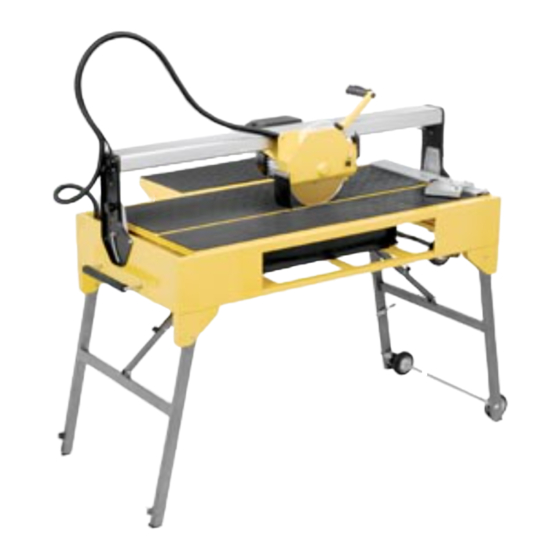
FUNCTIONAL DESCRIPTION AND OPERATION Attach the saw to the stand. Make sure the stand is level. A. STARTING AND STOPPING 1. Connect the unit to a power supply of the correct voltage and frequency (120V~, 60HZ). 2. To start the machine press the switch “ON” position. 3. - Page 7 8. Attach handle to motor unit. (FIG. 10) 9. Unlock the motor unit by loosening the knob (FIG. 11). 10. Pull the motor unit to the full front position, to extend the water/electric protective nose. Attach the nose housing as shown in (FIG. 12). C FILLING THE WATER TRAY AND DRAINING 1.
- Page 8 FIG. 17 FIG. 18 FIG. 19 Impeller cover Motor head Foam Filter Intake cover FIG. 22 FIG. 20 FIG. 21 FIG. 23-1 FIG. 23-2 FIG. 23-3 F. CUTTING WITH THE TABLE AT AN ANGLE 1. Loosen the two knob screws on the two rail stands (FIG. 17). 2.
-
Page 9: Maintenance
MAINTENANCE WARNING! Disconnect the power supply before making adjustments or maintenance on the machine! Never use water or chemicals while cleaning electrical parts of the machine. A. Periodic maintenance of the saw will reduce unnecessary problems. Use soft cloth to clean the water and dust on the machine. -
Page 10: Technical Specifications
PARTS LIST DESCRIPTION PART NO. Technical Specifications Motor 83240-1 Main voltage (Volt): 120 V 83240-2 Motor Fixture Water proof for the motor 83240-3 Main current (A): 15 A Inside Flange 83240-4 Motor capacity: 2.4 HP 83240-5 Diamond Blade Mains frequency (Hz):... - Page 11 EXPLODED PARTS 83200-16 83200-27 83200-03B 83200-11 83200-08 - 10 -...
- Page 12 Made in China Q.E.P., Co., Inc. Boca Raton, FL 33487 www.qep.com S104...
Need help?
Do you have a question about the 83240 and is the answer not in the manual?
Questions and answers