Table of Contents
Advertisement
Quick Links
Download this manual
See also:
Using
Owner's Manual
The VH-12 V-Hi-Hat is to be used in combination with the Roland TD-20 or TD-12 Percussion
Sound Module.
When using the VH-12, you will need to make the settings for the sound
module. Refer to p. 8
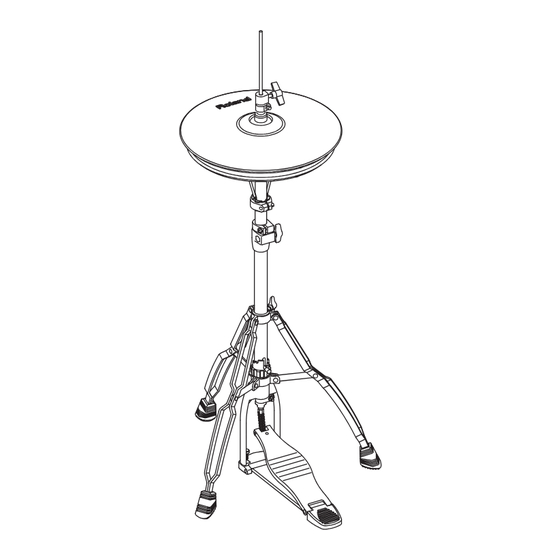
fig.Structure
* Hi-hat stand is not included.
For details on compatible stands, refer to p. 10.
201a
Before using this unit, carefully read the sections entitled: "USING THE UNIT SAFELY"
and "IMPORTANT NOTES" (p. 2; p. 3). These sections provide important information
concerning the proper operation of the unit. Additionally, in order to feel assured that
you have gained a good grasp of every feature provided by your new unit, Owner's
manual should be read in its entirety. The manual should be saved and kept on hand
as a convenient reference.
202
Copyright © 2004 ROLAND CORPORATION
All rights reserved. No part of this publication may be reproduced in any form without the
written permission of ROLAND CORPORATION.
Advertisement
Table of Contents

Summary of Contents for Roland VH-12
- Page 1 Owner’s Manual The VH-12 V-Hi-Hat is to be used in combination with the Roland TD-20 or TD-12 Percussion Sound Module. When using the VH-12, you will need to make the settings for the sound module. Refer to p. 8 fig.Structure * Hi-hat stand is not included.
- Page 2 Do not attempt to repair the unit, or replace parts within it (except when this manual provides specific instructions directing you to do so). Refer all servicing to your retailer, the nearest Roland Service Center, or an authorized Roland distributor, as listed on the “Information” page.
-
Page 3: Important Notes
IMPORTANT NOTES 291a In addition to the items listed under “USING THE UNIT SAFELY” on page 2, please read and observe the following: Placement 354a • Do not expose the unit to direct sunlight, place it near devices that radiate heat, leave it inside an enclosed vehicle, or otherwise subject it to temperature extremes. -
Page 4: Getting Started
Available Hi-Hat Stands (p. 10) Package Contents Top Hi-Hat fig.Top Bottom Hi-Hat fig.Bottom fig.Accessories Special VH-12 Clutch * The clutch included with the hi- hat stand will not be used. Clamp Holder (3 types) Link Cable Cable Tie Tuning Key... - Page 5 Mounting on the Hi-Hat Stand (1) Assembling the Top Hi-Hat * Due to the different shape, the clutch included with the hi-hat stand cannot be used with the VH-12. Be sure to use the special VH-12 clutch. fig.Clutch.e Clutch Top...
- Page 6 Mounting on the Hi-Hat Stand (2) Assembling the Bottom Hi-Hat 1. Remove the clutch included with the hi-hat stand from the cymbal rod. * The clutch included with the hi-hat stand will not be used. * It is not necessary to remove the felt (or rubber) pad on the hi- hat stand used for supporting the bottom cymbal.
- Page 7 1. Place the top hi-hat assembly on the hi-hat stand with the cymbal rod passing through the top hi-hat hole. At this point, position the “Roland” logo on the farther side, as viewed from the performer. 2. Use the link cable to connect the bottom hi-hat and the top hi-hat LINK jacks.
- Page 8 Tighten it not to slip (5) Adjusting the Sound Module When using the VH-12, you will need to make the settings for the sound module. When Using with the TD-20 1. Loosen the clutch screw, and set the hi-hat in the closed position.
- Page 9 Setting the gap to 10 mm provides the most natural feel when playing the VH-12. 2. Change the spring tension by adjusting the hi- hat stand.
-
Page 10: Playing Methods
Playing Methods Open/Closed The hi-hat tone changes smoothly and continuously from open to closed in response to how far the pedal is pressed. You can also play the foot closed sound (playing the hi-hat with the pedal completely pressed down) and foot splash sound (playing the hi-hat with the pedal fully pressed and then instantly opening it). -
Page 11: Troubleshooting
Are you striking the area where an edge sensor is located? The VH-12 has an edge sensor only at the area closest to you, at the front (p. 10). Align the marks (▼ and ▲) on the top and bottom hi-hat, and position the marks so they face toward the player (p. - Page 12 Information When you need repair service, call your nearest Roland Service Center or authorized Roland distributor in your country as shown below. AFRICA PHILIPPINES G.A. Yupangco & Co. Inc. 339 Gil J. Puyat Avenue EGYPT Makati, Metro Manila 1200, Al Fanny Trading Office...


Need help?
Do you have a question about the VH-12 and is the answer not in the manual?
Questions and answers