Table of Contents
Advertisement
Advertisement
Table of Contents

Related Manuals for Agilent Technologies Mx3000P


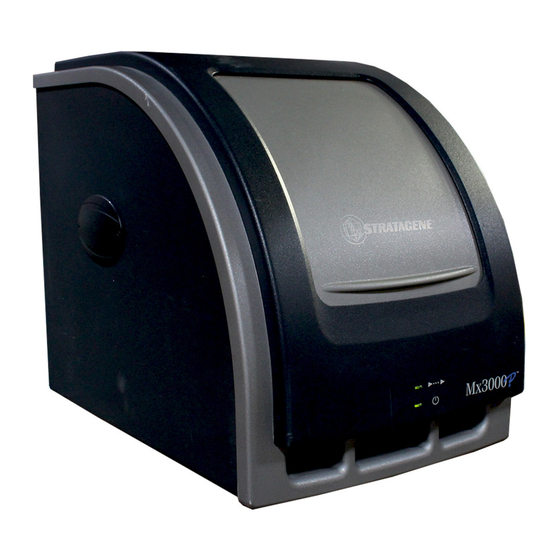
Summary of Contents for Agilent Technologies Mx3000P
- Page 1 Mx3000P and Mx3005P QPCR Systems Setup and User’s Guide...
- Page 2 Mx3000P and Mx3005P QPCR Systems SETUP AND USER’S GUIDE IN #70225 J.1 For Research Use Only. Not for Use in Diagnostic Procedures.
- Page 3 IMITED RODUCT ARRANTY Agilent warrants to the original purchaser that this product is free from defects in workmanship or materials for a period of one (1) year from the date of purchase, as indicated on the original invoice, under normal use. The sole and exclusive remedy under this limited warranty is repair or replacement of defective products or parts thereof.
-
Page 4: Table Of Contents
Mx3000P and Mx3005P QPCR Systems Setup and User’s Guide Mx3000P and Mx3005P QPCR Systems Components Provided ........... 1 Setting Up the System ......................... 2 Locating the Instrument ......................2 Environmental Conditions for Use ..................2 Unpacking the Instrument ..................... 3 Installing the Fuse........................ -
Page 6: Mx3000P And Mx3005P Qpcr Systems Components Provided
The MxPro QPCR software is compatible with Windows XP and Windows Vista operating systems. ® ® Store the qualification test plate at –20°C upon receipt. IN #70225 J.1 Copyright © 2015 by Agilent. Mx3000P and Mx3005P QPCR Systems Setup and User’s Guide... -
Page 7: Setting Up The System
In the event that the instrument needs to be returned for service, the instrument must be shipped in the original container to maintain warranty protection. Locating the Instrument Select a location for the Mx3000P or Mx3005P instrument according to the following guidelines: •... -
Page 8: Unpacking The Instrument
Surrounding the 96-well thermal block is a plastic Perfect Fit frame. Remove and retain the Perfect Fit frame for later use. See the Sample Loading section for more information about the Perfect Fit frame. Mx3000P and Mx3005P QPCR Systems Setup and User’s Guide... -
Page 9: Installing The Fuse
1. Remove the label located over the power entry module on the back of the instrument just above the power switch. 2. Use a small flathead screwdriver or similar tool to open the fuse box. 3. Unpack the fuse holder from its shipping container. Mx3000P and Mx3005P QPCR Systems Setup and User’s Guide... - Page 10 If your instrument is 200-240 volts, insert the fuse holder such that the 230V label is right-side-up.) 5. Replace the cover on the fuse box. Verify that the correct voltage label is visible through the cover. Voltage label Mx3000P and Mx3005P QPCR Systems Setup and User’s Guide...
-
Page 11: Connecting The Instrument To The Pc
Attach the power cord to the power entry module, just below the power switch. Plug the instrument into any properly grounded outlet. The Mx3000P or Mx3005P system must be connected to a power supply with the following specifications: 100–120 volts AC, 50/60 Hz, 10 A or 200–240 volts AC, 50/60 Hz, 5 A. -
Page 12: Configuring The Pc And Installing The Mxpro Qpcr Software
The activation Wizard will not be displayed if the information has been previously entered. Turn on the Mx3000P or Mx3005P instrument, using the power switch located at the rear of the instrument, and wait for both front status indicator lights to turn on and stop blinking. - Page 13 Next A window will open with a copy of the MxPro QPCR software license agreement. If you accept the terms of this agreement, click the button to continue loading the software. Mx3000P and Mx3005P QPCR Systems Setup and User’s Guide...
- Page 14 Next 9. When asked to continue in the following dialog box, click Important If a dialog box .NET Framework Initialization Error appears, please contact Technical Services assistance before proceeding. Mx3000P and Mx3005P QPCR Systems Setup and User’s Guide...
- Page 15 Next If the 21 CFR Part 11 Features setup type is selected, continue with step 12. If the setup type is selected, Non-21 CFR Part 11 Features proceed to step 15. Mx3000P and Mx3005P QPCR Systems Setup and User’s Guide...
- Page 16 E-mail, or via the Agilent website. The system- generated ID, sales order number, instrument serial number, and purchaser and institution names are required to request and obtain an activation key. After inputting the activation key, click Next Mx3000P and Mx3005P QPCR Systems Setup and User’s Guide...
- Page 17 Information Technology department. The database alias field can be left blank when creating a local database if you do not wish to assign once the appropriate fields are populated. an alias name. Click Next Mx3000P and Mx3005P QPCR Systems Setup and User’s Guide...
- Page 18 (if applicable), are installed to the designated folder location, select Yes, I want to restart my computer now . Click Finish from the final installation Wizard window to restart the PC. Mx3000P and Mx3005P QPCR Systems Setup and User’s Guide...
- Page 19 6 characters or more, re-type your personal password for verification, and select 21. The software will automatically prompt you to begin the Instrument Qualification Test. See the following section for detailed instructions on setting up and running this test. Mx3000P and Mx3005P QPCR Systems Setup and User’s Guide...
-
Page 20: Performing The Instrument Qualification Test Run
It is important to shake-down any noticeable liquid on the tube seal (e.g. visible semi-circles or crescent shapes when viewed from above). Small amounts of liquid spray retained on the tube sides should not affect test results. Mx3000P and Mx3005P QPCR Systems Setup and User’s Guide... - Page 21 A series of filter set dialog boxes may appear. Accept the default filter set changes and settings. dialog box will Instrumentation Qualification Test-Start Run appear, providing an opportunity to enter any comments for the qualification test. Mx3000P and Mx3005P QPCR Systems Setup and User’s Guide...
- Page 22 “Do you want to abort or continue the run?” (“Voulez-vous arrêter ou continuer l’expérience?”). Refermer la porte de l’instrument et choisir “Continue the run” (“Continuer l’expérience”). Mx3000P and Mx3005P QPCR Systems Setup and User’s Guide...
- Page 23 Information.txt, to Technical Services by E-mail for troubleshooting guidance (see step 9). After checking the results displayed on the Microsoft Excel software Validation template, go back into the MxPro QPCR software. Mx3000P and Mx3005P QPCR Systems Setup and User’s Guide...
- Page 24 E-mail the data or save the data to a disk to later E-mail to Technical Services (QPCR@agilent.com). Include a contact name, the name of your institution and the instrument serial number when sending the data to Technical Services. (See Mx3000P and Mx3005P QPCR Systems Support for additional contact information.) 10. The...
-
Page 25: Hardware Information And Specifications
Specification Excitation source Quartz-tungsten halogen lamp Detector Photomultiplier tube (PMT) Filters Excitation and emission filter wheels with four (Mx3000P system) or five (Mx3005P system) customer-selected filter sets Thermal system Peltier-based, 96-well block thermal cycling system Thermal system temperature range 25–99°C Operating environment 18–35°C (65–95°F);... - Page 26 Suite à l’ouverture de la porte, une fenêtre de dialogue apparaît sur l’écran et l’expérience est intérrompue. and the run has been interrupted. Mx3000P and Mx3005P QPCR Systems Setup and User’s Guide...
-
Page 27: Instrument Status Indicator Led's
Instrument Status Indicator LED’s The status indicators on the front of the Mx3000P or Mx3005P instrument consist of two LED's. The lower LED is a power status indicator. When this LED is lit, the instrument is plugged in and powered on. -
Page 28: Sample Loading
Ensure that the lid is raised, exposing the thermal block, prior to loading samples. Figure 2 The thermal block assembly, shown with the lid closed (left) and opened (right). Mx3000P and Mx3005P QPCR Systems Setup and User’s Guide... -
Page 29: Consumables
Prior to using a new type of plasticware for a run, test the fit in the thermal block, and attempt to close the heated lid. If you encounter resistance when closing the lid, do not use the plasticware for Mx3000P/Mx3005P system runs. Using plates or tubes that are too tall for the thermal block or using domed sample caps may prevent the heated lid from closing properly and may damage the instrument scanner. - Page 30 There are no audible sounds associated with the installation. (The frame does not “click” into place.) Figure 4 Appearance of the Perfect Fit frame when installed correctly on the thermal block. Mx3000P and Mx3005P QPCR Systems Setup and User’s Guide...
-
Page 31: Application Of Caps
Storage Mat Applicator (Corning Catalog #3081). Just before loading the samples into the thermal block, centrifuge the samples briefly to collect any liquid that may be on the tube walls or cap. Mx3000P and Mx3005P QPCR Systems Setup and User’s Guide... -
Page 32: Maintaining The Instrument
NSTRUMENT Replacement Parts Use only Agilent replacement parts (excluding fuses) in the maintenance of the Mx3000P and Mx3005P systems. Use of non-Agilent parts may void the warranty. Replacement lamp assemblies are available for purchase (Agilent Catalog #401411). The lamp is the only customer-serviceable part of the system. The system should be returned to Agilent for all other services and repairs. -
Page 33: Replacing The Fuse
Last date reset Replacing the Fuse The Mx3000P and Mx3005P instruments use a single slow-acting fuse. The fuse housing is located adjacent to the power cord inlet in the power entry module. See Installing the Fuse in Setting Up the System for pictures of the fuse housing unit. -
Page 34: Troubleshooting
Error dialog box appears When first connecting or reconnecting the Verify that the RS-232 cable between the PC and Mx3000P or Mx3005P PC to the instrument, “Communication instrument is securely connected to the serial-to-USB adapter cable, and Error” appears in software that the adapter cable is securely connected to the USB port on the PC. - Page 35 Check lamp, replace if necessary. See Changing the Lamp downward drift during run The bulb may be failing. With a Mx3000P system, unfiltered light can be seen coming through the read head whenever the lamp is on. If no light is seen, or if it looks very dim or yellowish, the bulb has likely failed or is failing.
- Page 36 In this case, there will normally be an error message under the plot stating “None of the wells selected have a reference dye selected.” Change the Fluorescence to dR and the amplification plots will be visible. Mx3000P and Mx3005P QPCR Systems Setup and User’s Guide...
- Page 37 Power Conditioner or UPS. An Mx3000P or Mx3005P system requires at least 1000 VA of power, so any power conditioner or UPS used must be rated to deliver at least this level of power.
- Page 38 If a probe-based chemistry is used and the amplification plot shows a steady fluorescence increase, rather than a sigmoid curve, the probe may be degrading. Mx3000P and Mx3005P QPCR Systems Setup and User’s Guide...
-
Page 39: Software License And Notices
Mx3000P/Mx3005P analysis computer and one additional computer or central processing unit (CPU) that is owned, leased, or otherwise controlled by you at a single site, for Mx3000P/Mx3005P generated data analysis purposes. The Software is in use on a computer or CPU when it is loaded into temporary memory (e.g., RAM) or installed into permanent memory (e.g., hard disk or other storage... - Page 40 Commercial Computer Software - Restricted Rights at 48 CFR 52.227-19, as applicable. This License Agreement shall be construed and governed in accordance with the laws of the State of California, without regard to its principles of conflicts of law. Mx3000P and Mx3005P QPCR Systems Setup and User’s Guide...
-
Page 41: Trademarks
® and registered trademarks of Intel Corporation. Excel ® , Microsoft ® and Windows ® are registered trademarks of Microsoft Corporation. SYBR ® is a registered trademark of Molecular Probes, Inc. Mx3000P and Mx3005P QPCR Systems Setup and User’s Guide... -
Page 42: Mx3000P And Mx3005P Qpcr Systems Support
Italy 800 012575 Netherlands 020 547 2600 Spain 901 11 68 90 Sweden 08 506 4 8960 Switzerland 0848 8035 60 UK/Ireland 0845 712 5292 All Other Countries Please visit www.agilent.com/genomics/contactus Mx3000P and Mx3005P QPCR Systems Setup and User’s Guide... - Page 43 Distributors For a list of worldwide distributors, please visit our website www.agilent.com/genomics Manufacturing Information: Manufactured by: Agilent Technologies Germany GmbH & Co.KG Hewlett-Packard-Strasse 8 D-76337, Waldbronn Germany For: Agilent Technologies Singapore (International) Pte. Ltd. No. 1, Yishun Avenue 7, Singapore 768923 www.agilent.com...