
Related Manuals for Owon HDS2062M


Summary of Contents for Owon HDS2062M
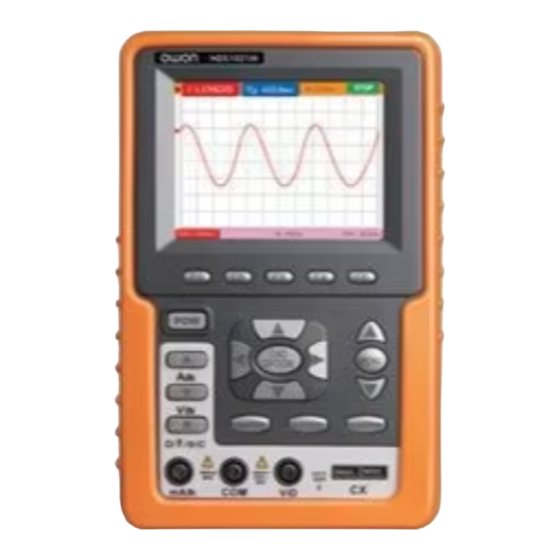
- Page 1 OWON HDS2062M Handheld Digital Storage Oscilloscope & Multimeter User’s Manual WWW.OWON.COM.CN LIMITED WARRANTY & LIMITATON OF LIABILITY...
- Page 2 Parts, product repairs and services are warranted for 90 days. This warranty only apply to the original buyer or customers of a Owon authorized dealer, and does not apply to fuses, disposable batteries or to any product which, in Owon’s opinion, has been misused, altered, neglected or damaged by accident or abnormal...
-
Page 3: Table Of Contents
Handheld DSO & DMM Contents OWON Table of Contents Chapter Page 1.DECLARATION OF CONFORMITY ················································ 1 1.1 Declaration of Conformity ······················································································1 1.2 Open the Oscilloscope Parts Box ·········································································1 2.SAFETY INFORMATION ···································································· 2 2.1 Safety Terms and Symbols ······················································································2 2.1.1 Specific Warning and Caution Terms that Appear throughout the Manual ········2... - Page 4 Handheld DSO & DMM Contents OWON 5.1 About this Chapter ·······································································································9 5.2 Power-Up the Oscilloscope ······················································································9 5.3 Oscilloscope Operation Window ·········································································9 5.4 Navigating a Menu ····································································································· 11 5.5 Manually Setting the Vertical System, Horizontal System and Trigger Position ··················································································································· 11 5.6 Resetting the Oscilloscope...
- Page 5 Handheld DSO & DMM Contents OWON 5.16 Reversing the Polarity of the Displayed Waveform ····························22 5.17 Using Waveform Mathematics Functions ·················································23 6.USING THE MULTIMETER ····························································· 25 6.1 About this Chapter ·····································································································25 6.2 Making Meter Connections ··················································································25 6.3 Multimeter Operation Window ··········································································25...
- Page 6 Handheld DSO & DMM Contents OWON 7.2.1 Setting the Channel Coupling ···············································································40 7.2.2 Make Open and Close Settings on Channel ·······················································41 7.2.3 Adjusting the Probe Scale ·····················································································41 7.2.4 Setting of Inverted Waveform ··············································································41 7.3 Make the Math Function Menu Setting ····················································42...
- Page 7 Handheld DSO & DMM Contents OWON 8.TROUBLE SHOOTING······································································ 58 9.APPENDIX ···························································································· 60 9.1 Appendix a Specifications ······················································································60 9.1.1 Oscilloscope ················································································································60 9.1.2 Meter ·····························································································································62 9.1.3 General Specifications ·······························································································63 9.2 Appendix B: Maintenance and Cleaning ······················································64 9.2.1 Common Maintenance ·······························································································64 9.2.2 Storage of Oscilloscope ·····························································································65...
- Page 8 1-Declaration of Conformity OWON 1.Declaration of Conformity 1.1 Declaration of Conformity HDS2062M Handheld Digital Storage Oscilloscope & Multimeter Manufacturer: Zhangzhou Lilliput Optoelectronic Institute Co., Ltd Statement of Conformity Base on the result using appropriate standards,the product is in conformity with...
-
Page 9: Declaration Of Conformity
Handheld DSO & DMM 1-Declaration of Conformity OWON 1.2 Open the Oscilloscope Parts Box,You Can See the Parts Below (see the picture below) Description Standard Optional Scopemeter Test Tool ● Battery Charger ● two Oscilloscope Probes (grey) ● a pair of Test Lesds of Multimeter (black and red) ●... -
Page 10: Safety Information
Handheld DSO & DMM 3-Performing the General Inspection OWON 2.Safety Information In order to ensure the correct using and the best efficient service, please carefully read this user’s manual. 2.1 Safety Terms and Symbols 2.1.1 Specific Warning and Caution Terms that Appear throughout the Manual “Warning”... -
Page 11: General Safety Information
● Use only insulated voltage probes, test leads and adapter supplied with the test tool, or indicated by OWON as suitable for the Oscilloscope & Multimeter. ● Before use, inspect voltage probes, test leads and accessories for mechanical damage and replace when damaged. - Page 12 Handheld DSO & DMM 3-Performing the General Inspection OWON voltage”. The represent V ac rms (50-60Hz) for AC sine wave applications and as V dc for DC applications. Overvoltage Category Ⅲ refers to distribution level and fixed installation circuits inside a building. Overvoltage Category Ⅱ refers to local level , which is applicable for appliances and portable equipment .
-
Page 13: Performing The General Inspection
If the instrument is damaged in its appearance or it fails in normal operation or performance test, consult the OWON dealer responsible for such a business or the local office of OWON. If the instrument is damaged due to transportation, keep the packing in a proper place and consult the transportation department and the OWON dealer responsible for such business, who will provide an instrument replacement or maintenance. -
Page 14: Input Connections
Handheld DSO & DMM 4-Input Connections OWON 4.Input Connections 4.1 Input Connections See the following figure 2: figure 2 Description: 1. The power adapter is supplied for AC power supply and battery recharging. 2. Multimeter test lead. 3. Multimeter input jacks, including three circular banana jacks and tow square jacks. The three circular jacks are used for voltage, current and resistance inputs, while the two square jacks are used for capacitance inputs. -
Page 15: Description For Front Panel And Keys
Handheld DSO & DMM 4-Input Connections OWON 5. Oscilloscope channel inputs: the upper one is for Channel 1 (CHI1), while the lower one is for Channel 2 (CH2). 4.2 Description for Front Panel and Keys See the following figure 3:... - Page 16 Handheld DSO & DMM 4-Input Connections OWON 3. USB jack. 4. Backlight switch . 5. POWER: Power switch. 6. A: Multimeter current measurement key. 7. V: Multimeter voltage measurement key. 8. R: Multimeter resistance, triode, On/Off and capacitance measurement key.
-
Page 17: Using The Scope
Handheld DSO & DMM 5-Using the Scope OWON 5.Using the Scope 5.1 About this Chapter This chapter provides a step-by-step introduction to the scope functions. The introduction does not cover all of the capabilities of the scope functions but gives basic examples to show how to use the menus and perform basic operations. - Page 18 Handheld DSO & DMM 5-Using the Scope OWON Description: Battery electric quantity indicating symbols, including Auto measurement window 1, in which “f ”means frequency, “T” means cycle, “V” means the average value, “Vp” the peak-peak value and “Vk” the root-mean-square value.
-
Page 19: Navigating A Menu
Handheld DSO & DMM 5-Using the Scope OWON operations. 19. The red pointer gives the grounding datum point of the waveform on CH1, which is the zero position of CH1. No display of this pointer indicates that the channel has not been opened. - Page 20 Handheld DSO & DMM 5-Using the Scope OWON level position (TRIG). The following example shows how to use OSC OPTION key to make a setting. Press once the OSC OPTION key; the following is displayed at the bottom left side of the screen, as shown in the figure below.
- Page 21 Handheld DSO & DMM 5-Using the Scope OWON figure 7: Voltage Unit Scale of Channel 2 Press the OSC UP or OSC DOWN key to adjust the vertical scale of Channel 2 and press the OSC LIFT or OSC RIGHT key to adjust the horizontal time scale.
- Page 22 Handheld DSO & DMM 5-Using the Scope OWON direction and press OSC LIFT or OSC RIGHT key to adjust the horizontal position. Again, press OSC OPTION key and the following appears at the bottom left side of the screen, shown as the following figure.
-
Page 23: Resetting The Oscilloscope
Handheld DSO & DMM 5-Using the Scope OWON figure 10: Trigger Level Position Press the OSC UP or OSC DOWN key to adjust the trigger position of Channel 2 and press OSC LIFT or OSC RIGHT key to adjust the horizontal position. -
Page 24: Input Connections
Handheld DSO & DMM 5-Using the Scope OWON visible at the bottom of the screen. 3. Press F1 key to select the factory settings. The oscilloscope is set to be the factory settings. See the following figure 11: figure 11: Reset the Oscilloscope 5.7 Input Connections... -
Page 25: Automatic Zero-Returning Of Trigger Horizontal Position And
Handheld DSO & DMM 5-Using the Scope OWON 5.9 Automatic Zero-returning of Trigger Horizontal Position and Trigger Level Position When we adjust the trigger horizontal position and trigger level position to be maximal to make it off the screen center remotely, then we perform the following steps to make trigger horizontal position and trigger level position return to zero automatically. -
Page 26: Freezing The Screen
Handheld DSO & DMM 5-Using the Scope OWON figure 12: Automatic Scope Measurements 5.11 Freezing the Screen You can freeze the screen (all readings and waveforms) Press the RUN/STOP key to freeze the screen and STOP appears at top right side of the screen. -
Page 27: Using Average For Smoothing Waveforms
Handheld DSO & DMM 5-Using the Scope OWON 5.12 Using Average for Smoothing Waveforms To smooth the waveform, do the following: Press the MENU key and the function menu appears on the right side of the screen. Press MENU UP or MENU DOWN key to select ACQU mode, with four items selectable displayed at the bottom of the screen. -
Page 28: Using Peak Detection To Display Glitches
Handheld DSO & DMM 5-Using the Scope OWON figure 15: Persistence to Observe Dynamic Signals 5.14 Using Peak Detection to Display Glitches You can use this function to display events (glitches or other asynchronous waveforms) of 50 ns or wider. - Page 29 Handheld DSO & DMM 5-Using the Scope OWON figure 16: Peak Detection Term interpretation Collecting mode: The oscilloscope transforms the collected analog data into a digital form after they are gathered in the following three different mode, that is, sampling, peak value detection and averaging values.
-
Page 30: Selecting Ac-Coupling
Handheld DSO & DMM 5-Using the Scope OWON 5.15 Selecting AC-coupling After a reset, the Oscilloscope is dc-coupled so that ac and dc voltages appear on the screen, Use ac-coupling when you wish to observe a small ac signal that rides on a dc signal. To select ac-coupling, do the following: Press MENU key and the function menu appears at the right side of the screen. -
Page 31: Using Waveform Mathematics Functions
Handheld DSO & DMM 5-Using the Scope OWON figure 18: Inverted On 5.17 Using Waveform Mathematics Functions When adding (CH1 + CH2), subtracting (CH1 – CH2, CH2 – CH1), multiplying (CH1 * CH2) or dividing (CH1 / CH2) the input waveforms of CHI and CH2, the Oscilloscope will display the mathematical result waveform M and the input waveforms of CH1 and CH2 on the screen. - Page 32 Handheld DSO & DMM 5-Using the Scope OWON Press the OSC UP or OSC DOWN key to adjust the displayed amplitude of the calculated waveform M. Now, you can see a screen that looks like the following figure 19. figure 19: Waveform Mathematics...
-
Page 33: Using The Multimeter
Handheld DSO & DMM 6-Using the Multimeter OWON 6.Using the Multimeter 6.1 About this Chapter This chapter provides a step-by-step introduction to the multi-meter functions of the test tool hereafter. The introduction gives basic examples to show how to use the menus and perform basic operations. -
Page 34: Making Multimeter Measurements
Handheld DSO & DMM 6-Using the Multimeter OWON operation mode and Auto refers to the measuring range in automatic operation mode. Measurement mode indicators: DCV: Direct voltage measurement ACV: Alternating voltage measurement DCA: Direct current measurement ACA: Alternating current measurement... -
Page 35: Measuring Resistance Values
Handheld DSO & DMM 6-Using the Multimeter OWON 6.4.1 Measuring Resistance Values To measure a resistance, do the following: Press the R key and R appears at the top of the screen. Insert the black lead into the COM banana jack input and the red lead into the V/Ω banana jack input. -
Page 36: On-Off Test
Handheld DSO & DMM 6-Using the Multimeter OWON figure 22: Diode Measurement 6.4.3 On-off Test To perform an On-off test, do the following: Press the R key and R appears on the top of the screen. Press the AUTO SET key till the following is shown on the screen. -
Page 37: Making A Capacitance Measurement
Handheld DSO & DMM 6-Using the Multimeter OWON figure 23: On-off Test 6.4.4 Making a Capacitance Measurement To measure a capacitance, do the following: Press the R key and R appears on the top of the screen Press the AUTO SET key till C appears at the top of the screen. -
Page 38: Making A Dc Voltage Measurement
Handheld DSO & DMM 6-Using the Multimeter OWON figure 24: Capacitance Measurement 6.4.5 Making a DC Voltage Measurement To measure a DC voltage, do the following: Press the V key and DCV appears at the top of the screen. Insert the black lead into the COM banana jack input and the red lead into the V/Ω banana jack input. -
Page 39: Making A Ac Voltage Measurement
Handheld DSO & DMM 6-Using the Multimeter OWON figure 25: DC Voltage Measurement 6.4.6 Making a AC Voltage Measurement To measure the AC voltage, do the following: Press the V key and DCV appears at the top of the screen. -
Page 40: Making A Dc Current Measurement
Handheld DSO & DMM 6-Using the Multimeter OWON figure 26: AC Voltage Measurement 6.4.7 Making a DC Current Measurement To measure a DC current which is less than 400 mA , do the following: Press the A key and DCA appears at the top of the screen. The unit on the main reading screen is mA. - Page 41 Handheld DSO & DMM 6-Using the Multimeter OWON figure 27: DC Current Measurement for 400 mA To measure a DC current which is larger than 400 mA, do the following: Press the A key and DCA appears at the top of the screen. The unit on the main reading screen is mA..
-
Page 42: Making An Ac Current Measurement
Handheld DSO & DMM 6-Using the Multimeter OWON figure 28: DC Current Measurement for 20A 6.4.8 Making an AC Current Measurement To measure an AC current which is less than 400 mA, do the following: Press the A key and DCA appears at the top of the screen. The unit on the main reading screen is mA. - Page 43 Handheld DSO & DMM 6-Using the Multimeter OWON figure 29: AC Current Measurement for 400 mA To measure an AC current which is larger than 400 mA, do the following: Press the AUTO SET key once and ACA is visible at the top of the screen.
-
Page 44: Freezing The Readings
Handheld DSO & DMM 6-Using the Multimeter OWON figure 30: AC Current Measurement for 20A 6.5 Freezing the Readings You can freeze the displayed readings at any time. Press the RUN /STOP key to freeze the screen and STOP will be displayed at the top right of the screen. -
Page 45: Taking A Relative Measurement
Handheld DSO & DMM 6-Using the Multimeter OWON 6.6 Taking a Relative Measurement A currently measured result relative to the defined reference value is displayed in a relative measurement. The following example shows how to take a relative measurement. At first, it is required to acquire a reference value. - Page 46 Handheld DSO & DMM 6-Using the Multimeter OWON Press F3 key and AUTO is displayed on the top left side of the screen to switch back to the automatic range mode. Look at the display, you can see a screen that looks like the following figure 33.
-
Page 47: Advanced Function Of Oscilloscope
Handheld DSO & DMM 7-Advanced Function of Oscilloscope OWON 7.Advanced Function of Oscilloscope 7.1 About this Chapter This chapter will detail the oscilloscope function of the test tool. 7.2 Setting the Vertical CH1 and CH2 Each channel has its own independent vertical menu and each item can be set respectively based on the specific channel. -
Page 48: Setting The Channel Coupling
Handheld DSO & DMM 7-Advanced Function of Oscilloscope OWON The following Table describes the Vertical Channel menu: Function Description Setting menu The dc component in the input signal is blocked.. Coupling The ac and dc components of the input signal are allowed. -
Page 49: Make Open And Close Settings On Channel
Handheld DSO & DMM 7-Advanced Function of Oscilloscope OWON figure 36: DC Coupling 7.2.2 Make Open and Close Settings on Channel With CH1 taken for example. Press F2 Channel key first, then Close to make a Close setting on CH1. -
Page 50: Make The Math Function Menu Setting
Handheld DSO & DMM 7-Advanced Function of Oscilloscope OWON Press F4 Invert to start Invert; again press F4 Invert to close Invert. 7.3 Make the Math Function Menu Setting The MATH functions in showing the result of adding, subtracting, multiplying or dividing calculation on CH1 and CH2 channel waveforms. -
Page 51: Setting The Trigger System
Handheld DSO & DMM 7-Advanced Function of Oscilloscope OWON figure 37: Waveform Mathematics 7.4 Setting the Trigger System The Trigger defines the time when the acquisition of data and display of waveform start. If it is set correctly, the trigger can turn an unstable display into a significant waveform. -
Page 52: Triggering Control
Handheld DSO & DMM 7-Advanced Function of Oscilloscope OWON figure 38: Edge Trigger 7.5 Triggering Control There are two triggering modes including Edge triggering and Video triggering. Each trigger mode is set by different function menu. Edge triggering: It occurs when the trigger input passes through a given level along the specified direction. -
Page 53: Video Triggering
Handheld DSO & DMM 7-Advanced Function of Oscilloscope OWON triggering condition is satisfied. Single shot The sampling is performed on a waveform when one trigger is detected, then stop sampling. . Coupling With this mode selected, the DC component is prevented from passing-though. - Page 54 Handheld DSO & DMM 7-Advanced Function of Oscilloscope OWON figure 40: Video Line trigger The Video triggering menu is described in the following table. Function Settings Description menu Polarity Normal Applicable to the video signal in which the black level is of low level.
-
Page 55: Acquiring Mode Setting
Handheld DSO & DMM 7-Advanced Function of Oscilloscope OWON 7.6 Acquiring Mode Setting The Acquiring Mode menu is described in the list shown as below. Function menu Settings Description Sampling Normal sampling mode. Peak Detection Used to detect the jamming glitch and reduce the possible blurring. -
Page 56: Persistence
Handheld DSO & DMM 7-Advanced Function of Oscilloscope OWON figure 41: Dot Style figure 42: Vector Style 7.7.2 Persistence With Persistence function selected, the displayed saved original data gradually decay in color and the new data are bright in color; with infinite persistence mode selected, the recorded points will be kept on the screen till the controlled value is changed. -
Page 57: Waveform Saving Setups
Handheld DSO & DMM 7-Advanced Function of Oscilloscope OWON the horizontal axis and CH2 is on the vertical axis; when the oscilloscope is under the sampling mode in which no trigger is found, the data appear in light spots. Operations for various control keys are shown as below: ■... -
Page 58: Function Setting Menu
Handheld DSO & DMM 7-Advanced Function of Oscilloscope OWON To display the saved waveform on the screen, do the following: Press the F4 key to select Start for the address A. The waveform saved in address A will be displayed on the screen in green color. -
Page 59: Making Automatic Measurements
Handheld DSO & DMM 7-Advanced Function of Oscilloscope OWON 7.10 Making Automatic Measurements The oscilloscope can perform 5 types automatic measurements such as frequency, cycle, average value, peak-to-peak value and root mean square value. And gives two kinds of measurement results simultaneously on the screen. -
Page 60: Setting The Cursor Measurements
Handheld DSO & DMM 7-Advanced Function of Oscilloscope OWON figure 44: Automatic Measurements 7.11 Setting the Cursor Measurements This oscilloscope allows you to make manual cursor measurements on time and voltage. The signal sources include Channel 1(CH1), Channel 2 (CH2), MATH, storage address A and storage address B. - Page 61 Handheld DSO & DMM 7-Advanced Function of Oscilloscope OWON V1 is moving up and down while the measured voltage value of V1 relative to the zero position of CH1 appears on the screen. Press and hold the OSC OPTION key till UP/DOWN CURSOR V2 appears on the screen.
-
Page 62: System State Menu
Handheld DSO & DMM 7-Advanced Function of Oscilloscope OWON frequencies of T1 and T2. Now, you can see a screen that looks like the following figure 46. figure 46: Use the Cursor for a Time Measurement 7.12 System State Menu The system state menu is used to display information about the present horizontal system, vertical system, trigger system and others. -
Page 63: Setting Of Time Base Mode
Handheld DSO & DMM 7-Advanced Function of Oscilloscope OWON figure 47: System State 7.13 Setting of Time Base Mode The time base mode menu is explained as the following table. Function menu Setting Explanation Main time base Horizontal main time base is used to wave display... -
Page 64: Data Transmission
Handheld DSO & DMM 7-Advanced Function of Oscilloscope OWON figure 48: Window Setting figure 49: Window Extension 7.14 Data Transmission For the operation of data transmission, please execute the following steps: Press MENU key, display the function menu on the right side of the screen. - Page 65 Handheld DSO & DMM 7-Advanced Function of Oscilloscope OWON Open the OWON software that had been installed completely. Setting the parameter under the use’s manual, then start data transmission.
-
Page 66: Trouble Shooting
Firstly, charge the battery and supply the oscilloscope with power through the battery charger. However, don’t switch on the oscilloscope till waiting for 15 minutes. If the oscilloscope still cannot start, please contact OWON for service. 2. The oscilloscope stops work only after operating for several seconds Probably the battery is dead, Check the battery symbol at the upper right of the screen. - Page 67 Handheld DSO & DMM 8-Trouble Shooting OWON display time in the display mode under the oscilloscope , the display speed is slow. It is normal in the above case.
-
Page 68: Appendix
Handheld DSO & DMM 9-Appendix OWON 9.Appendix 9.1 Appendix a Specifications 9.1.1 Oscilloscope Only if another instructions are provided, are all technical specifications applicable to the probe with the 10X attenuation switch setting and the HDS series digital type oscilloscope. In order to be up to these specifications, the oscilloscope should meet the following requirement. - Page 69 Handheld DSO & DMM 9-Appendix OWON Vertical Analog digital converter(A/D) With the resolution of 8 bits, make sampling on both channels synchronously. Sensitivity range (V/div) 5mV/div~5V/div(at the input BNC) Displacement range ±50V(500mV~5V),±2V(5mV~200mV) Analog bandwidth Single bandwidth Full bandwidth Low frequency response ( AD ≥5Hz(at the BNC )...
-
Page 70: Meter
Handheld DSO & DMM 9-Appendix OWON Probe 1X position 10X position Bandwidth Up to 6 MHz (DC) Up to full bandwidth (DC) Attenuation rate 1: 1 10: 1 Compensation range 10pf~35pf Input resistance 1MΩ±2% 10MΩ±2% Input impendence 85pf~115pf 14.5pf~17.5pf Input voltage... -
Page 71: General Specifications
Handheld DSO & DMM 9-Appendix OWON 40.00mA ±1.5%±3 digit 10uA 400.0mA ±2%±1 digit 100uA ±5%±3字 10mA Resistance Range Accuracy Resolution 400.0 Ω ±1%±3 digits 0.1Ω 4.000KΩ ±1%±1 digit 1Ω 40.00KΩ 10Ω 400.0KΩ 100Ω 4.000MΩ 1KΩ 40.00MΩ ±1.5%±3 digit 10KΩ Capacitance... -
Page 72: Appendix B: Maintenance And Cleaning
Handheld DSO & DMM 9-Appendix OWON Current output 1500 mA Working environment Temperature Operation Used battery 0 to 50 °C(32 to 122 °F) Power adapter 0 to 40 °C(32 to 104 °F) Storage. -20 to +60 °C(-4 to +140 °F) -
Page 73: Storage Of Oscilloscope
Handheld DSO & DMM 9-Appendix OWON 9.2.2 Storage of Oscilloscope If the test tool is to be stored for a long time, it is required to charge the lithium battery before storage. Charging the oscilloscope The lithium battery is possibly not charged when delivery. To make the battery with enough electric quantity, it must be charged for 4 hours (the test tool must be turned off during charging).
Need help?
Do you have a question about the HDS2062M and is the answer not in the manual?
Questions and answers