Table of Contents
Advertisement
Quick Links
Advertisement
Table of Contents

Related Manuals for Owon HDS100 Series


Summary of Contents for Owon HDS100 Series
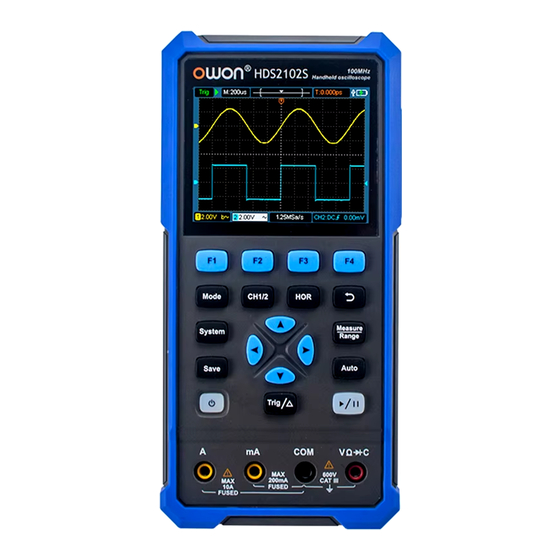
- Page 1 HDS100 Series Oscilloscope Meter User Manual For product support, visit:www.owon.com.hk/download ※:The illustrations, interface, icons and characters in the user manual may be slightly different from the actual product. Please refer to the actual product.
- Page 2 LILLIPUT will continue to improve products and reserves the rights to change specification at any time without notice. is the registered trademark of the LILLIPUT Company. Fujian LILLIPUT Optoelectronics Technology Co., Ltd. No. 19, Heming Road Lantian Industrial Zone, Zhangzhou 363005 P.R. China Tel: +86-596-2130430 Fax: +86-596-2109272 Web: www.owon.com E-mail: info@owon.com.cn...
- Page 3 General Warranty We warrant that the product will be free from defects in materials and workmanship for a period of 1 years from the date of purchase of the product by the original purchaser from our company. This warranty only applies to the original purchaser and is not transferable to a third party.
-
Page 4: Table Of Contents
Table of Contents TABLE OF CONTENTS 1.SAFETY INFORMATION ..........1 General Safety Requirements ....................1 Measurement Category ......................3 Safety Terms and Symbols ......................4 2.QUICK START ..............5 General Inspection ........................5 Install the Batteries ........................5 Adjusting the Tilt Stand .......................6 Power on/off ..........................6 Selecting the Range ........................ - Page 5 Table of Contents Automatic Measurement .......................25 Trigger System ......................... 26 Save and Recall Picture ......................27 System Settings ........................28 6.TECHNICAL SPECIFICATIONS ........33 Multimeter Specification ......................33 Oscilloscope Specification ......................35 General Specification ....................... 35 7.APPENDIX ..............37 Appendix A: List of Accessories ....................37 Appendix B: Maintenance and Cleaning ..................
-
Page 6: Safety Information
Safety Information 1.Safety Information (Be sure to read the safety information before using this product.) General Safety Requirements Before any operations, please read the following safety precautions to avoid any possible bodily injury and prevent this product or any other products connected from damage. In order to avoid any contingent danger, this product is only used within the range specified. - Page 7 Safety Information oscilloscope meter, have it inspected by qualified service personnel before further operations. Do not operate this product in wet or damp conditions. Do not operate in an explosive atmosphere. Keep product surfaces clean and dry. ...
-
Page 8: Measurement Category
Safety Information Measurement Category The oscilloscope meter has a safety rating of 1000 V,CAT III. Measurement category definition Measurement CAT I applies to measurements performed on circuits not directly connected to the AC mains. Examples are measurements on circuits not derived from the AC mains and specially protected (internal) mains- derived circuits. -
Page 9: Safety Terms And Symbols
Safety Information Safety Terms and Symbols Safety Terms Terms in this Manual. The following terms may appear in this manual: Warning: Warning indicates the conditions or practices that could result in personal injury or death. Caution: Caution indicates the conditions or practices that could result in damage to this product or other property. -
Page 10: Quick Start
Quick Start 2.Quick Start General Inspection After you get a new oscilloscope meter, make a check on the instrument according to the following steps: 1. Check whether there is any damage caused by transportation. If it is found that the packaging carton or the foamed plastic protection cushion has suffered serious damage, do not throw it away first till the complete device and its accessories succeed in the electrical and mechanical property tests. -
Page 11: Adjusting The Tilt Stand
Quick Start leads and any connectors from any circuit under test, remove test leads from the input terminals. Use only the specified battery type. Note:When charging,disconnect test leads from the input to open the charging cover and charge the device. Use the following procedure to install the battery: (1) Power off, remove test leads and any connectors from the input terminals. -
Page 12: Selecting The Range
Quick Start the shutdown will enter the standby mode); Automatic shutdown, emit a short beep one minute before shutdown, emit a long beep during shutdown; Low power automatic shutdown. Selecting the Range Auto ranging is set as default when the meter is powered on, Auto is displayed. -
Page 13: Instrument Panel
Instrument Panel 3.Instrument Panel Front Panel and Keys The front panel and keys of the oscilloscope meter are shown in Figure 3-1: Figure 3- 1:Front panel Description: Illustration in multimeter mode Illustration in oscilloscope mode Display area. The F1 - F4 keys are multi-function keys. In each menu mode, press the corresponding key to select the corresponding menu item. - Page 14 Instrument Panel Comparative value key. Trigger menu key. Function of direction keys Function of direction keys :used for changing range. used for the amplitude scales. Function of key:Restore Function of direction keys auto gear. used for zooming waveforms and the time base changing. Function of key:Perform automatic setup.
-
Page 15: Side Panel
Instrument Panel Side Panel Figure 3- 2:Side panel Description: 1. Charging or USB communication interface(Note:The measurement input port is not available when the interface is charging or communicating). 2. Bracket. -
Page 16: How To Use The Multimeter
How to Use the Multimeter 4.How to Use the Multimeter About This Chapter This chapter introduces the multimeter function and provides some basic examples of basic operations and how to use the menu. Instrument Interface The oscilloscope meter uses four 4-mm safety banana plug input ends: A、 mA、COM、... - Page 17 How to Use the Multimeter Freq Frequency measurement uA,DC、 mA,DC、 A,DC DC current measurement uA,AC、 mA,AC、 A,AC AC current measurement Range indication: Manu means manual range; Auto means automatic range. Current measurement range. Time display. Indicating that there is a USB cable inserted. Automatic shutdown sign:Displays the flag when enabled.
-
Page 18: Input Terminals
How to Use the Multimeter Hertz Frequency Percent Duty cycle Farad Capacitance Input terminals The terminal connections for the different measurement functions of the oscilloscope meter are described in the table below. Warning: Before starting any measurement, observe the rotary switch position of the oscilloscope meter, and then connect the test leads to the correct terminals. -
Page 19: Measuring Resistance
How to Use the Multimeter damage or electric shock. This oscilloscope meter displays DC voltage values as well as their polarity. Negative DC voltages will display a negative sign on the left of the screen. to switch DC Voltage measurement mode, *,DC will be Press displayed in the upper left corner (* denotes mV or V) .Then press switch into AC Voltage measurement mode, *,AC will be displayed in the... -
Page 20: Measuring Continuity
How to Use the Multimeter Connect the black test lead to the terminal and the red test lead to terminal. Resistance Measurement connect test leads: Probe the test points and read the display. Measuring Continuity Caution: To avoid possible damage to your oscilloscope meter or to the equipment under test, disconnect the circuit power and discharge all high-voltage capacitors before testing for continuity. -
Page 21: Measuring Diodes
How to Use the Multimeter Measuring Diodes Caution: To avoid possible damage to your oscilloscope meter or to the equipment under test, disconnect the circuit power and discharge all high-voltage capacitors before testing diodes. Press to enter diode testing mode,Diode will be displayed in the upper left corner. -
Page 22: Measuring Frequency
How to Use the Multimeter terminal. Capacitance Measurement connect test leads: Probe the test points and read the display. Measuring Frequency Press to enter frequency measurement mode,Freq will be displayed in the upper left corner. Connect the black test lead to the terminal and the red test lead to terminal. -
Page 23: Measuring Dc Or Ac Current
How to Use the Multimeter press to measure the frequency in AC voltage measurement mode. Measuring DC or AC Current Warning: Never attempt an in-circuit current measurement where the open-circuit potential to earth is greater than 250 V. Doing so will cause damage to the oscilloscope meter and possible electric shock or personal injury. -
Page 24: Multimeter Features
How to Use the Multimeter Disconnect the circuit path to be tested. Connect the black test lead to one side of the circuit (with a lower voltage); connect the red test lead to the other side (with a higher voltage). Reversing the leads will produce a negative reading, but will not damage the oscilloscope meter. -
Page 25: Making Max/Min Measurements
How to Use the Multimeter measurement scales. 2. Press to switch into AC Voltage measurement,then press 、 to select mV、V or Hz/V,and then press up and down measurement scales. 3. Press to switch into DC Current measurement,then press to select uA、mA or A,and then press to up and down measurement scales. -
Page 26: Value Hole Mode
How to Use the Multimeter When the condition is met for being outside the range: If the current measurement value displayed on the main screen is outside the comparison range, it will be considered as a pass. When the condition is met for being outside the range: If the current measurement value displayed on the main screen is inside the comparison range, it will be considered as a fail. -
Page 27: Making Relative Measurements
How to Use the Multimeter Making Relative Measurements When making relative measurements, reading is the difference between a stored reference value and the input signal. 1. Press to enter the relative mode, △ will be shown on the display. The measurement value when pressing as the reference value.In this mode,△(current reading) = input value - reference value. -
Page 28: How To Use The Oscilloscope
How to Use the Oscilloscope 5.How to Use the Oscilloscope Introduction to the User Interface of the Oscilloscope Figure 3- 3:Oscilloscope Interface Description: 1. Time base(In the vertical direction,the per grid denotes time). 2. Amplitude(In the vertical direction,the per grid denotes voltage or current). 3. - Page 29 How to Use the Oscilloscope oscilloscope. Single: In this trigger mode,the oscilloscope performs a single triggering and acquisition only when the specified trigger condition is detected, and then stops.This triggering method is suitable for situations where a single capture of a specific event is needed for subsequent analysis (enabling translation and scaling of the current displayed waveform, with subsequent waveform data not overwriting the current waveform).After a single triggering, the oscilloscope...
-
Page 30: Measuring System
How to Use the Oscilloscope Measuring System Automatic Measurement In oscilloscope mode,press can display automatic measurement value,the screen displays six measurement types in the lower left corner:Freq、Max、Min、Vpp、Avg and Rms. The automatic measurement of voltage parameters The oscilloscopes provide automatic voltage measurements including Avg, Vpp, Rms, Max, Min and Vamp. -
Page 31: Trigger System
How to Use the Oscilloscope 3. Press to enter voltage measurement,press select mV or V measurement unit,and then press to up and down measurement gear,press to adjust time base gear. 4. Press to enter current measurement,press select uA、mA or A measurement unit,and then press up and down measurement gear,press to adjust time base gear. -
Page 32: Save And Recall Picture
Save and Recall Picture data to draw a waveform on the right of the trigger point. The trigger mode of this series of oscilloscopes is edge trigger. The edge trigger mode is to trigger on the trigger electrical level of the edge of the input signal, that is, trigger on the rising and falling edges of the input signal. -
Page 33: System Settings
System Settings Note:The dot next to the battery will display orange if the storage space is insufficient, and it will display green if the storage space is adequate. 2. Recall picture:Upon connecting the USB cable to a computer,to open the saved image, select the path where the image is stored. 7.System Settings Press to enter the system function menu.Press... - Page 34 System Settings 2. Time setting:Select Date,Time option.Press to select year、month、day、hour、minute and second,and then press to set required time. 3. 12-hour format setting:Select Hour 12h option.Press the time display will be in the 12-hour format and press it again will switch to 24-hour format.
- Page 35 System Settings 2. Brightness setting:Select Brightness option,and then press ,the brightness varies between Low, Mid, and High. Sound Select Sound page,you can do the following. The description of the option is as follows: Page options Description Voice Set the key operation prompt tone. Volume Set the volume.
- Page 36 System Settings About Display information about the instrument. 1. Automatic shutdown setting:Select Auto Power Off option,and then press will enable automatically shut down.When enabled, the device will automatically power off after a specified period of inactivity; pressing the button again will require manual shutdown. 2.
- Page 37 System Settings comparison pass condition as outside the interval. Disabling this option sets the comparison pass condition as inside the interval.
-
Page 38: Technical Specifications
Technical Specifications 8.Technical Specifications Standard conditions: The environment temperature is 18℃ to 28℃,the relative humidity is less than 80%. Note: When measuring AC voltage, accuracy guarantee range is 10% to 100% of the range. When measuring DC voltage,AC/DC current or capacitance, accuracy guarantee range is 5% to 100% of the range. - Page 39 Technical Specifications 2.0000A 100μA ±(1.5%+10dig) 10.000A ±(2.5%+10dig) 200.00Ω 0.01Ω ±(0.8%+10dig) 2.0000kΩ 0.1Ω ±(0.3%+5dig) 1Ω 20.000kΩ 10Ω 200.00kΩ ±(0.3%+5dig) (Ω) Resistance 100Ω 2.0000MΩ 1kΩ 20.000MΩ ±(0.5%+5dig) 100.00MΩ 10kΩ ±(5.0%+10dig) 2.000nF ±(5.0%+10dig) 10pF 20.00nF 100pF 200.0nF 2.000μF Capacitance 20.00μF 10nF ±(3.0%+10dig) 100nF 200.0μF 1μF 2.000mF...
-
Page 40: Oscilloscope Specification
Technical Specifications meets the following conditions: Frequency Amplitude (rms) 1 Hz – 20 MHz ≥ 1 V [4] When measuring duty cycle, the typical waveform is Square. Note : when measuring resistance and capacitance, the influence of the resistance reactance of the pen itself on the measured value should be considered. - Page 41 Technical Specifications Input Impedance ≥ 10 MΩ Battery Single 18650 3.7v 2.8 inch Display IPS:320*240 resolution Weight (without package) Approx. 0.33kg(without battery) Dimension 188mm(Length)* 93mm(Width)*41.5mm(Depth) Working temperature 0℃ to 40℃ Storage temperature -10℃ to 60℃ Relative Humidity ≤ 80% Operating: 3,000 meters Altitude Non-operating: 15,000 meters Interval Period of Adjustment:...
-
Page 42: Appendix
Appendix 9.Appendix Appendix A: List of Accessories 1 set of probes 1 quick guide 1 USB-TYPEC line Appendix B: Maintenance and Cleaning General maintenance Do not store or place the instrument in a place where the LCD screen will be exposed to direct sunlight for a long time. -
Page 43: Charging And Replacement Of Battery
Appendix Charging and Replacement of Battery During the long-term storage of the device, the battery may be too low due to the self-discharge of the lithium battery and the device cannot be turned on. This is a normal phenomenon. To pre-charge the device for 0.5 to 1 hour (depending on the storage time) before turning it on.
Need help?
Do you have a question about the HDS100 Series and is the answer not in the manual?
Questions and answers