
Related Manuals for Delta M88H_121 (ST)


Summary of Contents for Delta M88H_121 (ST)
-
Page 1: Quick Installation Guide
Quick Installation Guide Solar power inverter M88H_121 (ST, product version J) M88H_122 (CF, product version D) Europe United Kingdom... - Page 2 DSP: 1.33 / RED: 1.03 / COM: 1.16 or higher The Delta part number can be found on the type plate of the inverter. The Product Version is shown by the last letters of the serial number, which is also located on the type plate. The firm- ware versions are listed on the display in the Inverter Info.
-
Page 3: Table Of Contents
Table of Contents Basic safety instructions ............4 Scope of delivery –... -
Page 4: Basic Safety Instructions
► Ensure that the DC cables cannot be lation and operation of mains-based solar inverters. touched accidentally. ● All repair work on the inverter must be carried out by Delta Electronics. Otherwise, the warranty will be void. ● Warning instructions and warning symbols attached to the inverter by Delta Electronics must not be removed. - Page 5 Basic safety instructions Safety instructions for the M88H_122 (CF) DANGER Electric shock Potentially fatal voltages are present at the inverter during operation. When the inverter is disconnected from all power sources, this voltage remains in the inverter for up to 100 seconds.
-
Page 6: Scope Of Delivery - M88H_121 (St)
Scope of delivery – M88H_121 (ST) Part Description Part Description M88H_121 inverter Mounting plate with wiring box For closing the upper cable feed-throughs on the junction box when the power module is removed from the junction box. The cover caps are fitted to the mounting plate. Cover caps For grounding the inverter housing;... -
Page 7: Scope Of Delivery - M88H_122 (Cf)
Scope of delivery – M88H_122 (CF) Part Description Part Description M88H_122 inverter Mounting plate with wiring box For closing the upper cable feed-throughs on the wiring box when the inverter part is disconnected. The cover caps are fitted to the mounting plate. Cover caps For grounding the inverter housing;... -
Page 8: Components Of The M88H_121 (St) Inverter
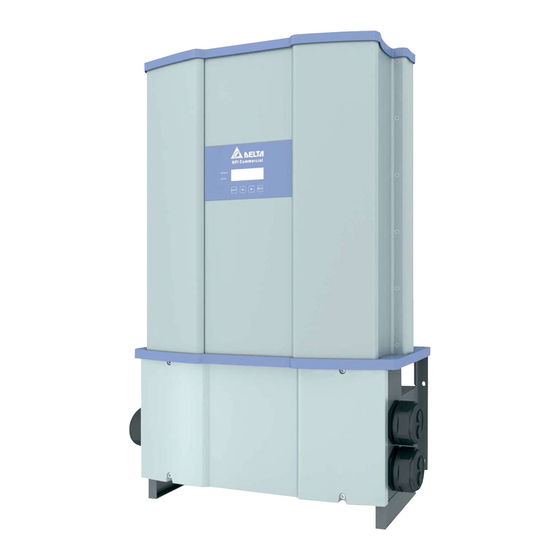
Components of the M88H_121 (ST) inverter 11.4 11.1 11.3 11.2 Power module Grounding connection Display, buttons, and LED Mounting plate Fan module Cable gland for the communication connection Filter for air outlet (2x) Communication card Filter for air inlet AC cable gland Cover panel for the air inlet (2x) Cover panel for the wiring box DC cable gland (2x) - Page 9 Components of the M88H_121 (ST) inverter DANGER Modified design of the DC connections The design of the DC connections on the DC terminal block has changed in comparison with previous versions of the M88H_121 (ST)! ► You must comply with the correct use of plus (+) and minus (-) when connecting the DC cables.
-
Page 10: Components Of The M88H_122 (Cf) Inverter
Components of the M88H_122 (CF) inverter 10.4 10.1 10.3 10.2 Power module DC isolating switch Display, buttons, and LED Mounting plate Fan module Communication card Filter for air outlet (2x) Cable gland for the communication connection Filter for air inlet AC cable gland Cover panel for the side air inlet (2x) Cover panel for the wiring box... - Page 11 Components of the M88H_122 (CF) inverters 14 AC surge protection devices 16 DC1 string fuses 18 AC terminal block 15 DC surge protection devices 17 DC2 string fuses Quick Installation Guide for Solar Power Inverter M88H EU V3 EN 5013240202 02 2018-03-22...
-
Page 12: Display, Buttons, And Leds
Display, buttons, and LEDs Exit the current menu. EXIT EXIT Cancel the setting for a parameter. Changes are not adopted. Move downwards in the menu. Down Reduce the value of a configurable parameter. Move upwards in the menu. Increase the value of a configurable parameter. -
Page 13: Hazard Zones In The Wiring Box
Hazard zones in the wiring box DANGER DANGER Electric shock Modified design of the DC inputs The cover in the interior of the terminal box The design of the DC inputs on the DC terminal does not need to be removed for cabling work. block has changed in comparison with previous All connections are accessible, even when the versions of the M88H_121 (ST)! -
Page 14: Planning The Installation
Planning the installation Installation location of the inverter ► Attach the inverter so that the information on the display ► The inverter is very heavy. The wall can be read and the buttons can be operated without any or mounting system must be able problems. - Page 15 Planning the installation Installation clearances and air circulation ► Ensure sufficient air circulation. Hot air must be able to dissipate upwards. Leave enough space around each inverter. ► Do not install inverters above one an- other so that they do not heat each other. ►...
-
Page 16: Dimensions
Dimensions Quick Installation Guide for Solar Power Inverter M88H EU V3 EN 5013240202 02 2018-03-22... - Page 17 Dimensions Quick Installation Guide for Solar Power Inverter M88H EU V3 EN 5013240202 02 2018-03-22...
-
Page 18: Ac And Dc Cable Requirements - M88H_121 (St)
AC and DC cable requirements – M88H_121 (ST) AC and DC terminal blocks - general informa- Specification for aluminum cable tion The section describes the general technical characteristics of the AC and DC terminal blocks. The special features which apply to the installation of the inverter are explained in the following sec- tions. -
Page 19: Ac Cable
AC and DC cable requirements – M88H_121 (ST) AC cable DC cables AC cable gland DC cable gland The inverter has 1 AC cable gland with 1 cable feed-through. The inverter has 2 DC cable glands with 2 cable feed-throughs each. -
Page 20: Ac And Dc Cable Requirements - M88H_122 (Cf)
AC and DC cable requirements – M88H_122 (CF) AC cable Specification for aluminum cable General information on AC terminal block The section describes the general technical characteristics of the AC terminal blocks. The special features which apply to the installation of the inverter are explained in the following sections. SM-S SM-L The specifications in this section have been... -
Page 21: Dc Cables
AC and DC cable requirements – M88H_122 (CF) DC cables Check whether it is permissible in your country to The DC plugs for all DC connections are supplied with the utilize sector-shaped, solid aluminum cables. inverter. If you want to order more or need a different size, see the infor- Al-Cu crimped connectors (such as those from Klauke, Elpress mation in the following table. -
Page 22: Special Instructions For The Use Of Aluminum Cables
Special instructions for the use of aluminum cables The instructions contained in this section refer specifically to the use of aluminum cables with this inverter. These instructions supplement the specifications of the manufacturer of the terminal blocks. Handling aluminum conductors during installation work The special properties of aluminum must be taken in to consider- ation when using aluminum: ●... - Page 23 Special instructions for the use of aluminum cables Pull the heat-shrink sleeving over the complete aluminum part ► The length of the copper bolt on the Al-Cu crimped con- nector must be approximately equal to the stripping length specified for copper cable by the manufacturer of the terminal block (see “AC and DC terminal block specifica- tions”, page 18 for the M88H_121 or “AC terminal block specifications”, page 20 for the M88H_122):...
-
Page 24: Communications Cable Requirements
Communications cable requirements Cable gland The inverter has 1 cable gland for the communications cable with 2x2 cable feed-throughs. Cable requirements ● Shielded twisted-pair cable (CAT5 or CAT6) ● Cable diameter: 7.2 / 8.7 / 10.0 mm ● Wire cross-section: 0.25 ... 1.5 mm The communications cable is required for connection to the fol- lowing units: ●... -
Page 25: Routing The Cables
Routing the cables This section describes the optimum routing for the cables in the region of the inverter. When bending and twisting cables or conductors, always comply with the manufacturer’s instruc- tions, so as to avoid breakage of the conductors or the insulation. -
Page 26: Mounting The Inverter
Mounting the inverter The illustrations in this section show the M88H_121 (ST). The procedure for the M88H_122 (CF) is identical. 1. For vertical mounting of the inverter, attach the mounting plate to the wall / the mounting system with 8 M8 screws in accordance with the illustration on the left. - Page 27 Mounting the inverter 2. Mount the inverter on the mounting plate. 3. Check that the inverter is correctly mounted on the mount- ing plate. Quick Installation Guide for Solar Power Inverter M88H EU V3 EN 5013240202 02 2018-03-22...
- Page 28 Mounting the inverter 4. Screw the inverter to the mounting plate with 4 M5 screws, spring washer and washer. The screws are supplied in the scope of delivery. If desired, also mount the cover panels for the side air inlets. Quick Installation Guide for Solar Power Inverter M88H EU V3 EN 5013240202 02 2018-03-22...
-
Page 29: Grounding The Inverter Housing
Grounding the inverter housing The illustrations in this section show the DANGER M88H_121 (ST). The procedure for the Electric shock M88H_122 (CF) is identical. In IT grids, a twofold insulation fault can lead to high residual currents on the inverter housing. WARNING ►... -
Page 30: Connecting The Mains (Ac) - General Notes
DIN VDE 0100-712. L1-L3 480 V ± 20% L2-N 277 V ± 20% Possible error events were assessed by Delta in accordance with the current installation standards. The assessments showed that L2-L3 480 V ± 20% L3-N 277 V ±... - Page 31 Connecting the mains (AC) – general notes Wiring examples for the M88H_121 (ST) Wiring examples for the M88H_122 (CF) 8 ... 10 Nm 135 mm 25 ... 30 Nm L1 L2 L3 Wiring example 1: With PE conductor, with neutral conductor Wiring example 1: With PE conductor, with neutral conductor L1 L2 L3 Wiring example 2: With PE conductor, without neutral conductor...
-
Page 32: Connecting The Mains (Ac) - Cable Gland M88H_121 (St)
Connecting the mains (AC) – Cable gland M88H_121 (ST) Overview of the parts of the AC cable glands Dimensions of the sealing rings Quick Installation Guide for Solar Power Inverter M88H EU V3 EN 5013240202 02 2018-03-22... - Page 33 Connecting the mains (AC) – Cable gland M88H_121 (ST) ∅ 39.8 ... 49.8 mm ∅ 49.8 ... 58.8 mm ∅ 58.8 ... 65.8 mm ∅ 43.8 ... 53.5 mm ∅ 53.5 ... 65.9 mm Assignment of the sealing rings to the cable diameters Quick Installation Guide for Solar Power Inverter M88H EU V3 EN 5013240202 02 2018-03-22...
-
Page 34: Connecting The Mains (Ac) - Cable Gland M88H_122 (Cf)
Connecting the mains (AC) – Cable gland M88H_122 (CF) Overview of the parts of the AC cable glands Dimensions of the sealing rings Quick Installation Guide for Solar Power Inverter M88H EU V3 EN 5013240202 02 2018-03-22... - Page 35 Connecting the mains (AC) – Cable gland M88H_122 (CF) ∅ 23.9 ... 27.2 mm ∅ 27.2 ... 34.8 mm ∅ 34.8 ... 43.5 mm ∅ 43.5 ... 51.3 mm Assignment of the sealing rings to the cable diameters Quick Installation Guide for Solar Power Inverter M88H EU V3 EN 5013240202 02 2018-03-22...
-
Page 36: Connecting The Mains (Ac) - Tips For M88H_121 (St)
Connecting the mains (AC) – Tips for M88H_121 (ST) ► Screw off the outer and inner ring of the cable gland as well to make it easier to pull the AC cable into the junction box. ► Insert the conductors of the AC cable into the terminals of the AC terminal block in accordance with the phase as- signment, and tighten the terminals (torque 25 ... -
Page 37: Connecting The Mains (Ac) - Tips For M88H_122 (Cf)
Connecting the mains (AC) – Tips for M88H_122 (CF) ► Screw off the outer and inner ring of the AC cable gland as well to make it easier to pull the AC cable through the cover. ► Insert the conductors of the AC cable into the terminals of the AC terminal block in accordance with the phase assignment, and tighten the terminals (torque 8 ... -
Page 38: Connecting Solar Modules (Dc) - Cable Gland M88H_121 (St)
Connecting solar modules (DC) – cable gland M88H_121 (ST) ∅ 14.0 ... 21.9 mm ∅ 21.9 ... 25.7 mm ∅ 12.4 ... 14.0 mm Quick Installation Guide for Solar Power Inverter M88H EU V3 EN 5013240202 02 2018-03-22... -
Page 39: Connecting Solar Modules (Dc) - 1-/2-Mppt Operation M88H_121 (St)
Connecting solar modules (DC) – 1-/2-MPPT operation M88H_121 (ST) DANGER Modified design of the DC inputs The design of the DC inputs on the DC terminal block has changed in comparison with previous versions of the M88H_121 (ST)! ► You must comply with the correct use of plus (+) and minus (-) when connecting the DC cables. - Page 40 Connecting solar modules (DC) – 1-MPPT operation M88H_121 (ST) 1. Insert one jumper each in DC1 and DC2 until they engage in the DC terminal block. CLICK 2. Connect the red cable (DC+) to terminal DC1+ and the black cable (DC–) to terminal DC2–. The left-hand image shows the cabling when copper cables are used.
-
Page 41: Connecting Solar Modules (Dc) - M88H_122 (Cf)
Utilization of thin film modules ► Replace damaged string fuses with devices of the same type and from the same manufacturer. ► Surge protection devices are available from Delta. Tools The protective caps lock the DC plug so that it can only be disconnected from DC connections using the mounting tool. - Page 42 Connecting solar modules (DC) – M88H_122 (CF) Utilization of thin film modules Thin film modules can be connected to a maximum of 2 DC con- nections per DC input in accordance with the following connec- tion diagram. 1 Use MC4 branch socket PV-AZB4 (Stäubli order number 32.0018) or MC4 branch socket PV-AZS4 (Stäubli order number 32.0019).
- Page 43 Connecting solar modules (DC) – M88H_122 (CF) – – – Assignment of the DC string fuses to the DC connections The following illustration is also attached to the inner side of the cover of the wiring box. Quick Installation Guide for Solar Power Inverter M88H EU V3 EN 5013240202 02 2018-03-22...
-
Page 44: Closing The Wiring Box
Closing the wiring box NOTICE Impairment of operating response caused by moisture and dirt. In order to restore degree of protection IP65 after the completion of installation work, attach the cover of the wiring box in accordance with the following instructions. 1. -
Page 45: Overview Of Communications Card
The connections for RS485, the digital inputs, the dry contacts and the external power-off (EPO) are If you wish to use a PC with the Delta Service Software for set- all on the communication card. This means that ting up the inverter you will need a USB/RS485 adapter in order the installation work can be combined. -
Page 46: Connecting A Data Logger Via Rs485
Connecting a data logger via RS485 RS485 terminal block DIP switch for RS485 termination resistor and VCC VCC (+12 V; 0.5 A) RS485 termination resistor VCC (+12 V; 0.5 A) DATA+ (RS485) Connecting a single inverter to a data logger DATA–... -
Page 47: Connecting The Digital Inputs, Dry Contacts And External Power-Off (Optional)
Connecting the digital inputs, dry contacts and external power-off (option- Digital inputs and external power-off (EPO) Dry contacts To control the active power, an external ripple control receiver The inverter has two dry contacts. The contacts are closed when can be connected to the digital inputs. the relays energize. -
Page 48: Attaching Warning Labels To The Inverter
Attaching warning labels to the inverter All countries ► Attach all necessary warning labels to the inverter. Always follow the local regulations. Some examples of warning labels are listed below. Do not work on this equipment until it is located WARNING from both mains and on site generation supplies. -
Page 49: Commissioning - Basic Settings
NOTICE D e l t a p r o t . The Delta protocol is the Delta Modbus protocol and is intended for utilization with the S U N S P E C p r o t . Delta Service Software. -
Page 50: Date And Time
Commissioning – further settings (optional) Date and time 1 0 . S e p 2 0 1 4 1 5 : 3 2 If the default information is displayed, press the button to open the main menu. EXIT S t a t u s : O n G r i d Otherwise, press the button repeatedly until the main menu is displayed. -
Page 51: Baud Rate For Rs485
Commissioning – further settings (optional) Baud rate for RS485 1 0 . S e p 2 0 1 4 1 5 : 3 2 If the default information is displayed, press the button to open the main menu. EXIT S t a t u s : O n G r i d Otherwise, press the button repeatedly until the main menu is displayed. -
Page 52: External Power-Off (Epo)
A c t i v e / R e a c t i v e P w r F R T Enter the password provided by Delta customer service. W a r n i n g : A d j . w o u l d a f f e c t Use the buttons to set the individual numerals. -
Page 53: Dry Contacts (Relays)
Commissioning – further settings (optional) Dry contacts (relays) 1 0 . S e p 2 0 1 4 1 5 : 3 2 If the default information is displayed, press the button to open the main menu. EXIT S t a t u s : O n G r i d Otherwise, press the button repeatedly until the main menu is displayed. -
Page 54: Technical Data - M88H_121 (St)
Technical Data – M88H_121 (ST) Input (DC) M88H_121 (ST) for AC nominal voltage 400 V 480 V Maximum recommended PV power 90 kW 110 kW Maximum input power (total / per input) Symmetrical design 76 kW / 38 kW 91 kW / 45.5 kW Asymmetrical design 45.6 kW / 30.4 kW 54.6 kW / 36.4 kW... - Page 55 Phoenix Contact UKH 150 DC connection type Phoenix Contact UKH 150 Communication interfaces 2x RS485, 2x dry contacts, 1x external power-off, 6x digital inputs General specifications M88H_121 (ST) Delta model name RPI M88H_121 Delta part number RPI883M121200 Maximum efficiency 98.8% EU efficiency 98.5%...
-
Page 56: Technical Data - M88H_122 (Cf)
Technical data – M88H_122 (CF) Input (DC) M88H_122 (CF) for AC nominal voltage 400 V 480 V Maximum recommended PV power 90 kW 110 kW Maximum input power (total / per input) Symmetrical design 76 kW / 38 kW 91 kW / 45.5 kW Asymmetrical design 45.6 kW / 30.4 kW 54.6 kW / 36.4 kW... - Page 57 Phoenix Contact UKH 70 DC connection type Multi-Contact MC4 Communication interfaces 2x RS485, 2x dry contacts, 1x external power-off, 6x digital inputs General specifications M88H_122 (CF) Delta model name RPI M88H_122 Delta part number RPI883M122000 Maximum efficiency 98.8% EU efficiency 98.5%...
- Page 58 Space for notes Quick Installation Guide for Solar Power Inverter M88H EU V3 EN 5013240202 02 2018-03-22...
- Page 59 Space for notes Quick Installation Guide for Solar Power Inverter M88H EU V3 EN 5013240202 02 2018-03-22...
-
Page 60: Customer Service - Europe
+49 7641 455 549 5013240202 02 © Copyright – Delta Electronics (Netherlands) B.V. – All rights reserved. All information and specifications can be modified without prior notice. Quick Installation Guide for Solar Power Inverter M88H EU V3 EN 5013240202 02 2018-03-22...
Need help?
Do you have a question about the M88H_121 (ST) and is the answer not in the manual?
Questions and answers