
Related Manuals for Delta M80U


Summary of Contents for Delta M80U
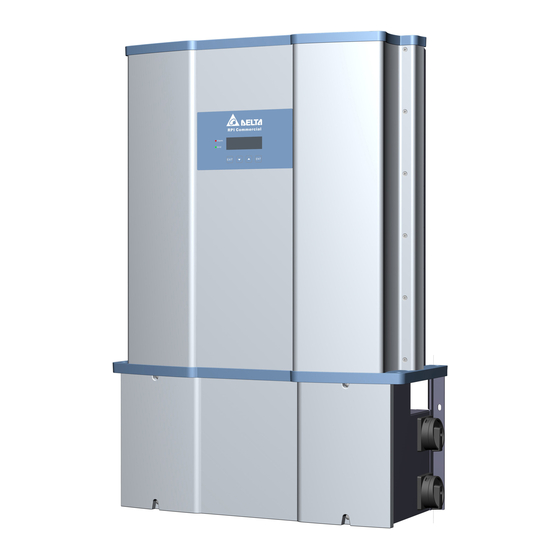
- Page 1 The power behind competitiveness Grid-tie Transformerless Solar Inverter M80U M60U Operation and Installation Manual www.deltaww.com...
-
Page 3: Table Of Contents
.... 3.3.2 Required Protective Devices for M80U / M60U ...... - Page 4 ...... 3.5.3 EPO Function & Digital Input ...... ...
- Page 5 ...... 7.1 Technical of M80U series ......
- Page 6 ....... . Figure 2-3: Rating labels of M80U ....... .
- Page 7 ....... Figure 3-31: DC Wiring illustration Figure 3-32: Wiring Box layout and Bottom view of inverter chassis showing location of MC4 .
- Page 8 ......Figure 7-1: Thermal Derating curve of M80U ......
- Page 9 ....... Table 7-1A: Specifications for M80U .......
-
Page 10: 1 Safety
DELTA ELECTRONICS, INC. Service engineers and end users may not divulge the information contained herein or use this manual for purpose other than those strictly connected with correct use of the product. -
Page 11: General Safety
This user manual provides important instructions for Delta grid-tie transformerless solar inverter. The product is designed, tested, verified, and certified according to international safety requirements, certifications, and standards but precautions must be observed when installing and operating the product. -
Page 12: Symbols
Safety 1.2.2 Symbols This section describes the definition of the symbols in this manual. In order to prevent both personal injury and property damage, and to ensure long-term operation of the product, please read this section carefully and follow all the safety instructions while you use the product. DANGER! - This warning indicates an immediate hazard which will lead to death or serious injury. - Page 13 Safety INFORMATION - An exclamation mark enclosed in a double circle indicates additional important information is contained in the following section and the user should follow the instructions to prevent any hazards. DANGER : ELECTRICAL HARZARD!! - This warning indicates an immediate electrical hazard that unheeded can lead to death or serious injury.
-
Page 14: 2 Introduction
Device) and MxxU_121 without RSD, please refer Figure 2-5 for details. This user manual must be followed during installation, operation, and maintenance. The M80/60 Series each have three models as shown in Figure 2-2. Delta reserves the right to make modifications to the content and technical data in this... -
Page 15: Product Overview
④ For 122 models For 121/122 models ⑤ ⑥ ⑦ ⑧ ⑨ Figure 2-1: Components of M80/60U M80U / M60U Object Description Delta Solar Inverter 1 pc Solar inverter Wiring Gland 1 pc For communication port wiring Important instructions for solar inverter... - Page 16 Introduction M80/60U Air Outlets / _120 Smart Fans LCD/LED Display and Control Buttons AC Switch Chassis access for DC grounding; ½" TSO* Chassis access for AC Wiring; 2" TSO* Rating Label RS-485 Air Inlets communications port, 3/4" TSO Chassis access for DC DC Switches, wiring;...
- Page 17 Introduction SUB_1G (optional) * Screw torque required for assembling: 1.6 N•m Vertical mounting Horizontal mounting SUB_1G support all kind of tilt installation angle (0~90°), make sure the antenna is vertical to ground.
- Page 18 Certified to CSA Std. C22.2 No. 107.1 and No. 292 Grid Support Utility Interactive Inverters Grid Support Utility Interactive Inverters 5 0 1 7 0 4 2 5 0 1 7 0 4 2 Figure 2-3: Rating labels of M80U...
- Page 19 Introduction M60U _ M60U _ Model / Model / Three Phase Photovoltaic Inverter Three Phase Photovoltaic Inverter P/N: RPI603M1203T2 P/N: RPI603M1213T2 DC Rating DC Rating DC Max. Input Voltage 1000V DC Max. Input Voltage 1000V DC Nominal Operation Voltage 710V DC Nominal Operation Voltage 710V DC Operation Voltage Range...
- Page 20 Use noise protection PPE Table 2-2: Rating label explanation of M80/60U In the following pages, Figures 2-4 illustrate the general layout of the M80U/M60U chassis and wiring box. Figure 2-5 and Table 2-3, provides a detailed description of each wiring box option.
- Page 21 Introduction M80/60U Dual MPPT channels, 8 strings/input (With RSD) Dual MPPT channels, 1 TB pair/input (Without RSD) Dual MPPT channels, 1 TB pair/input Dual MPPT channels, 9 strings/input Figure 2-5: External view and Wiring box layout...
- Page 22 Introduction -120 Model WB ⑰ ⑲ ⑱ ⑯ ⑮ ⑥ ⑬ IN 1 IN 1 IN 2 IN 2 ⑧ ⑭ ① ⑪ ④ ③ ⑦ ④ ⑫ -121 Model WB (With RSD) ⑮ ⑰ ⑱ ⑯ ⑥ ⑨ ⑤ ⑧...
- Page 23 Introduction -121 Model WB (Without RSD) ⑮ ⑰ ⑱ ⑯ ⑥ ⑨ ⑤ ⑧ ① ⑩ ⑦ ④ -122 Model WB ⑰ ⑲ ⑱ ⑯ ⑮ ⑥ ⑬ IN 1 IN 1 IN 2 IN 2 ⑦ ⑪ ⑪ ⑫ ⑫...
-
Page 24: 3 Installation
Installation 3 Installation CAUTION ! - In some locations, mounting the inverter in direct sunlight may cause the inverter to enter a thermal derating mode. To eliminate this concern, a shade structure over the inverter chassis may be necessary. WARNING ! - Do not install the unit near or on flammable surfaces. -
Page 25: Horizontal Or Tilt Mount
Installation 3.1.2 Horizontal or Tilt mount 1. Refer to Figure 3-10. Ensure the mounting stand meets the mounting dimensions shown, with the large plate at the lowest end of the stand. Ensure the stand is sufficiently strong enough to carry the inverter weight. 2. - Page 26 Installation 120 Models 615 mm [24.2 in] 275 mm [10.8 in] 121/122 Models 615 mm [24.2 in] 275 mm [10.8 in] Figure 3-2: Inverter dimensions...
-
Page 27: Mounting Bracket
Installation 3.1.3 Mounting Bracket This section introduce how to install new/old models of M80/60U with new version of mounting bracket. New models of M80/60U with new version of mounting bracket, please refer to section 3.1.3.1 Old models of M80/60U with new version of mounting bracket, please refer to section 3.1.3.2 Figure 3-3 shows how to distinguish new/old models of M80/60U. -
Page 28: New Models With New Version Of Mounting Bracket
Installation 3.1.3.1 New Models With New Version of Mounting Bracket 402.7mm [15.9in] 80mm [3.1in] 127.5mm [5in] 13mm [0.5in] 82mm [3.2in] 82mm [3.2in] 246mm [9.7in] 246mm [9.7in] 410mm [16.1in] 410mm [16.1in] 485.5mm [19.1in] 155mm [6.1in] 246mm [9.7in] 50mm [2.0in] 410mm [16.1in] 43.2mm [1.7in] 582mm [22.9in] Figure 3-4: Mounting bracket dimensions for new models... - Page 29 Installation Figure 3-5: Mounting base plate and rear view for new models Necessary for vertical mounting Necessary for horizontal mounting Figure 3-6: Required position for at least 8 screws for new models...
-
Page 30: Old Models With New Version Of Mounting Bracket
Installation 3.1.3.2 Old Models With New Version of Mounting Bracket 402.7mm [15.9in] 57mm [2.2in] 127.5mm [5in] 36mm [1.4in] 82mm [3.2in] 82mm [3.2in] 246mm [9.7in] 246mm [9.7in] 410mm [16.1in] 410mm [16.1in] 485.5mm [19.1in] 155mm [6.1in] 246mm [9.7in] 73mm [2.9in] 410mm [16.1in] 43.2mm [1.7in] 582mm [22.9in] Figure 3-7: Mounting bracket dimensions for old models... - Page 31 Installation Figure 3-8: Mounting base plate and rear view for old models Necessary for vertical mounting Necessary for horizontal mounting Figure 3-9: Required position for at least 8 screws for old models...
- Page 32 - To avoid malfunction of inverter caused by extreme weather (ex: snow, hail…etc) or non-proper installation/maintenance, an additional protection cover is strongly recommended to be installed by Delta. For more details, please contact local service team. Protection cover Protection cover...
- Page 33 Installation CAUTION ! 1. Install the wall mount bracket to the rack system prior to installing the inverter. Do not allow bending of the bracket. See Figure 3-12. 2. When installing the inverter on the rack system, use care not to apply excessive stress/torque as shown in Figure 3-13.
- Page 34 Installation Wall > 33cm [12.99in] > 20cm [7.9in] > 80cm > 5cm [31.5in] [1.97in] Inverter Inverter > 80cm > 80cm [31.5in] [31.5in] height * * Keep the height above the highest water level (flood level) to avoid damage to inverter caused by flood. Figure 3-14: Required mounting clearances CAUTION ! - Failure to comply with above mounting instructions including permitted...
-
Page 35: Accessories
Installation 3.1.4 Accessories Included with the inverter hardware are two sheet metal side shields, which can be used to cover the open ends of the air inlet channel as shown in Figure 3-16, and are intended to minimize nesting in the air channel by wildlife. Two shields and associated screws are included. - Page 36 Installation Name plate cover CAUTION ! - Please check the front and the back of the name plate cover BACK SIDE when installing. Small shade: The side with tape is back side. Large shade: The side with word "BACK SIDE" is back side. - After sticking the name plate cover on the inverter, do not remove it in 1 hour to ensure the stickiness of the tape.
- Page 37 Installation Remove name plate cover CAUTION ! If there is needed to monitoring or setting the display, please follow procedure below. ① Separate the large plate. Start monitoring or using the Loose two screws. ② Pull out the large plate. display.
-
Page 38: Wiring Box Cover
Installation 3.2 Wiring box cover For first time installing/re-installing WB cover, in order to guarantee proper long-term operation of the inverter, procedures in Section 5.1 must be followed. 3.3 Electrical Installation for AC Wiring DANGER : ELECTRICAL HAZARD!! - To avoid shock hazard during cabling, insure any live grid connections are removed from the inverter. -
Page 39: Ac Grid Types And Connections
480V/277V/ 3Ø-4W/Y 3W + EGC 480V/3Ø-3W/∆ (ungrounded) 3W +EGC 3.3.2 Required Protective Devices for M80U / M60U North American electrical codes require a dedicated over-current device such as a circuit breaker in line between the inverter and AC source. Model... -
Page 40: Ac Switch Terminals -Prewire Set-Up
Installation 3.3.4 AC Switch Terminals –Prewire set-up The AC switch terminals utilize cage-clamp design terminals and in order to insure proper connection of wiring, prior to inserting stripped conductors into switch terminals complete the following procedure to make terminals ready for connections. - Page 41 Installation For AL AC wires: To make sure good conductivity, bi-metal adapter must be used in conjunction with aluminum wires. NOTICE Extreme temperature rise at the clamping point If the contact resistance between the aluminum conductor and clamping point is too high, the clamping point can become very hot and even catch fire in extreme cases.
-
Page 42: Ac Wiring For M80/60U
Installation 3.3.5 AC Wiring for M80/60U models _120 Figure 3-19 illustrates the location of the AC conduit entry and connections and AC terminal block: for 120 models. Ensure the AC conductors used are sized to the correct ampacity per NEC or other local code. - Page 43 Installation Grounding screw terminal After inserting conductor, torque terminal screw to 80 lbf-in (9 N• m) Allowable PE conductor size 1~2/0 AWG (35~50mm²) Figure 3-20: Two optional Location of AC terminals and wiring (120 model) (Continued)
-
Page 44: Ac Wiring For M80/60U
Installation 3.3.6 AC Wiring for M80/60U models (With RSD) _121 Refer to Figure 3-17 in Section 3.3 for the procedure to prepare AC conductors for connection to the AC terminals (M80/60U _121 Ensure the AC conductors used are sized to the correct ampacity per NEC or other local code. -
Page 45: Ac Wiring For M80/60U Models (Without Rsd)
Installation 3.3.7 AC Wiring for M80/60U models (Without RSD) _121 Refer to Figure 3-17 in Section 3.3 for the procedure to prepare AC conductors for connection to the AC terminals (M80/60U _121 Ensure the AC conductors used are sized to the correct ampacity per NEC or other local code. -
Page 46: Ac Wiring For M80/60U Models
Installation 3.3.8 AC Wiring for M80/60U models _122 Refer to Figure 3-17 in Section 3.3 for the procedure to prepare AC conductors for connection to the AC terminals (M80/60U _122 Ensure the AC conductors used are sized to the correct ampacity per NEC or other local code. -
Page 47: Electrical Installation For Dc Wiring
Installation 3.4 Electrical Installation for DC Wiring DANGER : ELECTRICAL HAZARD!! - PV array converts sunlight into electric power with high DC voltage and high DC current which can cause dangerous electrical shock hazard! - Use an opaque material to cover the PV array before wiring or cabling. - Ensure the correct polarities are connected when DC cabling is applied. -
Page 48: Dc Wiring Installation For M80/60U _120 Models
Installation 3.4.1 DC Wiring Installation for M80/60U models _120 Please read the following instructions for connecting DC terminals (M80/60U _120 • Ensure the DC conductors used are Cu and sized to the correct ampacity per NEC or other local code •... - Page 49 +07 +08 +07 +08 Figure 3-25: Wiring Box layout for M80/60U _120 M80U version is compatible with 1000V/20A UL listed fuse, however, the _120 designer must be beware of the following requirements: • The max Isc-stc of a connected array (sum of all paralleled strings) cannot exceed the rated Isc limit of the inverter, that is no more than 108A/input or 216A total.
-
Page 50: Dc Wiring Installation For M80/60U
Installation 3.4.2 DC Wiring Installation for M80/60U models _121 Please read the following instructions for DC wiring (M80/60U _121 These models are designed to be utilized with external combiner boxes and are not provisioned with internal DC combining capability. • Specific size of DC conductors must be determined from NEC or other local codes. •... - Page 51 Installation ・Please follow below instruction for wire crimping. ≤ 25mm 0.5 〜 1mm <1mm ・To make sure good wire conduction, bare wire should not exceed the edge of crimping part of lug for more than 1mm. if> 1mm, it might interfere with screw Conductors Terminal Block Figure 3-28: DC terminal lug for M80/60U...
- Page 52 Installation - Allowable conductor size: 1 ~ 3/0 AWG (35 ~ 70mm²) To secure conductor, tighten the terminal screw(M6) to a torque of 52 lbf-in (5.9 N•m). - Allowable PE conductor size: 6 ~ 4 AWG (14 ~ 22mm²) Torque terminal screw to 26 lbf-in (3 N• m) Bottom entry shown using one 2"...
-
Page 53: Dc Wiring Installation For M80/60U
Installation The Tigo RSS Transmitter has a range limit. The entire DC loop for each string, from the positive terminal on the inverter, out through the array, to the negative terminal on the inverter, should be less than 1000 feet (300 meters). Please go to Tigoenergy website for more details. - Page 54 Installation M80/60U _122 IN 1 IN 1 IN 2 IN 2 Fuse Board 1 Fuse Board 2 +01 +02 +03 +04 +05 +06 +07 +08 +09 +01 +02 +03 +04 +05 +06 +07 +08 +09 - 01 - 02 - 03 - 04 - 05 - 06 - 07 - 08 - 09 - 01 - 02 - 03 - 04 - 05 - 06 - 07 - 08 - 09 - 01 - 04...
-
Page 55: Ground Bar Locations
Installation 3.4.4 Ground bar locations Figure 3-33 shows the DC grounding bar locations. The wire gauge of the ground cable: 6AWG ~ 4AWG Torque grounding cables to 26 lbf-in (3 N•m) -120 Model WB -121 Model WB -122 Model WB Figure 3-33: Ground bar locations... -
Page 56: Dc Side Ground Bar For 121/122 Models
Installation 3.4.5 DC side ground bar for 121/122 models After installing the unit, locate the ground bar and associated screws in accessory bag. Be sure to orient the ground bar as shown in Figure 3-34. Torque the mounting screws to: 22 lbf-in (2.5 N•m) The busbar accommodates grounding conductors in the range of 6AWG ~ 4AWG Torque grounding conductors to 26 lbf-in (3 N•m) ②... -
Page 57: Communication Module Connections
Installation 3.5 Communication Module Connections The communication module of M80/60U is shown in Figure 3-35. It provides VCC, RS-485, Rapid shutdown system connection, EPO, and Digital Input terminals for use in various applications. Details for each are presented below. There's a 12VDC source between VCC & GND for use with external device. Rapid Shutdown System Connection Terminal Resistor EPO*1 &... -
Page 58: Accessing The Communication Module
Installation 3.5.1 Accessing the Communication Module The communication module consists of an assembly with a PCB and a plastic carrier. It is located in a slot through the bottom of the wiring box chassis. It is accessed from the bottom exterior of the wiring box. The carrier is secured to the chassis by two self-retaining screws. -
Page 59: Connection
Installation 3.5.2 RS-485 Connection The pin definition for the RS-485 terminal block is shown in Table 3-1. - Pins 1 and 2 provide a 12V /0.5A bus for use with accessories such as R3 Power Monitor. * To avoid nuisance trip of rapid shutdown system (RSS), if 12V AUX power is used to power on transmitter of RSS with AC interlock purpose, do not connect additional load on 12V AUX power. - Page 60 Installation Terminal Resistor 120Ω(1/2W) DATA+ to DATA- Data Format: Baud rate: 19200 RS485/USB Data bits: 8 Stop bit: 1 RS485/RS232 Parity: N/A Figure 3-37: Multiinverter connection illustration Switch 1 Terminal Resistor ON Terminal Resistor OFF Table 3-2: Vcc and Bus Termination switch settings...
-
Page 61: Epo Function & Digital Input
Installation 3.5.3 EPO Function & Digital Input The communication Module has an emergency power off function (EPO), and EPO enable can be found in the Install Settings page. Figure 3-38: EPO function terminal block Once enabled, the EPO function can be used to turn off the inverter via a NO relay contact connected across terminal [V1 &... -
Page 62: Rapid Shutdown System Connection
Installation 3.5.4 Rapid shutdown system connection The M80/60U series provides a terminal to control the rapid shutdown system(RSS) which supports NEC 2017 requirement for the roof-top PV system. This terminal provides a 12V , Max. 1A power in normal condition but the power will turn-off in 2 seconds when the AC grid outage. -
Page 63: On-Site Insulation Test
Installation 3.6 On-site insulation test For customers who want to do on-site insulation test, please make sure: 1. The DC switches are in “OFF” position. 2. Apply one probe to the positions shown in Figure 3-40, the other to the ground. It might cause damages to the inverter if probes are applied to inappropriate positions. -
Page 64: 4 Commissioning
Commissioning 4 Commissioning CAUTION : HOT SURFACES, DO NOT TOUCH! - Use care to avoid hot surfaces when operating the product! - Do not perform any task until the unit cools down or appropriate personal protection gear is worn. 4.1 Display Operation Introduction M80/60 series include a front panel 4x20 character LCD display which includes four programming keys and 2 LEDs (located on the left-hand side of the LCD) that allow visual display of the inverter’s data and status as shown in Figure 4-1. - Page 65 Commissioning Condition Green LED Red LED Countdown FLASH * Power ON Error or Fault Standby or Night time (No DC) Bootloader mode FLASH * * ON 1s / OFF 1s Table 4-1: LED indicator Button Symbol Action Enter Enter a Menu or Confirm a programmed value ▲...
-
Page 66: First Startup
Deutsch IEEE1547.A 480V Français HECO A ► Yes / EXIT EXIT Are you sure to ► Delta prot. set protocol: Sunspec prot. XXXXXXX ► Yes / Are you sure to set Setting ID: ID : 1 AFCI ID = 001 Self Testing . -
Page 67: Home Page
Commissioning 4.2.1 Home Page After completion of First Start and inverter is in normal operation, the LCD will display the homepage screen as shown in Figure 4-3. The user can view information to include output power, inverter status, E-today, date and time. Pressing "any"... -
Page 68: Power Meter
Commissioning 4.3.1 Power meter This page displays voltage, current and power measurements from both the AC and DC side. 4.3.2 String monitoring (M80/60U _122 The string current monitoring function is accessed via the Power Meter menu Four sub-pages are accessed using display keys as shown in Figure 4-4, two pages display string current values for the nine strings of MPPT1 and MPPT2. -
Page 69: Energy Log
Commissioning 4.3.3 Energy Log User can view the inverter’s lifetime energy runtime via Energy Log page. Energy Log Life Energy: Runtime: 7302 Figure 4-5: Energy Log screen 4.3.4 Event Log Event Log display has two sub-pages as noted below and shown in Figure 4-6: •... -
Page 70: Inverter Information
Commissioning 4.3.5 Inverter Information This page allows the user to view static data associated with the inverter to include serial number, installation date, inverter ID (RS-485 address), and firmware version. Additional parameters are accessed via connected menus using the up/dn keys. Programmed settings (e.g., Inverter ID, baud rate) are adjusted using the settings menu. -
Page 71: Install Settings
To enter Install Settings page, users must enter a valid password, which must be obtained from Delta Electronics. There are three sets of password with different permissions: User Level, Installer Level, and Manufacturer Level. The following sub-sections will introduce the parameters settings accessible from the User and Installer level menus of the Install Settings page. -
Page 72: Inverter Id
Commissioning 4.3.7.1 Inverter ID Inverter ID is the RS-485 address which is assigned to the inverter and used when the RS-485 communication system is operating, e.g., connected to a PC or data logger. If several inverters are connected to the RS-485 bus, each must have a distinct Inverter ID. -
Page 73: Grid Settings
Commissioning 4.3.7.4 Grid Settings This menu item allows the installer or an engineer to enable and/or adjust specific "smart inverter" (aka, CA Rule 21 or HECO functionality) grid parameters to include low/high voltage ride-through(L/HVRT), low/high frequency ride-through (L/HFRT), Soft start and ramp rates. Refer to Figure 4-13. Further details of this functionality is provided in Appendix A and B. -
Page 74: Potential Induced Degradation
Commissioning 4.3.7.5 Potential Induced Degradation PID (Potential Induced Degradation) is a phenomenon which puts a high level negative voltage on PV module and make PV module performance low. The default action time of PID is set with 0(it means disable PID function), user can set the time from 0-10 Hours or Auto. -
Page 75: Emergency Power-Off Enable
Delta anti-islanding function is based on the Sandia Frequency Shift algorithm. The default setting depends on grid code (always ON in NA). -
Page 76: Dc Arc Fault Circuit Interrupter (Afci)
Commissioning 4.3.7.10 DC Arc Fault Circuit Interrupter (AFCI) AFCI (Arc Fault Circuit Interrupter) is an advanced circuit breaker that breaks the circuit when it detects a dangerous electric arc in the circuit it protects to prevent electrical fires. The default setting of AFCI is “ON”. ►... -
Page 77: Active / Reactive Power
Commissioning 4.3.8 Active / Reactive power A password is required to enter Active / Reactive Power page. This page includes two kinds of function: active power control and reactive power control. In active power control function, there are 3 control modes: Power Limit, Power vs. -
Page 78: Power Vs. Frequency
Commissioning 4.3.8.2 Power vs. Frequency Inverter will reduce output power when grid frequency rises up if this mode enabled. Users can tune the parameters in Power vs. Frequency page to change the inverter’s behavior. Power Limit Mode ► Power vs. Frequency F start 60.20 Hz ►... -
Page 79: P(V)
Commissioning 4.3.8.3 P(V) When grid voltage rises up to a lock-in voltage(V lock-in) and inverter’s present output power is greater than lock-in power(P lock-in), inverter will reduce the output power and keep it at a certain value(P lock-out) until grid voltage drop back to lock-out voltage(V lock-out) and passing a certain time(T recovery). -
Page 80: Cosphi (P)
Commissioning 4.3.8.5 Cosphi (P) Cosphi (P) is a function that inverter will feed in reactive power when its output active power reach the setting values. When grid voltage reach the lock-in voltage(V lock-in), inverter will enable cosphi (P) function automatically and disabled it when grid voltage reach lock-out voltage(V lock-out). -
Page 81: Constant Q
Commissioning 4.3.8.6 Constant Q Like Constant cosphi function, users can assign a percentage of reactive power in Constant Q page. Constant cosphi Mode ► Cosphi (P) Fix Q Ind 90% ► Constant Q Q(V) EXIT Figure 4-28: Constant Q screens 4.3.8.7 Q(V) Q(V) is a control mode that inverter will provide reactive power according to grid voltage. -
Page 82: Frt (Fault Ride Through)
Commissioning i limit s limit Figure 4-30: Q(V) parameter 4.3.9 FRT (Fault ride through) Some area requests that inverter should keep connected to grid when grid voltage drops suddenly in few seconds. In these areas, users can enable FRT function and adjust the parameters to meet the requirement. General Settings Warning: ►... -
Page 83: 5 Maintenance
Maintenance 5 Maintenance Please check the unit regularly. If there are any impaired or loose parts, please contact your solar installer. Ensure that there are no fallen objects in the path of the heat outlet. WARNING ! - Prior to beginning any maintenance procedures switch AC and DC power off to avoid risk of electrical shock! 5.1 Removing and re-installing the Wiring Box (WB) cover In order to guarantee proper long-term operation of the inverter, the following... -
Page 84: Removing The Wb Cover
Maintenance ATTENTION - Use Hexagon screw driver or other proper tool to untighten WB cover screws. - WB cover screws are captive screw type. Do not disassemble cover screws. 5.1.1 Removing the WB cover • Never attempt to remove the WB cover in rainy damp weather without weather protection around the inverter. -
Page 85: Replacement Of Surge Protection Devices (Spd)
Maintenance WARNING ! If it's necessary to remove the insulator cover of wiring box during Cabling or maintenance, the insulator cover must be put back in to the wiring box before re-install the cover, refer the figure. Insulator cover * Screw torque required for assembling: 7 lbf-in (0.8 N•... - Page 86 Maintenance Surge protection devices (SPD) are designed to protect sensitive circuit elements of the inverter from damage caused by lightning and other electrical transients/surges, as such they are sacrificial components and periodically, may need replacement. The SPDs are located in the inverter wiring box (WB) on both AC and DC input terminals.
- Page 87 Maintenance • Accessing the Wiring Box 1. Switch AC and DC power off and wait until LCD display turns off. 2. To access the wiring box, use procedure found in Section 5.1.1 Do not leave the WB uncovered for long periods of time. •...
- Page 88 Maintenance M80/60U _120 AC SPD DC SPD M80/60U _121 AC SPD DC SPD M80/60U _122 AC SPD DC SPD Figure 5-5: Location of SPD modules inside various WB versions...
- Page 89 Maintenance DC SPDs AC SPDs Figure 5-6: Remove screws as indicated unplug connectors...
-
Page 90: Replace Internal String Fuse
Maintenance 5.3 Replace Internal String Fuse M80/60U and M80/60U models both have a wiring box provisioned _120 _122 with two independent internal string combiners, each associated with one of the two MPPT inputs. The combiners utilize standard 10 mm x 38 mm PV combiner fuses and associated fuse holders. - Page 91 Maintenance The M80/60U wiring box is equipped with 32 DINrail mounted combiner _120 fuses, which support connection of up to 16 strings (eight/MPPT). The fuses are carried within Dead Front Fuse Holders (see Figure 5-7), which are designed to be "Finger Safe", i.e., opening a fuse holder disconnects the fuse at both ends, allowing safe removal by hand.
- Page 92 Maintenance Fuse replacement Procedure Check the combiner fuses if the power generation of inverter is abnormal. 1. Switch AC and DC power off and wait until LCD display turns off 2. To access the wiring box, use procedure found in Section 5.1.1 Use caution: Though the DC switches are off, the fuse holders are energized by the PV array.
- Page 93 Maintenance The M80/60U wiring box is equipped with 36 combiner fuses in “pull-out _122 fuse holders, which support connection of up to 18 strings (9/MPPT). The fuse holders are mounted on two separate PWBs (one/MPPT). The pull-out fuse holders allow safe removal of fuses which are inserted into a carrier. Figure 5-10 shows the location of the combiner fuse holders, and Figure 5-11 provides details to remove a fuse from the -122 WB;...
-
Page 94: Smart Fans Replacement And Filter Cleaning
Maintenance Check the combiner fuses if the power generation of inverter is abnormal using the following procedure: 1. Check “Power meter/string monitoring” page on the LCD display, to determine if any string current measurement is zero, which will most probably indicate a blown fuse. - Page 95 Maintenance Air Outlets / Smart Fans inside PM Air inlet duct, 2 places Figure 5-13: Smart Fans location on Power Module chassis Fan inside WB Figure 5-14: Smart Fan locations inside WB chassis...
- Page 96 Periodic fan and filter cleaning is required to insure long life and reliability. - The time period between cleanings depends on the quality of the environment. - Under normal duty use, Delta recommends smart fans and filters be cleaned every 6 months - For very dusty locations, it may be necessary to clean the fans and filters quarterly or monthly.
-
Page 97: Wiring Box (Wb) Compartment Fan
Maintenance 5.4.1 Wiring Box (WB) compartment fan When used, the WB compartment is provisioned with a single fan module. (See Figure 5-14, 5-16). Procedure to remove WB Compartment Fan (1) To access Remove the two thumb screws shown in Figure 5-16 and store outside the fan cabinet. -
Page 98: Power Module (Pm) Fan Tray
Maintenance 5.4.2 Power Module (PM) Fan Tray The inverter electronics are convection cooled. The primary equipment used for this function consists of a fan tray located in a plenum within the inverter power module. The PM electronics are isolated, and heat is transferred to the plenum airflow via a large heatsink. - Page 99 Maintenance ① * Screw torque required for assembling: 7 lbf-in (0.8N• m) ② * Screw torque required for assembling: 7 lbf-in (0.8N•m) ③ * Screw torque required for assembling: 7 lbf-in (0.8N •m) Figure 5-17: Disassembling fan tray from PM chassis (showing one side only)
-
Page 100: Procedures To Remove Pm Air Inlet Filter
Maintenance 5.4.2.2 Procedures to remove PM air inlet filter Refer to Figure 5-18. Filter can be removed from either side of PM: 1. Unlatch the retaining hook and grasp the filter handle. 2. Carefully pull the filter frame straight out keeping it perpendicular to the side of the PM chassis. -
Page 101: Commissioning
Maintenance 5.6 De-Commissioning When necessary to remove the inverter from active operation for maintenance or replacement, follow the instructions below. DANGER : ELECTRICAL HARZARD!! To avoid serious injury, use follow the procedure - Switch off internal AC switch and then both DC switches to cease inverter operation - Switch off external AC circuit breaker or switch to disconnect the electrical grid from the inverter chassis - Remove array DC from chassis requires opening string level MC4 connectors in order... - Page 102 Maintenance CAUTION : HOT SURFACES, DO NOT TOUCH ! - Use care not to touch hot surfaces if the inverter is just shutting down. - Do not perform any task until the product cool down sufficiently. CAUTION : POSSIBILE INJURY ! The inverter weighs more than 84 kg (185 lb).
-
Page 103: 6 Error Message And Trouble Shooting
If fault continues to appear or if it is listed more than once in the inverter Error log, it may be necessary to call Delta Technical Service Hot Line. A service call checklist with necessary information for a call to the hotline is provided at the end of the Troubleshooting guide. -
Page 104: Warning Codes
Error message and Trouble Shooting Table 6-1B: Error Codes and Messages Message Possible cause Action 1. Modify the solar array setting, and Solar2 1. MPPT 2 input voltage is over make the Voc less than 1000Vdc High 1000Vdc 2. Contact customer service for 2. -
Page 105: Fault Codes
Error message and Trouble Shooting 6.3 Fault Codes Table 6-3A: Fault Codes & Messages Message Possible cause Action 1. Check the utility waveform. Grid connection of inverter need to be Injection 1. Utility waveform is abnormal far away from non-linear load if necessary (F01, F02, 2. - Page 106 Error message and Trouble Shooting Table 6-3B: Fault Codes & Messages Message Possible cause Action 1. Check the input voltage, must >150Vdc 1. Insufficient input power HW DSP 2. Check the auxiliary circuitry inside the 2. Auxiliary power circuitry ADC2 inverter malfunction (F16)
- Page 107 Error message and Trouble Shooting Table 6-3C: Fault Codes & Messages Message Possible cause Action 1. Power line is disconnected 1. Check the power lines inside the inverter HW Con. Fail inside the inverter 2. Contact customer service for (F26) 2.
- Page 108 Error message and Trouble Shooting Table 6-3D: Fault Codes & Messages Message Possible cause Action 1. Test current loop is broken HW CT B Fail Contact customer service for technical 2. CTP4 is defective support (F43) 3. Detection circuit malfunction 1.
-
Page 109: Calling For Help
In order for Delta Hotline personnel to efficiently handle your service request, certain information must be made availble to the service technician. Prior to calling the Delta Service Hotline, the information listed below must be assembled: 6.4.1 Service Call Checklist 1. -
Page 110: 7 Technical Information
Technical Information 7 Technical Information 7.1 Technical of M80U series Table 7-1A: Specifications for M80U Model M80U M80U M80U _120 _121 _122 DC Input Maximum input voltage 1000V Max. Operating voltage range 200 - 1000 V Start voltage > 250 V... - Page 111 Technical Information Table 7-1B: Specifications for M80U Model M80U M80U M80U _120 _121 _122 Efficiency Peak Efficiency 98.8 % CEC Efficiency 98.5 % Euro Efficiency 98.5 % Communications Comm port | Protocol RS-485 | Delta or Sunspec Display 20 x4 line LCD Certifications UL1741 SA UL1741, UL1998, UL1699B, CSA C22.2,...
- Page 112 P/P* P*=80kW 115 % 110 % 105 % 100 % 95 % 90 % 85 % 80 % 600V 710V 75 % 800V 70 % 65 % 60 % 55 % 50 % Figure 7-1: Thermal Derating curve of M80U...
-
Page 113: Technical Of M60U Series
Technical Information 7.2 Technical of M60U series Table 7-2A: Specifications for M60U Model M60U M60U M60U _120 _121 _122 DC Input Maximum input voltage 1000V Max. Operating Voltage Range 200 - 1000 V Start voltage > 250 V range for P 520~800V OUT-RATED 710 V... - Page 114 CEC Efficiency 98.5 % Euro Efficiency 98.5 % Communications Comm port | Protocol RS-485 | Delta or Sunspec Display 20 x4 line LCD Certifications UL1741 SA UL1741, UL1998, UL1699B, CSA C22.2, Safety FCC Pt.15 (Class B), PV Rapid Shutdown System Equipment Interconnection IEEE1547, IEEE 1547.1...
- Page 115 Technical Information P/P* P*=60kW 115 % 110 % 105 % 100 % 95 % 90 % 85 % 80 % 600V 710V 75 % 800V 70 % 65 % 60 % 55 % 50 % Figure 7-2: Thermal Derating curve of M60U...
-
Page 116: Appendix: Grid Support Utility Interactive Inverters
Appendix A: Rule 21 APPENDIX: Grid Support Utility Interactive Inverters The inverter has pre-programmed control presets intended for use in specific geographic areas. They include: • Rule 21 – Preset all required controls to meet the F/VRT specifications that satisfy CA Power Tariff Rule 21 •... -
Page 117: Appendix A-3: Ca R21 Settings - Normal Ramp Rate (Rr) & Soft-Start Ramp Rate (Ss)
Appendix A: Rule 21 Appendix A-3: CA R21 Settings – Normal Ramp Rate (RR) Alias M80U M60U & Soft-Start Ramp Rate (SS) Irated 100A a) Output Current Rating (A) b) Minimum normal ramp-up rate (%Irated /sec) RRnorm_up_min 1.11%/sec c) Maximum normal ramp-up rate (%Irated /sec) RRnorm_up_max 0.4%/sec... -
Page 118: Appendix A-6: Ca R21 Settings - Volt/Var Mode (Q(V))
Appendix A: Rule 21 Appendix A-6: CA R21 Settings – Volt/VAr Mode (Q(V)) Alias M80U M60U 83000VA 66000VA a) Apparent Power Rating (VA) Srated 83000W 66000W b) Output Power Rating (W) Prated c) EUT Input voltage range with function enabled (V) -
Page 119: Appendix A-8: Ca R21 Settings - Volt-Watt (Vw)
Appendix A: Rule 21 Alias Appendix A-8: CA R21 Settings – Volt-Watt (VW) M80U M60U a) Output Power Rating (W) Prated 83000W 66000W [Vmin, Vmax] [249.3V, 304.7V] b) AC voltage range with function enabled (V) Vnom c) Nominal AC voltage (V) -
Page 120: Appendix B: Heco
Appendix B: HECO Appendix B: HECO Appendix B-1: Full Frequency Ride-Through Settings for O’ahu, Hawai’i Island, and Maui (HECO A) System Frequency Minimum Range Ride-Through Maximum Trip Operating Region Operating Mode Default Settings (Hz) of Adjustability Until Time Over-Frequency 2 Permissive Operation No Ride f >... - Page 121 Appendix B: HECO Meter ountry: Ener Insulation: Event Lo 19200 ► Inverter Info . Baud Rate: EXIT O2X16100005W0 3P4W S/N: onnection: 2016 83000W Install: Max . Power: INV I ont A: isable ont B: isable Version Normal Grid Settin ► Active Pwr Settin React Pwr Settin Figure B-1: Procedure to confirm Grid Code via LCD –...
- Page 122 Appendix B: HECO ► Volta e Prote tion . Prote tion onne 6000 P Ram EXIT 332.4 Trip value of OVR2 304.7 Hysteresis voltage of OVR2 0.1S Trip time of OVR2 138.5 Trip value of UVR3 243.7 Hysteresis voltage of UVR3 0.3S Trip time of UVR3 310.2...
-
Page 123: Appendix C: Assembly Note
Appendix C: Assembly Note Appendix C: Assembly Note -All Model ① ③ Location Screw torque Filter 7 lbf-in (0.8N • m) Screw assemblies 7 lbf-in (0.8N • m) 7 lbf-in (0.8N • m) Appendix C-1: Assembly Note for All model... -
Page 124: Appendix C-2: Assembly Note For 120 Model
Appendix C: Assembly Note ⑦ ⑥ ⑩ ⑦ ⑥ 120 Model ⑧ ① ⑤ ④ ⑬ ② ⑨ ⑫ ⑫ ⑭ ⑪ ③ Location Screw torque Conductor cross-section AC switch 31.0 lbf-in (3.5N • m) 1~2/0 AWG (35~50mm²) Communication cover 7.00 lbf-in (0.8N •... -
Page 125: Appendix C-3: Assembly Note For 121 Model (With Rsd)
Appendix C: Assembly Note 121 Model WB ⑦ ⑥ ⑬ ⑦ ⑥ (With RSD) ⑧ ① ⑩ ⑤ ④ ② ⑨ ⑫ ⑫ ⑪ ⑭ ③ Location Screw torque Conductor cross-section AC switch 31.0 lbf-in (3.5N • m) 1~2/0 AWG (35~50mm²) Communication cover 7.00 lbf-in (0.8N •... -
Page 126: Appendix C-4: Assembly Note For 121 Model (Without Rsd)
Appendix C: Assembly Note 121 Model WB ⑦ ⑨ ⑥ ⑬ ⑦ ⑥ (Without RSD) ⑧ ① ⑩ ⑤ ④ ② ⑮ ⑫ ⑫ ⑪ ⑭ ③ Location Screw torque Conductor cross-section AC switch 31.0 lbf-in (3.5N • m) 1~2/0 AWG (35~50mm²) Communication cover 7.00 lbf-in (0.8N •... -
Page 127: Appendix C-5: Assembly Note For 122 Model
Appendix C: Assembly Note ⑦ ⑨ ⑥ ⑩ ⑦ ⑥ 122 Model ⑧ ① ⑤ ④ ② ⑫ ⑫ ⑪ ⑬ ⑪ ⑭ ③ Location Screw torque Conductor cross-section AC switch 31.0 lbf-in (3.5N • m) 1~2/0 AWG (35~50mm²) Communication cover 7.00 lbf-in (0.8N •... - Page 130 Delta Products Corporation 15700 Don Julian Road City of Industry, CA 91745 Sales Email: sales.usa@solar-inverter.com Support Email: support.usa@solar-inverter.com Sales Hotline: 1-877-440-5851 or 1-626-369-8021 Fax: 1-626-709-5896 Support Hotline: 1-877-442-4832 5013274902 Support (Intl.) : 1.626.369.8019 Version 05201202 Mondays to Fridays from 8:30 am to 5 pm (apart from Holidays)
Need help?
Do you have a question about the M80U and is the answer not in the manual?
Questions and answers