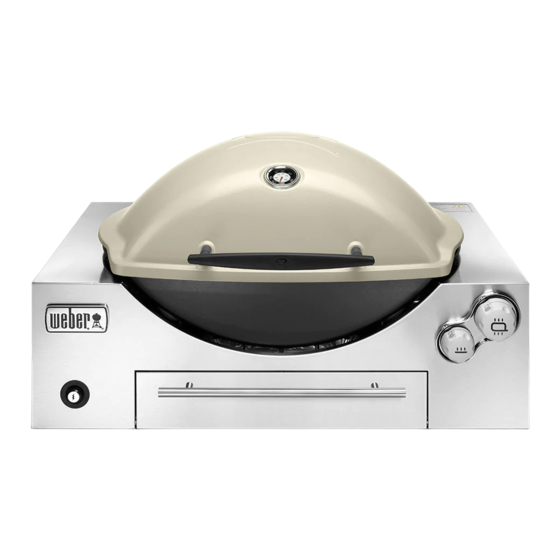
Weber 3600 Installation Manual
Universal liquefied petroleum gas
Hide thumbs
Also See for 3600:
- Installation manual (24 pages) ,
- Owner's manual (20 pages) ,
- Manual (36 pages)
Table of Contents
Advertisement
Quick Links
BARBECUE INSTALLATION GUIDE
UNIVERSAL LIQUEFIED PETROLEUM GAS
Thank you for purchasing a Weber
Now take a few minutes and protect it by registering your product online at www.weber.com.
NOTICE TO
INSTALLER
T
hese instructions must
be left with the owner, who
should keep them for future
use.
Contact your local
municipality for building
codes regulating outdoor gas
barbecue installations.
WE RECOMMEND THAT THIS
INSTALLATION BE DONE BY
A PROFESSIONAL.
barbecue.
®
IMPORTANT!
If you are installing this barbecue into an existing structure, you must closely
observe the following information from the "Planning Ahead" section of this
manual:
1) "Ventilation"
2) "Cutout Dimensions and Tolerances"
3) "Clearances from Combustible Materials"
4) "Lid Clearances"
5) "Planning the LPG Cylinder Compartment"
If your existing structure does not meet specified criteria outlined in this
manual, adjustments must be made before installing barbecue.
®
57991
AU - Australia
NZ - New Zealand
04/01/15
Advertisement
Table of Contents

Related Manuals for Weber 3600


Summary of Contents for Weber 3600
- Page 1 BARBECUE INSTALLATION GUIDE UNIVERSAL LIQUEFIED PETROLEUM GAS Thank you for purchasing a Weber barbecue. ® Now take a few minutes and protect it by registering your product online at www.weber.com. ® NOTICE TO INSTALLER hese instructions must be left with the owner, who...
-
Page 2: Warnings
See instructions in this Owner’s Guide for correct procedures. m Do not operate the Weber gas barbecue ® if there is a gas leak present. m Do not use a flame to check for gas leaks. -
Page 3: Table Of Contents
TO THE LPG CYLINDER........22 CHECKING FOR GAS LEAKS ....... . 22 WWW.WEBER.COM ®... -
Page 4: Parts List
......2 .......1 ......4 ........1 ......2 ......1 ........2 ........1 ........2 ........1 After unpacking your barbecue, ensure all parts are supplied. The barbecues illustrated in this Owner’s Guide may vary slightly from the model purchased. WWW.WEBER.COM ®... -
Page 5: Planning Ahead
25% of total wall area 30% or more in total of the remaining wall area is open and unrestricted Open side at least 30% or more in total of the remaining 25% of total wall area wall area is open and unrestricted WWW.WEBER.COM ®... -
Page 6: Recommended Gas Supply Location
At least one vent mounted high and at least one vent mounted low. one mounted low, to provide cross ventilation in the event of a gas leak. m WARNING: Keep the ventilation openings of the enclosure free and clear of debris. WWW.WEBER.COM ®... -
Page 7: Barbecue Dimensions
") Mounting flange BARBECUE CUTOUT DIMENSIONS CUTOUT DIMENSIONS AND TOLERANCES The Q 3600™ built-in gas barbecue unit should be on site ® before construction begins. All dimensions specified in this manual are to finished surfaces of your built-in structure. It is important to note that if your countertop has an overhang, a 25 mm (1") wide notch is required on both... -
Page 8: Required Clearances From Combustible Materials
NOTE: If you have questions on which materials are considered noncombustible, contact your local building materials supplier or fire department. 3600 cookbox ® ™ 457 mm (18") from edge of cookbox to any combustible surface... -
Page 9: Planning The Lpg Cylinder Compartment
Use of any other hose and regulator assembly could be dangerous, and may not provide adequate gas supply to the 3600™ built-in gas barbecue, and could ® result in a fire or an explosion causing serious bodily injury or death and damage to property. -
Page 10: Construction Details
25 mm (1") wide notch on both sides of the leading edge of the countertop. Tolerance should only be up to an additional 3 mm ( ⁄ "). Suggested gas supply compartment access. Alternate gas supply compartment access. The countertop must be level from front to back and side to side for proper drainage. WWW.WEBER.COM ®... - Page 11 25 mm (1") wide notch on both sides of the leading edge of the countertop. Tolerance should only be up to an additional 3 mm ( ⁄ "). Suggested gas supply compartment access. Alternate gas supply compartment access. The countertop must be level from front to back and side to side for proper drainage. WWW.WEBER.COM ®...
-
Page 12: Preparing To Install
PREPARING YOUR BARBECUE FOR A LEAK CHECK Place the Q 3600 built-in gas barbecue assembly on ® ™ a table or other stable raised surface. Place the LPG cylinder on the ground next to the table. This will enable... -
Page 13: Connecting The Hose & Regulator To The Lpg Cylinder
Your barbecue is now ready for a leak check. Proceed to “CHECKING FOR GAS LEAKS.” POL CONNECTION Valve handwheel – close clockwise Hose Regulator POL connection – tighten anticlockwise The minimum LPG cylinder capacity for this barbecue is 9 kg. Regulator vent hole - point hole downward WWW.WEBER.COM ®... -
Page 14: Checking For Gas Leaks
OPERATE THE BARBECUE. Contact the Customer Service Representative in your area using the contact information on our web site. Log onto www.weber.com. C) When leak check is complete, turn gas supply off at the source and rinse connections with water. -
Page 15: Reassembly For Permanent Installation
B) Carefully place the cookbox back into the built-in cabinet making sure not to pinch or crush the igniter wires (5). C) Slide cookbox retainers back in (6) and replace thumb screws (7). WWW.WEBER.COM ®... - Page 16 CAUTION: The burner tube openings (16) must be positioned properly over the valve orifices (17). m WARNING: You should check for gas leaks every time you disconnect and reconnect a gas fitting. Refer to “CHECKING FOR GAS LEAKS.” WWW.WEBER.COM ®...
-
Page 17: Installation
L) Seal the gap between the cabinet and the countertop from moisture. Apply clear high-temp silicone around the edge of the cabinet where it meets the countertop surface (8). IMPORTANT: Use care not to twist or kink gas line when test fitting the barbecue. WWW.WEBER.COM ®... -
Page 18: Final Assembly
FINAL ASSEMBLY WWW.WEBER.COM ®... - Page 19 FINAL ASSEMBLY WWW.WEBER.COM ®...
- Page 20 FINAL ASSEMBLY WWW.WEBER.COM ®...
- Page 21 FINAL ASSEMBLY WWW.WEBER.COM ®...
-
Page 22: Final Gas Supply Connection
OPERATE THE BARBECUE. Contact the Customer Service Representative in your area using the contact information on our web site. Log onto www.weber.com. C) When leak checking is complete, turn gas supply off at the source and rinse connections with water. - Page 23 WWW.WEBER.COM ®...
- Page 24 ATTENTION: This product has been safety tested and is only certified for use in a specific country. Refer to country designation located on outer carton. These parts may be gas carrying or gas burning components. Please contact Weber-Stephen Products LLC Customer Service Department for genuine Weber-Stephen Products LLC replacement part(s) information.
Need help?
Do you have a question about the 3600 and is the answer not in the manual?
Questions and answers