Weber GENESIS SP-E-335 Owner's Manual
Hide thumbs
Also See for GENESIS SP-E-335:
- Assembly manual (172 pages) ,
- Owner's manual (28 pages) ,
- Owner's manual (9 pages)
Table of Contents
Advertisement
E-335 • S-335 • SE-S-335 • SP-E-335
E-435 • S-435 • SL-S-435
LP Owner's Manual
REGISTER TODAY
Register your gas grill and receive special content
to make you the ultimate backyard hero.
Scan the QR Code or register online at weber.registria.com
Need help? Visit photoregister.com/help or text help to 71403
Keep this Owner's Manual for future reference, thoroughly read through it, and
if you have any questions please contact us today.
52981
101021
enUS
Advertisement
Table of Contents

Related Manuals for Weber GENESIS SP-E-335


Summary of Contents for Weber GENESIS SP-E-335
- Page 1 LP Owner’s Manual REGISTER TODAY Register your gas grill and receive special content to make you the ultimate backyard hero. Scan the QR Code or register online at weber.registria.com Need help? Visit photoregister.com/help or text help to 71403 52981 101021 Keep this Owner’s Manual for future reference, thoroughly read through it, and...
-
Page 2: Important Safety Information
Important Installation and Assembly Storage and/or Nonuse m DANGER: This grill is not intended to be installed in m WARNING: Turn off the gas supply at the gas Safety Information or on recreational vehicles or boats. cylinder (tank) after use. m WARNING: Do not use this grill unless all parts m WARNING: LP tanks must be stored outdoors out of DANGER, WARNING, and CAUTION are in place and the grill was properly assembled... -
Page 3: Table Of Contents
The Weber Promise grill, so please take just a couple of minutes to register your grill. When you sign up for a WEBER-ID as part of your registration, we will deliver special grill- Product Features related content just for you to enjoy. -
Page 4: The Weber Promise
The WEBER Promise At WEBER, we pride ourselves on two things: making grills that last and providing a lifetime of excellent customer service. Thank you for purchasing a WEBER product. Weber-Stephen The use and/or installation of parts on your WEBER product Products LLC, 1415 S. -
Page 5: Genesis Features
PERFORMANCE GRILLING The high performance grilling system sets the standard in the world of gas grilling, and lands Weber in a class of its own. This powerful grilling system is based on over 65 years of grilling experience, culinary expertise, and most importantly, the wants and needs of the people who matter most –... -
Page 6: Important Information About Lp Gas
• Replacement regulator and hose assemblies must be as specified by Weber-Stephen Products LLC (UL-listed Type 1 (CGA 791) tank connection device as described in the latest edition of ANSI Z21.81). - Page 7 LP Tank Installation Installation Location The tank is hung onto the tank scale which is located inside the cabinet. The shape of the collar assembly (the metal protective ring around the tank valve) determines one of two directions in which the tank will correctly hang on the tank scale (A).
- Page 8 The fuel system in your grill features factory- made connections that have been thoroughly checked for gas leaks and the burners have been flame-tested. WEBER recommends performing a thorough leak check after assembly, as well as annually. The following fittings should be tested: •...
-
Page 9: Refilling Or Replacing An Lp Tank
Refilling or Replacing an LP Tank How Much Fuel is in the Tank? The tank scale indicates the amount of fuel in a standard 20 pound (9.07 kg) tank once the tank is hung from the scale. The fuel level is checked by viewing the red level indicator arrow on the front of the grill, adjacent to the door. -
Page 10: The Very First Time You Grill
WARNING: Grill brushes should be checked for loose bristles and excessive wear on a regular basis. Replace brush if any loose bristles are found on cooking grates or brush. WEBER recommends purchasing a new stainless steel bristle grill brush at the beginning of every spring. -
Page 11: Igniting The Grill
Igniting the Grill Using the Electronic Ignition System to Ignite the Grill Each control knob operates an individual burner, and each burner ignites independently. Ignite the burners starting from left to right. All burners should be lit for preheating, however, all burners do not have to be lit while grilling. -
Page 12: Using The Sear Zone
Using the sear zone Searing is a direct grilling technique used on meats, such as steak, poultry parts, fish and chops. Searing browns the surface of the food at a high temperature. By searing both sides of the meat, you caramelize the food surface, creating a more desirable flavor. -
Page 13: Igniting The Side Burner
Igniting the Side Burner Using the Electronic Ignition to Ignite the Side Burner If one or more of the main burners on your grill are already lit and you would like to ignite the side burner, skip to step 3. If none of the main burners are lit and you are only using the side burner, start with step 1. -
Page 14: The Flame - Direct Or Indirect
The Flame - Direct or Indirect HIGH MEDIUM DIRECT HEAT INDIRECT HEAT SETUP SETUP Use the direct method for small, tender pieces of food that take less than Use the indirect method for larger cuts of meat that require 20 minutes or 20 minutes to cook, such as: hamburgers, steaks, chops, kabobs, boneless more of grilling time, or for foods so delicate that direct exposure to the heat chicken pieces, fish fillets, shellfish, and sliced vegetables. -
Page 15: Grilling Do's And Don'ts
Frame. Remove the right-hand cooking grate. Place the Frame on the right-hand side of the cookbox for the widest range of heat control (A). The Spacer included with your grill is used only when cooking with the WEBER CRAFTED Outdoor Kitchen Collection (B). -
Page 16: Real Smoke Flavor
FLAVORIZER BARS, near the front of the grill, making sure only the narrow end with the WEBER logo will be directly over a lit burner (C). This is the end where the wood chips ignite first. The main body of the smoker box aligns... -
Page 17: Extra On The Side
The side storage area (A) is ideal for storing outside of the grill. Additional hooks on the inside of accessories and grillware. the cabinet store the WEBER CRAFTED spacer grate, Adjustable condiment basket keeps smaller items which can be used with WEBER CRAFTED Outdoor close at hand. -
Page 18: Cleaning And Maintenance
Cleaning and Maintenance Cleaning the Inside of the Grill Over time, the performance of your grill can diminish if it has not been maintained properly. Low temperatures, uneven heat, and food sticking to cooking grates are all signs that cleaning and maintenance are overdue. - Page 19 MEAL-TO- MEAL MAINTENANCE. Cleaning the Outside of the Grill The outside of your grill may include stainless steel, porcelain-enameled, and plastic surfaces. WEBER recommends the following methods based on the surface type. Cleaning Stainless Steel Surfaces...
- Page 20 Follow the instructions for “Checking the Components of the Electronic Ignition System”. 9) Replace the matchstick holder by hanging underneath left side table (B). REPLACEMENT PARTS To obtain replacement parts, contact the local retailer in your area or log onto weber.com.
- Page 21 Weber-Stephen Products LLC, Customer Service Department. WARNING: Failure to use genuine Weber- Stephen parts for any repair or replacement will void all warranty protection. CAUTION: The burner tube openings must be...
- Page 22 4) Line up graphic indicators (C) on the sleeve and handle as you reinstall the sleeve. Tighten cap. NOTE: Periodically wipe the lenses with a damp cloth to keep the lights illuminating brightly. CALL CUSTOMER SERVICE If you are still experiencing any problems, contact the Customer Service Representative in your area using the contact information on weber.com.
- Page 23 Checking the Components of the Checking the Wires There are two potential trouble spots that need to be Electronic Ignition System checked: When pressing the ignition button you should hear a 1) Check that the ignition wires are connected ticking sound. If you cannot hear the ticking sound, securely to the terminals on the ignition button check the battery, then check the wires.
- Page 24 Grilling Guide Type Thickness/Weight Approximate Total Grill Time RED MEAT ¾ inch (19 mm) thick 4 to 6 minutes direct high heat Steak: New York strip, porterhouse, 1 inch (25 mm) thick 6 to 8 minutes direct high heat rib-eye, T-bone, and filet mignon (tenderloin) 14 to 18 minutes sear 6 to 8 minutes direct high heat, 2 inches (5 cm) thick...
- Page 25 GENESIS E-335 • S-335 GENESIS SE-S-335...
- Page 26 GENESIS E-435 • S-435 GENESIS - E/S-435 LP - US 063021...
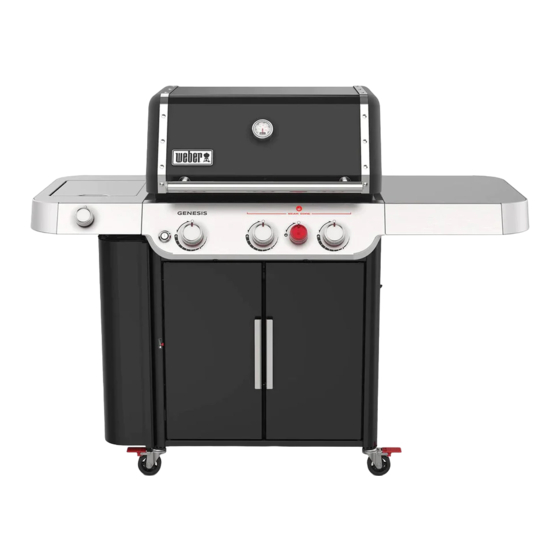
- Page 27 GENESIS SP-E-335 GENESIS SL-S-435...
- Page 28 U.S.: Canada: Mexico: 1-800-446-1071 1-800-446-1071 01 800 0093237 © 2021 Designed and engineered by Weber-Stephen Products LLC, 1415 S. Roselle Road, Palatine, Illinois 60067 USA.
Need help?
Do you have a question about the GENESIS SP-E-335 and is the answer not in the manual?
Questions and answers