Chef's Choice Ceramic + Steel 700 Instructions Manual
Diamond hone knife sharpener
Hide thumbs
Also See for Ceramic + Steel 700:
- Instructions manual (32 pages) ,
- Instructions manual (48 pages) ,
- Instructions manual (64 pages)
Advertisement
Available languages
Available languages
Quick Links
Download this manual
See also:
Instruction Manual
INSTRUCTIONS
MODEL 700
®
Ceramic + Steel Diamond Hone
Knife Sharpener
GB
HU
Read these instructions before use.
It is essential that you follow these
instructions to achieve optimum results.
© 2017 EdgeCraft Corp.
Advertisement

Related Manuals for Chef's Choice Ceramic + Steel 700


Summary of Contents for Chef's Choice Ceramic + Steel 700
- Page 1 INSTRUCTIONS MODEL 700 ® Ceramic + Steel Diamond Hone Knife Sharpener Read these instructions before use. It is essential that you follow these instructions to achieve optimum results. © 2017 EdgeCraft Corp.
-
Page 2: Important Safeguards
IMPORTANT SAFEGUARDS When using electrical appliances, basic safety precautions should always be followed including the following: 1. Read all instructions. Every user should read this manual. ® 2. To protect against electrical hazards, do not immerse the Chef’sChoice Ceramic + Steel Model 700 sharpener in water or other liquid. ®... - Page 3 YOU MADE AN EXCELLENT CHOICE ® Congratulations! As an owner of the highly versatile Chef’sChoice Ceramic + Steel Model 700 you will appreciate how easy it is to maintain all of your Ceramic and Steel knives in factory sharp condition. A highly precise guide system is provided to position each style knife automatically at the optimum sharpening angle as customized diamond abrasive disks quickly restore a fresh edge.The ®...
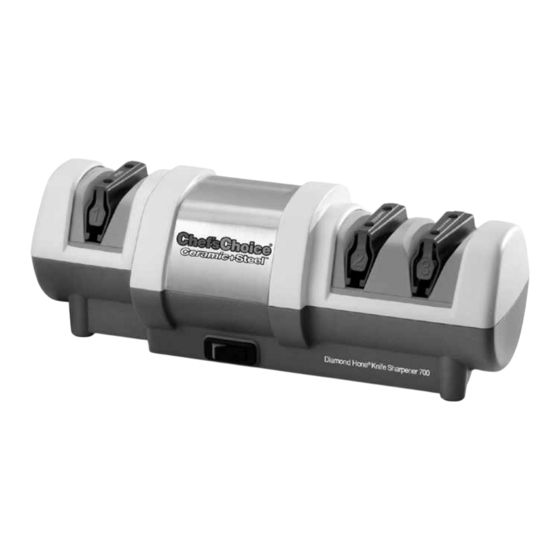
- Page 4 GETTING ACQUAINTED WITH THE MODEL 700 SHARPENER The Model 700 (Figure 1) is a unique sharpener with Stage 1 Steel designed exclusively to sharpen steel knives and the Stage 2 Ceramic designed primarily to sharpen Ceramic ® Knives. Stage 3 Polish/Finish contains the proprietary Chef’sChoice ultrafine diamond abrasive disks designed for both ceramic and steel blades to create a microscopic bevel along the edge and to polish it to astonishing sharpness.
- Page 5 Periodically, the swarf (metal and ceramic dust) created during sharpening needs to be cleaned out. Please see “Cleaning the Sharpener” on page 13. Never operate the sharpener from the back side. Use just enough downward pressure when sharpening to ensure uniform and consistent contact of the blade edge with the abrasive disks on each stroke (see Suggestions, page 12.) Additional pressure is unnecessary and will not speed the sharpening process.
- Page 6 SHARPENING THE CERAMIC KNIFE Ceramic knives will have each of their edge facets sharpened at the standard 15 degrees to create a total edge angle of 30º. Use only Stages 2 and 3. SHARPENING THE EDGE IN STAGE 2 CERAMIC Turn ON the power and pull the ceramic blade thru the left slot of Stage 2 Ceramic (Figure 5), then thru the adjacent right slot of Stage 2.
- Page 7 alternating pairs of pulls and then testing for sharpness. If the knife is still not sufficiently sharp, try another 2-3 more pairs of alternating pulls. The knife should be paper-cutting sharp. Ceramic knives are inherently more brittle at their edge than conventional metal knives. This final Stage 3 with its unique diamond abrasive composition is critical to obtain razor sharp ceramic knives.
- Page 8 DETECTING THE BURR To confirm the presence of a burr (see Figure 9) move your forefinger carefully across the edge in the direction shown. Do not move your finger along the edge – to avoid cutting your finger. If the last pull was in the right slot, the burr will appear only on the right side of the blade as you normally hold it and vice versa.
- Page 9 magnifier. The back face is ground flat at the factory or more commonly it is slightly hollow ground to ensure that an effective microfacet can be formed there as part of the cutting edge. Because of the lack of standardization, commonly, the manual approach is used to sharpen ®...
- Page 10 POLISHING/FINISHING THE FINAL EDGE ON TRADITIONAL JAPANESE BLADE IN STAGE 3 (RIGHT HANDED BLADES) a. Make two to three (2-3) slow pulls, 3-4 seconds each, only in the left slot of Stage 3 Polish/Finish and then proceed to remove the burr in step below. b.
- Page 11 SHARPENING SERRATED (STEEL) KNIFE Serrated steel blades are similar to saw blades with scalloped depressions and a series of pointed teeth. In normal use the pointed teeth do most of the cutting. ® Serrated blades of all types can be sharpened in the Chef’sChoice Ceramic + Steel Model 700.
- Page 12 unnecessarily remove too much of the abrasive surface – wearing the disks prematurely. If that should occur, factory replacement of the disks will become necessary. If you clean your knives regularly before sharpening you will likely need to clean or dress the Stage 3 disks no more than once a year.
-
Page 13: Normal Maintenance
the tip of the choil may be sharp!) Your finger can act as a “stop” and prevent you from inserting the blade so far that the choil area will catch on the front stop-bar of the sharpener as you withdraw the blade. A little practice will help you perfect this technique. As you insert the blade let your finger slide down the front of the sharpener. - Page 14 adhered to a magnet attached to the inside of that cover. Simply rub off or brush off accumulated filings from the magnet with a paper towel or tooth brush and reinsert the cover in the opening. If larger amounts of metal or other dust have been crated you can shake out any remaining dust through the bottom opening when the cover is removed.
- Page 15 SERVICE In the event post-warranty service is needed, return your sharpener to the EdgeCraft factory where the cost of repair can be estimated before the repair is undertaken. Outside the USA, contact your retailer or national distributor. Please include your return address, daytime telephone number and a brief description of the problem or damage on a separate sheet inside the box.
- Page 16 ® EdgeCraft Corporation 825 Southwood Road, Avondale, PA 19311 U.S.A. Customer Service (800) 342-3255 or 610-268-0500 www.chefschoice.com Assembled in the U.S.A. This product may be covered by one or more EdgeCraft patents and/or patents pending as marked on the product. ®...
- Page 17 INSTRUCTIONS MODEL 700 ® Kerámia + acél gyémántköves késélező Olvassa el ezeket az utasításokat, mielőtt használná a készüléket. Alapvető fontosságú, hogy kövesse ezeket az utasításokat az optimális eredmények elérése érdekében. © 2017 EdgeCraft Corp.
- Page 18 FOTOS BIZTONSÁGI UTASÍTÁSOK Amikor elektromos készülékeket használ, mindig alapvető biztonsági intézkedéseket kell betartania, beleértve az alábbiakat: 1. Olvassa el az összes utasítást. Minden használónak el kell olvasnia ezt a használati utasítást. 2. Az elektromos veszélyekkel szembeni védekezés miatt ne merítse a Kerámia + acél ®...
- Page 19 JÓL VÁLASZTOTT Gratulálunk! A sokoldalú Chef’sChoice Kerámia + acél gyémántköves ® késélező tulajdonosaként értékelni fogja, hogy milyen egyszerű minden kerámia és acél kés gyári élességének fenntartása. Rendkívül precíz szögvezető rendszer biztosítja azt, hogy minden típusú kést automatikusan a megfelelő szögbe pozícionáljon, amikor a testreszabott gyémánt korongok gyorsan ®...
- Page 20 ISMERKEDÉS AZ M700-AS ÉLEZŐVEL Az M700-as modell (1. ábra) egy egyedi élező. Az 1. Acélélező fokozatot kizárólag az acél késekhez tervezték. A 2. Kerámiaélező fokozatot pedig kizárólag a kerámia késekhez alakították ® ki. A harmadik fokozat tartalmazza az egyedülálló Chef’sChoice ultrafinom csiszolókorongokat, amely mikroszkopikus éleket alakít ki a pengén, és megdöbbentően élesre csiszolja azokat.
- Page 21 Rendszeresen le kell tisztítani az élezés során keletkezett fém és kerámia port. „Az élező tisztí- tása” részt a 13. oldalon találja. Sose működtesse az élezőt a hátsó oldaláról. Élezéskor a megfelelő erősségű lefelé nyomást alkalmazza, amely biztosítja, hogy a pengék éle minden egyes húzásnál egyforma és állandó kapcsolatban legyen a csiszoló...
- Page 22 A KERÁMIA KÉS ÉLEZÉSE A kerámia kések mindkét oldala 15 fokban élezi meg a teljes 30 fokos élszögért. A 2. és 3. fázis használata ÉLEZÉS A 2. KERÁMIAÉLEZŐ FÁZISBAN Kapcsolja be az élezőt az ON gombbal és húzza át a kerámia pengét a 2. Kerámiaélező fokozat bal nyílásában (5.
- Page 23 Ha a kés nem elég éles, 2-3 húzást végezzen el vele. A késnek már olyan élesnek kell lennie, hogy elvágja a papírt. A kerámia kések kialakításuknál fogva törékenyebbek a hagyományos acél késeknél. A 3. fázisban az egyedülálló gyémánt korongok használata elengedhetetlen a borotvaéles él kialakításához.
- Page 24 A SORJA ÉRZÉKELÉSE Hogy megbizonyosodjon a sorja jelenlétéről (lásd 9. ábra), óvatosan húzza végig a mutatóujját a pengén, az ábrán mutatott irányban. Ne húzza az ujját az élen, nehogy elvágja azt. Ha az utolsó húzás a jobb nyílásban történt, akkor a sorja csak a penge jobb oldalán alakul ki – ha a szokásos módon tartja a kést - és fordítva.
- Page 25 gyakrabban kissé homorú, hogy hatékony mikroélt lehessen kialakítani a vágóél részeként. Mivel nincs sztenderdizálás, Ázsiában ezeket a késeket gyakran kézi módszerrel élezik. Következésképpen ezen kések élezése nehéz, munka- és időigényes. A Chef’sChoice Kerámia + acél gyémántköves ® késélezőt úgy tervezték, hogy gyakorlatilag minden tradicionális ázsiai pengét meg tud élezni, és gyári minőségű...
- Page 26 A TRADICIONÁLIS JAPÁN PENGÉK VÉGSŐ ÉLÉNEK POLÍROZÁSA/FNYEZÉSE A 3. FÁZISBAN (JOBB OLDALAS PENGÉK ESETÉN) A) Végezzen 2-3 lassú 3-4 mp/3 cm-es húzást, csak a 3. fázis bal oldali nyílásában és utána távolítsa el a sorját a lenti B) lépésnek megfelelően. B) Végezzen egy szabályszerű...
- Page 27 első szakaszban a kezdeti élezés több időt vehet igénybe, mint várnánk, de az újraélezés már normális lesz. A FOGAZOTT (ACÉL) PENGÉK ÉLEZÉSÉNEK FOLYAMATA A fogazott pengék hasonlóak a fűrész éléhez, cakkozott bemélyedésekkel és csúcsos fogak sorozatával. Normál esetben a kis csúcsok végzik a vágást. A Chef’sChoice Kerámia + acél gyémántköves ®...
- Page 28 Ezt a tisztító/helyreállító folyamatot CSAK akkor használja, ha a 3. fokozat fehér korongjai jelentősen elsötétedtek, vagy ha a 3. fokozatban a fényezés/polírozás nem megfelelő. Ezen eszköz használata eltüntet minden anyagot a 3. fokozat lemezeinek felületéről, így ha túl- zottan sokat használja, akkor szükségtelenül túl sokat fog eltávolítani az élről és így a korong idő előtt tönkremegy.
- Page 29 6. Csak lefelé irányuló mozgást végezzen az élezés során – olyan erővel, amely biztos kapcsolatot eredményez a csiszoló koronggal. 7. Ha a késének van egy nagy bemélyedése a hüvelykujj megtartásáért (ujjtartó), akkor hasznos lehet, ha a mutatóujját az ujjtartóra vagy mögé teszi (lásd 16. ábra), amikor a pengét beilleszti az élezőbe.
- Page 30 Egyszerűen törölje le vagy távolítsa el a mágnesről az összegyűlt darabkákat egy papírtörlővel vagy fogkefével és helyezze vissza a fedőt a nyílásra. Ha nagyobb mennyiségű fémdarabkák vagy por gyűlt össze, akkor ki tudja rázni a maradék port az alsó nyíláson át, ha leveszi a fedőjét. Tisztítás után helyezze vissza a fedőt a mágnessel együtt a helyére.
- Page 31 KÉT ÉV GARANCIA A gyártási és anyaghibáknak tulajdonítható meghibásodások vonatkozásában a vásárlás napjától számítva 24 hónapos gyártói garanciát vállalunk. A garancia nem terjed ki a nem megfelelő kezelésből és használatból eredő károkra, valamint az olyan hibákra, amelyek csak csekély mértékben befolyásolják a készülék működését vagy értékét. Továbbá, a garanciális jogok nem vonatkoznak a szállítási sérülésekre, kivéve, ha ezek a mi hibánkból következtek be.
- Page 32 ® EdgeCraft Corporation 825 Southwood Road, Avondale, PA 19311 U.S.A. Customer Service (800) 342-3255 or 610-268-0500 www.chefschoice.com Assembled in the U.S.A. This product may be covered by one or more EdgeCraft patents and/or patents pending as marked on the product. ®...
Need help?
Do you have a question about the Ceramic + Steel 700 and is the answer not in the manual?
Questions and answers