Table of Contents
Advertisement
Quick Links
Quick Installation Guide
Read this manual carefully before you use the product and keep it handy for future reference. For safe and correct use, please be sure to read "Safety Information" before using the machine.
Optimum Environmental Conditions
Where to Put the Printer
Permissible and recommended temperature and
humidity ranges are as follows:
The printer's location should be carefully chosen because
environmental conditions greatly affect its performance.
Warning
• The supplied power cord is for use with this
equipment only. Do not use with other appliances.
Doing so may result in fire, electric shock, or injury.
• Connect the machine to the power source specified in
"Safety Information" and do not use any other power
sources. Connect the power cord directly to a
wall outlet and do not use an extension cord. Power
sources not specified in "Safety Information" and
extension cords are electric shock or fire hazards.
• Power cords that are damaged, broken, modified,
trapped under heavy objects, pulled hard, or bent
severely are electric shock and fire hazards.
Caution
• Make sure the room where you are using the machine
is well ventilated and spacious. Good ventilation is
especially important when the machine is used heavily.
• Place the machine on a strong and level surface.
• White area: Permissible Range
Otherwise, it might fall and injure someone.
• Blue area: Recomemended Range
• Keep the machine in an area that is within
optimum environmental conditions.
Operating the machine in an environment that is
outside the recommended ranges of humidity and
• The machine must be level within 5 mm, 0.2˝ from
temperature can cause an electrical fire hazard. Keep
both front to rear and left to right.
the area around the socket free of dust. Accumulated
• To avoid possible build-up of ozone, locate this
dust can become an electrical fire hazard.
machine in a large well ventilated room that has an
• It is dangerous to handle the plug with wet hands.
air turnover of more than 30 m
Doing this may result in receiving an electric shock.
• When you use this machine for a long time in a
confined space without good ventilation, you may
detect a smell. To keep the workplace comfortable,
were commend that you keep it well ventilated.
Do not use the printer in the following environments:
Power Source
• Areas exposed to direct sunlight or strong light
Connect the power cord to a power source of the
• Dusty areas
following specification:
• Areas with corrosive gases
• Areas that are excessively cold, hot, or humid
• Locations near air conditioners or humidifiers
•120 V, 60 Hz, 12 A or more
• Locations near other electronic equipment
• Locations subject to frequent strong vibration
Space Required for Installation
Machine Stand or Table
Leave enough space around the printer to operate it
The machine stand or table must able to support at least
freely. The recommended minimum space is as follows:
210 pounds. Not using a stand or table that can support
the machine weight can cause permanent damage and
will affect normal printing operations.
: 75.0 cm (29.6 inches) or more
: 10.0 cm (4.0 inches) or more
: 10.0 cm (4.0 inches) or more
: 55.0 cm (21.7 inches) or more
: 67.0 cm (26.4 inches) or more
: 67.0 cm (26.4 inches) or more
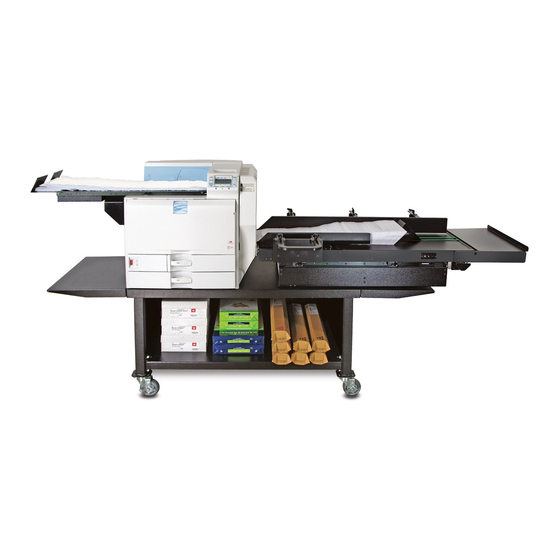
Checking the Included Items
Verify the items that come with the printer. Make sure
that you find all the items listed below.
Note that some of the items are in tray 1. Pull out tray1,
and remove the red tag on the tray. Take out the items
inside tray 1.
Manuals and CD-ROMs
CD-ROM "Manuals"
Ferrite Core
/hr/person.
3
Power cord
Toner: Black (K), Magenta (M), Cyan (C),
Yellow (Y)
Additional Documentation
Paper Feed Unit Labels
• This package does not include an interface cable.
Purchase one as necessary to connect to the printer.
Holding the left and right side grips,
Unpacking
carefully open the front cover.
To protect it from shock and vibration during transit,
this printer comes packaged in cushioning foam and
secured with tape. Remove these protective materials
after bringing the machine to where it will be installed.
Caution
• When moving the machine, hold the handles at both
sides, and lift the printer slowly. Lifting it carelessly
or dropping it may cause an injury.
• Place no objects on the front or inner cover.
Turn the two green levers counterclock-
wise.
Pull out the handle from the right side of
the printer
Pulling the handle, slowly open the inner
cover.
Lift the printer using the side handles and
carefully place on a stand or table.
Remove the orange tapes from the
printer.
• Leave the tape in place while moving the printer.
• Lower the printer slowly and carefully to prevent
trapping your hands.
Return the handle you pulled out from
the printer to its original position.
Remove the tape indicated by the arrow.
Do not remove the four strips of tape
attached to the front cover.
Impressia
IMP QRM Rev 1.pdf
Pull out the tapes horizontally. Be sure
to pull out all four strips of tape.
• To avoid malfunctions, be sure to remove all four
strips of tape from the photo conductor unit.
• Removed tape is dirty. Be careful not to let it touch
your hands or clothes.
Pressing both sides, firmly close the
inner cover.
Turn the two green levers clockwise to
lock the cover.
Next Sheet
Page 1 of 3
Advertisement
Table of Contents

Related Manuals for Xante Impressia


Summary of Contents for Xante Impressia
- Page 1 Impressia Quick Installation Guide IMP QRM Rev 1.pdf Read this manual carefully before you use the product and keep it handy for future reference. For safe and correct use, please be sure to read “Safety Information” before using the machine.
- Page 2 Quick Installation Guide Impressia Take the toner containers out of the box. Push tray 1 carefully into the printer Selecting the Display Loading Paper Turning the Power On Installing the Toner until it stops. Language If you push the tray forcefully, the paper guides might move.
- Page 3 Quick Installation Guide Impressia Press the key. Specifying an IP Address ( DHCP Off ) If your network uses IPv4, assign the MENU Network Connection Test Printing Ethernet Configuration IPv4 address to the printer. Press the Press the key. MENU...
Need help?
Do you have a question about the Impressia and is the answer not in the manual?
Questions and answers