Raymarine ST60 Owner's Handbook Manual
Multi instrument
Hide thumbs
Also See for ST60:
- User manual ,
- Owner's handbook manual (64 pages) ,
- Operating manual (38 pages)

Related Manuals for Raymarine ST60


Summary of Contents for Raymarine ST60
- Page 1 ST60 Multi Instrument Owner’s Handbook Document number: 81039-4 Date: 1 April 2004...
- Page 2 Raymarine, ST60 and SeaTalk are trademarks of Raymarine Limited © Handbook contents copyright Raymarine Limited 2004...
-
Page 3: Emc Conformance
Handbook information To the best of our knowledge, the information in this handbook was correct when it went to press. However, Raymarine cannot accept liability for any inaccuracies or omissions it may contain. In addition, our policy of continuous product improvement may change specifications without notice. - Page 4 ST60 Multi Instrument Owner’s Handbook...
-
Page 5: Table Of Contents
Preface Contents Preface ........................i Important information ..................i Safety notices ..................i EMC conformance ................... i Handbook information ................i Contents....................iii Introduction ....................vii Data inputs ....................vii Remote control .....................viii Options ......................viii Auxiliary alarm ..................viii Mounting options ................viii Parts supplied ....................viii Chapter 1: Operation ....................1 1.1 Introduction ................... - Page 6 ST60 Multi Instrument Owner’s Handbook Chapter 2: Maintenance & Troubleshooting ..........11 2.1 Maintenance ..................11 Servicing and safety ................11 Instrument ....................11 Transducer ....................11 Cabling ....................12 2.2 Troubleshooting ...................12 Preliminary procedures .................12 Fixing faults ..................12 Technical support ..................13 World wide web ................13 Telephone help line ................13...
- Page 7 Preface Date format ..................28 Time format ................... 28 Time offset ..................30 Units setup ..................31 Setting units ................31 Waypoint identity ................31 Select NMEA or auxiliary alarm ............31 Auxiliary alarm enable ..............31 Pop-up pilot ................... 32 Instrument configuration ...............
- Page 8 ST60 Multi Instrument Owner’s Handbook...
-
Page 9: Introduction
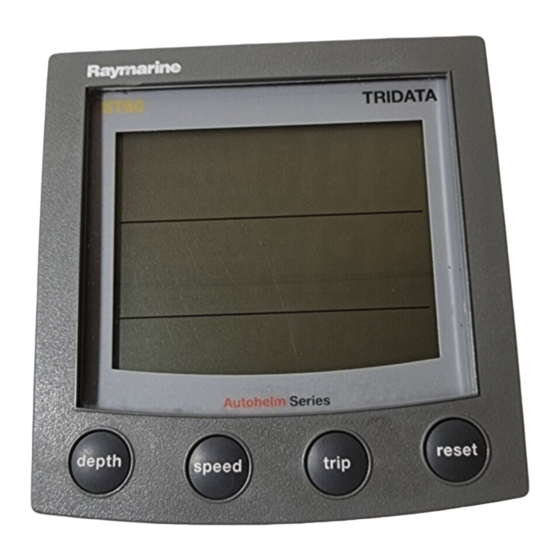
Preface Introduction Thank you for purchasing a Raymarine product. We are sure your ST60 instrument will give you many years of trouble-free operation. This handbook describes how to install and use the Raymarine ST60 Multi instrument. This instrument provides a wide range of accurate depth information, on a high quality Liquid Crystal Display (LCD). -
Page 10: Remote Control
Mounting options If you do not want to surface mount your ST60 instrument, options are available for: • Flush mounting. If you have ordered the flush mounting option a low-profile bezel and four fixing screws are provided. - Page 11 Preface MULTI Operation ST60 Multi Instrument Owner's Handbook Key: Chapter selection and content D4440-3...
- Page 12 ST60 Multi Instrument Owner’s Handbook...
-
Page 13: Chapter 1: Operation
Chapter 4, Calibration 1.2 Normal operation The information displayed on the ST60 Multi instrument is organized in groups or ‘chapters’, and within each chapter, the different types of information are presented as pages. The availability of pages on your ST60 Multi instrument depends on: •... - Page 14 ST60 Multi Instrument Owner’s Handbook Depth Current depth Minimum depth Maximum depth Speed Autopilot Speed Pilot status Maximum speed Rudder angle Average speed Speed over ground VMG to windward Key: Trip Timer Chapter name Pages within chapter Listed in sequence.
- Page 15 Chapter 1: Operation To display a particular page: Chapter selection and content 1. Refer to the diagram to determine the location of the information you need (i.e. which chapter it is in), then press the the necessary number of times, to cycle to the required chapter. If the chapter Chapter 4, Calibration title facility is enabled (see ), the name of each chapter...
-
Page 16: Chapters And
ST60 Multi Instrument Owner’s Handbook 1.3 Chapters and pages This section lists all the available pages along with titles and salient points. Depth chapter pages Function Title Remarks Current Displayed in either FEET , METRES or FATHOMS . An up arrow is displayed depth if the sea-bed is rising, and a down arrow is displayed for sea-bed falling. -
Page 17: Wind Chapter Pages
Chapter 1: Operation Wind chapter pages Function Title Remarks Apparent Either knots (KTS) or meters per second (M/S). wind speed Apparent Shown in degrees. Shows a STBD indicator when the boat is on a star- wind angle board tack and a PORT indicator when the boat is on a port tack. True wind TRUE Either knots (KTS) or meters per second (M/S). -
Page 18: Navigate Chapter Pages
ST60 Multi Instrument Owner’s Handbook Navigate chapter pages Function Title Remarks Bearing to way- Displayed in degrees. Either TRU(e) or MAG(netic) depending on the Chapter 4, Calibration point value set during User calibration (see Distance to way- In kilometers (KM), statue miles (SM), or nautical miles (NM) -
Page 19: Autopilot Chapter Pages
1.5 Alarms Internal alarms The ST60 Multi instrument responds to alarm signals by sounding an internal buzzer and by flashing the appropriate alarm message at the top of the screen alternately with the normal top line of the current display. The alarm messages are... -
Page 20: Auxiliary Alarm Option
To cancel an alarm, press any one of the ST60 Multi front panel keys. Auxiliary Alarm option An optional Auxiliary Alarm can be fitted at a convenient remote position, to give a loud, audible indication if any one of a range of alarms occurs. -
Page 21: Nmea To Seatalk
Chapter 1: Operation NMEA to SeaTalk The ST60 Multi instrument decodes certain data from NMEA when available, and if the respective data is not already present on SeaTalk, transmits the decoded data to SeaTalk. The data types and NMEA headers are:... -
Page 22: Contrast
Calibration 1.9 Remote control When it is connected to SeaTalk, the ST60 Multi instrument can be controlled remotely with a SeaTalk Remote Keypad Unit. Remote control of an instrument is indicated by a REMOTE legend on the display, to indicate that the keypad has control. -
Page 23: Chapter 2: Maintenance & Troubleshooting
This will not harm the instrument and can be cleared by increasing the illumination setting to Level 3. Periodically clean your ST60 instrument with a soft damp cloth. Do NOT use chemical and abrasive materials to clean the instrument. -
Page 24: Cabling
Some data types may not be supported by your system and therefore will not be displayed on your ST60 Multi instrument. If you think that some data is missing, ensure that your system supports this data before assuming that a fault exists. -
Page 25: Technical Support
Please visit the Customer Support area of our web site at: • www.raymarine.com As well as providing a comprehensive Frequently Asked Questions section and servicing information, the web site gives e-mail access to the Raymarine Technical Support Department and a details of the locations of Raymarine agents, worldwide. - Page 26 ST60 Multi Instrument Owner’s Handbook...
-
Page 27: Chapter 3: Installation
Chapter 3: Installation Chapter 3: Installation This chapter describes how to install the ST60 Multi instrument, and when supplied, the Auxiliary Alarm. For advice, or further information regarding the installation of this equipment, please contact the Raymarine Product Support Department or your own National Distributor. -
Page 28: Emc Installation Guidelines
ST60 instruments can be fitted either above or below deck, provided the rear of the instrument is sited where it is protected from contact with water. -
Page 29: Suppression Ferrites
Raymarine equipment. Always use the ferrites supplied by Raymarine. D3548-6 Connections to other equipment If your Raymarine equipment is to be connected to other equipment using a cable not supplied by Raymarine, a suppression ferrite MUST always be attached to the cable near the Raymarine unit. -
Page 30: Fitting The Instrument
If you have ordered the flush mounting option a low-profile bezel and four fixing screws are also provided. Fitting the instrument The ST60 Multi instrument can be installed using one of a number of different mounting options: • Surface mounting. Gives a profile of approximately 0.95 in (24 mm). -
Page 31: Flush Mounting
0.25 in (6 mm) above the panel fascia. Fitting the low-profile bezel In order to flush-mount your ST60 instrument, you must first replace the standard bezel with the low-profile bezel as follows: 1. Hold the instrument in both hands with the display towards you. -
Page 32: Flush Mounting Procedure
Flush mount your instrument (see the illustration) as follows: Fit- 1. Assemble the ST60 instrument and low-profile bezel as described under ting the low-profile bezel 2. Ensure that: • The panel on which you intend to mount the instrument is between 0.12 in (3 mm) and 0.78 in (20 mm) thickness. -
Page 33: Bracket Mounting
(5). Bracket mounting A Control Unit Mounting Bracket (Part No. E25009) enables you to mount your ST60 instrument in locations where other forms of mounting are impractical. Although this provides a useful alternative method for securing your instrument,... -
Page 34: Auxiliary Alarm Option
(supplied). 5. Connect a 2-core cable to the connector block and run the other end of the cable to the rear of the ST60 Multi instrument. The manner in which you run... -
Page 35: Connecting The Instrument
Connecting the instrument Types of connection The ST60 Multi instrument, is connected to SeaTalk as a repeater, and derives its power directly from SeaTalk so that a separate power connection is not necessary. Where a SeaTalk system includes an autopilot, the power for the system is provided by the autopilot. - Page 36 ST60 Multi Instrument Owner’s Handbook SeaTalk cable SeaTalk cable Blue Blue Either NMEA out Auxiliary Alarm Buzzer Note: If connections are made to the NMEA OUT terminals, the instrument must be set up for either NMEA or Anciliary Alarm Buzzer operation, in accordance with the instructions in Chapter 4, Calibration.
-
Page 37: Power Supply Connections
Chapter 3: Installation Power supply connections CAUTION: When instruments are connected to SeaTalk, ensure that the power supply for the SeaTalk 12 V line is protected by a 5 A fuse. Systems with a large number of instruments on the SeaTalk bus may require connections to the power supply from each end of the system (‘ring-main’... - Page 38 ST60 Multi Instrument Owner’s Handbook...
-
Page 39: Chapter 4: Calibration
Chapter 4: Calibration 4.1 Introduction The ST60 Multi instrument is set up with factory-programmed default settings, so in order to optimize the performance of the instrument on board a particular vessel, the procedures in this Chapter must be carried out immediately after the completion of installation, and before the equipment is used for navigational purposes. -
Page 40: Procedure
Battery alarm threshold The recommended setting is 10.5 VOLTS. Alarms on/off Determines whether or not the ST60 Multi instrument will give alarm indications. The following alarms will occur irrespective of the setting here: • Pop up pilot alarms. Select NMEA •... - Page 41 Chapter 4: Calibration Hold down chap for approximately 2 seconds Entry screen track either reset to set the required values on each screen Chapter Heading type titles from sheet 2 Battery alarm threshold Alarms on/off Time display Date format to sheet 2 User calibration - sheet 1 D4406_1...
-
Page 42: Time Offset
ST60 Multi Instrument Owner’s Handbook Time offset You can apply an offset from -12 hours to +12 hours in 1 hour increments, to set your system time to local time. The time with the offset applied is shown at the top right of the screen. -
Page 43: Units Setup
Determines whether waypoints are identified by name (WP NAME) or by number (WP NO). Select NMEA or auxiliary alarm If the ST60 Multi is connected to NMEA, select ON. If the Auxiliary Alarm option is fitted select OFF, to enable the Auxiliary Alarm. Auxiliary alarm enable If the Auxiliary Alarm option is fitted, use this screen to determine which alarms you want to sound at the Auxiliary Alarm. -
Page 44: Pop-Up Pilot
ST60 Multi Instrument Owner’s Handbook Title Alarm function WATCH Watch alarm OFF CRS Off course alarm WND CHNG Wind change alarm LOW BATT Low battery AUTO REL Auto release WPT ADVN Waypoint advance DRV STOP Drive stopped NO XTE No NMEA... - Page 45 Chapter 4: Calibration Title Page Chapter DPTH MAX Maximum Depth Depth SPEED Boat Speed Speed SPD MAX Maximum Speed Speed SPD AVG Average Speed Speed SPD SOG Speed SPD VMG VMG to Windward Speed SPD LOG Speed SPD TRIP Trip Speed SPD TIMR Timer...
-
Page 46: Leaving User Calibration
ST60 Multi Instrument Owner’s Handbook Title Page Chapter NAV LON Longitude Navigate NAV COG Navigate NAV SOG Navigate NAV SATS Stats Navigate ENV TEMP Sea Temperature Environment ENV VOLT Battery Voltage Environment NAV TIME Time Environment NAV DATE Date Environment... -
Page 47: Dealer Calibration
Chapter 4: Calibration 4.4 Dealer calibration The Dealer calibration procedures enable the following parameters to be set: • User calibration on/off. • Response settings for speed, depth heading wind angle, wind speed, VMG, course over ground and speed over ground. Dealer calibration also gives access to the Factory defaults screen. - Page 48 ST60 Multi Instrument Owner’s Handbook Title Response function Velocity made good COG/SOG Course over ground and speed over ground Hold down for approximately 12 seconds Entry screen track reset Calibration on/off track either reset Factory defaults Response to set the required values...
-
Page 49: Factory Defaults
Chapter 4: Calibration Factory defaults You can use this screen to reset the operating parameters to the factory default values. Use the track and reset keys to make the required selection. Note that the selection you make at this screen will be applied when you exit the screen, so be sure you make the correct selection. - Page 50 ST60 Multi Instrument Owner’s Handbook...
- Page 51 Drill 5mm (3/16in) diameter ST60 Surface Mount Template Machine hole 90mm (3.54in) diameter Shaded areas to be removed Drill 5mm (3/16in) diameter D4436-1...
- Page 53 ST60 Flush Mount Template 4 holes 6 mm diameter Shaded area to be removed 109 mm D4437-1...
Need help?
Do you have a question about the ST60 and is the answer not in the manual?
Questions and answers