Table of Contents
Advertisement
Quick Links
Advertisement
Table of Contents

Related Manuals for Datavideo SE-2000R


Summary of Contents for Datavideo SE-2000R
- Page 1 HD Digital Video Switcher SE-2000R Quick Start Guide www.datavideo-tek.com...
-
Page 2: Table Of Contents
Table of Contents What’s in the box? ........................2 Introduction ..........................2 Product Overview ........................2 Features ............................. 2 Front Panel ........................... 3 Rear Panel ........................... 6 System Configuration ......................... 8 Configuration Utility Service ..................... 19 1. Device Setup ........................19 2. -
Page 3: What's In The Box
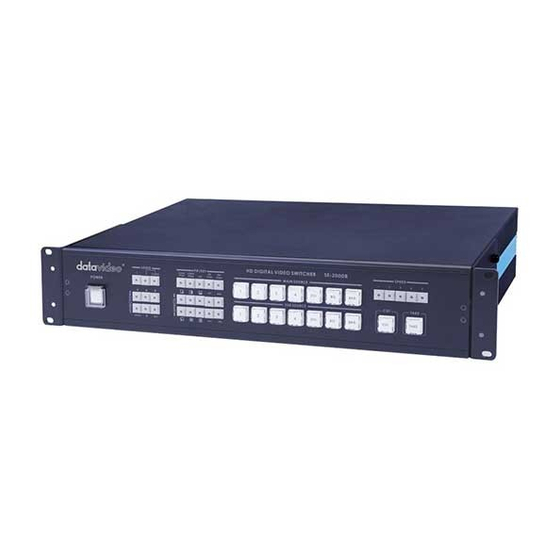
Product Overview The SE-2000R is an HD input, digital processing live video switcher. The SE-2000R includes 6 groups of video inputs (4x BNC connector for HD -SDI & 2 x DVI), and 4 x video outputs PGM (2x HD-SDI output, 1x HD-YUV output, and, PVW (1x DVI-D output), PVW output include 6x monitoring screen and 1x PVW screen and 1x PGM screen. -
Page 4: Front Panel
POWER Switches the power On / Off. Logo Setting Select SE-2000R Logo1, Logo2 or Clock Functions on the screen. LUMA PVW / LUMA PGM Step 1: Select LUMA source from sub source. Step 2: Press LUMA PVW or LUMA PGM key. - Page 5 10 effect keys, for more information, see Transition Effects (Page 6). Menu and Controls Menu button is SE-2000R functions configuration and setting, press the up, down, left, right arrow button move to another control, and ENT button to confirm the setting.
- Page 6 Video Source Selecting the Main and Sub Video Sources is the first thing to do when setting up the SE-2000R. The source you select (by pressing one of the buttons; a bright red LED on the selected button lights for confirmation) on the Main Source bus is what is sent to the Video output.
-
Page 7: Rear Panel
Rear Panel 1. HD- SDI IN 6. HD- SDI OUT 2. HD- SDI IN / DVI-D IN 7. HD- SDI YUV OUT 3. DVI-D IN 8. MULTIVIEWER OUT 4. TALLY 9. DC IN 5. RS-232... - Page 8 HD- SDI IN HD SDI Signal Input (Digital Inputs 1 to 3). HD- SDI IN / DVI-D IN The digital Inputs 4 has two kinds of digital modes for use (HD-SDI & DVI) you can select the mode in MENU function. For more information, see INPUT 4 MODE (Page 14).
-
Page 9: System Configuration
LOGOS MODE SETTING MONITOR MODE INPUT 4 MODE MASTER USER SETTING SOFT EDGE AUTO TAKE SPEED BACKGROUND BLACK & BARS POS.RIGHT FACTORY SETTINGS CLOCK SETTINGS After SE-2000R firmware upgrade, you need to reload your (logo, background, name…etc) files to SE-2000R. - Page 10 2. INTPUT SETTINGS Press the MENU button and select item 2 for INTPUT SETTINGS. Press the arrows button to select an item and press the ENT to confirm the setting. BRIGHTNESS: adjustment range from -7 to +7 CONTRAST: adjustment range from -7 to +7 SATURATION: adjustment range from -7 to +7 USER’S PROFILE -7 ~ +7...
- Page 11 3. PIP SETTING Press the MENU button and select item 3 for PIP SETTING. Press the arrows button to select an item and press the ENT to confirm the setting. X- POSITION: adjustment range from 0 to 102(under 1080i) Y- POSITION: adjustment range from 113 to 0(under 1080i) X- POSITION: adjustment range from 0 to 70(under 720p) Y- POSITION: adjustment range from 77 to 0(under 720p) PIP SIZE: adjustment range from +1 to 33...
- Page 12 4. LUMA SETTINGS Press the MENU button and select item 4 for LUMA SETTINGS. Press the arrows button to select an item and press the ENT to confirm the setting. LUMA LEVEL: adjustment range from 0 to 255 The PIP windows will display on preview and program, where are the PIP displayed on, is dependent on your setting.
- Page 13 5. LOGOS Press the MENU button and select item 5 for LOGOS. Press the arrows button to select an item and press the ENT to confirm the setting. SELECT LOGO 1: 14 types (1~14) logo for user’s setting on LOGO1. SELECT LOGO 2: 14 types (1~14) logo for user’s setting on LOGO2.
- Page 14 Press the arrows button to select an item and press the ENT to confirm the setting. Mode setting is set the input mode. Please check your input source is what’s mode, and then select same mode of SE-2000R. USER’S PROFILE...
-
Page 15: Monitor Mode
7. MONITOR MODE Press the MENU button and select item 7 for MONITOR MODE. Press the arrows button to select an item and press the ENT to confirm the setting. This mode is setting DVI (preview) output mode, you can select Phase on 1080i or 720p. USER’S PROFILE INTPUT SETTINGS PIP SETTING... - Page 16 Press the MENU button and select item 9 for MASTER USER SETTING. Press the arrows button to select an item and press the ENT to confirm the setting. This mode is return SE-2000R USER’S PROFILE (0) to its factory default settings. USER’S PROFILE...
- Page 17 11. AUTO TAKE SPEED Press the MENU button and select item 11 for AUTO TAKE SPEED. Press the arrows button to select an item and press the ENT to confirm the setting. This mode is setting different speeds of transition effect. USER’S PROFILE INTPUT SETTINGS PIP SETTING...
-
Page 18: Factory Settings
Press the MENU button and select item 14 for FACTORY SETTINGS. Press the arrows button to select an item and press the ENT to confirm the setting. This mode is return SE-2000R USER’S PROFILE (all) to its factory default settings. USER’S PROFILE... - Page 19 15. CLOCK SETTINGS Press the MENU button and select item 15 for CLOCK SETTINGS. Press the arrows button to select an item and press the ENT to confirm the setting. This mode is set the clock of the screen. USER’S PROFILE INTPUT SETTINGS PIP SETTING LUMA SETTINGS...
-
Page 20: Configuration Utility Service
Configuration Utility Service Computer platform: Windows XP Installation: SE2000SetupService.exe Default Installation Directory: С:\Program Files\SE2000 Setup Service Add and Remove Programs: SE2000 Configuration Utility Service, Uninstall 1. Device Setup Connect SE2000 to PC COM port Open “SE2000 Configuration Utility Service” tools ... -
Page 21: Logos Setup
4. Write to the Slot you need. Note: If you use the pair of BMP files, only one file can be selected – the Config program add second file automatically. Note: When you upgrade SE-2000R, The Datavideo logo will reappear. -
Page 22: Clock Font
3. Clock Font Clock Source Files: 128 х96 pixels, TGA 32bit or BMP 24 bit files with α- channel α- channel can be obtain from pair of bmp files, see picture below: Step by step: 1. Open “SE2000 Configuration Utility Service” tools 2. -
Page 23: Background
4. Background Background Source Files: 128 х128 pixels, TGA 32bit or BMP 24 bit Step by step: 1. Open “SE2000 Configuration Utility Service” tools 2. Select bookmark: Background 3. Load file 128 х128 pixels, TGA 32bit or BMP 24 bit 4. -
Page 24: Names
5. Names Name source files consist 2 elements: 1. Inscription Background 192 х32 pixels, TGA 32bit or BMP 24 bit files with α- channel. 2. Key in text label name in spatial window named “Text”. α- channel can be obtain from pair of bmp files, see picture below: ... -
Page 25: Dimension
Dimension... -
Page 26: Specification
Specification • 4x BNC connector for HD -SDI input Inputs • 2x DVI connector for DVI-D input (1x DVI-D input is collective with SDI#4 channel) • 2x HD-SDI output, 1x HD-YUV output, and 1x DVI-D output Outputs • HD (1080/50i -1080/60i -1080/59.94i -720/50p -720/60p -720/59.94p) Video Input •... -
Page 27: Service & Support
It is our goal to make your products ownership a satisfying experience. Our supporting staff is available to assist you in setting up and operating your system. Please refer to our web site www.datavideo-tek.com for answers to common questions, support requests or contact your local office below.
Need help?
Do you have a question about the SE-2000R and is the answer not in the manual?
Questions and answers