
Related Manuals for Moxa Technologies MRC


Summary of Contents for Moxa Technologies MRC
- Page 1 Moxa Remote Connect Gateway User’s Manual Edition 1.0, December 2017 www.moxa.com/product © 2017 Moxa Inc. All rights reserved.
- Page 2 Moxa Remote Connect Gateway User’s Manual The software described in this manual is furnished under a license agreement and may be used only in accordance with the terms of that agreement. Copyright Notice © 2017 Moxa Inc. All rights reserved. Trademarks The MOXA logo is a registered trademark of Moxa Inc.
-
Page 3: Table Of Contents
Table of Contents Introduction ............................1-1 Installation ............................2-1 LED Indicators ..........................3-1 Interfaces ............................4-1 RESET Button ............................. 4-2 WAN/LAN Ethernet Ports........................4-2 USB Interface ............................. 4-3 Digital Input and Digital Output ......................4-3 Management ............................. 5-1 Activation Wizard ..........................6-1 Activate a Gateway .......................... -
Page 4: Introduction
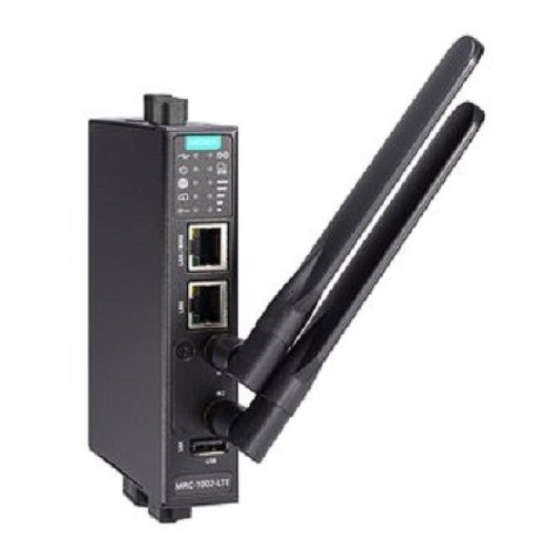
Introduction The MRC gateway is a 2-port Ethernet device that creates a connection between Ethernet equipment installed at a remote site and the Moxa Remote Connect Platform. The remote connection normally occurs between a SCADA server and a device that belongs to a service engineer. -
Page 5: Installation
Installation The MRC gateway supports a power input range from 12 to 36 VDC. Please ensure you use the correct power supply to power on the gateway. The MRC gateway also has an embedded DIN-rail mounting kit to allow the... -
Page 6: Led Indicators
Steady On: Internet is available Cloud Server Green Off: Not connected to the MRC Server Blinking: Gateway is testing the MRC Server connectivity Steady On: MRC Server is connected Activation Key Green Off: There is no activation key inside the gateway... - Page 7 Moxa Remote Connect Gateway LED Indicators LED Symbol LED Name Color Function 2 LEDs On: Normal signal quality 1 LED On: Bad signal quality (may cause no Internet connection) 0 LED On: Very bad signal quality (no Internet connection) Ethernet Ethernet port is connected at 10M speed (amber) or 100M speed Speed (green) speed...
-
Page 8: Interfaces
Interfaces The following topics are covered in this chapter: RESET Button WAN/LAN Ethernet Ports USB Interface Digital Input and Digital Output... -
Page 9: Reset Button
WAN/LAN Ethernet Ports There are two Ethernet ports, WAN and LAN, on the MRC gateway. The WAN connects to the network that provides Internet access to the MRC Server and the LAN connects to the field devices that require monitoring or connections. -
Page 10: Usb Interface
Digital Input and Digital Output There is one DI and one DO on the bottom of the MRC gateway. The DI is used to control the connection for the tunnel to the MRC Server. The DO can be used as an alarm when the remote access tunnel is active. -
Page 11: Management
LAN port, open your browser and type in the default web console address to access the web GUI: http://192.168.127.254 Default username: admin Default password: moxa After you successfully login to the web console, you will see the management portal of the MRC gateway. - Page 12 Moxa Remote Connect Gateway Management Click “Edit” to change the password.
-
Page 13: Activation Wizard
Activation Wizard The following topics are covered in this chapter: Activate a Gateway Activation Option #1 Activation Option #2 Activation Option #3... -
Page 14: Activate A Gateway
#3: I do not have an activation key You get activating information from the MRC server administrator to manually activate your gateway. Activation Option #1 When choosing option 1, users need to copy the string (activation key) and paste it into the MRC gateway. - Page 15 Moxa Remote Connect Gateway Activation Wizard When choosing Option #1, follow the wizard to finish the gateway activation. Input the activation key. Select the time zone where you will install the gateway. On the last step, please click “Initialize Now” to activate your gateway. (Remember to first connect your gateway to the Internet.)
-
Page 16: Activation Option #2
Activation Option #2 When choosing Option #2, the MRC gateway will execute the auto configuration exchange with the MRC server. Users should insert the USB drive that has the activation file stored on it. Then, follow the wizard to finish activating your gateway. -
Page 17: Activation Option #3
On the last step, please click “Initialize Now” to activate your gateway. (Remember to first connect your gateway to the Internet.) Activation Option #3 When choosing option #3, you need to fill in all the necessary information retrieved from the MRC Server administrator step by step. - Page 18 Input the MRC server IP address or domain name, service port, the Group Code, and a user-defined gateway name. The gateway name must be unique in the MRC server. If activation is not successful, it is possible that you registered your gateway with an existing name already stored in the MRC server. If you have any further issues please contact your MRC server administrator.
- Page 19 Use cellular as Internet access. The two Ethernet ports are both LAN ports that can be used for connecting to local devices. Step 3: Select the Internet Access method for your MRC gateway. WAN-LAN Mode, WAN-LAN Mode with NAT, Transparent-LAN Mode:...
- Page 20 Moxa Remote Connect Gateway Activation Wizard Setting Static IP Setting DHCP...
- Page 21 Moxa Remote Connect Gateway Activation Wizard Setting PPPoE...
- Page 22 MRC gateway will reset the module. Step 4: Input the LAN settings and the management IP for your MRC gateway. The MRC gateway’s management IP and subnet must be the same as the network where your local devices are located.
- Page 23 ” to add a local device. Input the name of a local device and its IP address. Select “Ping Check” or “Port Link” for the MRC gateway to check the health status of your device by PING or Port Link On/Off events. You can disable the Health Check function if you want.
- Page 24 Moxa Remote Connect Gateway Activation Wizard Step 6: Select the time zone where you will install the gateway. On the last step, please click “Initialize Now” to activate your gateway. (Remember to first connect your gateway to the Internet.) 6-12...
-
Page 25: Gateway
Gateway The following topics are covered in this chapter: Activation Status Tunnel Control... -
Page 26: Activation Status
Moxa Remote Connect Gateway Gateway Activation Status On the “Gateway” settings page, you can check the activation status of your MRC gateway. You can also configure the remote access capability of your MRC gateway. Tunnel Control Users can configure the method for how the MRC gateway establishes a tunnel for remote access. -
Page 27: Network
Network The following topic is covered in this chapter: Scenario Setting... -
Page 28: Scenario Setting
Moxa Remote Connect Gateway Network Users can change the network scenario settings and check the WAN/LAN status from the Network settings page. Scenario Setting Click “ ” to change the tunnel control settings and click “Next” to continue inputting settings. Mode Scenario WAN-LAN Mode... - Page 29 Moxa Remote Connect Gateway Network Step 1: Setup Internet access...
- Page 30 Moxa Remote Connect Gateway Network Setting Static IP Setting DHCP Setting PPPoE Step 2: Setup the management IP address for LAN (must be the same subnet as the local network devices).
- Page 31 Moxa Remote Connect Gateway Network Click “Next” and wait for the configurations to change. WAN-LAN Mode with NAT:...
- Page 32 Moxa Remote Connect Gateway Network Step 1: Setup Internet access. Step 2: Setup management IP address for LAN (must be the same subnet as local network devices). Click “Next” and wait for the configurations to change.
- Page 33 Moxa Remote Connect Gateway Network Transparent-LAN Mode: Step 1: Setup the unified interface for Internet access and LAN management IP address (must be the same as local devices’ subnet). Click “Next” and wait for the configurations to change.
- Page 34 Network Cellular-WAN Mode: In this mode, the two Ethernet ports are operating as two LAN ports and your MRC gateway will use cellular to access the Internet. Step 1: Setup cellular for Internet access. There are two pre-defined carriers in the system, “AT&T” and...
- Page 35 PIN: Input the PIN code to unlock your SIM card. (Provided by your carrier) Username/Password: Input username and password for Internet access. (Provided by your carrier) Cellular Keep Alive: When the cellular drops Internet access, the MRC gateway will restart the cellular connection to the carrier.
-
Page 36: Local Device
Local Device The following topic is covered in this chapter: Local Device... -
Page 37: Local Device
Local Device Users can locally add or remove Ethernet devices that are available for remote access. After modifying the local device list, the MRC gateway will automatically push the configuration back to the MRC server. NOTE The MRC gateway must have the capability to access the Internet when performing this configuration. - Page 38 Moxa Remote Connect Gateway Local Device Users can also setup service-based access control of the devices. For example, you can limit the HTTP web service of the local device so that only Engineer A can have access to it. Therefore, other engineers will not be able to access that device’s HTTP web service.
-
Page 39: Service
Service The following topic is covered in this chapter: Service... - Page 40 Moxa Remote Connect Gateway Local Device Service Users can change the time zone if the gateway was moved to a location in a different time zone. This will reflect the local time when auditing the event logs. Click “ ” to change the settings. 10-2...
-
Page 41: System
System Users can obtain the system information locally and upgrade the firmware of the gateway. If necessary, users can reset the gateway to default settings or reboot the gateway. - Page 42 Moxa Remote Connect Gateway System 11-2...
Need help?
Do you have a question about the MRC and is the answer not in the manual?
Questions and answers