
Related Manuals for Kia LAN-8660EK


Summary of Contents for Kia LAN-8660EK
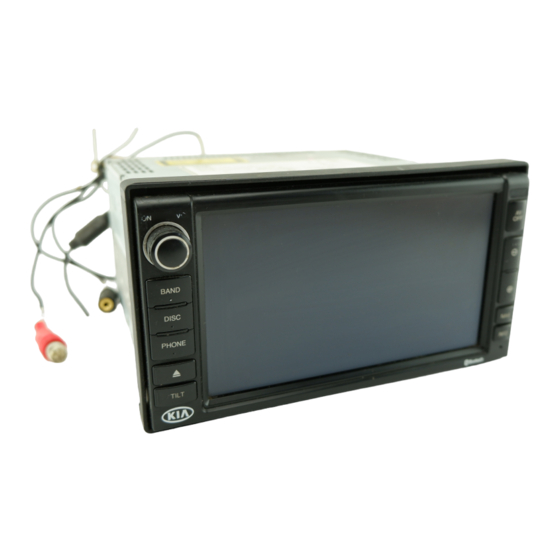
- Page 1 ENGLISH CAR NAVIGATION/DVD Receiver OWNER’S MANUAL MODEL : LAN-8660EK Please read this instruction booklet carefully and completely before connecting, operating or adjusting this product. P/NO : ???
-
Page 2: Table Of Contents
Table of contents Safety note Basic operation 9-12 Front panel ........9 Remote control (Optional) . - Page 3 Table of contents Radio (RDS) operation 24-25 RDS display options ......24 AF (Alternative frequency) ..... . .24 TA (Traffic announcement identification) .
- Page 4 Table of contents NAVI operation 36-60 What is GPS? ....... .36 Memory navi mode .
-
Page 5: Safety Note
Safety note CAUTION RISK OF ELECTRIC SHOCK DO NOT OPEN TO REDUCE THE RISK OF ELECTRIC SHOCK DO NOT SPLIT THE COVER (OR BACK). THERE ARE NO USER SERVICEABLE PARTS INSIDE. REFER SERVICING TO QUALIFIED SERVICE PERSONNEL. The lightning flash with an arrowhead symbol within an equilateral triangle is intended to alert the user about the presence of uninsulated dangerous voltage within the product’s enclosure that may be of sufficient magnitude to constitute a risk of electric shock. - Page 6 Safety note The driver must not watch the monitor while driving. If the driver watches the monitor while driving, it may lead to carelessness and cause an accident. This unit id is for vehicles with a 12-volt battery and negative ground- ing.
-
Page 7: Types Of Playable Discs
Safety note A section whose title has one of the following symbols is applicable only to the disc represented by the symbol. Video CDs Audio CDs MP3 discs WMA discs About the Symbol Display When you are watching a DVD and attempt to perform an operation, it may not be performed by the program on the disc. - Page 8 Safety notes • A defective or soiled disc inserted into unit can cause the sound to drop during playback. • Handle the disc by holding its inner and outer edges. • Do not touch the surface of the unlabeled side of the disc. Do not stick paper or tape etc.
-
Page 9: Basic Operation
Basic operation Front panel Power ON/OFF AV OFF - Turn on/off main unit. - Audio and video pause. - Adjust the volume. - Diminish the map level. BAND - Select the band. - Enlarge the map level. DISC - Select the disc. NAVI - Display the navigation map. -
Page 10: Remote Control (Optional)
Basic operation Remote control (Optional) REAR ON/OFF B/?? - PLAY/PAUSE v/V/b/B - Move the cursor (up/down/left/right) E (Enter) - Display or select a menu CHAPTER/TRACK/FILE - Select chapter/track/file Using the REAR ON/OFF button You can output the sound and video of a disc in the built-in DVD drive to the rear display regardless of whether the DVD drive is selected as the source or not (rear ON mode). -
Page 11: Connecting The System
Basic operation Connecting the system Exterior GPS External Code Radio ANT Terminal Name Terminal Name VIDEO 1 MIC_GND VIDEO 2 ALTERTO SPEED Power Code Terminal Name Terminal Name EXT AMP Front L-ch (+) EXT AMP Front L-ch (-) EXT AMP Front R-ch (+) EXT AMP Front R-ch (-) EXT AMP Rear R-ch (+) EXT AMP Rear R-ch (-) -
Page 12: Turn The Unit On
Basic operation Turning the unit on Press the “ON/VOL” button. Turning the unit off Press the “ON/VOL” button again. Insert a disc 1. Press the “ ” button to open the monitor. 2. The disc is drawn in, and starts playback automatically. Changing the monitor angle Press the “TILT”... -
Page 13: Setup Operation
Setup operation SETUP You can set the setup on the screen so it works according to your particular needs. 1. Press the “INFO” button to select the setup. 2. The “SETUP” screen appears on the screen. You can set the RDS setting. EON TA (Enhanced Other Network) LOCAL When the found strength level of EON linked is less than... -
Page 14: Device Info. (Device Information)
Setup operation Device Info. (Device information) You can check the Software version, Hardware version, Map version and OS version. Bell Sound Vol. (Bell sound volume) You can set the ringer volume on incoming calls. Touch the + or - buttons to adjust the settings. LCD Brightness You can set the monitor brightness. -
Page 15: Bluetooth Operation
Bluetooth operation Using a Bluetooth wireless connection Your unit supports Bluetooth wireless connections. You can set up a wireless link with a Bluetooth phone. Starting Bluetooth on your phone Your phone’s Bluetooth feature may be set to off by default. To use your car Bluetooth feature, Bluetooth must be turned on in your phone. - Page 16 Bluetooth operation 6. In an initial connection, the user will see the "INPUT PIN CODE" screen as shown in the figure. To successfully connect, make sure to enter the same PIN code for the mobile phone and the unit. 7. Touch the number 0~9 buttons, then confirm. 8.
-
Page 17: Headset Function
• To successfully connect, make sure to enter the same PIN code for the Bluetooth phone and the LAN-8660EK. • The same instructions as "connecting through LAN-8660EK" . Headset function The connection method is the same as with "Hands-free con- nection", but the... -
Page 18: Phone Setup
Bluetooth operation PHONE SETUP 1. Touch the PHONE SETUP button. 2. PHONE SETUP screen appears on the screen. Connect You can check the connected Bluetooth phone. BT Info. (Bluetooth Information) You can check the Bluetooth phone information. Connection Mode Auto : If the Bluetooth phone has already been connected successfully in the past, it would be registered at the "CON- NECT PHONE"... -
Page 19: Rename
Refer to the Owner’s man- ual.) 3. Press the “Sending the phone number” in the Bluetooth phone. 4. The telephone no. is transmitted to the LAN-8660EK from the Bluetooth phone. Note If the hands-free or headset connection has been already made, disconnect the corresponding item to add a new con- tracts entry. -
Page 20: Phone Book Info. (Phone Book Information)
Bluetooth operation PHONE BOOK INFO. (Phone book information) You can view all entries' numbers or select which phone number is dialed when you default dial the phone book entries. (If the entry has more than one phone number.) 1. Touch a phone number you want to set as the default number for phon book lists. -
Page 21: Making A Call From Speed Dial Numbers
Bluetooth operation Making a call from speed dial numbers To make a call from speed dial numbers, press "SEND" for long after pressing the speed dial number assigned to the mobile phone or press the last digit of the speed dial number for long. -
Page 22: Answering Calls
Bluetooth operation Answering calls When you receive a call, your phone rings and appears on the screen an incoming call message. 1. The “CALL FROM” screen appears on the screen. 2. Touch the “RECEIVE” button to answer the call. If you want to switch over by the phone, touch the “REJECT”... -
Page 23: Radio Operation
Radio operation Listening to radio stations 1. Press the “BAND” button to select the radio. 2. Press the “BAND” repeatedly to select a band. The indicator lights up in the following order. FM1 t FM2 t FM3 t MW 3. Seek tuning: Touch the buttons. -
Page 24: Radio (Rds) Operation
Radio (RDS) operation RDS display options The RDS system is capable of transmitting a wide variety of information in addition to the initial call sign that appears when a station is first tuned. In normal RDS operation the display will indicate the station name, broadcast network or call letters. -
Page 25: Ta (Traffic Announcement Identification)
Radio (RDS) operation TA (Traffic announcement identification) This is an On/Off switching signal that indicates when a traffic announcement is on air. 1. Touch the “TA” button. The “TA” indicator appears on the screen. 2. To cancel, touch it again. PTY (Program type recognition) To select a certain program type from the reception band, please make sure to follow this procedure. -
Page 26: Radio (Sound) Operation
Radio (sound) operation R TEXT (Radio text recognition) The radio station’s information appears on the screen. 1. Touch the “R TEXT” button. Radio text appears on the screen. 2. To cancel, touch it again. Note Some RDS stations may not choose to include some of these additional features. -
Page 27: Cd/Mp3/Wma Operation
CD/MP3/WMA operation Playing an audio CD and MP3/WMA disc - Please see page 12 for details. Note The unit can play MP3/WMA formatted recordings on CD-ROM, CD-R or CD-RW discs. Before playing MP3/WMA recordings, read the notes on MP3/WMA Recordings on page 29. AV OFF (Audio/Video off) 1. -
Page 28: Marking A Track Using The List
CD/MP3/WMA operation Marking a track using the list This functions only with 1. Move to the file you want. 2. Touch the “MARK” button. The selected file is marked To cancel, touch it again. 3. Repeat steps 1 and 2 to mark an other track. 4. -
Page 29: Shuffle
CD/MP3/WMA operation SHUFFLE Touch the “SHUFFLE” button during playback. The item changes as follow. OFF t ALL t FOLDER t OFF... • OFF : Cancels shuffle play. • ALL : Plays randomly all tracks on the disc. • FOLDER : Plays randomly all tracks of the current folder. EQ (Equalizer) Touch the “EQ”... -
Page 30: Dvd/Vcd Operation
DVD/VCD operation Playing a DVD/VCD disc The disc is drawn in, and “Disc reading” appears on the dis- play window, and playback starts automatically. If playback does not start, press the B button. Notes • It takes several seconds for the unit to detect a disc type. •... -
Page 31: Av Off (Audio/Video Off)
DVD/VCD operation AV OFF (Audio/Video off) Please see page 12 for details. Pause Touch the ?? button during playback. To return to the playback, press the B button. Skip to the next chapter/track Touch briefly the M? button to select the next chapter/track. Skip to the previous chapter/track Touch briefly the ?m button within 4 seconds of playing time. -
Page 32: Operating The Title
DVD/VCD operation Operating the TITLE When a disc has more than one title, you can move to another title as follows. 1. Touch the screen during playback. The setup screen displays on the screen. 2. Touch the “TITLE” button. 3. Touch the v,V,b b or B B buttons to select a title you want. 4. -
Page 33: Operating The
DVD/VCD operation Operating the It is the function to use at the display requiring menu selection, while playing a DVD. (The various playing displays are required at the recorded DVD title during playing.) The menu screen appears on the screen. Please see page 31 for details. -
Page 34: Audio
DVD/VCD operation AUDIO Touch the “AUDIO” button during playback. If the disc contains multi- audio languages, you can change to a different audio language during playback. The menu item changes. SUBTITLE Touch the “SUBTITLE” button during playback. If the disc contains multi- subtitle languages, you can change to a different subtitle language during playback. -
Page 35: Eq (Equalizer)
DVD/VCD operation Aspect Ratio Select the monitor type your unit to play DVD recorded with aspect ratio of 16:9. 16:9 t 4:3 t ZOOM1 t ZOOM2... 16:9 Select when the aspect ratio of your screen fixed to 16:9 (Wide screen). Select when the aspect ratio of your screen fixed to 4:3 (Conventional screen). -
Page 36: Navi Operation
NAVI operation What is GPS? The Global Positioning System (GPS) is a satellite-based navigation system made up of a network of 24 satellites placed into orbit by the U.S. Department of Defense. GPS was originally intended for military applications, but in the 1980s, the government made the system available for civilian use. -
Page 37: Installing The New Map Data In The Memory
NAVI operation Installing the new map data in the memory If you want to use these functions, please insert the map disc again. In addition, you may need to insert the map disc and store new data in the memory during navigation operation. 1. -
Page 38: Map Description
NAVI operation Map description There are various buttons and buttons on the map screen that are used to plan and view a route. 1. Press the “NAVI” button to select the navigation. 2. The map screen appears on the screen. The current location of your vehicle. - Page 39 NAVI operation Guide mode The map of your surroundings is shown on the left, and an arrow indicating the direction of travel is shown on the right. - Please see page 57 for details. (Route Overview) Each touch changes the guide mode. Trace mode You can check information about the route between your current location and your destination.
-
Page 40: Scrolling The Map Display
NAVI operation Scrolling the map display Whenever you switch to the map display, your current position is shown just below the center of the display. However, you can scroll the map in any direction using the finger touch in the direction you wish to scroll. To stop scrolling, release the finger touch and allow it to return to the center position. -
Page 41: Changing The Map Scale
NAVI operation Changing the map scale The current map scale is indicated by the map scale indicator towards the bottom right of the map. You can easily increase or decrease the map scale (zoom in or zoom out) using the # and 3 buttons on the Navigation commander. - Page 42 NAVI operation 7. Map screen displays on the screen. 8. Touch the “OK” button. 9. Route calculation starts automatically. 10. The “ROUTE OVERVIEW” screen displays on the screen. 11. Touch the “Guide” button. 12. To guide you to your destination. The navigation will give you spoken instructions and visual instructions on the screen.
-
Page 43: Adding A Destination
NAVI operation Adding a destination You can select way points (locations you want to visit on the way to your destination) and you can calculate the route to pass through these locations. Notes • You can add up to four way points. •... -
Page 44: Destination
NAVI operation Destination Touch the “Destination” button. The menu appears on the screen. Memory Points You can register a single stored location for easy and quick routing from any current location. One use of this feature might be to store the location of your office, for example. Or you might enter a favorite restaurant that you often visit. -
Page 45: Modifying Memory Points
NAVI operation Modifying memory points You can select a point from the list of stored “MEMORY POINT”. You can also save or edit points from this item. 1. Touch an item from the list. The listing is highlighted in orange. 2. -
Page 46: Previous Dest. (Previous Destination)
NAVI operation Previous Dest. (Previous destination) The “Previous Dest” is a convenient list of places that you have routed to in the past. Up to previous destinations are stored in the list, and you can register or delete particular listings at any time. To set a route back to one of these listings, all you have to do is to select it from the list. -
Page 47: Address Search : Street
NAVI operation Address Search : Street This function, which cannot be used in the memory navi mode : Street . If you know the address of your destination, you can use it to set a route. 1. Touch the “Address Search” button. The text entry palette appears on the screen. -
Page 48: Address Search : City Street
NAVI operation Address Search : City Street 1. Touch the “Address Search” button. The text entry palette appears on the screen. 2. Touch the first letter of the city you want to input the name. (City) You may enter only the first few letters, highlight “OK” button. -
Page 49: Junction Search : Street1 Street2
NAVI operation Junction Search : Street1 Street2 This function cannot be used in the memory navi mode : Street1 Street2. If you failed to obtain a city, town, or village name in the “Address Search” above, or if there is more than one street matching the name you have input, you will be presented with a list of cities, towns, and villages that have a matching road or street. -
Page 50: Poi (Point Of Interest) Search : Name
NAVI operation POI (Point of interest) Search : Name Information about various facilities (Point of Interest POI), such as petrol stations, amusement parks or restaurants is available. By selecting the category (or entering the POI Name or City), you can search for a POI. 1. -
Page 51: Poi (Point Of Interest) City , Name
NAVI operation POI (Point of interest) Search : City Name 1. Touch the “POI Search” button. The text entry palette displays on the screen. 2. Touch the “City” button. 3. Touch the first letter of the POI you want to input the name of. -
Page 52: Poi (Point Of Interest) Category , Name
NAVI operation POI (Point of interest) Search : Category Name 1. Touch the “POI Search” button. The text entry palette appears on the screen. 2. Touch the the “Category” button. 3. Touch the item from the list (CATEGORY LIST). The listing is highlighted in orange. 4. -
Page 53: Poi (Point Of Interest) City , Category , Name
NAVI operation POI (Point of interest) Search : City Category Name 1. Touch the “POI Search” button. The text entry palette appears on the screen. 2. Touch the “City” button. 3. Touch the first letter of the POI you want to input the name of. -
Page 54: Poi (Point Of Interest) Category , City , Name
NAVI operation POI (Point of interest) Search : Category City Name 1. Touch the “POI Search” button. The text entry palette appears on the screen. 2. Touch the “Category” button. 3. Touch the item from the list (CATEGORY LIST). The listing is highlighted in orange. 4. -
Page 55: Nearest Poi (Point Of Interest)
NAVI operation Nearest POI (Point of interest) The map information on the memory includes the location of many points of interest. These range from railway stations to amusement parks and restaurants. You can use this function to quickly locate and route to any one of these points of interest. -
Page 56: Route
NAVI operation ROUTE Touch the “ROUTE” button. The menu appears on the screen. The route from the current position to your destination is recalculated. 1. Route calculation starts automatically. 2. The “ROUTE OVERVIEW” screen appears on the screen. Detour You can set the length of the area, and avoid just that area, or you can even search a new route from the current location to your destination. -
Page 57: Cancel Route
NAVI operation Cancel Route If you no longer need to travel to your destination or if you want to change your destination. Route Overview You can check information about the route between your current location and destination. Touch the “Route Overview” button. The “ROUTE OVERVIEW”... -
Page 58: Route Options
NAVI operation Route Options You can set the route option on the screen to make it operate according to your particular needs. (This option is included because some drivers do prefer it) Touch the “Route Options” button. The “ROUTE OPTIONS” screen appears on the screen. Route Condition Fast : The unit calculates the route by picking the shortest distance and highest speed limits. -
Page 59: Setup
NAVI operation SETUP Touch the “SETUP” button. The menu appears on the screen. Orientation North up : Orients the map so that north is always at the top. Head up : Orients the map so that your forward direction is always at the top. Color Day : Always use to day-driving background colour. -
Page 60: Guidance
NAVI operation Guidance The navigation allows warnings and alerts which, when selected ON, will provide voice prompts. Confluence Memory Points Service Area Volume This sound volume for the navigation can be set. Touch the + or - buttons to change the guidance volume. Mute : the Items related to sound volume muting can be set. -
Page 61: Troubleshooting (Navigation)
Troubleshooting (Navigation) Cannot identify the current location. (GPS not receiving) GPS cannot be used indoors and must be connected to a power source with ACC to a vehicle in a location where the sky can be seen well. When initially connecting the GPS, it usually takes about 10 minutes to be normally operating, but the connection speed can differ depending on the weather condition, and surrounding obstacles. - Page 62 Troubleshooting (Navigation) The path guide can be different from the actual path (Path guide error) • When the road is closely parallel. • When the splitting road angle is very small. • When there is an adjacent road when turning. •...
-
Page 63: Troubleshooting
Troubleshooting Symptom Cause Correction Leads and connectors are not Confirm once more that all Power doesn’t properly connected. connections are correct. turn on. The fuse is blown. Rectify the problem that caused The unit doesn’t the fuse to blow, and then replace operate. - Page 64 Troubleshooting Language Codes Use this list to input your desired language for the following initial settings: Disc Audio, Disc Subtitle, Disc Menu. Language Code Language Code Language Code Language Code Abkhazian 6566 Fiji 7074 Lingala 7678 Singhalese 8373 Afar 6565 Finnish 7073 Lithuanian...
-
Page 65: Troubleshooting
Troubleshooting Bluetooth phone compatibility list • If even a phone as described in this list meets requirements of Bluetooth Hand-free Profile 1.0 and Object Push Profile 1.1, it can operate. However, it is noted that we can- not assure for operation by function. •... -
Page 66: Specifications
Specifications GENERAL Output Power ......... . 50W x 4CH (Max.) Power Source . - Page 67 P/NO : ????
Need help?
Do you have a question about the LAN-8660EK and is the answer not in the manual?
Questions and answers