
Related Manuals for bObsweep Junior WJ540011


Summary of Contents for bObsweep Junior WJ540011
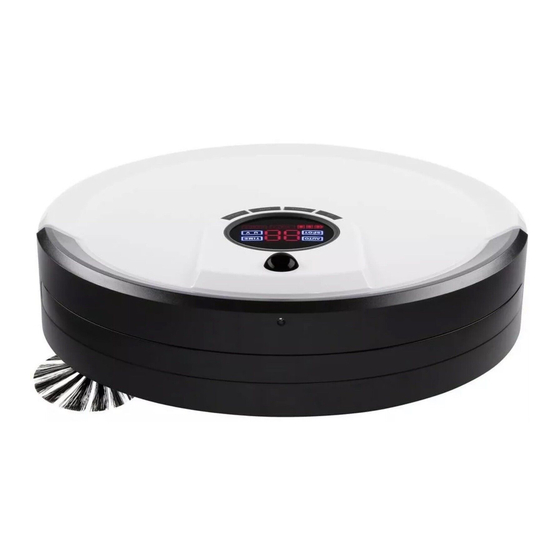
- Page 1 OWNER’S MANUAL How to employ your intelligent floor cleaner Junior™ by bObsweep | Model WJ540011 NEXT...
- Page 2 To see Junior at his best, please read the Quick Start Guide and this manual thoroughly. Welcome to the bObsweep family and happy cleaning! If you have any questions or concerns, feel free to contact our helpful team at: support@bobsweep.com.
- Page 3 Get Junior Important Safety Box Contents Ready to Clean Instructions Charging Remote Control Parts & Maintenance End User Troubleshooting Warranty License Agreement & Checkup Test & FAQs NEXT PREVIOUS...
-
Page 4: Important Safety Instructions
Do not operate Junior or his charging station if they have been damaged in any way. If Junior is not working as he should, or has been dropped, left outdoors, or dropped in water, contact our customer care center at support@bobsweep.com. •... -
Page 5: Box Contents
Box Contents Junior, Your Intelligent Floor Cleaner Charging Station Spare Main Brush Charging Adapter Remote Control Screwdriver Side Brushes (1 Spare) Cleaning Tool Pack of Screws and Blindfold Stickers Filter Replacement Owner’s Manual, Quick Start Guide, Warranty Card NEXT PREVIOUS... - Page 6 Anatomy Top View Bumper Wireless Receiver Display Cover Buttons NEXT PREVIOUS...
- Page 7 Bottom View Charging Plates Front Wheel Side Brush Battery Main Brush ON/OFF Switch (on Junior’s side) Charging Inlet (on Junior’s side) Left and Right Wheels Dustbin NEXT PREVIOUS...
- Page 8 Cover Buttons Junior will clean on his default setting WAFFLE Send Junior to his charging station MUTE Mute Junior’s beeping CHECKUP Put Junior in checkup mode / Deactivate edge sensors (page cleaning charging Oops! I feel there’s something funny going on with my: Edge Sensors Obstacle Sensors Touch Sensors...
- Page 9 Remote Control Charging Station NEXT PREVIOUS...
-
Page 10: Table Of Contents
Get Junior Ready to Clean Install Junior’s Side Brush Charge Junior Sync Junior’s Charging Station Sync Junior’s Remote Control Junior’s First Clean Watch Quick Start Video NEXT PREVIOUS... -
Page 11: Install Junior's Side Brush
Install Junior’s Side Brush Before Junior’s first clean, you must install his side brush, which allows him to sweep along corners, walls, and other hard-to-reach places. To do this, you will need the following materials, all of which are included inside Junior’s box: a side brush, a flat head screwdriver, and a short screw. -
Page 12: Charge Junior
Charge Junior After installing Junior’s side brush, you must now set him to charge. Plug the charging adapter into Junior’s side. Junior will chirp and start charging. Plug the charging adapter into the side Place Junior on his charging station with of the charging station. - Page 13 When Junior is charging, the battery When Junior has fully charged, the bat- bars on his display screen will flash and tery bars will remain still and the word the word “Charging” will appear. “Charging” will disappear. cleaning cleaning charging charging Oops! I feel there’s something funny Oops! I feel there’s something funny...
-
Page 14: Sync Junior's Charging Station
Sync Junior’s Charging Station Junior automatically returns to his charging station when his battery reaches 15%. If Junior has trouble finding his station, it likely needs to be synced. To sync the charging station: While the station is plugged While still holding down Junior will chirp twice to in, hold down the SYNC the SYNC button, flip Ju-... -
Page 15: Sync Junior's Remote Control
Sync Junior’s Remote Control Junior’s remote runs on 2 AAA batteries (not included). If Junior is not responding to his remote, it likely needs to be synced. To sync the remote: Hold down the PAUSE While still holding down Junior will chirp twice to button on Junior’s remote. -
Page 16: Junior's First Clean
Junior’s First Clean Junior is now ready to clean! Press the GO! button on his cover — or on his remote — and he will clean on his default setting. Standby Mode When Junior is on but hasn’t been commanded to do anything for awhile, he enters Standby Mode. - Page 17 Charging Charging Station Placement Auto Charging Manual Charging Conserving Junior’s Battery Watch Charging Video NEXT PREVIOUS...
-
Page 18: Charging Station Placement
Charging Station Placement • Position the charging station against a wall on a hard, flat surface. • Make sure there is at least 10 feet (3 meters) of open space to the front and 2 feet (0.5 meters) to the sides. 2 ft (0.5 m) 2 ft (0.5 m) 10 ft (3 m) -
Page 19: Auto Charging
Auto Charging Junior is smart and automatically searches for his charging station when his battery reaches 15%. If Junior has trouble finding his station, it likely needs to be synced. To sync the charging station: Plug the charging adapter Hold down the SYNC Junior will chirp twice to into the charging station. -
Page 20: Manual Charging
Manual Charging While Junior is charging, the battery bars on his display screen will flash and the word “Charging” will appear. When Junior has fully charged, the battery bars will remain still and the word “Charging” will disappear. Using the charging station: •... -
Page 21: Conserving Junior's Battery
Conserving Junior’s Battery Junior should not sit on his charging station for more than 5 days. If you will not be using him at least once every 5 days, flip his side power switch OFF to conserve battery. days NEXT PREVIOUS... -
Page 22: Remote Control
Remote Control Remote Control Buttons Syncing Junior’s Remote Watch Remote Control Video NEXT PREVIOUS... - Page 23 Remote Control Adjust Junior’s cleaning speed, and control his movements from his remote control. Power Corner Mute Waffle Charge Speed Navigational Arrows Pause Junior’s remote requires 2 AAA batteries (not included). Do not leave the batteries in the remote if you are not using it on a regular basis. Keep the remote at a normal room temperature.
- Page 24 Power • Wakes Junior or puts him in standby mode • Junior will begin cleaning Corner • Junior will start cleaning along corners and walls Mute • Mutes Junior’s beeping while he is in standby mode Waffle • Junior will target a localized mess Charge •...
- Page 25 Syncing Junior’s Remote If Junior is not responding to his remote, it likely needs to be synced. To sync Junior’s remote: Hold down the PAUSE While still holding down Junior will chirp twice to button on Junior’s remote. the PAUSE button, flip Ju- let you know the sync was nior’s power switch ON.
- Page 26 Parts & Maintenance Dustbin Sensors Filters Edge Sensors Main Brush Battery Side Brush Storing Watch Weekly Maintenance Video NEXT PREVIOUS...
- Page 27 Dustbin To empty the dustbin: Push the center black button on Junior’s Open the transparent gate to empty back to release the dustbin, and pull. the bin. NEXT PREVIOUS...
- Page 28 You may wipe the dustbin with a dry When done, replace the transparent gate cloth or brush it with the cleaning tool. and slide the dustbin back into Junior. Never wash the dustbin nor fill it with water or any other fluid.
- Page 29 Filters Three filters are located inside the dustbin’s ceiling. These filters capture fine particles and allergens, preventing them from escaping back into the air. To remove the filters: Eject the dustbin. Pull the filter’s frame towards you. NEXT PREVIOUS...
- Page 30 You will see three filter layers: Mesh filter for larger particles Electrostatic filter for fine particles HEPA filter for sub-micron particles Use the cleaning tool to brush dust off the filters. It is recommended that you change Junior’s filters every 6 months, depending on the frequency and intensity of his cleaning.
- Page 31 Main Brush It is recommended that you remove and clean Junior’s main brush on a weekly basis. To clean Junior’s main brush: Remove the screw secur- Use the cleaning tool to re- You may use a pair of ing Junior’s main brush move hair and debris from scissors to cut away any using a flat head screw-...
- Page 32 To reinstall the brush: Replace the end piece and insert the Lastly, re-tighten the screw. opposite end of the brush into the square indentation inside Junior. NEXT PREVIOUS...
-
Page 33: Side Brush
Side Brush It is recommended that you remove and clean Junior’s side brush on a weekly basis. To clean Junior’s side brush: Remove the side brush Use the cleaning tool to Replace the side brush using a flat head screw- brush off hair tangled and re-tighten the screw. - Page 34 Sensors Dirt and dust on Junior’s wall and edge sensors can reduce his performance. Reg- ularly cleaning these sensors ensures that Junior keeps working at his best. To clean Junior’s sensors: Gently wet a soft cloth with cold water or rubbing alcohol. Then, wipe the wall sensors along Junior’s bumper and the oval-shaped edge sensors on his under- side.
- Page 35 Deactivate Edge Sensors Watch Deactivate Edge Sensors Video Dark-colored carpeting and certain floor patterns may seem like edges to Junior’s edge sensors. If you notice that Junior stops working on your carpet and displays that he feels “something funny going on” with his edge sensors, then you may need to temporarily deactivate them.
- Page 36 To reactivate Junior’s edge sensors: Hold down the CHECKUP button on After the 4 bars stop flashing and dis- Junior’s cover. The 4 bars above it will appear, release the CHECKUP button. begin to flash on Junior’s screen. Junior’s edge sensors are active again. cleaning charging Oops! I feel there’s something funny...
- Page 37 Battery To replace Junior’s battery: Remove the battery cover on Junior’s Lift the battery out of its compartment, underside using a Phillips head screw- and unplug the connecting wires. driver. Do not let Junior sit idly with his power switch ON for more than five days;...
- Page 38 Plug the new battery in and slide it into Re-tighten the screws on the battery the empty compartment. cover. NEXT PREVIOUS...
- Page 39 To charge Junior’s new battery: Plug the charging adapter into Junior’s side, Junior will chirp and start charging. Storing Junior If you are not using Junior for an extended period of time, unplug his charging sta- tion, remove his battery, and store everything in a dry place at room temperature. Do not leave Junior in direct sunlight.
-
Page 40: Troubleshooting
Troubleshooting & Checkup Test Troubleshooting Home Checkup Test Junior’s Cleaning Behaviors Junior’s Challenges NEXT PREVIOUS... - Page 41 If after attempting the suggested solutions Junior’s problem persists, you may want to perform a home checkup test on him (see page 46). You may also con- tact our customer care center at support@bobsweep.com. For handy video guides, visit owners.bobsweep.com, or scan this QR code: NEXT PREVIOUS...
- Page 42 Oops! I feel there’s something funny going on with my: Edge Sensors The edge sensors are blocked or dirty. Junior’s four, oval-shaped edge sensors are located on his underside, near his bumper. What to do: • Clean the sensors using a clean, dry cloth or compressed air. If Junior is continually having trouble with his edge sensors while working on dark- colored carpeting, you may need to deactivate them.
- Page 43 Left Wheel Something is blocking the left wheel. What to do: • Use the cleaning tool or compressed air to remove any dust or debris that may be jamming the left wheel. Right Wheel Something is blocking the right wheel. What to do: •...
- Page 44 Wall Sensors The wall sensors are blocked or dirty. What to do: • Do a visual check on the transparent strip on Junior’s bumper. If it is too dirty for you to see what is behind it, wipe it with a clean, damp cloth. •...
- Page 45 Power System Junior’s battery is disconnected or has absolutely no juice left. What to do: • Check Junior’s battery connection. • Place Junior directly onto his charging station and allow him to charge for a few hours. If this fails to wake him, then Junior may need a new charging station. What to do: •...
- Page 46 Junior’s is now in checkup mode. power switch ON. Release the CHECKUP button. Do not press any additional buttons. While in checkup mode, the “bObsweep” logo will flash on Junior’s screen. NEXT PREVIOUS...
- Page 47 Step One: Edge Sensors • The 4 bars at the top of the screen should be lit on Junior’s display. • Lift Junior about 6 inches (15 cm) off the ground. You should see the 4 bars turn off. • If all 4 bars turn off while Junior lifted, place him back on the floor.
- Page 48 Step Two: Wall Sensors • Use a thick, flat, and white surface to imitate a wall and drag it around Junior’s bumper. • The 5 bars at the bottom of the screen should light up one at a time as you move your imitation wall around Junior’s bumper.
- Page 49 Step Three: Touch Sensors • Press the left side of Junior’s bumper and the left bar should light up; press the right side of the bumper and the right bar should light up. • Press the center of the bumper and both the left and right bars should light up at the same time.
- Page 50 Step Four: Charging Station The charging station must be synced and plugged in for this step of the checkup test. • Next, press the GO! button on Junior’s cover. • Place Junior directly in front of his charging station, about 1 ft (0.3 m) away. •...
- Page 51 The far left and right battery bars represent the station’s sensors. If either one of them fails to light up, then clean the window in front of Junior’s charging station. The two middle battery bars represent Junior’s sensors. If they fail to light up, wipe clean Junior’s cover receiver and the small sensor on the center of his bumper.
- Page 52 Step Five: Display Screen • Press the GO! button on Junior’s cover once more. Each icon on Junior’s screen will light up in a repeating rotation. cleaning charging Oops! I feel there’s something funny going on with my: Edge Sensors Obstacle Sensors Touch Sensors Dustbin...
- Page 53 Step Six: Brush and Suction Power • Press the WAFFLE button on Junior’s cover. Both the side brush and the main brush should start rotating and you should feel air flowing from the back of the dustbin. If Junior’s main brush is having difficulty moving, Junior will let you know by indicating on his screen that there is “something funny going on”...
- Page 54 Step Seven: Wheels • Lift Junior off the floor to keep him from running away! • Next, press the MUTE button and his wheels should drive forward. • Press the MUTE button once more. Junior’s wheels should drive backwards. If Junior is having difficulty rotating either one of his wheels, he will indicate on his screen that there is “something funny going on”...
- Page 55 If Junior completes the checkup test without any issues, then his internal parts are working properly! Contact support@bobsweep.com or scan this QR code if you have any questions, as our doctors at the bObsweep hospital are always ready to help! NEXT PREVIOUS...
- Page 56 Junior’s Cleaning Behavior Junior’s cleaning pattern may look quite different from the way a human would clean: he may spin in a gradually widening circle, follow along walls, or zigzag across a small area. Sometimes he may seem to be ignoring some spaces or spending too much time on others —...
- Page 57 Junior’s Challenges Unique Furniture Junior is designed to maneuver around furniture of most shapes and sizes, but certain configurations may confuse him temporarily. Junior may sometimes find it difficult to clean under chairs with narrow legs, or furniture that is too low for his bumper sensors to detect.
- Page 58 Inclines Sometimes Junior will attempt to drive up angled surfaces and get stuck for a few minutes before deciding to clean somewhere else. This is because Junior wants to cover every spot in your home and will try his hardest to overcome any obstacle! As long as Junior does not indicate on his screen that there is a problem, let him find his own way around your home and continue cleaning.
- Page 59 Warranty & FAQs Warranty Information FAQs NEXT PREVIOUS...
-
Page 60: Warranty Information
Even after Junior’s 1-year warranty is over, replacement parts and visits to the bObsweep hospital are subsidized between 25% – 50% for 5 years from the date he was first purchased. To activate Junior’s warranty, keep your original receipt and register him online at bobsweep.com/warranties/registerbobsweep. - Page 61 1. Where can I find Junior’s how-to videos? Junior’s “training” videos can be found at Junior’s Owners’ Corner: owners.bobsweep.com. 2. How long should Junior’s battery last? The exact time depends on the type of surface Junior is cleaning as well as the age of the battery.
- Page 62 6. My Junior won’t turn on no matter what I do. If Junior does not start after flipping his power switch ON, his battery has likely drained too low to operate. To recharge him, place him directly onto his charging station with the metal plates on his underside lined up with the nodes on his station.
- Page 63 11. Junior is telling me there’s “something funny going on” with one of his parts. How can I fix this? Junior notifies you directly on his screen the specific reason his work has been interrupted. This self-scanning feature allows you to quickly identify the source of the problem.
- Page 64 Call us toll free at 1-888-549-8847 for support in the United States and Canada, or e-mail us at support@bobsweep.com. To watch Junior’s how-to, repair, and troubleshooting videos; order parts; and connect with your extended bObsweep family members, visit owners.bobsweep.com. NEXT PREVIOUS...
- Page 65 End User License Agreement NEXT PREVIOUS...
- Page 66 A separate license is required for each additional use and/or individual user in all other cases. If you are an entity, Bobsweep grants you the right to designate one individual within your organization to have the sole right to use the Bobsweep Software and the Bobsweep in the manner provided above.
- Page 67 TERMINATION: This Agreement becomes eective on the date you accept this Agreement and will continue until terminated as provided for in this Agreement. You may terminate this Agreement voluntarily at any time. Bobsweep may terminate this Agreement at any time if you are in breach of any of its terms and conditions, and may refuse to license the Bobsweep Software or the Bobsweep to you after termination.
- Page 68 ® and © bObsweep Inc. All rights reserved. PREVIOUS...
Need help?
Do you have a question about the Junior WJ540011 and is the answer not in the manual?
Questions and answers