
Related Manuals for bObsweep SW603001


Summary of Contents for bObsweep SW603001
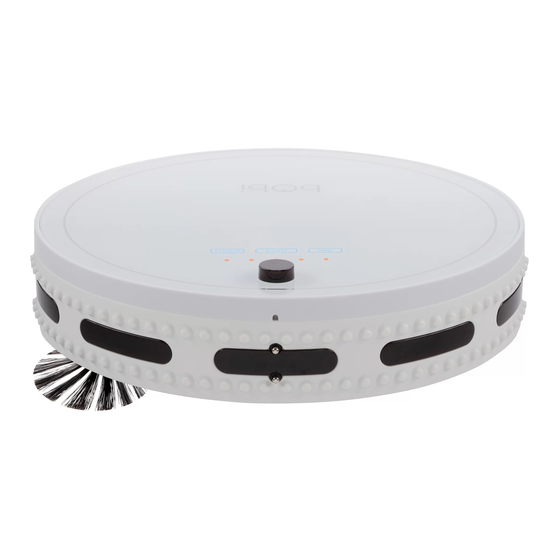
- Page 1 OWNER’S MANUAL How to employ your intelligent floor cleaner bObi Classic™ | Model SW603001 NEXT...
- Page 2 To see bObi at her best, please read the Quick Start Guide and this manual thoroughly. Welcome to the bObsweep family and happy cleaning! If you have any questions or concerns, feel free to contact our helpful team at support@bobsweep.com...
- Page 3 Important Safety Box Contents Anatomy Instructions Get bObi Charging Remote Control Ready to Clean Cleaning Schedule Parts & Troubleshooting Maintenance & Home Checkup Warranty End User & FAQs License Agreement NEXT PREVIOUS...
-
Page 4: Important Safety Instructions
• If bObi, her remote control, charging station, or blOck (not included) has been damaged, do not operate them. Contact our customer care center at support@bobsweep.com. • Do not handle bObi, her remote control, blOck (not included), or her charging station with wet hands;... - Page 5 • bObi is composed of electronic components that in rare and unintended cases can cause hazards of heating, fire, and other malfunctions. Furthermore, because bObi is capable of and intended for autonomous movement and cleaning, her use poses the risk of collision with property, pets, and persons and unintended removal of articles, such as small valuables, jewelry, or hair of persons or pets lying on the floor, among others.
-
Page 6: Box Contents
Box Contents bObi Classic Charging Station Spare Main Brush Charging Adapter Remote Control Screwdriver Spare Side Brush Cleaning Tool Pack of Screws Blindfold Stickers Mini-Mop Attachment 2 Microfiber Mopping Cloths Spare HEPA Filter Owner’s Manual, Quick Start Guide, Warranty Card Syncing Tool 2 Spare Main Brush Holders NEXT... - Page 7 Anatomy Anatomy Top View Cover Touchscreen Buttons Transmitter Charging Indicator Touch Sensors Wall Sensors Charging Inlet Power Switch NEXT PREVIOUS...
-
Page 8: 4 Right Wheel
Bottom View Main Brush Rubber Brush Dustbin Right Wheel Left Wheel Side Brush Edge Sensors Front Wheel UV Light Battery NEXT PREVIOUS... - Page 9 Charging Station Remote Control NEXT PREVIOUS...
- Page 10 Touchscreen Buttons bObi will clean on her default cleaning mode JUICE bObi will search for her charging station to refuel WAFFLE bObi will clean a localized mess NEXT PREVIOUS...
- Page 11 Get bObi Ready to Clean Install the Battery First Charge First Clean Touchscreen Buttons Watch Quick Start Video NEXT PREVIOUS...
- Page 12 Install bObi’s Battery Before bObi’s first clean, you must install her battery. Make sure bObi’s power switch is turned OFF. Replace the cover and Plug the battery in at the Remove the battery cover circuit junction. Tuck the retighten the screws. using a Phillips head wire into the side of the screwdriver.
- Page 13 Charge bObi Plug the charging adapter into the side Place bObi on her charging station with of the charging station. The station’s the metal nodes on her front resting blue power light will turn on. against the plates on her station. bObi will chirp, her lights will flash, and the center light will blink to indicate that she is charging.
- Page 14 Alternatively, you may charge bObi by plugging the charging adapter into the inlet above her power switch. NEXT PREVIOUS...
- Page 15 bObi’s First Clean bObi is now ready to clean! Flip her power switch ON, and press the GO! button on her cover or remote. bObi will clean on her default setting. If bObi is left idle with her power switch ON, her screen will go blank and she will enter standby mode.
-
Page 16: Touchscreen Buttons
Touchscreen Buttons Watch Cleaning Modes Video There are three touchscreen buttons on bObi: GO!, JUICE, and WAFFLE. These buttons do not work while bObi is on her charging station. To use these buttons, you must first remove bObi from her charging station. Alternatively, you can use bObi’s remote to select her cleaning modes without needing to remove her from her charging station. - Page 17 Charging Placement Auto Charging Manual Charging Watch Charging Video NEXT PREVIOUS...
-
Page 18: Charging Station Placement
Charging Station Placement • Position bObi’s charging station against a wall on a hard, flat surface. • Make sure that there is at least 10 feet (3 m) of open space in front of the charging station and 2 feet (0.5 m) on either side of the station. 2 ft (0.5 m) 2 ft (0.5 m) 10 ft (3 m) -
Page 19: Auto Charging
Auto Charging bObi automatically searches for her charging station when her battery reaches 15% capacity. She will chirp, stop vacuuming, and display JUICE on her cover while searching. When bObi detects her charging station, she will line herself up, dock, and begin to charge. If bObi has trouble finding her station, you likely need to sync the station. - Page 20 While still pressing the sync button, flip bObi will chirp twice to let you know the bObi’s power switch ON. sync was successful. Direct bObi to her charging station at any time by pressing the JUICE button on her cover or remote. To prolong bObi’s battery life, flip her power switch OFF...
-
Page 21: Manual Charging
Manual Charging Using the charging station: • Place bObi on her charging station with the metal nodes on her front resting against the plates on her station. Using the adapter: • Plug the charging adapter directly into the inlet above bObi’s power switch. NEXT PREVIOUS... -
Page 22: Remote Control
Remote Control Remote Buttons Syncing Remote Navigational Buttons Watch Remote Control Video NEXT PREVIOUS... - Page 23 Remote Control The remote control is your most useful tool when communicating with bObi. It allows you to set bObi’s cleaning schedule and activate her cleaning modes. Each time you select an action on the remote, bObi will chirp once before performing the selected action.
- Page 24 CUR TIME (Current Time) • Sets the current time and weekday SCH TIME (Scheduled Time) • Sets bObi’s cleaning schedule All/None • Selects and deselects all weekdays • Turns bObi’s UV light ON and OFF HI/BYE • Puts bObi in and out of standby mode •...
- Page 25 Syncing bObi with her Remote bObi’s remote control requires two AAA batteries (not included). Do not leave the batteries in the remote if you are not using it on a regular basis. Keep the remote at room temperature. If bObi is not responding to her remote, it likely needs to be synced.
- Page 26 Using the navigational arrows: Hold down the remote’s navigational buttons to keep bObi moving in the desired direction. Release the button when you are done manually driving bObi. bObi’s edge sensors are located along her front, not along her back. Do not reverse bObi towards edges, as she will fall.
-
Page 27: Cleaning Schedule
Cleaning Schedule Current Time & Day Cleaning Schedule Auto-Resume Watch Cleaning Schedule Video NEXT PREVIOUS... - Page 28 Set bObi’s Cleaning Schedule bObi can be programmed to start cleaning on the days and time of your choosing through her remote control. To set up bObi’s cleaning schedule, you must first set the current time and weekday on her remote. Weekdays Signal Indicator UV Indicator...
- Page 29 Weekdays • Numbers 1 through 7 at the top of the screen represent days of the week: 1 = Monday 2 = Tuesday 3 = Wednesday 4 = Thursday 5 = Friday 6 = Saturday 7 = Sunday Signal Indicator •...
-
Page 30: Setting The Current Time
Setting the Current Time To set the current time on bObi’s remote: The first hour digit will start Press the RGHT button to Make sure bObi’s power flashing. Use the FWD and move on to the next digits. switch is ON. Press the BACK buttons to adjust Use the FWD and BACK CUR TIME button on bObi’s... - Page 31 Press the RGHT button When reach Press the FWD and BACK until the frame around current weekday, press buttons to scroll through number 1 at the top of the CUR TIME again to save the weekdays. screen starts to flash. your settings.
- Page 32 Setting a Cleaning Schedule To set the cleaning time and days: Press the RGHT button to Make sure bObi’s power The first hour digit under move on to the next digits. switch is ON. Press the SCHEDULE TIME will start Use the FWD and BACK SCH TIME button on bObi’s flashing.
- Page 33 Press OK to select a day Press the RGHT button until Press the FWD and BACK while the frame around the frame around the first buttons to scroll through that day is flashing. Days day of the week, number 1, the weekdays.
- Page 34 bObi will chirp to confirm Use FWD and BACK to scroll Press SCH TIME to save she has saved her new through weekdays and press your settings. schedule. OK to select or deselect cleaning for each day. NEXT PREVIOUS...
-
Page 35: Auto-Resume
Auto-Resume On auto-resume mode, bObi leaves her charging station EVERY TIME her battery is full to perform “back-to-back” cleaning cycles. To enable auto-resume: Make sure bObi and her remote are Press the SCH TIME on bObi’s remote. synced and bObi’s power switch is ON. The first hour digit under SCHEDULE TIME will start flashing. - Page 36 Press the STOP button and “ ” Press the SCH TIME button again to FFG0 — finish fueling and go — will appear on save your settings. the remote’s screen. NEXT PREVIOUS...
- Page 37 To disable auto-resume: Press the SCH TIME Press TIME Press the STOP button button on the remote. button again to save your and “ ” will reset to FFG0 settings. the last saved time. NEXT PREVIOUS...
-
Page 38: Parts & Maintenance
Parts & Maintenance Mini-Mop Side Brush Dustbin UV Lamp HEPA Filter Front Wheel Washing the Dustbin Sensors Main Brushes Blindfold Stickers Storing NEXT PREVIOUS... - Page 39 Mini-Mop Watch Mopping Video bObi comes with a mini-mop attachment and 2 microfiber mopping cloths, which can be used dry or damp. bObi’s mini-mop can be used to remove small stains from hard floors such as tile, laminates, and hardwood. To use bObi’s mini-mop: Hold the attachment per- Lay the attachment flat...
- Page 40 To detach bObi’s mop: Lift the attachment until it Remove the mopping Grip the button on the back is perpendicular to bObi, cloth from the mini-mop of the mop attachment and attachment and wash pull up to unlock. then pull up to detach. as needed.
- Page 41 Dustbin Watch Dustbin Video To use bObi’s mini-mop: Pull the dustbin out. Pull up the two color Hold down eject clips on either side of the button on the back of the dustbin with both hands. dustbin. This will release the gate. Use the cleaning tool to remove remaining dirt and dust from the dustbin.
-
Page 42: Hepa Filter
HEPA Filter Watch HEPA Filter Video The HEPA filter captures fine particles and allergens, and prevents them from escaping back into the air. To clean the filter: Flip the dustbin upside- Remove the filter and dust Eject the dustbin and down and open the clear it off using bObi’s cleaning release the gate. - Page 43 Washing the Dustbin One of bObi’s best features is her washable dustbin. To wash the dustbin, first remove the vacuum motor and filter. To remove the vacuum motor: Eject the dustbin, and remove the HEPA Push the button on top of the dustbin. filter.
- Page 44 To reinstall the dustbin: Replace the filter and vacuum motor. Slide the dustbin into bObi until it locks properly. NEXT PREVIOUS...
-
Page 45: Main Brushes
Main Brushes Watch Brush Maintenance Video bObi has one bristled brush and one rubber brush. It is recommended that you remove and clean bObi’s main brushes every few cleaning cycles. To remove and clean the main brushes: Use the cleaning tool to re- Flip bObi over and press Lift the locking bar up and move debris from the ends... - Page 46 Remove and clean the rubber brush You may use a pair of scissors to cut ends. Make sure the metal cores remain away any hair or threads wrapped in place before replacing the brush ends. around the brush, or a pair of tweezers to remove congestion from the notches where the main brush is held.
- Page 47 Starting with the rubber brush, replace Lower the locking bar until it clicks and the brushes. Insert the socket ends first, locks into place. and lower the rubber ends into place under the latch bar. NEXT PREVIOUS...
-
Page 48: Side Brush
Side Brush bObi uses a side brush to clean along corners and walls. Dirt and dust trapped around the brush can hinder its ability to move freely and reduce bObi’s efficiency. To clean the side brush: Replace the side brush Remove the side brush Use the cleaning tool to and retighten the screw. - Page 49 UV Light bObi’s UV light is activated by default. The UV light is only visible while she is cleaning. To toggle the UV light ON and OFF: • While bObi is cleaning, press the UV button on the remote. Do not look directly into the UV light.
-
Page 50: Front Wheel
Front Wheel Watch Front Wheel Video To remove and clean the front wheel: Clean the wheel and the Replace the wheel and Using a flat head screwdriver socket where it is held. push it down until it locks for leverage, pop the wheel into place. - Page 51 Sensors Dirt and dust on bObi’s wall and edge sensors can reduce her performance. Regularly cleaning these sensors ensures that bObi keeps working at her best. To clean bObi’s sensors: • Wipe the wall and edge sensors using a cloth slightly dampened with cold water or rubbing alcohol.
-
Page 52: Blindfold Stickers
Blindfold Stickers Dark-colored carpet and certain floor patterns may seem like edges to bObi’s edge sensors. If bObi displays Error Code 01 (Er 01) on her remote while working on your carpet, you may need to “blindfold” her using the blindfold stickers that came in her box. - Page 53 Storing bObi should not be left unused with her power switch ON for more than 5 days. If you are not using bObi for an extended period of time, switch her OFF. Then, unplug the charging station, remove bObi’s battery, and store everything in a dry place at room temperature.
-
Page 54: Troubleshooting
Troubleshooting & Checkup Test Troubleshooting Error Codes Home Checkup Test Cleaning Behavior NEXT PREVIOUS... - Page 55 (see page 61). You may also contact our customer care center at support@bobsweep.com, or call 1-888-549-8847 for support in the US and Canada. Our business hours are Monday – Friday 9 am – 5 pm, PST.
-
Page 56: Error Codes
Error Codes Edge Sensors Error Code 01 (Er 01): bObi’s four, oval-shaped edge sensors are located on her underside, near her bumper. What to do: • Clean the edge sensors using a clean, dry cloth or compressed air. • If bObi displays Error Code 01 while working on dark-colored or patterned flooring, you may need to blindfold her (see page 52). - Page 57 Brushes Error Code 02 (Er 02): What to do: • Remove bObi’s main and side brushes, and clean them thoroughly from end to end (see page 45). You may use a pair of scissors to cut hair or thread wrapped around bObi’s brushes, or a pair of tweezers to remove congestion from the ends of the brushes.
- Page 58 Power System Error Code 03 (Er 03): What to do: • Check bObi’s battery connection. Open the battery compartment and unplug the battery. Wait 30 seconds, then reinstall the battery. • Plug the charging adapter directly into the inlet above bObi’s power switch.
- Page 59 Left/Right Wheels Error Code 04 (Er 04): What to do: • Check bObi’s left and right wheels for jamming. • Remove the two screws around each wheel and use compressed air to remove debris inside the brush compartments. NEXT PREVIOUS...
- Page 60 Dustbin Error Code 05 (Er 05): What to do: • Remove the dustbin and empty it. Turn the dustbin around and gently wipe the metal plates on its bottom with a soft, dry cloth. • Look at where the dustbin connects to bObi’s body. Under the red plastic casing is the dustbin’s contact points.
- Page 61 1-888-549-8847 for toll-free support in the US and Canada, or email us at support@bobsweep.com. Our business hours are Monday – Friday 9 am – 5 pm, PST. To put bObi in checkup mode: Press and hold the OK bObi’s touchscreen but-...
-
Page 62: Touchscreen Buttons
bObi will beep twice to confirm that she is in checkup mode. You may now release the OK button on the remote. The current and scheduled times should clear from the remote, and GO!, JUICE, and WAFFLE should all remain lit on bObi’s cover. The 5 lights above the touchscreen buttons should cycle sequentially. - Page 63 Edge and Wheel Sensors Step 1: The checkup mode indicator should read 0000. Numbers 1 – 4 at the top of the remote represent bObi’s 4 edge sensors, and the numbers 5 and 6 represent the 2 ground sensors inside bObi’s left and right wheels. Remove bObi’s side brush before testing her edge sensors.
- Page 64 Firmware Version Step 2: While in mode 0000, press LEFT on the remote. The checkup mode indicator should read 0001. The main 4-digit number in the center of the screen indicates the firmware version of your bObi. NEXT PREVIOUS...
- Page 65 Battery Step 3: While in mode 0001, press LEFT on the remote. The checkup mode indicator should read 0002. The main 4-digit number in the center of the screen indicates the voltage of bObi’s battery in millivolts (mv). A fully charged battery should have a voltage between 1300 and 1600 mv. If the voltage is below 1400 mv, charge bObi for at least 8 hours and repeat this step.
- Page 66 Wall Sensors Step 4-1: While in mode 0002, press RGHT on the remote. The checkup mode indicator should read 0100. Ignore the main 4-digit number in the center of the screen. Use a thick, flat, and white surface to imitate a wall in front of bObi. Drag the imitation wall from the left side of bObi’s front around to the right side.
- Page 67 Touch Sensors Step 4-2: Do not press any additional buttons. Ignore the numbers on the main 4-digit number in the center of the screen. 80 touch sensors surround bObi’s front. While in mode 0100, press on any of the touch sensors on the left side of the bumper and the number 6 should be underlined.
- Page 68 Usage Counter Step 5: While in mode 0100, press RGHT on the remote. The checkup mode indicator should read 0200. The main 4-digit number in the center of the screen indicates the number of times bObi’s battery has been charged. NEXT PREVIOUS...
- Page 69 Left and Right Wheels, Brushes, and Vacuum Motor Step 6: Flip bObi over onto a flat surface. While in mode 0200, press RGHT on the remote. The checkup mode indicator should read 0300. As soon as bObi enters this mode, her wheels should drive forward, her brushes should rotate, and her vacuum motor should run.
- Page 70 Charging Station Step 7: While in mode 0303, press RGHT on the remote. The checkup mode indicator should read 0400. The main 4-digit number in center of the screen should read 0000. Place bObi on her charging station with the nodes on her front resting against the plates on her station.
- Page 71 If everything responds properly, bObi’s internal parts are working correctly. If you have any questions, contact our helpful team at support@bobsweep.com, for further assistance. Or, call us toll-free at 1-888-549-8847. Our hours are Monday –...
- Page 72 bObi’s Cleaning Behavior bObi’s cleaning pattern may look quite different from the way a human would clean. She may travel in a straight line, follow along walls, or zigzag across a small area. Sometimes she may seem to be ignoring some spaces or spending too much time on others —...
-
Page 73: Warranty
Warranty & FAQs Warranty Information FAQs NEXT PREVIOUS... -
Page 74: Warranty Information
Even after bObi’s 1-year warranty is over, replacement parts and visits to the bObsweep hospital are subsidized between 25% - 50% for 5 years from the date she was first purchased. To activate bObi’s warranty, keep your original receipt and register her online at bobsweep.com/warranties/registerbobsweep. - Page 75 1. Where can I find bObi’s how-to videos? bObi’s how-to videos can be found at bObi Classic’s owners’ corner at owners.bobsweep.com. 2. How long should bObi’s battery last? The exact time depends on the age of the battery and the type of surface bObi is cleaning.
- Page 76 6. My bObi won’t turn on no matter what I do. If bObi does not start after flipping her power switch ON, her battery has likely drained too low to operate. To recharge, place her on her charging station with the metal nodes on her front resting against the plates on her station.
- Page 77 10. bObi is getting stuck under some of my furniture or traveling into areas with wires that tangle up the brush. How can I stop her from going into these areas? If bObi maneuvers under a piece of furniture and there is only one open entrance, she may need a few minutes to figure out how to escape on her own.
- Page 78 15. I have a question and need to contact bObsweep’s support team. Our devoted team is ready to help you! You can reach us by phone or email.
- Page 79 End User License Agreement NEXT PREVIOUS...
- Page 80 OR WRITTEN INFORMATION OR ADVICE GIVEN BY BOBSWEEP OR ITS AGENTS SHALL CREATE A WARRANTY. If the Bobsweep Software or the Bobsweep is found to be defective in material or workmanship under normal use for a period of one (1) year from the date of receipt, Bobsweep’s entire liability and your exclusive remedy shall be the replacement of the Bobsweep Software or the Bobsweep.
- Page 81 Bobsweep Software or the Bobsweep provided to you after the expiration of the one (1) year period are not covered by any warranty or condition, express, implied or statutory. SOME JURISDICTIONS DO NOT ALLOW THE EXCLUSION OF IMPLIED WARRANTIES, SO THE ABOVE EXCLUSION MAY NOT APPLY TO YOU.
- Page 82 ® and © bObsweep Inc. All rights reserved. PREVIOUS...
Need help?
Do you have a question about the SW603001 and is the answer not in the manual?
Questions and answers