Table of Contents
Advertisement
Advertisement
Table of Contents

Related Manuals for Logik L37SPDB14


Summary of Contents for Logik L37SPDB14
- Page 1 Instruction Manual Sound Stage L37SPDB14...
-
Page 2: Table Of Contents
Contents Safety Warnings ..........................3 Unpacking ............................5 Product Overview ..........................6 Front View .................................. 6 Top View ..................................6 Rear View ................................... 6 Remote Control ..........................7 Remove the Plastic Strip from the Remote Control ..............8 Battery Replacement for the Remote Control ................8 Remote Control Operation Range ....................10 Placing TV or Monitor........................10 Connections ..........................11... -
Page 3: Safety Warnings
Safety Warnings Safety • Read all the instructions carefully before using the unit and keep them for future • Always disconnect the unit from the mains reference. supply before connecting/ disconnecting other devices or moving the unit. • Retain the manual. If you pass the unit onto a third party make sure to include this • Unplug the unit from the mains socket manual. - Page 4 CAUTION RISK OF ELECTRIC SHOCK DO NOT OPEN The lightning flash with arrowhead symbol, within an equilateral triangle, is intended to alert the user to the presence of uninsulated “dangerous voltage” within the unit’s enclosure that may be of sufficient magnitude to constitute a risk of electric shock.
-
Page 5: Unpacking
Thank you for purchasing your new Logik Sound Stage. We recommend that you spend some time reading this instruction manual in order that you fully understand all the operational features it offers. You will also find some hints and tips to help you resolve any issues. -
Page 6: Product Overview
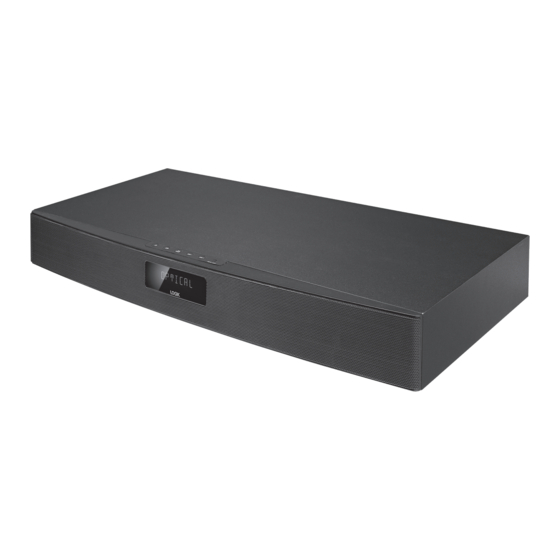
Product Overview Front View 1. Speakers 4. Remote Control Sensor 2. POWER Indicator 5. Subwoofer 3. Display Top View SOURCE / PAIR VOL – VOL + MP3 LINK 1 2 3 4 5 6 4. VOL – Button Button 2. SOURCE Button 5. -
Page 7: Remote Control
Remote Control SOURCE SCAN MUTE VOL + VOL – MENU INFO PAIR PROG 7. MENU Button Button Switch the unit between On and Display menu screen. Standby mode. 8. PAIR Button 2. SCAN Button Access Bluetooth function in BT mode. Scan for radio stations automatically in 9. -
Page 8: Remove The Plastic Strip From The Remote Control
Remove the Plastic Strip from the Remote Control Remove the plastic strip from the battery if the battery is being used for the first time. It is located at the bottom rear of the remote control. Battery Replacement for the Remote Control The remote control requires a CR2025, 3V Lithium battery. - Page 9 Handling the Battery • Improper or incorrect use of batteries may cause corrosion or battery leakage, which could cause fire, personal injury or damage to property. • Install the battery correctly in the battery compartment. • When the battery is exhausted, the remote control will not function. • Only use the battery type indicated in this manual.
-
Page 10: Remote Control Operation Range
Remote Control Operation Range • The remote control sensor at the front unit is sensitive to the remote control’s commands up to a maximum of 6 metres away and within a maximum of a 40° arc. • Please note that the operating distance may vary depending on the brightness of the room. -
Page 11: Connections
Connections Using the OPTICAL Connection Use an optical cable (not included) to connect the TV’s optical output socket to the unit’s OPTICAL socket. Before inserting the optical cable, remove the OPTICAL socket cover. OPTICAL cable (not included) OPTICAL OPTICAL Rear view of the unit If there is no sound output and the display shows PLEASE CHANGE YOUR SOURCE DEVICE TO PCM MODE UNDER AUDIO OUTPUT SETTING, ensure the audio setting of the input source (e.g. -
Page 12: Using The Dab Aerial Connection
Using the DAB Aerial Connection Connect one end of the aerial (included) to the DAB socket at the rear of the unit. Then position the aerial to obtain optimum reception. OPTICAL Using the MP3 LINK Connection Use the 3.5mm to 3.5mm audio cable to connect the audio device’s headphone socket to the unit’s MP3 LINK socket. -
Page 13: Connecting To The Mains Supply
Connecting to the Mains Supply • Ensure that the power supply voltage corresponds to the voltage printed on the back or the underside of the unit. • This unit is designed to operate with the provided mains cable. • Connecting the unit to any other power source may damage the unit. Unwind the mains cable to its full length. -
Page 14: General Operation
General Operation When you first connect the unit to the mains socket, the unit will be in Standby mode. The POWER indicator will light up red. to switch the unit on. The display will show a greeting message HELLO and •... -
Page 15: Dab Operation
DAB Operation Auto scan The auto scan will search for the entire DAB Band III channels. When DAB mode is selected, the unit will start an auto scan. You may also follow the steps below to run a auto scan manually: 1. -
Page 16: Presetting Stations
Presetting Stations You can store up to 20 of your favourite DAB stations to the memory. This will enable you to access your favourite stations quickly and easily. 1. To store a preset, you must first be listening to the station that you would like to save, press the PROG Button on the remote control. -
Page 17: Dab Display Modes
DAB Display Modes Every time you press the INFO button, the bottom line of the display will cycle through the following display modes. DLS (Dynamic Label Segment) Dynamic label segment is a scrolling message that the broadcaster may include with their transmissions. The message usually includes information, such as programme details etc. - Page 18 DAB channels Channel number Channel Frequency 174.928 MHz 176.640 MHz 178.352 MHz 180.064 MHz 181.936 MHz 183.648 MHz 185.360 MHz 187.072 MHz 188.928 MHz 190.640 MHz 192.352 MHz 194.064 MHz 195.936 MHz 197.648 MHz 199.360 MHz 201.072 MHz 202.928 MHz 204.640 MHz 206.352 MHz 208.064 MHz...
-
Page 19: Fm Operation
234.208 MHz 235.776 MHz 237.488 MHz 239.200 MHz FM Operation Auto Scan and Save Preset Station 1. Press the SOURCE Button repeatedly on the unit or on the remote control to select FM mode. 2. Press the SCAN Button on the remote control to activate automatic programming. All available stations are programmed in the order of waveband reception strength. -
Page 20: Bluetooth® Operation
4. Activate your Bluetooth device and select the search mode. 5. “L37SPDB14” will appear on your Bluetooth device list. 6. Select “L37SPDB14” and enter “0000” for the password if necessary. 7. The display will show “PAIRED” when connection is successful. -
Page 21: Listen To Music From Bluetooth Device
Listen to Music from Bluetooth Device • If the connected Bluetooth device supports Advanced Audio Distribution Profile (A2DP), you can listen to the music stored on the device through the player. • If the device also supports Audio Video Remote Control Profile (AVRCP), you can use the player’s remote control to play music stored on the device. -
Page 22: Hints And Tips
DVD player, etc.) is set to PCM mode while using optical connection. I cannot find Ensure the Bluetooth function is activated on your Bluetooth “L37SPDB14” on my device. Bluetooth device. If any functional abnormality is encountered, unplug the unit from the mains... -
Page 23: Specifications
Specifications Model L37SPDB14 Power Power Supply 220-240V~ 50/60Hz Power Consumption Speaker Output Power 15Wrms x 2 + 30Wrms (Subwoofer) Feature Connectivity AUX IN (L/R) Sockets, MP3 LINK Socket, OPTICAL Socket, Bluetooth 3.0, FM, DAB Frequency FM 87.5-108 MHz DAB 174.92 - 239.2 MHz... - Page 24 For advice on where to purchase accessories, please contact the store where you purchased your equipment. All trademarks are the property of their respective owners and all rights are acknowledged. DSG Retail Ltd. (co. no. 504877) Maylands Avenue, Hemel Hempstead, Herts., HP2 7TG, UK IB-L37SPDB14-140213V1...
Need help?
Do you have a question about the L37SPDB14 and is the answer not in the manual?
Questions and answers