Table of Contents
Advertisement
Available languages
Available languages
WARNING
Read all precautions and instructions
in this manual before using this
equipment. Save this manual for
future reference. Maximum user
weight 200 lbs
IMPORTANT
Trampoline and Enclosures are
susceptible to winds. Be sure to secure
your trampoline and enclosure.
Wind Damage is not covered in the
warranty of your trampoline.
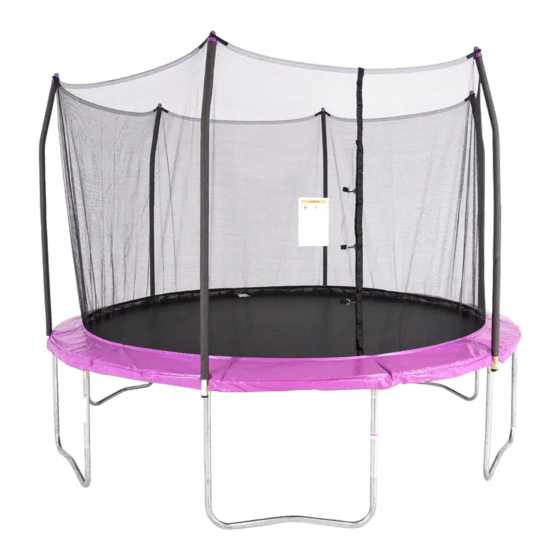
User'sManual
Model
STEC12B /STEC12R /STEC12G/STEC12P
CAUTION
: Adult Assembly
Required
Advertisement
Chapters
Table of Contents

Related Manuals for Skywalker STEC12B


Summary of Contents for Skywalker STEC12B
- Page 1 User’sManual Model STEC12B /STEC12R /STEC12G/STEC12P WARNING CAUTION : Adult Assembly Read all precautions and instructions Required in this manual before using this equipment. Save this manual for future reference. Maximum user weight 200 lbs IMPORTANT Trampoline and Enclosures are susceptible to winds. Be sure to secure your trampoline and enclosure.
-
Page 2: Table Of Contents
Model STEC12B /STEC12R /STEC12G /STEC12P A serial decal is found on one of the trampoline legs. Model number decal tag is located on the jumping mat. CONTENTS Important Precautions............3 Warning Label Placement............4 Before You Begin..............4 Trampoline Safety Information..........5 Enclosure Safety Information..........6 Methods of Accident Prevention..........7... - Page 3 USE INSTRUCTIONS WARNING To reduce the risk of serious injury, read and follow all of the warnings, precautions, and instruc- tions in this manual before you use the trampoline enclosure. Warnings and instructions for care, maintenance, and use of this trampoline and enclosure are included to promote safe enjoyable use of this equipment. It is the responsibility of the owner and supervisors of the Do not attach anything to the enclosure barrier that is not a trampoline and enclosure to make sure all users obey the...
-
Page 4: Warning Label Placement
Climb on to and off the trampoline. Do not jump on or off. Do not use the trampoline as a springboard to other objects. of loss of control, collision and falling For further equipment information contact Skywalker. For skill training information, contact a trainer certification organization. off. This can result in broken head, Mountain Time, to order a free neck, back, or legs. -
Page 5: Trampoline Safety Information
TRAMPOLINE SAFETY INFORMATION In trampoline use, as in all active recreational sports, participants can be injured. However, there are steps that can be taken to reduce risk of injury. In this section, primary accident patterns are identified and the responsibilities of supervisors and jumpers in accident prevention are described. -
Page 6: Enclosure Safety Information
ENCLOSURE SAFETY INFORMATION NEED FOR TRAMPOLINE ENCLOSURE SAFETYUSING THE ENCLOSURE SAFELY A trampoline enclosure is a recreational product. The information on this page and on pages 7-9 identify important safety precautions. The precautions are not all-inclu- sive, because an enclosure can be used in ways that this manual cannot cover completely. To prevent pinches and cuts during enclosure use, a frame pad must be installed on the trampoline (See the trampoline manufacturer’s instructions). -
Page 7: Methods Of Accident Prevention
METHODS OF ACCIDENT PREVENTION The Supervisor's Role in Preventing Accidents It is the responsibility of the supervisors of trampoline users to provide knowledgeable and mature supervision. They need to know and enforce all of the rules and warnings printed in this manual to minimize the likelihood of accidents and injuries. - Page 8 • Wear clothing that does not have drawstrings, hooks, loops or anything else that could get caught while using the trampoline/enclosure and result in entanglement or strangulation, or both. • Do not attach anything to the netting that is not a Skywalker Trampolines approved accessory or part of the of the trampoline enclosure.
-
Page 9: Use And Instructional Material
D-ring on the jump mat and that the horizontal clips areattached to the D-rings on the enclosure netting, both during use and after use. For additional information regarding equipment, contact Skywalker Holding, LLC. For additional information regarding skill training, contact a trainer certification organization. -
Page 10: Instructional Program And Model Lessons
Instructional Program And Model Lessons The following lessons are examples of an instructional program. They should follow a complete discussion and demonstration of body mechanics between the supervision and the student(s). See also page 12. 1. Mounting and dismounting (getting on and off)-Demonstration and practice of proper techniques. 2. - Page 11 Lesson 5: Seat Drop Lesson 6: Front Drop 1. Review and practice of skills already learned. 1. To save time and avoid mat (bed) burns, all students should be 2. Land in a sitting position with your legs parallel to the requested to assume the front drop position on the floor while the mat.
-
Page 12: Part Identification Chart
Part Identification Chart ( not to the actual scale) Use below drawings to identify all the parts. Top Tube with Socket (6 pcs) Top Tube with T-joint (6 pcs) Leg brace (6 pcs) Leg extension (12 pcs) Jumping mat (1 pc) Frame Pad (1 pc) Enclosure net (1 pc) Spring (72 pcs) - Page 13 Exploded Drawing...
-
Page 14: Ordering Replacement Parts
Parts List Key No. Qty. Description Top Tube with T-joint Top Tube with Socket Leg extension Leg brace Jumping mat Frame Pad Enclosure net Spring Straight Tube Curved Tube Foam Pole Cap End Cap M5x50mm Bolt M4.8x16mm Self-tapping Screw(3 spare parts) 16 Spring Tool Screw Driver # User’s Manual and Safety Placard #... -
Page 15: Assembly
ASSEMBLY ASSEMBLY (PUTTING THE TRAMPOLINE AND ENCLOSURE TOGETHER) IMPORTANT ASSEMBLY INFORMATION • Need phillips screw driver (included with trampoline) and 2 adjustable wrenches (for putting the trampoline together). A rubber mallet is also recommended to make assembly easier. • Assembly requires two adults. Keep children away from the trampoline and enclosure until they are completely put together. •... - Page 16 Insert the Leg Brace(4) into two Leg Extensions(3) as shown, then tighten with two M4.8x16mm Self- tapping screws(15). Press down on both Leg Extensions(3) at the same time and fully insert them into the T-joint and Socket , then tighten by two M4.8x16mm Self-tapping screws(15).
- Page 17 If the Enclosure net(7) and Jumping mat(5) are not pre-installed, follow below steps to install. Place the Jumping mat(5) on clear ground.Identify the warning label on mat top and the ID label on mat back as shown. the first hole the first V-ring ID label (on mat back) Place the Enclosure net(7) on the Jumping mat(5),...
- Page 18 If the Enclosure net and Jumping mat are pre-in- stalled, follow below steps to assemble the Jumping T-joint mat to frame. Warning Inspect the connection of Jumping mat and Enclosure Decal net, make sure all the V-rings are passed through the corresponding net holes.
- Page 19 Attach the Spring as follows: Hook one end of Spring into the V-ring sewn on Jumping V-ring mat. Hook a Spring Tool as shown to the free end of the Spring. Pull the Spring until it reaches the frame. D: Push the end of the Spring into a hole in the frame, then unhookthe Spring Tool Frame CAUTION:...
- Page 20 Attach all the remaining V-rings with spring to Top tube holes correspondlingly. Enclosure door T-joint Lay the Frame Pad(6) on the frame. Adjust it’s position so that the slits are just above the Sockets as shown. CAUTION: Do not use the trampoline without the Frame Pad(6).The Frame Pad is designed to reduce the possibility of injuries due to jumpers coming in contact with the trampoline frame.
- Page 21 Inner Straps Look underneath the trampoline. Locate the straps attached to the underside of the Frame Pad. Posi- tion each outer strap so that one strap is on each Inner Straps side of the frame as shown. Tie the outside straps sewn to the pad joints to each side of the frame as shown and attach the inner straps to the near V-ring...
- Page 22 Follow below steps to attach Curved tube to cap: Hexagon hole Holes Identify the hexagon hole on the Pole Cap(12) with a nut buried inside. Strap ring Insert the Pole Cap(12) into one strap ring on the topedge of net. Make sure the Hexagon hole side of the cap is against the net, and the holes on both the strap- ring and the caps are aligned.
-
Page 23: Assembly
Insert the end cap(13) into the bottom hole of the Socket as shown. Socket Using a ladder, reach to the top of the enclosure poles and tie the straps around the pole caps as shown. Make sure to secure the knot tightly.(Do not stand on the edge of the trampoline to do this step. -
Page 24: Care And Maintenance
WARNING TRAMPOLINE AND ENCLOSURE CARE AND MAINTENANCE CARE To avoid damage to the trampoline and enclosure, do not allow pets or animals inside the enclosure. The trampoline is intended to be used by one person at a time who weighs no more than 200 pounds. The user should be either barefoot, wearing socks, or wearing gymnastic shoes. -
Page 25: Limited Warranty
All other parts are warranted for ninety (90) days after the date of purchase. Wind or weather damage is not warranted. All warranty coverage extends only to the original retail purchaser from the date of purchase. Skywalker Holdings, LLC obligation under this Warranty is limited to replacing or repairing, at Skywalker Holdings, LLC option, the product at one of this authorized service centers. - Page 26 Manuel de l'utilisateur Modèle STEC12B /STEC12R /STEC12G/STEC12P AVERTISSEMENT MISE EN GARDE : Assemblage requis Veuillez lire toutes les précautions et par un adulte les instructions de ce manuel avant d'utiliser cet équipement. Conservez ce manuel pour référence ultérieure. Poids maximal de l'utilisateur 91 kg...
- Page 27 Modèle STEC12B /STEC12R /STEC12G/STEC12P Un autocollant de sécurité se trouve sur l'une des pattes de la trampoline. L'autocollant du numéro de modèle est situé sur la toile de la trampoline. TABLE DES MATIÈRES Précautions importantes ............3 Emplacement de l'étiquette d'avertissement ....... 4 Avant de commencer ............
- Page 28 INSTRUCTIONS D'UTILISATION AVERTISSEMENT Afin de réduire le risque de blessure grave, lisez et respectez tous les avertissements, précautions et instructions indiqués dans ce manuel avant d'utiliser l'enceinte de la trampoline. Les avertissements et les instructions pour l'entretien, la maintenance et l'utilisation de cette trampoline et de cette enceinte sont inclus afin d'encourager une utilisation sécuritaire et agréable de cet équipement.
-
Page 29: Emplacement De L'étiquette D'avertissement
AVANT DE COMMENCER Merci d'avoir choisi la trampoline de marque Skywaker Trampolines. Les trampolines rondes de Skywalker Trampolines sont conçues et fabriquées pour procurer plusieurs années de plaisir et de remise en forme. Cette trampoline est livrée avec des instructions et des avertissements pour l'assemblage, l'entretien, la maintenance et l'utilisation. -
Page 30: Information De Sécurité Pour La Trampoline
INFORMATION DE SÉCURITÉ POUR LA TRAMPOLINE Lors de l'utilisation de la trampoline, comme pour tous les sports récréatifs, les participants peuvent être blessés. Cependant, des précautions peuvent être prises pour réduire le risque de blessures. Dans cette section, les principaux types d'accidents sont identifiés ainsi que les responsabilités des superviseurs et des personnes qui sautent dans la prévention des accidents. -
Page 31: Information De Sécurité Pour L'enceinte
INFORMATION DE SÉCURITÉ POUR L'ENCEINTE IL EST NÉCESSAIRE D'ASSURER LA SÉCURITÉ DE L'ENCEINTE DE LA TRAMPOLINE EN UTILISANT CELLE-CI DE FAÇON SÉCURITAIRE L'enceinte de la trampoline est un produit récréatif. L'information contenue sur cette page et sur les pages 7 à 9 identifie les précautions de sécurité importantes. Les précautions ne comprennent pas toutes les situations puisque l'enceinte peut être utilisée de certaines façons que ce manuel ne couvre pas. -
Page 32: Méthodes Pour La Prévention D'accident
MÉTHODES POUR LA PRÉVENTION D'ACCIDENT Le rôle du superviseur quant à la prévention des accidents Il est de la responsabilité des superviseurs des utilisateurs de la trampoline de fournir une surveillance en toute connaissance et de façon mature. Ils doivent connaître et appliquer toutes les règles et tous les avertissements imprimés dans ce manuel afin de minimiser la possibilité... - Page 33 • Portez des vêtements qui n'ont pas de cordons, de crochets, de boucles ou tout autre objet qui pourrait se prendre lorsque vous utilisez la trampoline/l'enceinte et qui pourrait provoquer un enchevêtrement, un étranglement ou les deux. • N'attachez rien au filet qui n'est pas un accessoire des trampolines de Skywalker Trampolines ou une pièce de l'enceinte de la trampoline.
- Page 34 D sur le filet de l'enceinte, durant et après l'utilisation. Pour obtenir de l'information supplémentaire en ce qui a trait à l'équipement, veuillez contacter Skywalker Holdings, LLC. Pour obtenir de l'information supplémentaire en ce qui a trait à la formation, contactez un organisme de certification d'entraîneurs.
- Page 35 Programme d'instruction et modèle de leçons Les leçons suivantes sont des exemples d'un programme d'instruction. Ils doivent être précédés d'une discussion complète et d'une démonstration de la mécanique du corps par le superviseur pour les étudiants. Voir aussi la page 12. 1.
- Page 36 Leçon 5 : Chute sur le postérieur Leçon 6 : Chute avant 1. Passez en revue et pratiquez les techniques déjà apprises. 1. Pour économiser du temps et éviter les éraflures causées par la 2. Atterrissez dans une position assise en ayant vos jambes toile, tous les étudiants devraient être en mesure de prendre la parallèles à...
-
Page 37: Tableau D'identification Des Pièces
Tableau d'identification des pièces (celles-ci ne sont pas à l'échelle) Utilisez les dessins ci-dessous pour identifier toutes les pièces. Tube supérieur avec connecteur (6 morceaux) Tube supérieur avec joint en T (6 morceaux) Armature de patte (6 morceaux) Rallonge de patte (12 morceaux) Coussin de protection de Toile de la trampoline (1 morceau) - Page 38 Dessin éclaté...
-
Page 39: Commander Des Pièces De Remplacement
Liste des pièces No de la légende Qté Description 1 ..........6 .........Tube supérieur avec joint en T 2 ..........6 .........Tube supérieur avec connecteur 3 ..........12 ........Rallonge de patte 4 ..........6 .........Armature de patte 5 ..........1 .........Toile de la trampoline 6 ..........1 .........Coussin de protection de l'armature 7 ..........1 .........Filet de l'enceinte 8 ..........72 ........Ressort 9 ..........6 .........Tube droit... -
Page 40: Assemblage
ASSEMBLAGE ASSEMBLAGE (ASSEMBLER LA TRAMPOLINE ET L'ENCEINTE) INFORMATION IMPORTANTE POUR L'ASSEMBLAGE • Vous aurez besoin d'un tournevis Phillips (inclus avec la trampoline) et 2 clés ajustables (pour assembler la trampoline). Un maillet en caoutchouc est également recommandé pour faciliter l'assemblage. •... - Page 41 Insérez l'armature de patte (4) dans les deux rallonges de patte (3) comme illustré. Fixez-les ensuite à l'aide de deux vis M4,8x16mm autotaraudeuses (15). Appuyez sur les deux rallonges de patte (3) simultané- ment et insérez-les entièrement dans le joint en T et le connecteur, puis fixez-les avec deux vis M4,8x16mm autotaraudeuses (15).
- Page 42 Si le filet de l'enceinte (7) et la toile de la trampoline (5) ne sont pas déjà installés, suivez les étapes ci-dessous pour les installer. Placez la toile de la trampoline (5) sur un sol dégagé. Localisez l'étiquette d'avertissement sur le dessus de la toile et l'étiquette d'identification à...
- Page 43 Si le filet de l'enceinte et la toile de la trampoline sont déjà installés, suivez les étapes ci-dessous pour Joint en T assembler la toile de la trampoline sur l'armature. Autocollant Inspectez la jonction de la toile de la trampoline et du d'avertissement filet de l'enceinte en vous assurant que les anneaux en V sont passés à...
- Page 44 Fixez le ressort comme suit : A : Accrochez une extrémité du ressort dans l'anneau en V cousu Anneau en V sur la toile de la trampoline. B : Accrochez l'outil à ressort comme illustré à l'extrémité non attachée du ressort. C : Tirez sur le ressort jusqu'à...
- Page 45 Accrochez les anneaux en V restant avec des ressorts aux trous correspondant sur le tube supérieur. Porte de l'enceinte Joint en T Déposez le coussin de protection de l'armature (6) sur l'armature. Ajustez sa position de façon à ce que les fentes se trouvent au-dessus des connecteurs comme illustré.
- Page 46 Courroies intérieures Regardez sous la trampoline. Localisez les courroies attachées au-dessous du coussin de protection de la trampoline. Positionnez chaque Courroies intérieures courroie extérieure de façon à ce qu'une courroie se retrouve de chaque côté de l'armature comme illustré. Attachez les courroies extérieures cousues Anneau en V sur les joints du coussin de chaque côté...
- Page 47 Suivez les étapes ci-dessous pour fixer le tube courbé au capuchon : Trou hexagonal Trous Localisez le trou hexagonal sur le capuchon de poteau (12) ayant un écrou à l'intérieur. Anneau de la courroie Insérez le capuchon de poteau (12) dans un anneau de la courroie dans la partie supérieure du filet.
- Page 48 Insérez le capuchon d'extrémité (13) dans le trou inférieur du connecteur comme illustré. Connecteur En utilisant une échelle, montez pour atteindre les poteaux de l'enceinte et attachez les courroies autour des capuchons de poteau comme illustré. Assurez-vous de bien attacher les courroies.
- Page 49 AVERTISSEMENT PRÉCAUTIONS ET ENTRETIEN DE LA TRAMPOLINE ET DE L'ENCEINTE PRÉCAUTIONS Pour éviter les dommages à la trampoline et à l'enceinte, ne laissez pas d'animaux de compagnie à l'intérieur de l'enceinte. La trampoline est conçue pour être utilisée par une personne à la fois pesant moins de 91 kg (200 lb). L'utilisateur doit être soit pieds nus, porter des bas ou des souliers de gymnastique.
-
Page 50: Garantie Limitée
à une utilisation inappropriée, à un usage inadéquat ou anormal ou à une réparation qui n'a pas été effectuée par un représentant autorisé de Skywalker Holdings, LLC, u aux produits utilisés à des fins commerciales ou de location. Aucune autre Garantie au-delà de ce qui est mentionné précédemment n'est autorisée par Skywalker Holdings, LLC.
Need help?
Do you have a question about the STEC12B and is the answer not in the manual?
Questions and answers