Amana CRC18T2OG Service Manual
Hide thumbs
Also See for CRC18T2OG:
- Technical information (8 pages) ,
- Quick start & reference manual (8 pages)
Table of Contents
Advertisement
Service
Commercial
Microwave Oven
Service Manual for
®
Amana
This manual is to be used by qualified appliance
technicians only. Amana does not assume any
responsibility for property damage or personal
injury for improper service procedures done by an
unqualified person.
This Base Manual covers Commercial
Microwave Ovens with 120/230 V, 60 Hz.
Refer to individual Technical Sheet for
information on specific models.
This manual includes, but is not limited to
the following:
CRC18T2OG
P1323006M, P1323015M
CRC21T2RL
P1323007M, P1323017M
HDC10
P1323008M
HDC12
P1323009M
HDC18
P1323003M, P1323013M
HDC18SD
P1323004M, P1323014M
HDC21
P1323005M, P1323016M
RS2240002
Revision 1
October 2000
Advertisement
Chapters
Table of Contents

Related Manuals for Amana CRC18T2OG


Summary of Contents for Amana CRC18T2OG
- Page 1 Microwave Oven Service Manual for ® Amana This manual is to be used by qualified appliance technicians only. Amana does not assume any responsibility for property damage or personal injury for improper service procedures done by an unqualified person. RS2240002...
-
Page 2: Important Product Information
Important Product Information WARNING WARNING To avoid risk of electrical shock, injury, or death, make Precautions to be observed before and during servicing sure these grounding instructions are followed. to avoid possible exposure to excessive microwave energy. Grounding Instructions (A) Do not operate or allow oven to be operated with the WARNING door open. -
Page 3: Table Of Contents
Component Testing Procedures ........ 17 Component Location Test Modes Figure 1 .............. 33 Power Test............. 21 Figure 2 .............. 34 Figure 3 .............. 35 Amana Appliances • 2800 220thTrail • Amana, Iowa • 52204-0001 • Printed in the U.S.A. RS2240002 Rev. 1... -
Page 4: Important Information
(such as exposure to electrical shock) may result. CAUTION Amana will not be responsible for any injury or property damage from improper service procedures. If prefroming service on your own product, assume responsibility for any personal injury or property damage which may result. -
Page 5: Important Safety Information
11. If servicer encounters an emission reading over 4mw/ outlet. Do not operate on a two-wire extension cord. , servicer is to cease repair and contact Amana 2. Before servicing unit (if unit is operable) perform Service Department immediately for further direction. - Page 6 Important Safety Information CAUTION To avoid personal injury or property damage, observe the following: 7. Do not use regular cooking thermometers in oven. 1. Briskly stir or pour liquids before heating with microwave energy to prevent spontaneous boiling Most cooking thermometers contain mercury and may cause an electrical arc, malfunction, or or eruption.
-
Page 7: Grounding Instructions
Important Safety Information Recognize this symbol as a SAFETY message WARNING When using electrical equipment, basic safety precautions should be followed to reduce the risk of burns, electrical shock, fire, or injury to persons. 1. READ all instructions before using equipment. 8. -
Page 8: Product Information
Product Information Antenna Blade Auto Transformer Distributes microwave energy throughout the cavity. Auto transformer in this unit provides a voltage of 120, 208, or 230 VAC. Blower/Fan Assembly Transformer High Voltage Circulates cooling air throughout the microwave oven compartment and cavity. High voltage transformer is used in this unit, which supplies high voltage A.C. -
Page 9: Installation
Installation Unpacking Oven Radio Interference • Remove packing and printed material from ovencavity. Microwave operation may cause interference to radio, television, or similar equipment. Reduce or eliminate • Inspect oven for damage such as dents in door or inside oven cavity. interference by doing the following: •... -
Page 10: Care And Cleaning
Care and Cleaning Changing Oven Light Bulb Cleaning Interior, Exterior, and Door CAUTION WARNING To avoid electrical shock hazard unplug power cord or To avoid electrical shock which can cause severe open circuit breaker to microwave oven before replacing personal injury or death, unplug power cord or open light bulb. -
Page 11: Cleaning Air Intake Filter
Care and Cleaning To replace filter Incorrect Installation • Place bottom portion of filter into position first and push (Shield in upside down) in on the top portion of the filter, until filter is securely in place. NOTE: When placing filter back into position, verify plastic tab is on the outside of the unit. -
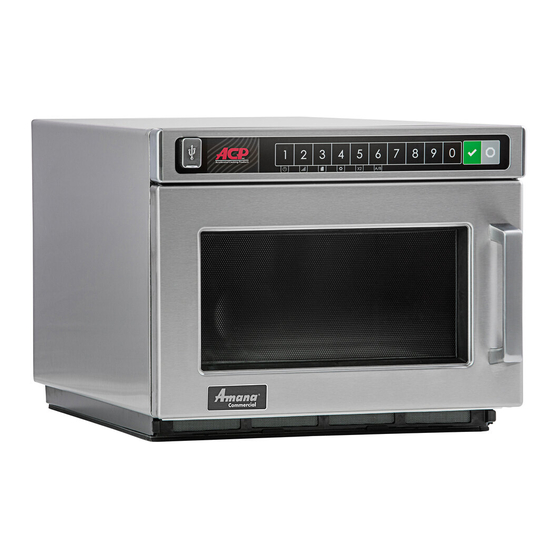
Page 12: Control Panel Features
Control Panel Features TIME ENTRY pad is used to enter cooking time for START pad begins Manual Time Entry cooking or either manual entry or programming. Cooking time restarts an interrupted cooking cycle. When ranges from 1 second (00:01) to a total of 60 minutes programming, use to save time and power level, and to (60:00) over four stages. -
Page 13: Displays
Displays Cooking Methods Programming Displays Memory Pads This oven can of store either 10 or 100 cooking programs MICRO DEFR WARM MEDHI POWER HOLD TIMER in memory. READY COOK CLOCK LEVEL Single Pad Cooking From the factory, it is programmed to store 10 cooking programs. -
Page 14: Operation
Operation Interrupting Operation Double Pad Programs The oven control can be changed to store up to 100 Open oven door or press STOP/RESET pad to interrupt cooking programs. See the “User’s Options” section of operation. Display continues to show countdown time. this manual to change oven control. -
Page 15: Programming Instructions
Programming Instructions 5. Press 3 and 0 to enter desired cooking time. Memory Pads 6. Press POWER LEVEL pad to change power level. From the factory, this oven can of store up to 10 cooking • Display shows “COOK LEVEL” and current power programs. -
Page 16: User Options
Programming Instructions 3. Press 9 pad. User Options • See table for options. Follow the instructions below to customized the • Displays shows “OP:91”. microwave oven’s operation. End-of-cycle signal, • “OP” represents optional program mode, first maximum cooking time and other options can be number represents option number and second changed to meeting your cooking needs. -
Page 17: Component Testing Procedures
Component Testing Procedures WARNING To avoid risk of electrical shock, personal injury, or death, disconnect power to oven and discharge capacitor before servicing, unless testing requires it. Illustration Component Testing Results Thermal Cutout Disconnect all wires from TCO. Measure resistance across terminals. Cavity Thermal Fuse Open at 219°F (104°C) Magnetron TCO... - Page 18 Terminal 4 to any other terminal Infinite resistance should be HDC21, Violet indicated, if not replace transformer. HDC18SD, Terminal 1− 230 V HDC18 Terminal 2− Common CRC18T2OG Gray Terminal 3−208 V CRC21T2RL Transformer Discharge Capacitor 10426609−HDC10 Remove all wires from terminals, and 10426610−HDC12 measure resistance from: Less than 1 Ω...
- Page 19 All Models Line voltage to control board Type 1 P2 connector Pin #1 Pin 1 — Pin 3 ........Line voltage (All Condition) CRC18T2OG Output drive voltage to triac 0 VAC (Idle and Standby) P1323006M Triac terminals CRC21T2RL Gate — T1..........
- Page 20 Component Testing Procedures WARNING To avoid risk of electrical shock, personal injury, or death, disconnect power to oven and discharge capacitor before servicing, unless testing requires it. Illustration Component Testing Results Type 3 Controller board All Models Line voltage to control board HDC10, HDC12 P2 connector Pin 1 —...
-
Page 21: Test Modes
Test Modes Power Test (Traditional Test Method) Test equipment required is Amana power test kit R0157397 (Fahrenheit), or Menumaster power test kit M95D5 (Celsius). 1. Fill the plastic container to the 1000 ml. line with cool tap water. 2. Using the thermometer; stir the water, measure, and record the water temperature. -
Page 22: Microwave Energy Leakage Testing
WARNING DANGER Check for radiation leakage after servicing. Should the leakage be more than 4mW/cm inform Amana To avoid risk of personal injury or death avoid immediately. After repairing or replacing any radiation contacting any high voltage components. safety device, keep a written record for future reference, as required by D.H.H.S. -
Page 23: Troubleshooting
Troubleshooting Initial Power Up Apply power with door closed. Open line fuse. Open cavity TCO. Inoperative control board. Relays click. Broken or improper wire connections. 5. Open magnetron TCO (only on models P1323013M thru P1323017M). Which display is shown? MICRO DEFR WARM MEDHI POWER HOLD MICRO DEFR WARM MEDHI POWER HOLD TIMER TIMER... -
Page 24: Standby Condition
Troubleshooting Standby Condition Open oven door. Display Inoperative interlock switch assembly (logic or primary). MICRO DEFR WARM MEDHI POWER HOLD Inoperative control board. TIMER Broken or improper wire connections. READY COOK CLOCK LEVEL Inoperative light bulb. Inoperative light socket. Oven light is on? Inoperative auto-transformer. -
Page 25: Cook Condition
Troubleshooting Cook Condition Place cup of water in oven and close oven door. Beep not programmed into oven. Display Pad not programmed. Inoperative touch panel. Inoperative control board. MICRO DEFR WARM MEDHI POWER HOLD TIMER Broken or improper wire connections. READY COOK CLOCK... -
Page 26: Disassembly
Disassembly To avoid the risk of electrical shock, personal injury, or WARNING death, disconnect power to oven and discharge capacitors before following any disassembly procedure. Door Removal Inner 1. Unplug power cord from power source. Door door 2. Remove outer case cover. ring 3. -
Page 27: Interlock Switch Assembly
Disassembly To avoid the risk of electrical shock, personal injury, or WARNING death, disconnect power to oven and discharge capacitors before following any disassembly procedure. Interlock Switch Assembly 1. See “Component Location” Figure 1, for location. 2. Unplug power cord from power source. 3. -
Page 28: Switch Replacement / Door Adjustment
Disassembly To avoid the risk of electrical shock, personal injury, or WARNING death, disconnect power to oven and discharge capacitors before following any disassembly procedure. Switch Replacement / Door Adjustment 7. Tape shims 12382602 and 12019302 to door, as shown. WARNING To avoid risk of electrical shock, personal injury or 12019302... -
Page 29: Outer Case
Back panel 7. Apply a light water spray to the fresh RTV sealent. 8. Using RTV scrapper, Amana part # R0000039, remove excess RTV. NOTE: Allow RTV to set for 1 hour before using. Back Panel Antenna Assembly–Bottom 1. -
Page 30: Antenna Motor-Bottom
Disassembly To avoid the risk of electrical shock, personal injury, or WARNING death, disconnect power to oven and discharge capacitors before following any disassembly procedure. Antenna Motor–Bottom Triac See “Component Location” Figure 2, for location. 1. See “Component Location” Figure 3, for location. 1. -
Page 31: Cavity Thermal Cutout Replacement
Disassembly To avoid the risk of electrical shock, personal injury, or WARNING death, disconnect power to oven and discharge capacitors before following any disassembly procedure. Blower Wheel and Motor 1. Unplug power cord from power source. 2. Remove outer case and back panel. 3. -
Page 32: High Voltage Transformer
Disassembly To avoid the risk of electrical shock, personal injury, or WARNING death, disconnect power to oven and discharge capacitors before following any disassembly procedure. High Voltage Transformer Replacing Oven Lamp 1. See “Component Location” Figure 3, for location. WARNING 2. -
Page 33: Component Location
Disassembly To avoid the risk of electrical shock, personal injury, or WARNING death, disconnect power to oven and discharge capacitors before following any disassembly procedure. Component Location Screws Diode location single magnetron ovens Capacitor Diode location Touch panel 2 magnetron ovens Tray supports Oven Tray... -
Page 34: Figure 2
Disassembly To avoid the risk of electrical shock, personal injury, or WARNING death, disconnect power to oven and discharge capacitors before following any disassembly procedure. Antenna Motor Magnetrons Antenna assembly Antenna Motor Shaft Antenna assembly bottom Snap Ring Washer NOTE: Raised rib on edge of washer must face away from cavity. -
Page 35: Figure 3
Disassembly To avoid the risk of electrical shock, personal injury, or WARNING death, disconnect power to oven and discharge capacitors before following any disassembly procedure. Control board Cavity thermal cutout Blower motor Snubber Triac Lamp and receptacle High Voltage Mounting bracket Transformer Capacitors Power cord... - Page 36 Appendix A A–1 RS2240002 Rev. 0...
- Page 37 ® Owner's Manual Commercial Microwave Oven HDC21* HDC18* HDC12* HDC10* * Additional alphanumeric characters representing other models in the series may follow each model number. Keep these instructions for future reference. If the oven changes ownership, be sure this manual accompanies oven.
-
Page 38: Model Identification
1-319-622-5511 outside U.S.A. 1-800-843-0304 inside U.S.A. 1-319-622-5511 outside U.S.A. If an automated telephone system is reached, When contacting Amana, provide product information. select Commercial Microwave Ovens category. Warranty Product information is located on oven serial plate. service must be performed by an authorized servicer. -
Page 39: Important Safety Instructions
IMPORTANT SAFETY INSTRUCTIONS Recognize this symbol as a SAFETY message WARNING When using electrical oven, basic safety precautions should be followed to reduce the risk of burns, electric shock, fire, or injury to persons or exposure to excessive microwave energy. 1. -
Page 40: Precautions To Avoid Possible Exposure To Excessive Microwave Energy
IMPORTANT SAFETY INSTRUCTIONS CAUTION To avoid personal injury or property damage, observe the following: 1. Briskly stir or pour liquids before cooking with 7. Do not use regular cooking thermometers in oven. microwave energy to prevent spontaneous boiling or Most cooking thermometers contain mercury and eruption. -
Page 41: Mesures De Securite Importantes
MESURES DE SECURITE IMPORTANTES Ce symbole signale un message de SECURITE DANGER Lors de l’utilisation d’appareils électriques, prendre les précautions élémentaires suivantes pour réduire les risques de brûlures, d’électrocution, d’incendie, de blessures ou d’exposition a un exces de micro-ondes. 1. LIRE la totalité des instructions avant d’utiliser 8. - Page 42 MESURES DE SECURITE IMPORTANTES ATTENTION Pour éviter tous dégâts matériels ou blessures, observer les consignes suivantes : 7. Ne pas utiliser de thermomètre de cuisson pour four 1. Pour éviter toute ébullition ou éruption spontanée, traditionnel dans le four. La plupart des remuer vigoureusement ou verser les liquides thermomètres de cuisson contiennent du mercure avant de les chauffer au four à...
- Page 43 Mise à la terre Grounding Instructions WARNING DANGER To avoid risk of electrical shock or death, this oven Pour éviter tout risque d’électrocution, voire de décès, must be grounded. cet appareil doit être relié à la terre. WARNING DANGER To avoid risk of electrical shock or death, do not alter Pour éviter tout risque d’électrocution, voire de décès, the plug.
-
Page 44: Installation
Installation Specifications " " " " Models HDC10 HDC12 HDC18 HDC21 Power Source Voltage AC 120 VAC 120 VAC 230/208 VAC 230/208 VAC Amperage (Single Unit) 20 A 20 A 20 A 20 A Frequency 60 Hz 60 Hz 60 Hz 60 Hz Single Phase, 3-wire ground Receptacle... - Page 45 Unpacking Oven Oven Placement • Inspect oven for damage such as dents in door or dents • Do not install oven next to or above source of heat, inside oven cavity. such as pizza oven or deep fat fryer. This could cause •...
-
Page 46: Features
Features Oven Features Stainless Steal Outer Case Oven Control Pads Oven Display Oven Door Window (Some Models) Self-sealing Base Rear Air Vents (Some Models) Removeable Splatter Shield Door Handle (Not Shown) (Pull to open) 5' 6" Power Cord Oven Cavity Light (Some Models) A–11 RS2240002 Rev. -
Page 47: Control Panel Features
Control Panel Features START pad begins Manual Time Entry TIME ENTRY pad is used to enter cooking cooking or restarts an interrupted cooking time for either manual entry or programming. cycle. When programming, use to save Cooking time ranges from 1 second (00:01) to time and power level, and to advance to a total of 60 minutes (60:00) over four stages. -
Page 48: Cooking Methods
Cooking Methods MANUAL TIME ENTRY MEMORY PADS Manual Time Entry feature allows the operator to heat This oven can of store either 10 or 100 cooking without changing the programs in memory. preprogrammed pads. Time must be entered and power Single Pad Cooking can be set before cooking. - Page 49 Cooking Displays Programming Displays This display indicates 88:88 READY shows when 8P:08 MICRO DEFR WARM MEDHI POWER HOLD MICRO DEFR WARM MEDHI POWER HOLD oven is in TIMER TIMER oven control will accept READY READY COOK programming mode COOK CLOCK LEVEL entries.
- Page 50 Operation Interrupting Operation Double Pad Programs Open oven door or press STOP/RESET The oven control can be changed to store pad to interrupt operation. Display up to 100 cooking programs. See the continues to show countdown time. Close “User’s Options” section of this manual to door and press START pad to resume oven change oven control.
- Page 51 Programming Memory Pads Multiple Cooking Stages From the factory, this oven can of store up to Follow instructions below to program oven 10 cooking programs. Follow instructions to perform four consecutive cooking cycles below to program cooking times and power without interruption.
- Page 52 X2 Quantity Feature User Options This feature allows the user to change the amount of time added when the X2 pad Follow the instructions below to customized the and then the programmed pad is pressed. microwave oven’s operation. End-of-cycle signal, Based on the original time, the X2 pad can maximum cooking time and other options can be add from 10%-100% of additional cooking...
- Page 53 Numbered Pads Display Options (Factory Settings in Bold) OP:10 3 second continuous beep End of Cycle Beep OP:11 Continuous beep until door is opened OP:12 5 beeps bursts until door is opened OP:20 Eliminates beep Speaker Volume OP:21 Sets volume to low OP:22 Sets volume to medium OP:23...
-
Page 54: Cooking Guidelines
Cooking Guidelines The Amana Microwave Oven can make your job easier. The starting temperature of foods affects the amount of You’ll cook ahead and pre-portion more. You’ll also spend cooking time. Each temperature degree that the food item less time preparing special-order dishes. -
Page 55: Manipulation Of Foods
Manipulation of Foods Microwave Utensils Sometimes recipes suggest manipulating or moving food Never use cooking containers or covers with any metal during cooking. There are several forms of manipulation: content. This includes all metal and enameled metal- core ware, foil, and metal-trimmed containers. Suitable Stirring is required less often in microwave cooking than cooking containers include those made of paper in conventional cooking. -
Page 56: Care And Cleaning
Care and Cleaning WARNING To avoid electrical shock which can cause severe personal injury or death, unplug power cord or open circuit breaker to oven before cleaning or removing light bulb. Part Description Interior, Exterior, and Door Clean microwave oven with mild detergent in warm water using soft sponge or cloth. - Page 57 Part Description Air Intake Filter Filter is located below oven door. Clean air intake filter weekly for proper airflow. Wash filter in hot water and mild detergent. Do not use oven without filter in place. Remove filter to clean. Important To avoid overheating and oven damage, clean air filter regularly.
- Page 58 Before Calling for Service Record all inspections and repair for future reference. WARNING To avoid electrical shock which can cause severe personal injury or death, do not remove outer case at any time. Only an authorized servicer should remove outer case. Symptom Check •...
- Page 59 RS2240002 Rev. 0 A–24...
-
Page 60: Quick Reference Instructions
6. Press RESET pad or close oven door to exit power level in oven memory. programming mode. 8. Press STOP/RESET pad or close oven door to exit programming mode. © 1999 Amana Appliances Part No. 12392743 www.amanacommercial.com Amana, Iowa 52204 Printed in U.S.A. 10/99 A–25...
Need help?
Do you have a question about the CRC18T2OG and is the answer not in the manual?
Questions and answers